Monogram's 1/48 scale
UH-1C Huey
by Maurizio Di Terlizzi
|

|
UH-1C Huey |

Revell-Monogram's 1/48 scale UH-1C Gunship is available online from Squadron
After a long time far from helicopter modelling, I come back to this exciting world with a long dreamed Huey. I hoped about the producing of a brand new UH-1B/C from some good firm, but this didn’t happened. So I turned to the venerable Monogram/Revell kit, and watching carefully at it, I discovered many features:
-
With the kit is impossible to realize a C neither a B. Every version misses something.
-
Overall it is a good kit
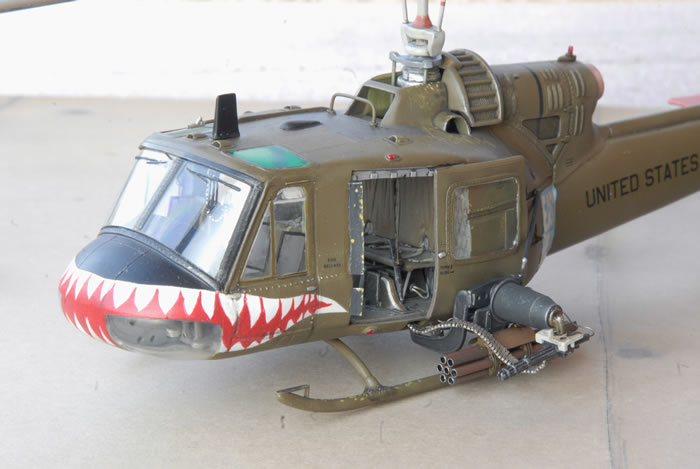
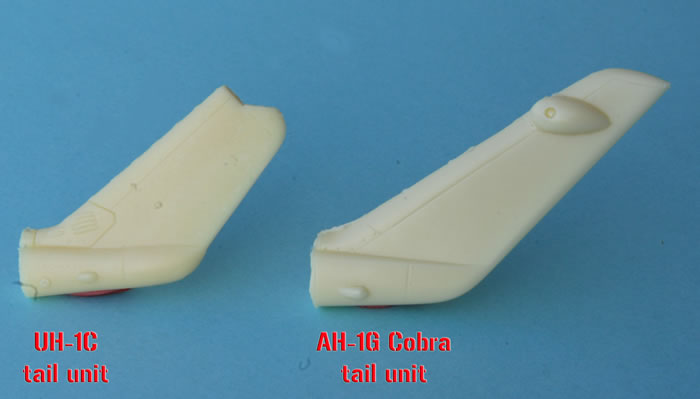
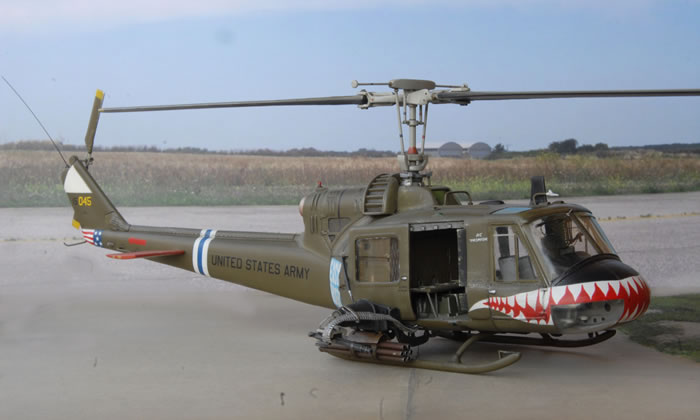
I decided to realize “Easy Rider”, a UH-1C from 174th AHC, I had old Microscale decal sheet, and many, many pictures and videos of this very machine are available on the net. The problems were localized on the tail, because it is larger and with a different profile and 90° gear box. I finished to scratchbuild the entire area, but thinked about friends and me (I would like to build a few more) and casted in resin the results (with the completely assembled model). Then I took the Italeri AB-205 taiplanes for my model.

After a quick detailing of the cockpit and cargo area (I made from scratch many parts included the two profiles of the fuselage behind pilot’s seats) I dedicated a couple of hours scratchbuilding the two different gunsights for the Miniguns and rockets, then made the seats’ armour and the famous “hell hole” on the fuselage bottom. Then I removed the pilots glazing, replacing them with suitably shaped acetate parts.
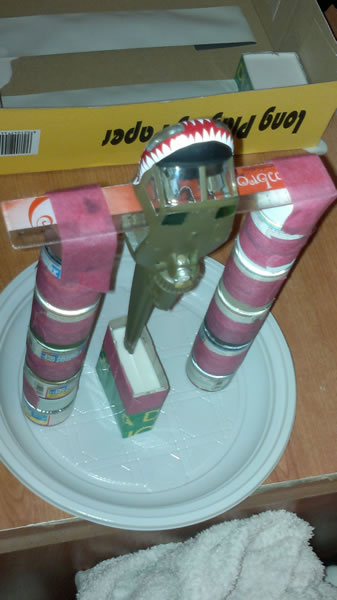
Assembling of the fuselage parts wasn’t easy, I first glued the top roof, being careful to let the rear doors area in line with this part. Then comes the main front glass, then the nose.
Regarding this part, I have to say that a major work was to glue and sand many, many times, the lower glazing. A lot of polishing was needed, but now these parts were ready to be fitted to the rest of the model without any trouble. It has to be said that a considerable lead weight MUST be added inside the nose, to prevent tail-down attitude.

Just one major work remained: the universal mount for the armament was wrong and were in one piece each. I separate them, the reshaped their lines with 320 grain abrasive paper. Then made holes to insert some copper wire, and spent many hours dry-fitting them to the bottom fuselage to achieve the correct dihedral and position.
Finally, I was ready to paint !
Two Easy Rider flew with 174th AHC. I wanted to realize the first, s/n 15045. The other was a UH-1M with different features.
After a pair of OD hands, the last of which a little faded with some drops of flat white, I prepared the model for decaling, just to discover that Microscale decals were wrong in the shape and size of the Shark mouth !!

So I decided to paint it, using a hand traced template, and a white-airbrushed bakground. Then, with various size of fine brushes, I realize the red details. I was happy with the result.
The final parts was dedicated to the armament. The minigun system and support were realized as follows:
-
I made the support, the reinforce bar, the rack and the minigun fitting entirely from scratch.
-
M-134s were from my OH-6A 1/48 details set.
-
Then I used the magnificent Fireball Modelwork’s M-158 2,75 inch rocket pods. You must be very careful in the building and achieve a realistic weathering, but once finished, these a really BEAUTY !
-
All the last details, such as weapons electric wiring, feeding ammo links and their support were made from PE spare sections and fine lead wire.
-
The “air spoiler” fitted behind the cargo compartment were realized with this PE segment, very, very difficult to be glued to the fuselage.
Now was time to finish the decaling (many time spent in the hand painting of the US flag on tail), weathering, scratching and drybrushing the details.
Once finished, I feel satisfied, despite the fact that this is considered an OLD kit. I look forward to see a better and new Huey, but in the meantime I continued casting tails for me and for who wanted to do a Charlie model Huey.
Now I am building a AH-1G Cobra, starting from a J model. The tail has been made from scratch too ! Future Cobra must be assembled with minimal efforts.
Text and Images Copyright ©
2012 by Maurizio Di Terlizzi
Page Created 17 July, 2012
Last Updated
17 July, 2012
Back to
HyperScale Main Page

|
Home
| What's New |
Features |
Gallery |
Reviews |
Reference |
Forum |
Search