|
Panzer I Ausf A
Part Two - Painting and
Finishing
by Brett Green
 |
|
Panzer I Ausf A |

HyperScale is proudly supported by Squadron.com
Continued from Part One -
Construction
Selecting the Subject
Tristar supply four marking options for their Panzer I Ausf. A. They are:
-
3 Company, 2 Battalion, Agrpacion de Carros, Spain
1938 in overall Panzer Grey
-
Pz-Abt. zBV40, Norway, 1940, in overall Panzer Grey
-
Polish Campaign in overall Panzer Grey
-
5 Liechte Division, North Africa in Desert Yellow
(almost certainly painted over Panzer Grey).
I have been looking for an excuse to build an early-war Panzer sporting
yellow crosses, so I chose the Polish Campaign subject.
Step 1: Pre-Shading Coat
The paint job started with an overall pre-shading panel coat, taking special
care to thoroughly cover edges and areas that would be in natural shadow using
flat black.
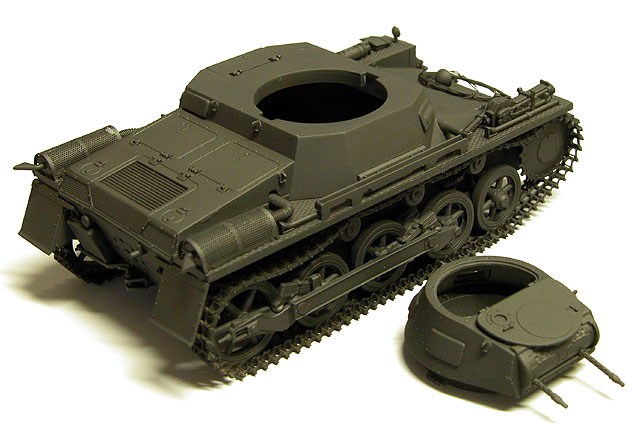
Step 2: Camouflage Colour Coating
Polly Scale Panzer Grey was now sprayed in the centre of panels, followed by
a light dusting coat overall. The photograph below shows the application of the
main camouflage colour to the centre of the panels before being blended-in with
the overall coat.
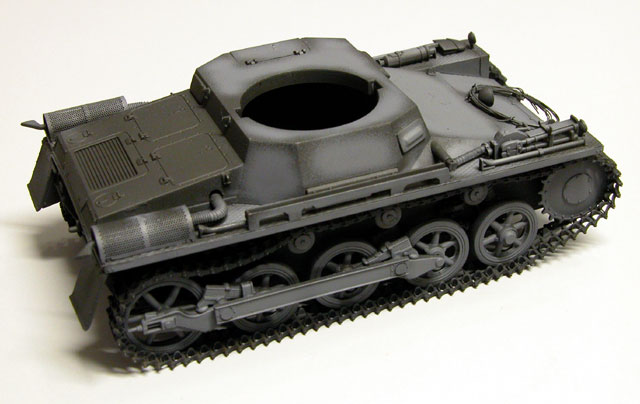
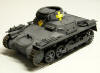
The next photograph shows the basic camouflage coat completed:
Note that all the fittings have been sprayed Panzer Grey, but
the tracks have been left Flat Black at this stage.
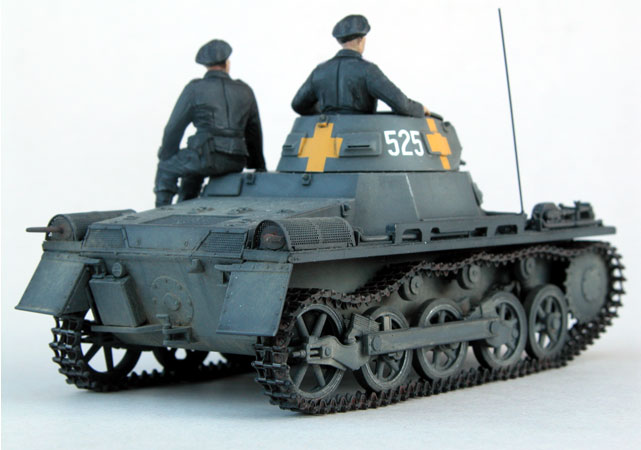
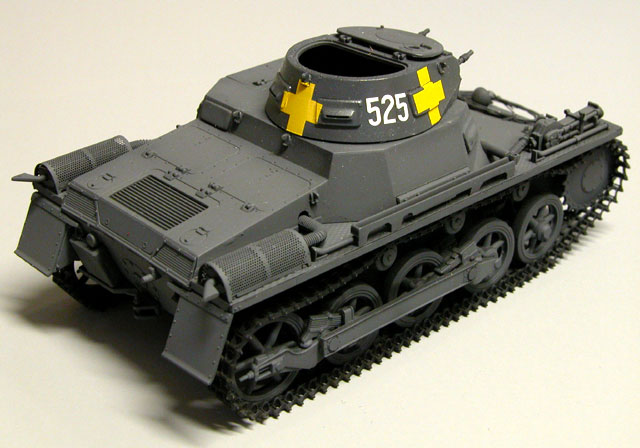
Step 3: Gloss Coating and Decals
This vehicle only wore markings on the turret, so I sprayed the
turret with Testor's "Sealer for Metalizer" as a fast drying, hard gloss base
for the decals.
The decals, printed beautifully by Cartograf, have almost no
carrier film. I did find that they had a tendency to "stick" on the model
though. Plenty of water or Setting Solution is recommended. The results were
terrific - the markings truly look painted on!
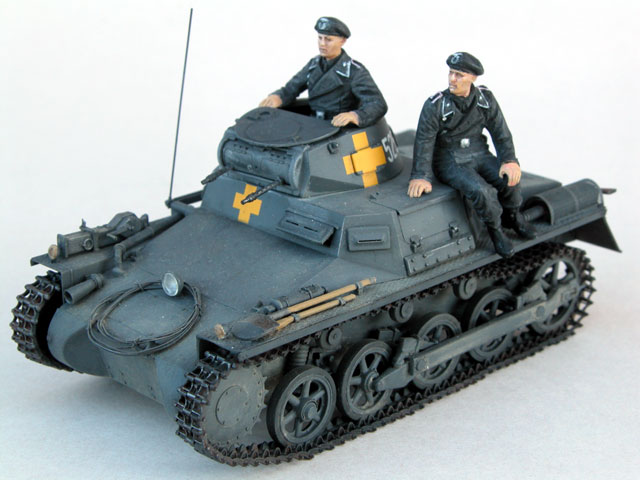
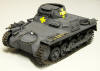
Step 4: Weathering
I decided to apply a black oil wash to provide some contrast to
the dark grey bulk of the vehicle. The wash was force-dried with a hairdryer.
The details, including the tools, were now picked out with a fine brush. The
tyres of the roadwheels, idler wheels and return rollers were brush painted with
a thin black mix. A wash of Rustall was applied to the tracks and as thin
streaks on some vertical sections of the hull.
The metallic elements including the head of the shovel and the
parts of the tracks that come into regular contact with the ground, were
highlighted with the tip of a 2B pencil.
Click the thumbnails below to view
larger images:
|
|
|
|
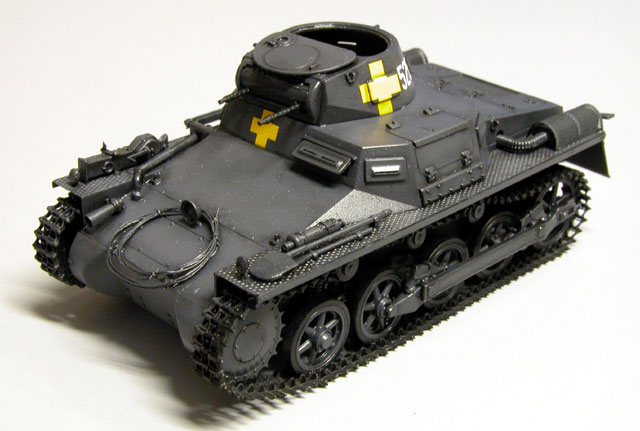
A thin black oil wash has been applied to the whole vehicle.
|
|
|
|
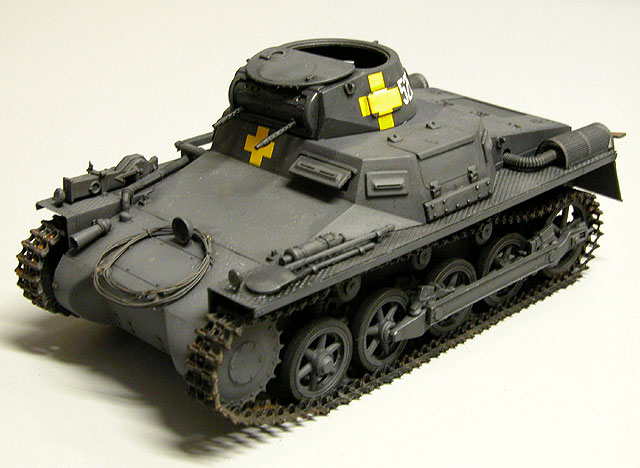
After the wash has been force-dried with a hair dryer, the tracks and coil of cable receive a coat of Rustall
|
|
|
|
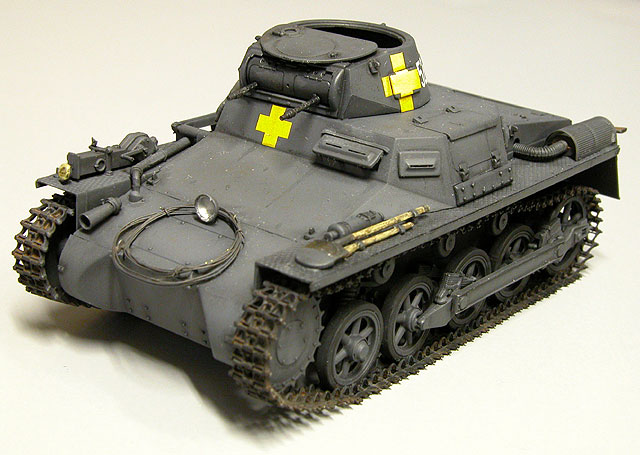
Details such as tools are now painted with a fine brush. Metallic elements are highlighted with a 2B pencil.
|
|
|
|
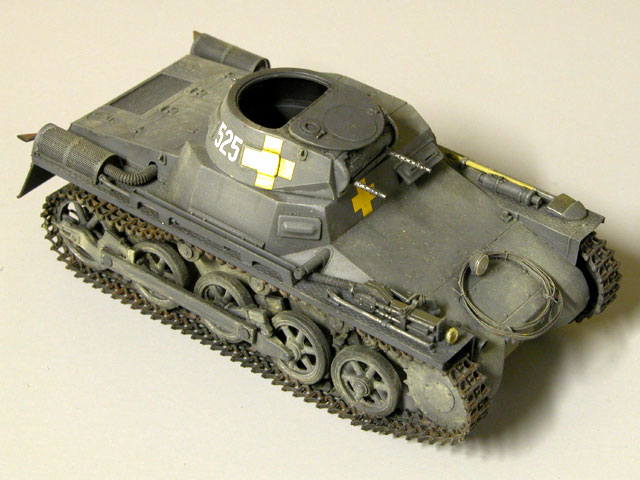
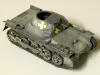
After a coat of Aeromaster Flat Clear over the decals, the vehicle receives a light dusting of pastel chalk.
|
|
|
After the turret received a coat of Aeromaster Flat Clear, the
whole vehicle was given a light dusting of Pastel Chalk.
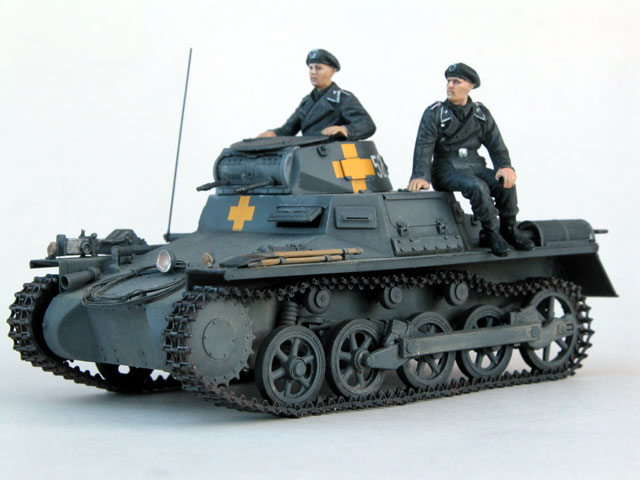
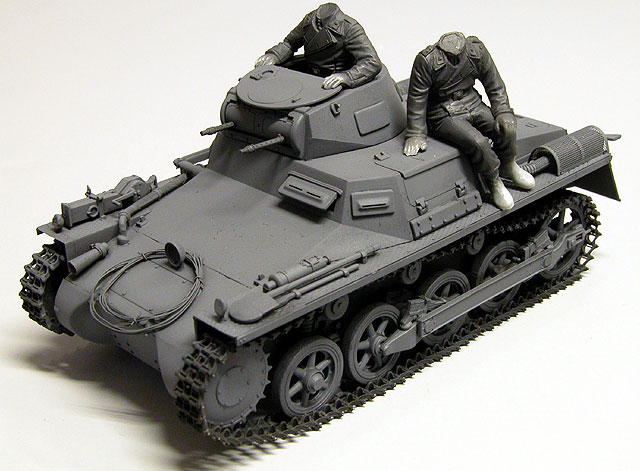
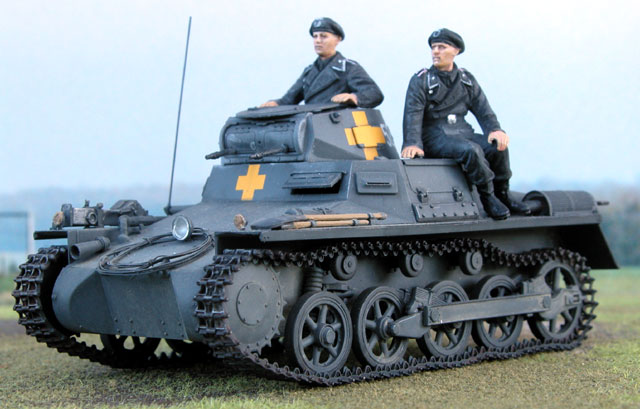
Step 5: Figures
The inclusion of two figures with this model is very welcome
firstly because the figures are beautifully sculpted, and secondly because they
lend a sense of scale to this small vehicle. The figures are versatile too, with
alternate heads supplied for either the large beret or the later field cap.
I should confess now that I dread painting figures. I find this
task to be challenging, to say the least. To make matters worse, the all-black
Panzer uniform might just be the most challenging subject to paint.
The paint job started with an overall coat of Polly Scale Panzer
Grey applied to the uniforms. The high spots of the uniform - those areas that
would be highlighted by sunshine - were then picked out with a fine brush in
Dark Grey. I was not happy with the result, so I dry-brushed the uniforms with
the Dark Grey. This now made the uniforms look too pale to my eye, so I applied
a liberal wash of acrylic Flat Black thinned with water. At least this was an
improvement.
The next step was to apply black paint with a fine brush to
natural shadow areas such as under the large lapels of the tunic, and to some of
the bigger creases in the fabric. The uniforms were completed by painting fine
outlines to the piping on the figures' lapels and epaulets; plus detail on the
buckles and berets.
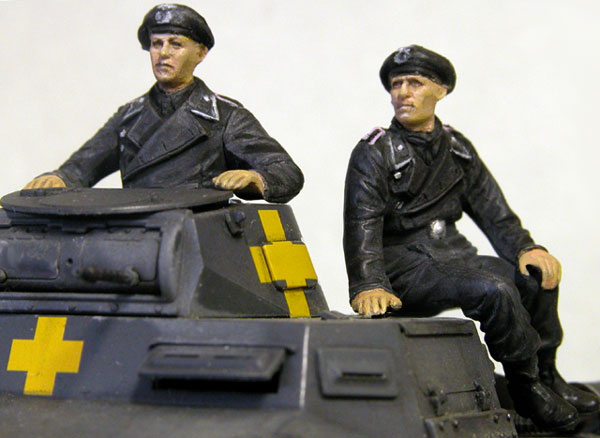
I had earlier sprayed the faces and hands in a base coat of flat
Acrylic Flesh. The face was then covered in a thin, brush-applied coat of Winsor
and Newton Flesh Tint oil paint. Fine black lines were applied to the mouth and
the eyes, followed by a mix of Flesh Tint and Raw Umber for the shadow areas
under the chin, below the cheekbones and eyebrows, and beside the nose. "High"
points such as the bridge of the nose, the tip of the chin, bottom lip and
cheekbones, and the forehead were treated to a pale mix of Flesh Tint and Flake
White. Detail inside the ears was represented by the darker flesh mix.
These basic components were blended and reworked until I felt
that the result looked acceptable - if only from a distance.
Just when I thought I was finished the model, I broke off one of
the fender lights and could not find it on the dark carpet of my workshop floor.
I found a substitute in the HiPM Flammpanzer I Ausf. A kit, although the
replacement was puny and poorly moulded compared to the Tristar part.
An aerial was added from the filament of an industrial globe to
complete this project.
Tristar's 1/35 scale Panzer I Ausf. A may be a small model, but
I predict that it will make a big impact in the marketplace.
This debut offering has instantly launched Tristar to the top of the mainstream
armour model heap; sharing this space with Tamiya and Dragon. Indeed, Tristar is
the first of this trio to offer fully workable tracks in a mainstream kit (even
though some modellers might not agree that individual links are an entirely good
thing).
The model seems to have been tooled with accuracy as the primary
objective and it does have a few tricky spots during construction, but the
overall fit is excellent.
Tristar's Panzer I Ausf. A was a thoroughly enjoyable project. I
hope that this is the first in a long line of interesting armour kits from
Tristar!
Click the
thumbnails below to view larger images:
Model, Images and
Article Copyright © 2002 by Brett Green
Page Created 09 September 2002
Last updated 04 June 2007
Back to HyperScale Main Page
Back to Features Page |
 Home
| What's New |
Features |
Gallery |
Reviews |
Reference |
Forum |
Search
Home
| What's New |
Features |
Gallery |
Reviews |
Reference |
Forum |
Search