Typhoon Mk.Ib Car Door
Early-Mid & Mid Production
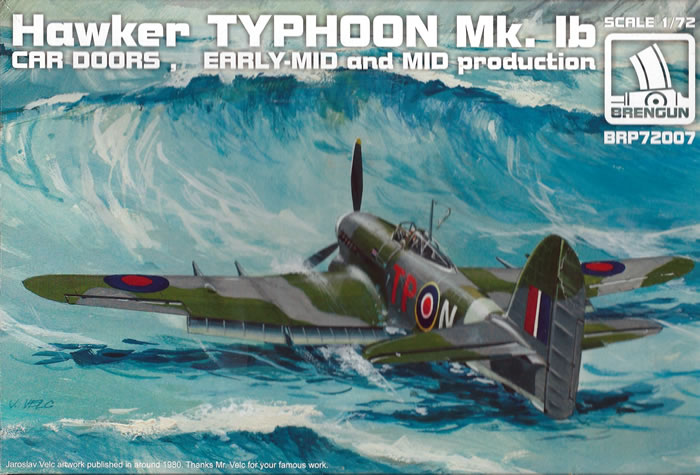
Brengun, 1/72 scale
S u m m a r y : |
Catalogue Number: |
Brengun Kit No. BRP72007 - Typhoon Mk.Ib Car Door Early-Mid & Mid Production |
Scale: |
1/72 |
Contents & Media: |
56 tan and seven clear styrene parts, one PE fret of five parts, and decals for four subjects. |
Price: |
Available on-line from these stockists:
|
Review Type: |
First Look. |
Advantages: |
Excellent surface detail; appears to be very accurate, with very nice cockpit and wheel wells. |
Disadvantages: |
No fishplate detail included around the rear fuselage, and the prop may be a little narrow in chord. |
Conclusion: |
This is the best injected kit in 1/72-scale of a car-door Typhoon so far. A lot of effort has gone into providing plenty of refined detail. It appears to be accurate in outline when compared to the CMR and Pavla kits, as well as to A.L. Bentley’s plans.
Highly Recommended. |
Reviewed by
Mark Davies

Sword's 1/72 scale Ki 44 Shoki is available online from
Squadron.com
I recently reviewed Brengun's kit of the Typhoon Mk.Ib with late production (with four-blade-prop) here on HyperScale. I also assessed the merits of the three-blade prop mid-production bubble top Typhoon, as all of the parts for this version were included as well. This first look in February 2013 mentioned various aspects of the Typhoon's history and development, included some images of the real plane, and compared the new Brengun kit to those from Academy and CMR. There seems little point in repeating the aircraft's history here.
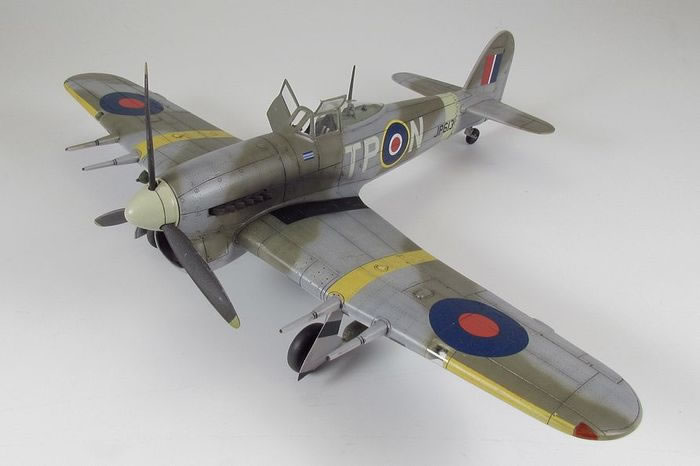
My earlier review also noted that there were parts indicating that a kit of the earlier car-door version was planned; this has now been released and is reviewed here.
Previous 1/72 Scale Car Door Typhoon Kits
Most of the better-known Typhoon kits of the last 50 years have been of the bubble-canopied version, including the latest from Airfix (reviewed by me here).
However, there have been a few car-door kits as well from Frog, Aviation USK, Pavla and CMR. The Frog kit has quite delicate raised surface detail, but an overly plump fuselage in plan-view. Aviation USK's kit has recessed detail, but is a very crude early-generation limited run kit. Pavla's kit has some excellent resin and PE detail, and fine surface detail. It looks to be one of this company's better efforts, but is still very much a limited-run kit with all that implies for parts preparation and assembly. Builds articles are not too hard to find and suggest that Pavla's is a good kit, but none have appeared here on HyeprScale as far as I know. CMR's kits are simple good quality resin kits.
The later boxed kits are better than the earlier bagged type, and include colour PE details. CMR's Typhoons are not as sophisticated as their more recent kits, being quite simple and straightforward to build quickly. Glen Porter reviewed CMR's car-door kit here on HyperScale, and Libor Jekl's very nice finished model from this kit can be seen in HyperScale's gallery here.
My review of Brengun's bubble-canopy Typhoon kit rated it very highly, especially the three-blade version (which, unlike the four-blader, did not require fuselage surgery); so it is very pleasing to now have the car-door version based on the same kit
Contents
The kit comes in a rather large box for a single-engine fighter in this scale. It has artwork showing a Typhoon about to ditch into the sea on the front, and a colour scheme and markings guide on the rear. Not that it matters all that much, but as a kid I always viewed the kit subject less favourably if the box-art showed it crashing!
One large and two smaller sprues of light-brown plastic are contained in a zip-lock plastic bag, along with a further small cellophane bag enclosing the clear parts, decals and a small PE fret.
Thumbnail panels:1 | 2 | 3 | 4
The parts are limited-run but crisply molded on the whole, with delicately recessed panel lines, and some acceptable raised detail on the wings. There is some flash, but this should be easy to deal with. I did notice a panel line on the rear fuselage that is not quite continuous in depth; but again, easy to remedy.
The Kit
The instructions are a folded A4 sheet with a parts map and reasonably well-drawn assembly diagrams. Colour descriptions are restricted to generic and RAF names, and as with the markings guide, no colour system or paint brand codes are provided. This matters little as WW2 RAF temperate scheme colours are well known to most modellers.
Most of the parts are shared with Brengun's mid and late-production bubble-canopy kits, although a new fuselage sprue is supplied with the car-door cut-outs. The clear parts are the same, as these already had the car-door canopy included. Of interest is the solid rear canopy fairy included with the new fuselage sprue, as this indicates that a Mk.Ia 12-machinegun wing (and probably prototype) kit is planned as well.
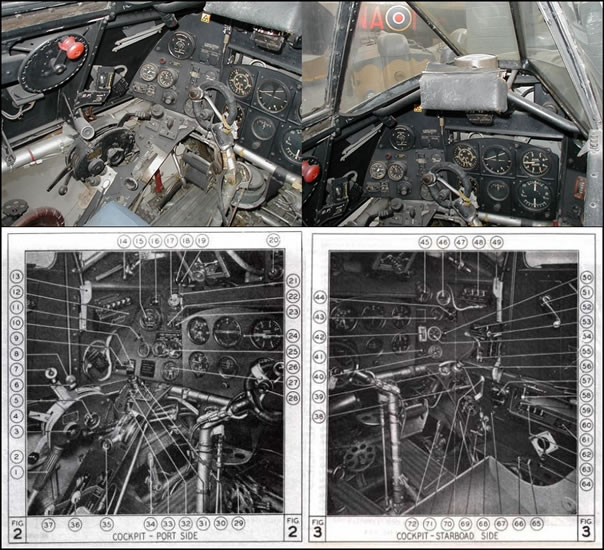
As review tradition almost demands, I shall begin with the cockpit. Brengun’s Typhoon kits beat all previous injection moulded kits, even bettering Pavla’s despite its use of some resin parts. The cockpit features tubular framework and open floor with heal-boards in true Hawker-fashion. Front and rear bulkheads brace this assembly. (They should be open framework too, but are virtually hidden from view and can have their flat surfaces painted matt black to simulate an open void.) The rear “bulkhead” includes the head armour. Nicely moulded rudder pedals, a control column and seat with PE belts complete this sub-assembly. A crisply moulded instrument panel locates within the fuselage halves that have further integral detail on the cockpit sides. There is a gun-sight mount to fit to the instrument panel, but sadly, no gun-sight. Two tubes that are not included braced the mount, but these can easily be scratch-built from rod or stretched sprue
Cockpit detail colours are given, but I am not convinced that a totally grey-green cockpit interior, as advised, is correct. I understand that Gloster, who built all but fifteen of the Typhoons produced, finished their cockpits in matt black above waist level, with aluminium tubular framing, seat and lower panels. The preserved cockpit in the Imperial War Museum and illustrations in the Pilot’s notes support this.
It looks as though the simple removal of the lugs that the cockpit cage sits on will enable this sub-assembly to be inserted after the fuselage halves have been cemented together and any seams cleaned up; worth doing to keep sanding dust out. Otherwise, it must be in place before the halves are joined as per the instructions. There is a separate rudder suits either tail choice.
It is also timely to mention the radiator and oil-cooler matrix as the fuselage encloses this too. This is supplied as front and rear faces, with a separate upper panel, complete with downward facing bulge. I think that these parts will look good once finished and enclosed.
My earlier reviews commented on the absence of fishplate strengtheners on the rear fuselage transport joint; a result of the way the late four-blade Tempest-tail version is engineered to use a separate tail section. The fishplates were the initial fix to stop tails breaking off in dives until the elevator flutter problem that caused this structural failure was determined. By then the fishplates were part of the production process and remained to give extra strength.
Fishplates were introduced from the 820th airframe produced, and retrofitted to previously produced in-service aircraft between December 1942 and March 1943. Therefore, it is conceivable to model some car-door Typhoons without fishplates, but most had them fitted in the end. Their presence is a subtle one (see the image accompanying this review), unlike the lumps on several kits that need sanding down. However, most photos show evidence of their presence due to dirt accumulating along the fishplates’ outlines, especially when over-painted with the sky tail-band.
I think that Brengun should have included the fishplate detail, and they do as part of a separate set that I reviewed here in May on HyperScale. This is not an ideal solution at €6.70, but it is a fix of sorts. The set also supplies flaps and some cockpit details. I think a simple decal with fine grey fishplate outlines would be fine to solve this minor problem (Mike Grant to the rescue?). Please see the accompanying photo to see how subtle they are in actual appearance.
The three -blade propeller is fine enough, given the limitations of injection mouldings It does look a little undernourished when compared to CMR’s and Academy’s interpretations. It also looks narrow in chord and slightly under-diameter compared to A.L. Bentley's plans. It may reflect the difference between a De Havilland and Rotol prop, as both types were used, but I cannot say for sure. The spinner looks fine to me.
Brengun have made quite an effort with the undercarriage. Commendably deep and detailed main wheel wells are separate three-side boxes that are closed in by a front piece representing the main spar. These mount to the wing underside ensuring that there is an undercut rather than walls that conform to the outline wheel well opening as on other kits. The oxygen bottles located in the wheel wells are provided, along with the main leg and ancillary door retraction jacks. The undercarriage doors are nicely done, with faceted internal panels like the original. The axles have the correct camber to the axles, rather than being perpendicular to the undercarriage leg. The colour call-out for the inside of the main undercarriage doors is medium sea grey. A friend of mine who spent a long time researching his 1/48-scale Typhoon project advised me that aluminium is the more likely colour here.
The main wheels consist of two halves, due to the limited run tooling. This reduces the risk of sinkholes often associated with thick parts, as well as eliminating ejector pin marks in the tyres. The tail wheel is simple and nicely done, and is the early pattern rather than the double-ridged anti-shimmy kind generally found on later Typhoons.
The wings are simple enough, but they will require some attention in two or possibly three areas. The cutouts for the landing lights really need to be closed in and a light added behind their clear leading covers, otherwise you will be able to see into the wing’s interior. The cut-outs are quite square, whereas the clear light covers have rounded corners, so some filling and re-polishing will needed here. However, landing lights were quite often blanked off in service use, so check references. The cannons are split horizontally along their tapered rear sleeves, and care will be needed to get a good round finish here. A dry fit of the main-wheel bay within the wing suggests it is just possible to close the upper and lower wing parts. I think that sanding or filing a little of the hidden face of the wheel bay away will make wing assembly easier. I found when dry-fitting the wings that the curved opening in the fuselage for the lower leading edge needs just a smidgeon more room for easy insertion of the lower wing.
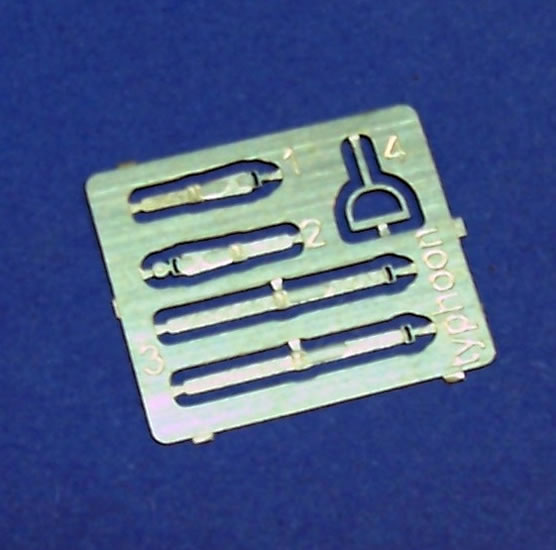
Not a lot remains to describe. There is a diagonal brace and an open-frame structure to add behind the head armour, along with a clear light part. All that is left is an underwing pitot, and the retractable boarding step made from PE to mention. The step is not quite right, as the stirrup the pilot places his foot in should lie parallel with the ground when the step is extended, but the kit item will lie at an angle as supplied. This can be easily fixed by making new wire step, so nothing to lose sleep over. The canopy looks good and clear.
The instructions make no mention of external weapons, although rockets and their rails, as well as bomb-pylons, do come with the sprues. I have seen a few photos of car-door Typhoons armed with rockets, and more with bombs. So check your references if you wish to have external weapons, or just their rails or racks. If you do decide to use them, remember to drill out the appropriate holes indicated by indents on the inside of the lower wing half.
Generally, I think that this kit should be a straightforward build. Dry-fitting the major parts, and a close examination of the assembled model images from Brengun, suggest that it may not be as faultless as long-run kits to assemble; but by no means will it be a limited run battle either.
Accuracy
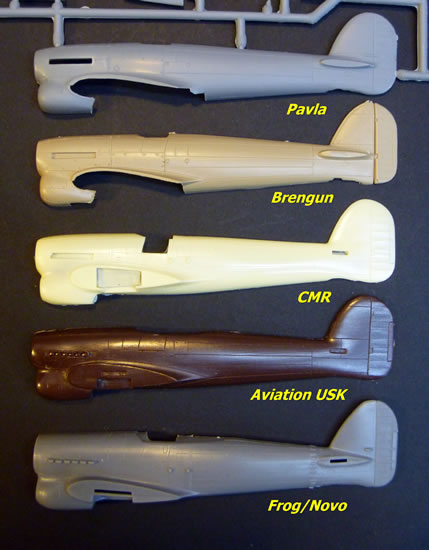
I usually restrict any accuracy assessments to comparison with previous kits, and this one compares well with Pavla and CMR's car-door kits, and is far better than the Frog/Novo and Aviation USK kits.
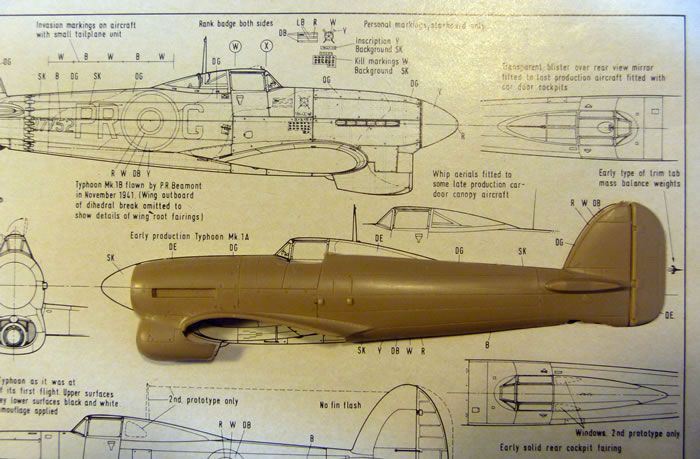
I also found that Brengun’s parts correspond very closely in outline to Arthur L Bentley’s beautifully drawn plans. I cannot say how accurate these plans are, but they look to be thoroughly researched (The ones I used came from Scale Models Magazine of November 1975).
Suffice to say, Brengun’s kit agrees with the best 1/72 kits of which I am aware. Brengun’s images of the completed kit included with this review certainly suggest that they have captured the looks of this pugnacious looking fighter.
Marking Options
The decals look well registered and appear to have good opacity.
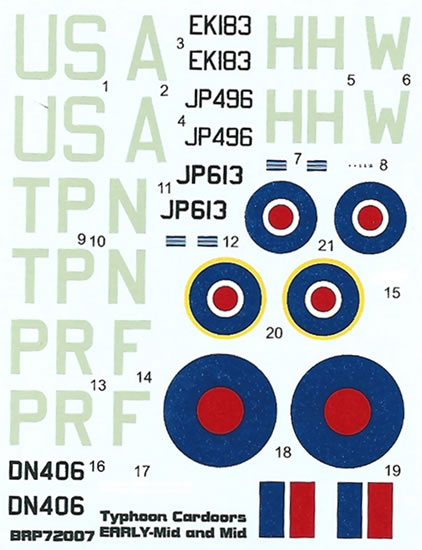
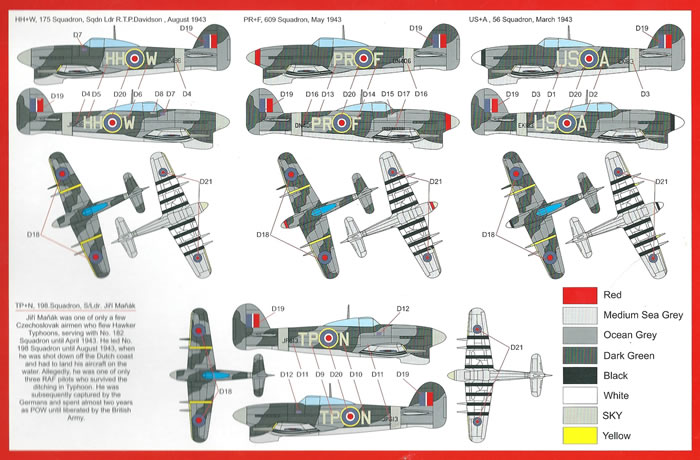
The options they cover are:
-
HH-W, No 175 Sqn, Sqn Ldr RTP Davidson, August 1943;
-
PR-F, No 609 Sqn, May 1943;
-
US-A, No 56 Sqn, March 1943; and
-
TP-N, No 198 Sqn, Sqn Ldr J Manak, April 1943.
This kit has very nice surface detail, and is accurate in outline; if the lack of criticism of the other two Typhoon kits I have compared it with is a reasonable basis to make this call. The cockpit and wheel well detail surpasses what has gone before.
Criticism of the parts makes for a very short list - No gun-sight or sight-bracing and empty spaces behind the landing lights. Neither of these is of any real consequence, and is easy to remedy. There is also the issue of no fishplates that most kits over-state with lumpy raised detail; although Brengun does offer a separate PE set that has fishplates included for an extra €6.72. I think that they should be moulded with the fuselage halves in the first place. Finally, I think that the propeller may be a bit narrow in chord, and possibly a fraction under in diameter.
Quibbles aside, this is by the best injected kit of a car-door Typhoon in 1/72-scale to date, as well as being by far the most available, and attractively priced. It has all of the right elements to build into a stunning model.
Thanks to Brengun for the review sample.
Review Text & Blue Background Images Copyright © 2013 by Mark Davies
Page Created 3 July, 2013
Last updated
4 July, 2013
Back to HyperScale Main Page

|
