|
Academy's 1/48
scale
Hispano
HA-1112-M1L
by
Jon Bryon
|
 |
|
Hispano HA-1112-M1L |

Academy's 1/48 scale Hispano HA-1112-M1L
is available online from
Squadron
Comments on construction for this model are the same as for
my recent Hobbycraft 1/48 scale
Avia S-199, including the very poorly fitting canopy.
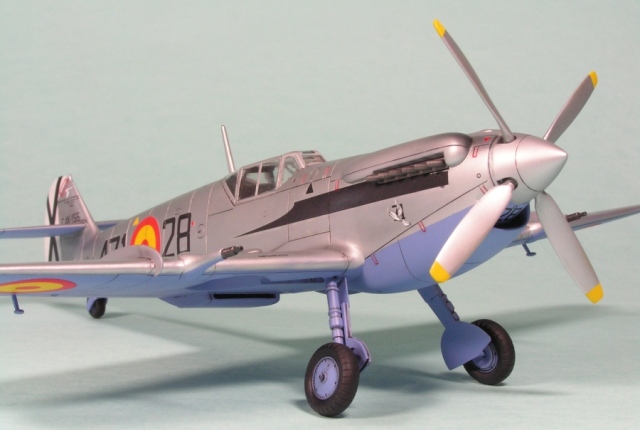
The only modifications to this kit were to replace the pitot tube
with brass tube and wire, and to drill out the gun barrels and engine
exhausts.
I did not attach the underfuselage housing provided in the kit since
I couldn't see this on the only pictures I could find of this aircraft
(see the walkaround in the 109 Lair). These pictures also caused me to
paint the propeller and spinner silver, rather than brown for the former
(as suggested by the instructions) or black for the latter (as on
another museum aircraft photographed on Wikipedia).
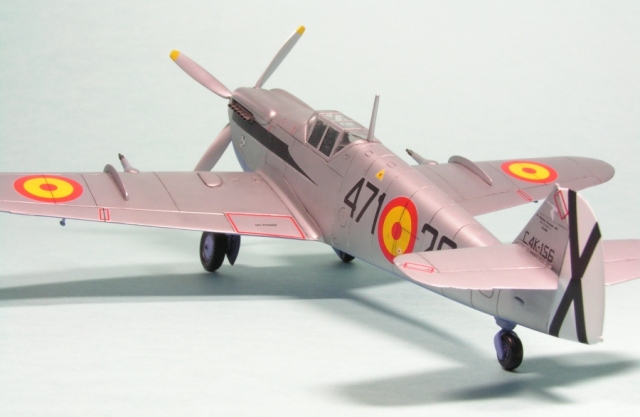
As with the Avia, I would have replaced the wingtip lights with clear
plastic had it occurred to me before I painted the aircraft. As it is, I
painted them to represent coloured lenses, which I believe is incorrect.
Also of note is that the instructions would have the builder place
the wing guns in the wrong place. They should be further outboard so
they don't interfere with the wheel wells.
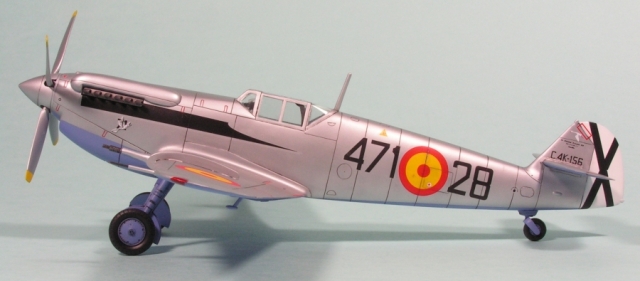
After cleaning, the
airframe was primed with Mr Surfacer 1000 and polished using Tamiya
polishing compounds.
The rudder was painted
with Mr Base White and the Azure Blue is Mr Hobby, which is only
available as part of their RAF WWII Color set #2.
I didn't preshade this
model and the silver is also Mr Color #8. Some of the blue paint lifted
under Tamiya masking tape. This is a frequent problem with Mr Color
paints that I cannot solve, even with carefully washing the plastic,
using a primer coat and only handling the model with gloves.
Johnson's Klear was
airbrushed over the final colours and an oil paint wash applied, again
using Zippo lighter fluid as a thinner.
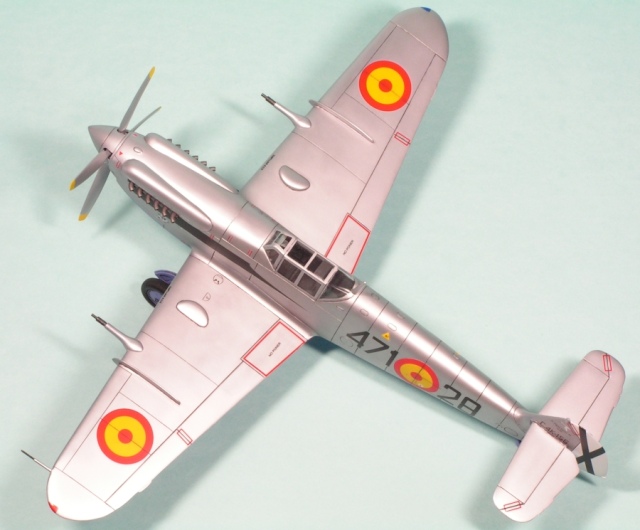
 The
kits decals were used and were okay. They also lacked adhesion and were
a bit stiff, not reacting much to Mr Mark Setter or Mr Mark Softer. The
kits decals were used and were okay. They also lacked adhesion and were
a bit stiff, not reacting much to Mr Mark Setter or Mr Mark Softer.
The black tail cross was
cut out from the rudder decal and applied separately.
All the smaller parts were
then attached (landing gear, antenna mast, etc.) and a mix of Pollyscale
flat and satin applied to dull it all down.
Overall, this was a nice build.
It did cause me some trouble with the canopy, and the plastic did not
react very well (or maybe too well) to Revell Contacta cement. A long
ghost seam (a very shallow depression along the seam) appeared on the
nose after painting and decalling. I decided to deal with it, rather
than leave it, and applied Mr Surfacer 1000 which was gently polished
out using Tamiya compound. This removed the seam completely and it looks
much better, but it was a real pain to cut into a perfectly good paint
job and reapply the silver. I may try constructing airframes solely
using super glue from now on to see if I can reduce the number of ghost
seams that often appear on my models as a result of the liquid
polystyrene cement slowly reacting with the plastic.
As I exclusively model post-WWII aircraft in 1/48 I am very happy to
be able to add these unusual models to my collection without resort to
expensive conversion or aftermarket sets.
Click on the thumbnails
below to view larger images:
[../../photogallery/photo00014792/real.htm]
Model, Images and Text
Copyright © 2007 by Dr Jon Bryon
Page Created 25 September, 2007
Last Updated
24 December, 2007
Back to
HyperScale Main Page |
 Home
| What's New |
Features |
Gallery |
Reviews |
Reference |
Forum |
Home
| What's New |
Features |
Gallery |
Reviews |
Reference |
Forum |