|
F-86
Sabre
by Alex Bernardo
 |
|
North
American F-86 Sabre
Captain Clifford Jolley, assigned
to 4th F.I.G., based in Kimpo, Korea, flew this Korean War F-86 in 1952. |

available online from Squadron.com
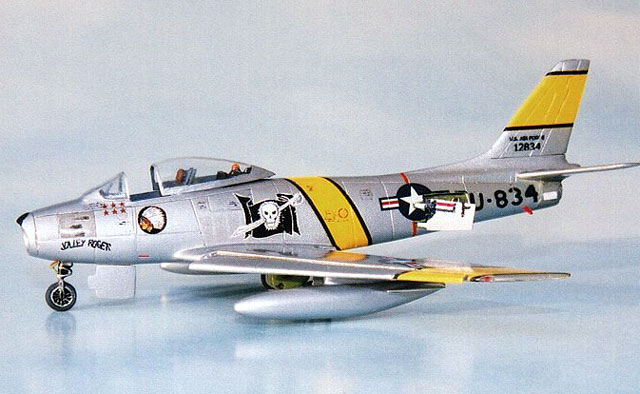
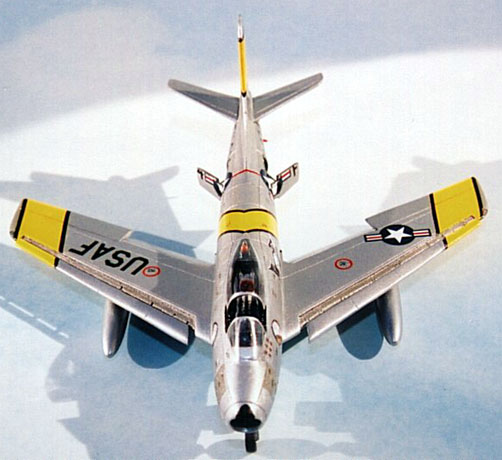
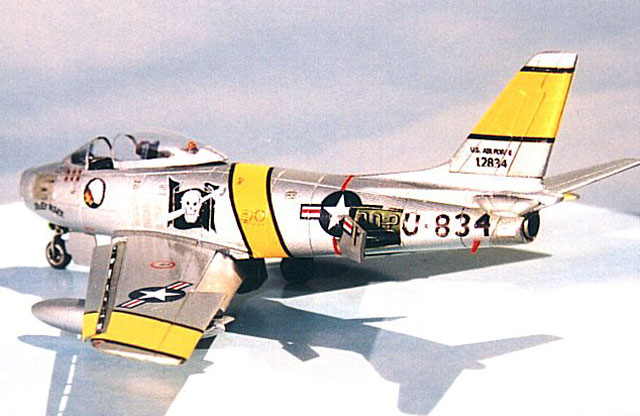
This is Ozmods 1/144 scale F-86 Sabre finished in the markings
of Captain Clifford Jolley, assigned to 4th F.I.G., based in Kimpo, Korea, who
flew this Korean War F-86 in 1952.
Comments on construction are as follows:
-
The kit did not include an intake
funnel. Intake funnel was constructed by first cutting a small circle from sheet
styrene. Next, I cut a small hole in the center of the pie. Then, cut a pie
section out. Then curl the remaining pie into a funnel. Then glued the seam with
super glue and trimmed to fit. Obviously, this took several tries to get the
correct size and shape.
-
Cut flaps from wing in order to
reposition them in the dropped position. Glued a small strip of styrene on to
the joining side to allow for the correct drop angle.
-
Leading edge slats: Looking at the
bottom of the wings. Scribed the leading edge panel line to a depth just short
of going to thru the top of the wing. Next, looking at the top of the wings,
scribed the slat panel line all the way thru to the bottom of the wing. Then cut
both ends with a razor saw. Looking at the back end of the slats. Cut a groove
just below the top surface of the slat. After cutting away the bottom of the
slat. I call that piece the ledge. The ledge was glued on to the wing. Slat
guide rail slots were later notched into the slat ledge. The guide rails were
made from small pieces of styrene rod.
-
Speed breaks: Drilled out speed break
panels from each fuselage half. Then glued sheet styrene from the interior of
the fuselage half. I used various sizes of electronic wire and styrene to
provide break compartment details. The speed break itself was constructed from
sheet styrene. I laid a piece of styrene over the open speed break compartment
and traced the shape from the inside of the fuselage.
-
The kit did not include burner can.
The burner can was made from a piece of a straw. I waded a small piece of paper
towel and painted it black. Then glued the painted paper towel into the interior
end of the burner can.
-
Cockpit details: using small pieces of
styrene and clear cellophane to replicate heads up details. Seat cushion was
made from painted aluminum foil. Seat belts were made from painted masking tape.
Joystick was made from painted copper wire. Extended the height of the main
instrument panel with a piece of styrene. Painted instrument panels with black
paint, then followed up with a small brush to add white button details. Added
canopy guide rails on to the rear deck, behind the seat.
-
The main landing was not molded
correctly. I made new landing gear from a piece of steel wire. Scissors were
made by cutting leftover photo etch into the correct shape and size.
-
Wingtip navigation lights were made
from clear styrene blocks. The backside of the styrene was drilled out, then
painted to simulate light bulbs. After gluing the blocks into place. I used a
file to reshape the blocks to match the contours of the wing. Followed up with
multiple grits of sand paper to give them a smooth finish. Then touched up with
Future Floor Polish.
-
 Poly
S Bright Sliver and Flat Aluminum, Flat Yellow Poly
S Bright Sliver and Flat Aluminum, Flat Yellow
-
Tamiya Clear Gloss, Flat white
-
Floquil’s Engine black, Grimy black
-
Testor's Enamel Steel, Flat Aluminum,
Silver, Gray
Special thanks to Sunil Gupta for providing custom decals
printed from his Alps printer. Using scanned images of the Eagle Strike 1/32
F-86 decal sheet. I was able to acquire and clean up the images using Paint Shop
Pro software. I sent my sized images to Sunil for the actual decal printing
process. Then coated the printed decal paper with liquid decal film.
The kit provided yellow band decals. But the yellow wasn’t opaque. I cut the
black out line of the yellow band decals. I painted the yellow bands, and then
applied the black out line decals.
The remaining decals were taken from Super Scale 1/144 F-100 and P-38 sheets.
The national insignia decals came from a Siga decal sheet, which
included multiple small sizes of the U.S. insignia.
Click the thumbnails below to view
larger images:
Model, Images and
Article Copyright © 2001 by Alex
Bernardo
Page Created 06 April, 2002
Last updated 04 June 2007
Back to HyperScale Main Page
Back to Features Page |
 Home
| What's New |
Features |
Gallery |
Reviews |
Reference |
Forum |
Search
Home
| What's New |
Features |
Gallery |
Reviews |
Reference |
Forum |
Search


