|
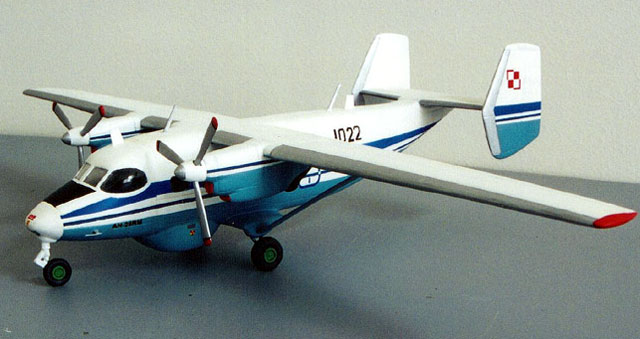
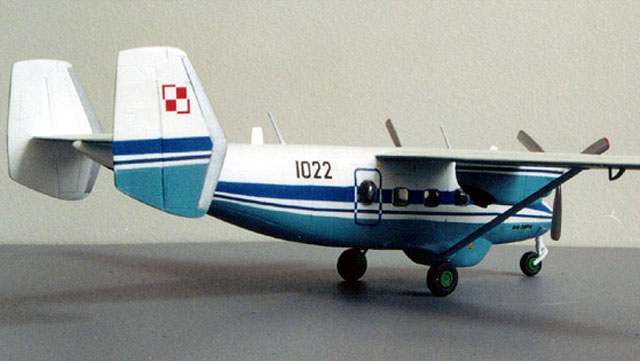
PZL An-28RM Bryza
(Sea-Breeze)
by Lukasz Kedzierski
|

|
|
PZL An-28RM Bryza
(Sea-Breeze) |

HyperScale is proudly supported by Squadron.com
The Antonov 28 was initially designated An-14M since the new OKB Antonov
project was based on An-14 Clod. An-28 was design to replace An-2 on
short local routes characterised by short airstrips not suitable for
other types. Several different variants were planned including
passenger, transport, fire fighter, ambulance, paratrooper trainer and
search and rescue. The variety of roles that the aircraft could be used
in and its STOL properties made it attractive for both civilian and
military use.
Official testing was completed in 1972 and
production started in 1973. In 1975 a new version with TWD-10 engines
was tested and subsequently was introduced into production. PZL Mielec
factory in Poland undertook licensed production of An-28 in 1978 and PZL
Rzeszow was chosen to manufacture TWD-10 power plants. First
Polish-built aircraft was rolled out in 1984. Shortly afterwards Soviet
Union become unable to pay for An-28 and production ceased. However, PZL
Mielec decided to modify its product and initiated production of
civilian passenger/transport M28 Skytruck as well as two military
versions PZL An-28TD (transport) and PZL An-28RM (SAR), the latter was
named Bryza (sea-breeze) since it is operated by Polish Naval Aviation.
The latest versions are designated PZL M28B Bryza and feature PZL10S
power plants with 5 bladed propellers. An-28 is currently used by the 13
PLT (Transport Regiment) in Krakow and the 1 and 3 DLMW (Division of
Naval Aviation) stationed in Gdynia-Babie Doly in An-28TD and An-28RM
versions, respectively.
Broplan's
Vacform 1/72 Scale An-28
|
When it comes to esoteric subjects such as An-28
there is no real choice of model kits, since usually there is none to
choose from. As far as I know An-28 in 1:72 scale is only made by
Broplan as a vacuformed kit. It was also announced by Top Gun (resin
kit), but never materialised in a kit form. I have a few of Broplan
kits, but that was the first one I attempted to build although not my
first vacuformed kit.
The kit comes in a small plastic bag that contains
3 sheets of vacuformed parts and two identical sprues containing
injection moulded parts plus clear glazing.

Overall quality is rather low - surface detail of
main components is poor, plastic is very thin which does not make
construction easy, and injection moulded parts frankly speaking are
crap. The instructions are a bit confusing and decals are not useable,
but contain markings for one An-28RM and one An-28TD.
So why would I build something like this? Well, I
like a challenge and I really like aircraft with white and red checkers
on the wings. Besides, no other manufacturer is going to make this kit.
Construction should have been pretty
straightforward after parts cleanup, but it turned out to be a long and
tedious process.
The interior consists of a couple of bulkheads,
floor, seats, tables, something that seems to be a toilet compartment,
instrument panel and side consoles. Lots of parts but not much detail on
them although instruction contains detailed drawing of an instrument
panel for those who want to make it. Not much can be seen anyway despite
several windows on both sides since clear parts are not that
transparent. I only added a ceiling to the crew compartment to make the
whole thing more sturdy.
Before I put the completed cockpit and crew cabin
inside I cut openings for all the windows. Do not follow outlines
engraved on the fuselage since they have very irregular shapes, but use
the clear parts as a guideline.
After the interior was painted I added all the
glazing and detail and stuffed the nose with lead and there is a lot of
it needed! I also glued plastic tabs to one of the fuselage halves to
facilitate and strengthen the structure.
 When
I attempted to put fuselage together I faced about 3 mm gap between both
halves. Either the interior (bulkheads and floor) was too wide or I
sanded too much plastic from the fuselage halves (I was really
enthusiastic about this kit when I started so there was a lot of energy
put into construction). Quick calculations revealed the interior is of
the right width so I had to fill the gap to make the fuselage look
right. I think the parts were already too small and I oversanded a bit
as well. Oh well, nothing that a little (yeah right!) of putty cannot
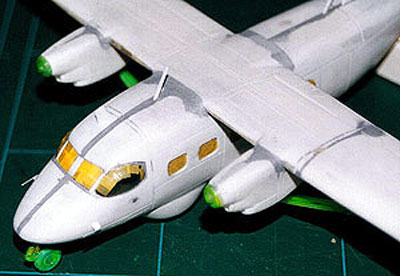
fix! Before I started filling and sanding I also added radar cover
underneath the forward fuselage and short wings, which serve as housing
for the main undercarriage and support for wing struts. And then I spent
a few evenings covered in dust, cursing a lot and filling and sanding,
sanding and filling, filling and then there was no problem with vertical
and horizontal stabilizers. I just had to fill the joints with putty and
sand, normal construction procedures with this kit. When
I attempted to put fuselage together I faced about 3 mm gap between both
halves. Either the interior (bulkheads and floor) was too wide or I
sanded too much plastic from the fuselage halves (I was really
enthusiastic about this kit when I started so there was a lot of energy
put into construction). Quick calculations revealed the interior is of
the right width so I had to fill the gap to make the fuselage look
right. I think the parts were already too small and I oversanded a bit
as well. Oh well, nothing that a little (yeah right!) of putty cannot
fix! Before I started filling and sanding I also added radar cover
underneath the forward fuselage and short wings, which serve as housing
for the main undercarriage and support for wing struts. And then I spent
a few evenings covered in dust, cursing a lot and filling and sanding,
sanding and filling, filling and then there was no problem with vertical
and horizontal stabilizers. I just had to fill the joints with putty and
sand, normal construction procedures with this kit.
|
Home
| What's New |
Features |
Gallery |
Reviews |
Reference |
Forum |
Search