|
Kaleido Acrylic Metallics
& Gloss Varnish
Razor Crest model built and
finished
by Grant “Model Dude” Schatz
Text and Images by John Miller

Testing Kaleido Acrylic Metallics and Gloss Varnish
Text and Pictures by John Miller.
Review Type:
In-Bottle
Description:
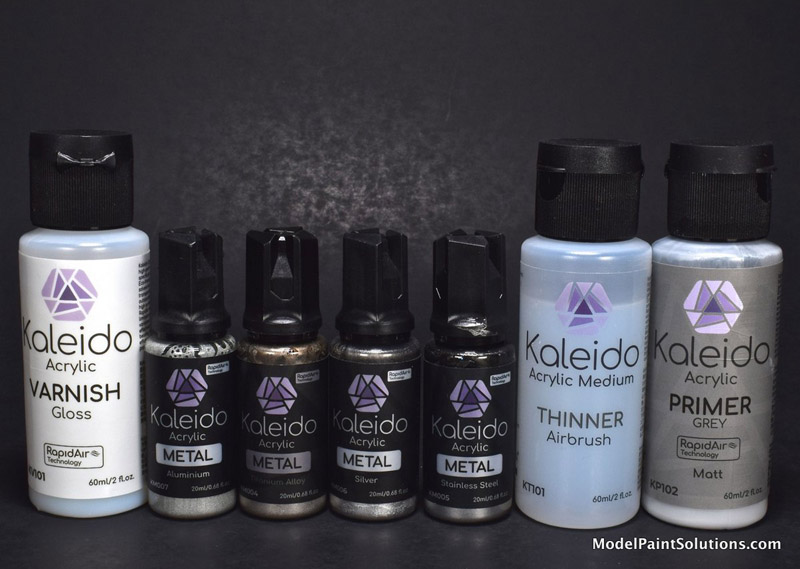
Kaleido is a new line of acrylic (“water-based”) paint that includes primers, metallics, auto-colors, mecha-colors and clear coats. Kaleido is a subsidiary of Gaahleri Airbrush.
Advantages:
Kaleido Grey Primer and metallics (Aluminum, Titanium, Steel and Silver) are easy to apply and easy to clean from an airbrush. Both the primer and metallics dry quickly producing surprisingly smooth and hardy finishes that are resistant to decal solvents, Tamiya enamel panel liner and Mona Lisa odorless thinner. For preparing custom mixes, Kaleido provides assistance via their interactive website, which is very cool…
https://www.kaleidocolorlab.com/make-color
Disadvantages:
Although Kaleido says military colors will be available in the future, for now colors for most aviation, naval and armor subjects have to be custom mixed. Some tip-dry was experienced but less than expected for an acrylic paint.
Kaleido is one of the new kids on the block that’s gotten a lot of attention of late. The description of the paint on the Kaleido website includes phrases like “Rapid-Air Technology” and “Nano-level Pigments”……..Don’t know much about rapid-air tech or nano-pigments but I can say Kaleido metallics and primers are some of the easiest acrylics to apply I’ve experienced. What’s really surprising is how sturdy and chemically stable the metallic paints and primers are once dry.
Being primarily an aircraft modeler, I was most intrigued by the line of metallic paints. Moreover, being an acrylic, I was interested to see how Kaleido Gloss Varnish would lay down and handle decal solvents. After perusing the Kaleido website, I placed an order and roughly 4 days later received a nicely packed shipment of metallic paints, thinner and primer.
Here we go!
My introduction to airbrushing model paints was in 1973 so I’ve grown accustomed to assessing what’s in a new brand of paint by carefully using ye olde sniffer. Many acrylic paints contain alcohols and/or ammonia, which have the expected odors. What’s singular about Kaleido is the lack of a strong odor. Whether they’re still in the bottle or airbrushed, this brand has little-to-no smell. Folks who are sensitive to strong paint odors will appreciate this.
I test new paints by airbrushing them onto a sheet of Evergreen styrene plastic (~3x4 inches). After de-greasing the sheet with Denatured Alcohol (for cleaning glass not for fuel!), I prime and paint the sheet as though it were a scale model. This includes spraying the same primer, paints and clear coats I intend to use on an actual project. Once done, the effects of decal solvents on the finish can be assessed with no worry of a bad result ruining a model.
Kaleido Primer:
After thoroughly shaking a bottle of Kaleido Grey Primer (made easy by the mixing ball provided in each bottle), the primer was shot straight from the bottle at ~12psi with an H-S Evolution fitted with a 0.28mm tip. It was applied first as a Dry-Coat, followed a few moments later with a light Wet-Coat. Please see below for a more in-depth description of spraying Dry- and Wet-Coats. Coverage was very good requiring just a couple of passes to achieve good coverage.
Tip dry was as expected for an acrylic on a rather arid day, meaning the tip required cleaning 2-3 times over a 10 minute painting session. I usually clean the tip using a microbrush wet with whatever thinner is being sprayed.
The airbrush was cleaned with a mixture of 40% Denatured Alcohol and water, which is a good cleaner for many acrylics and cheaper than using a brands thinner or cleaner. My usual technique of putting the brush nose-down in a shot-glass with a 1/2in of cleaner in it for 3 soaks of 5 minutes each resulted in a clean brush with little-to-no work.
Note: The same technique was used to clean all of the Kaleido metallics from the airbrush.
The Kaleido Grey Primer was dry to the touch in ~30 minutes. The finish was amazingly smooth with no texture. As I usually do with most acrylics, I let the primer dry over-night (~12 hours) before applying strips of 10mm AK Masking Tape that was previously de-tacked with my fingers. I also used a square of Parafilm to mask the remainder of the test sheet.
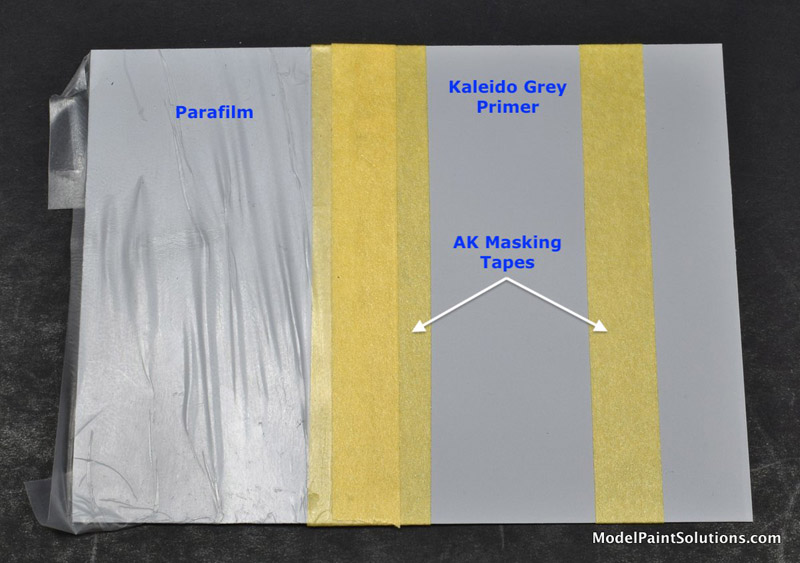
First up was Kaleido Aluminum, which was sprayed straight from the bottle at ~12psi with an H-S Evolution/0.28mm tip. This was applied as a Dry-Coat followed by a light Wet-Coat. These metallics are very pigment dense so achieving good coverage only required a few, light passes. As with the primer, the Aluminum was dry to the touch in less that 30 minutes and the finish was smooth with a very nice metallic sheen.
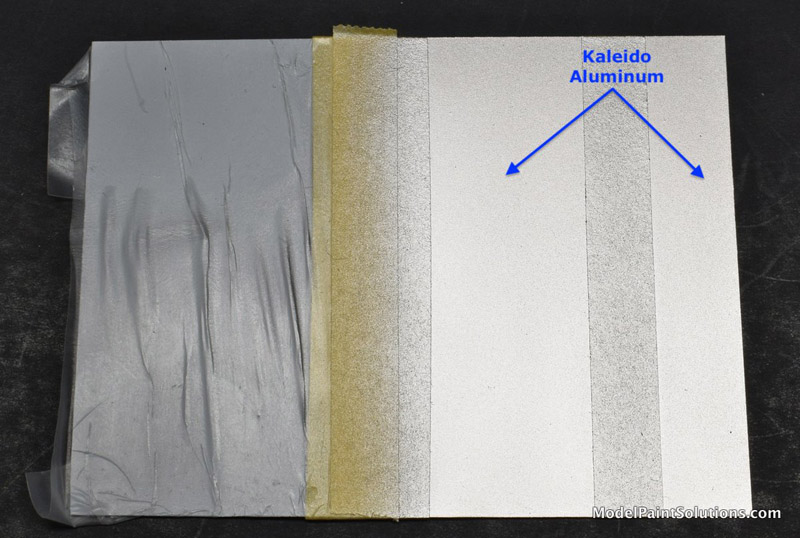
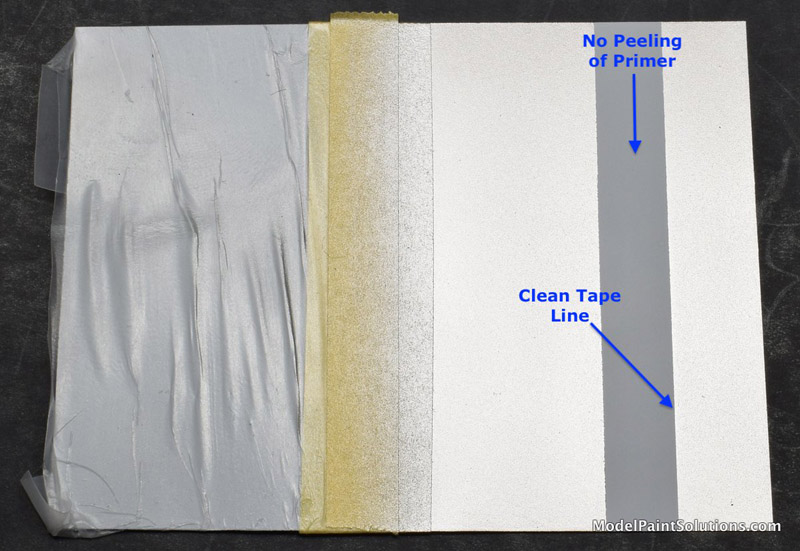
After about an hour the AK masking tape was removed revealing a nice, tight line. None of the Kaleido Aluminum came up along the tape line when the tape was removed. In addition, the Grey Primer was completely unaffected by the masking tape; no peeling or chips were seen even at the edges of the test sheet. Nice!
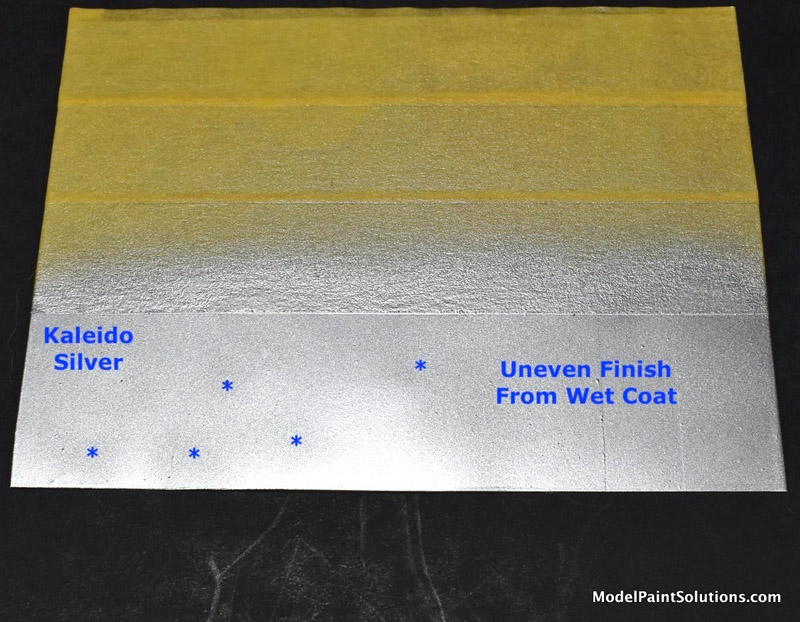
Next up was Kaleido Silver. As with the Aluminum, Silver was sprayed straight from the bottle at 12 psi with an H-S Evolution/0.28mm tip. It was applied as a Dry- followed by a light Wet-Coat. While spraying the Silver I inadvertently, sprayed an area with too much paint and observed a change in the metallic sheen of the finish. To assess this response, I purposely sprayed multiple passes with too much paint to the point of obtaining puddles. After drying about an hour, a difference in the resulting metallic sheen was clearly visible in those areas.
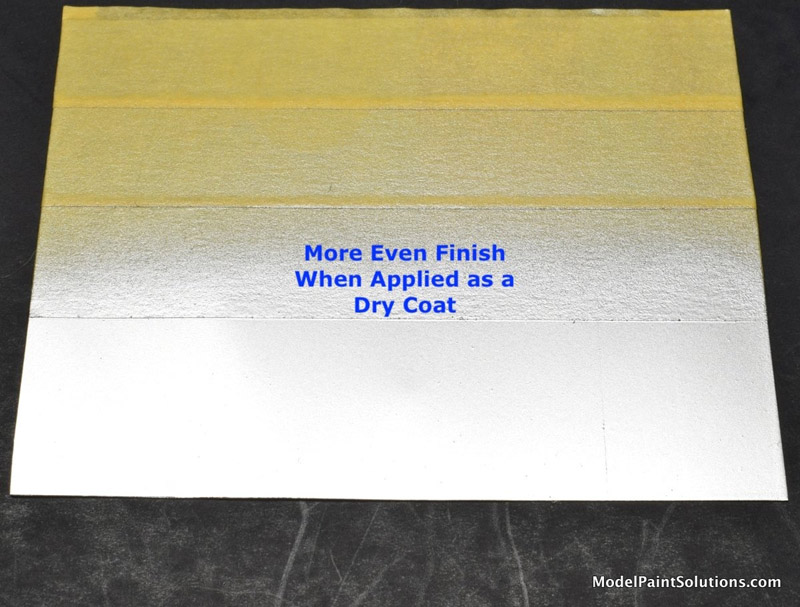
To see if the areas caused by the overly heavy application could be blended out, I over-shot the previous coat of Silver with an additional light, dry coat using the same bottle of Silver and airbrush set up (12 psi/Evolution/0.28mm tip). The distorted areas blended beautifully with the surrounding areas. Lesson learned. This paint is very sensitive to over-application so when shooting a wet coat of Kaleido metallic, it’s best to use a lightwet coat with no puddling. Moreover, if you make a mistake (like applying it too heavy), the paint seems quite forgiving in that mistakes can be blended out using a light dry coat. Very nice!
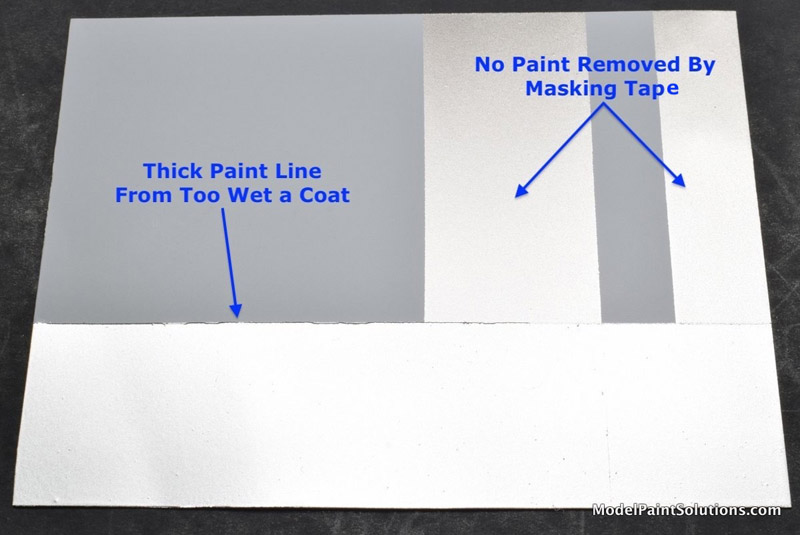
Removal of the AK masking tape revealed no chipping or pealing of the previously shot Aluminum coat. In addition, the metallic sheen and finish of the Aluminum was unaffected by having been masked. This can be an issue with some metallic paints that exhibit an altered finish after being exposed to masking tape adhesive. An overly thick (and ugly) tape line, caused by the multiple wet coats, was clearly evident.
AK masking tape was again applied to the test sheet in preparation for spraying Kaleido Titanium. The Titanium was shot straight from the bottle as a dry-coat followed by a light wet-coat with the same airbrush set up used for spraying the other metallics (~12psi, Evolution/.28mm tip).
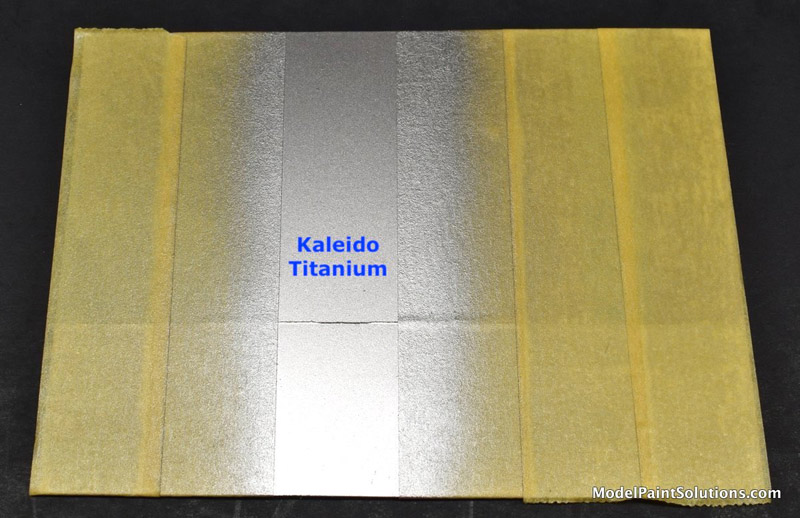
To test how soon Kaleido metallics can be masked after spraying, AK Masking Tape was used to cover the Kaleido Titanium after about 1 hour of drying time. The tape was first de-tacked with my fingers but lightly pressed in place with a burnishing tool as I regularly do when masking a model. I allowed the masked Titanium to sit for ~5 hours before spraying the next metallic, Stainless Steel.
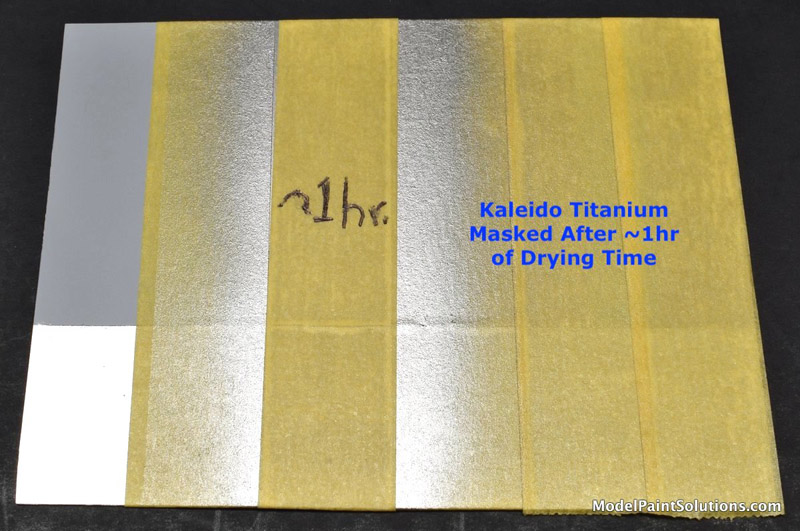
As with the other metallics, the Stainless Steel was sprayed straight from the bottle (12 psi/Evolution/0.28mm tip) as a Dry- followed by a light Wet-Coat. After ~30 minutes of drying time, the tape was removed from the Titanium strip revealing a perfect finish; no chipping, no peeling and most importantly, no change in the metallic sheen. Good stuff!
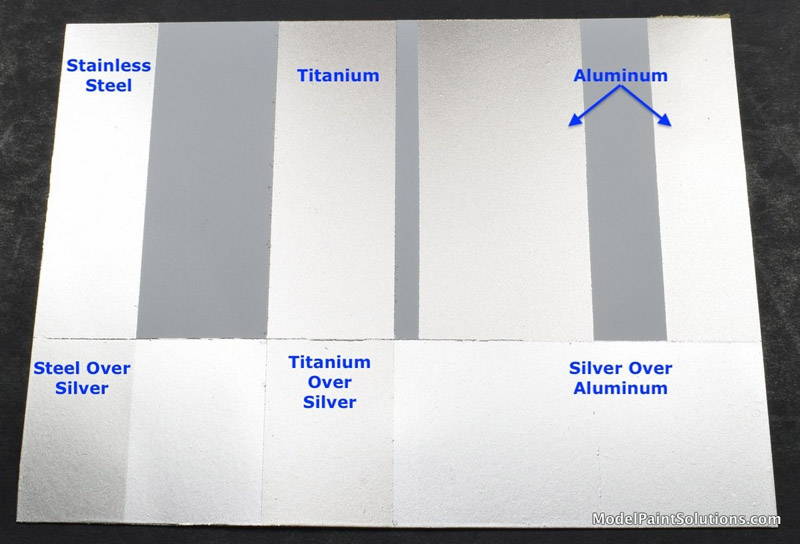
Prior to spraying the Gloss, roughly half of the test sheet was covered with AK Masking Tape and Parafilm. The Gloss was diluted to 80% with Kaleido Retarding Thinner and applied using the same technique and set-up used with the Kaleido metallics (12 psi/Evolution/0.28mm tip).
It took about an hour for the Gloss to become dry to the touch. However, the coat still felt a bit tacky so it was set aside and allowed to dry overnight. It’s important to note that, unlike the metallics, the Gloss was diluted with Retarding Thinner so a longer drying time is to be expected.
Once dry, the Gloss coat was very smooth and noticeably shinier than the un-glossed side of the test sheet. That said, the shine of the glossed area was not very intense. The shine is more than sufficient as a preparatory step to decalling (see below) and/or as a final finish on an aircraft or armor model. In contrast, car modelers that are looking for that “10 foot deep shine” may be disappointed. On a separate sheet I assessed multiple different ways of applying Kaleido Gloss that included no dilution with thinner, dilution to 50% with thinner, application by just dry-coats, just wet-coats and a combination of both. Irrespective of the technique used, I was not able to achieve an appreciably shinier finish than that obtained on the test sheet.
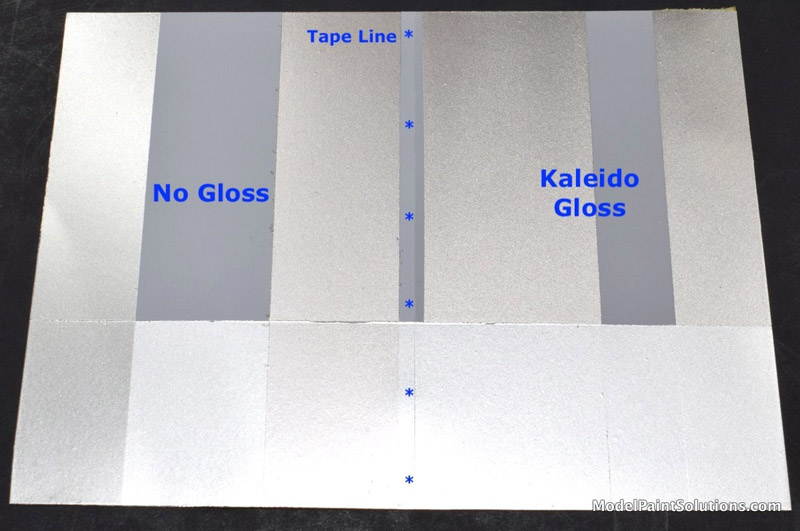
In my experience, a weakness of many acrylic gloss coats is a sensitivity to decal solvents like Micro-Set, Micro-Sol, Mr. Setter and Mr. Softer. This can manifest as a milky-white appearance when the gloss coat is exposed to a decal solvent. Sometimes the milky-white area will disappear when the solvent dries. Conversely, sometimes the gloss coat is compromised leading to a very noticeable change in the finish.
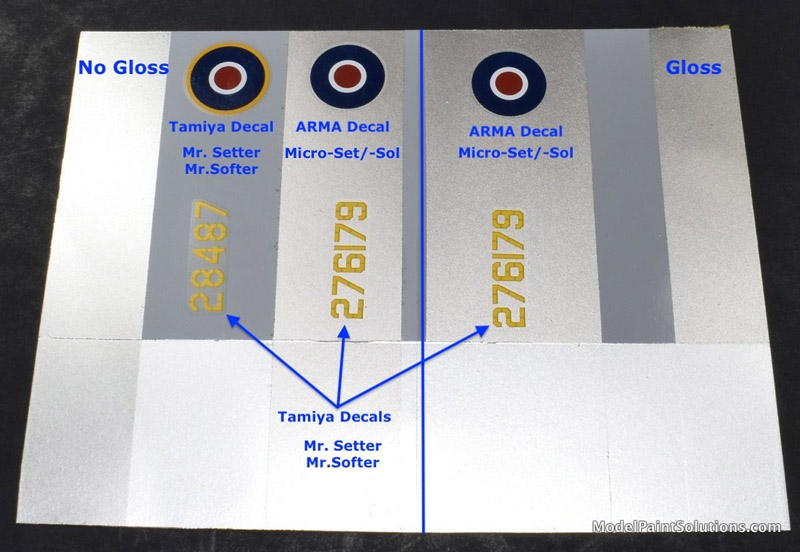
To asses how a coat of Kaledo Gloss responds to decal solvents, decals from ARMA Hobby and Tamiya were sourced from the spares box. Decals were applied to the glossed portion of the test sheet as well as on un-glossed primer and directly onto un-glossed Titanium. The ARMA decals were treated with Micro-Set followed by Micro-Sol and the Tamiya decals were treated with Mr. Setter and Mr. Softer.
Both the ARMA and Tamiya decals responded as expected with a slight crinkling around the edges when first treated with a decal solvent. Most importantly, at no time did the gloss coat turn milky-white in response to any of the solvents tested.
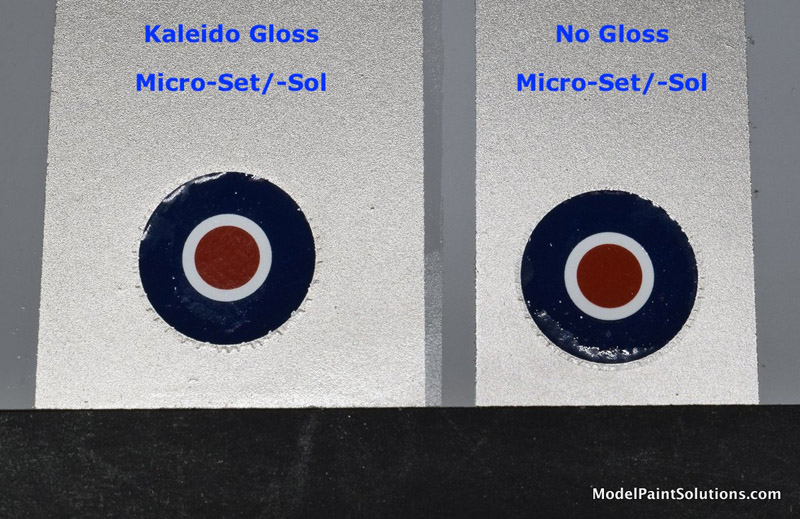
In addition, application of Set/Sol or Setter/Softer to un-glossed Titanium had no effect on the metallic finish. Ditto that for all of the solvents when applied to un-glossed Kaleido Primer. Very nice!!
Bandai 1/220th scale Razor Crest |
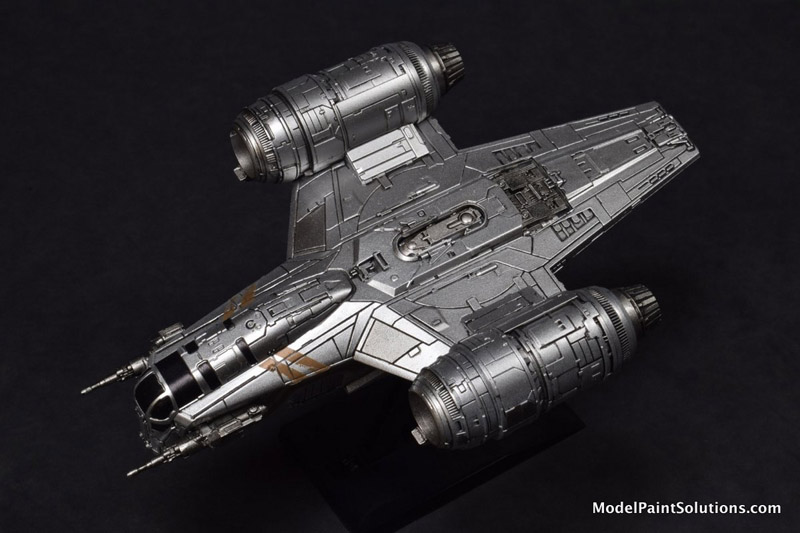
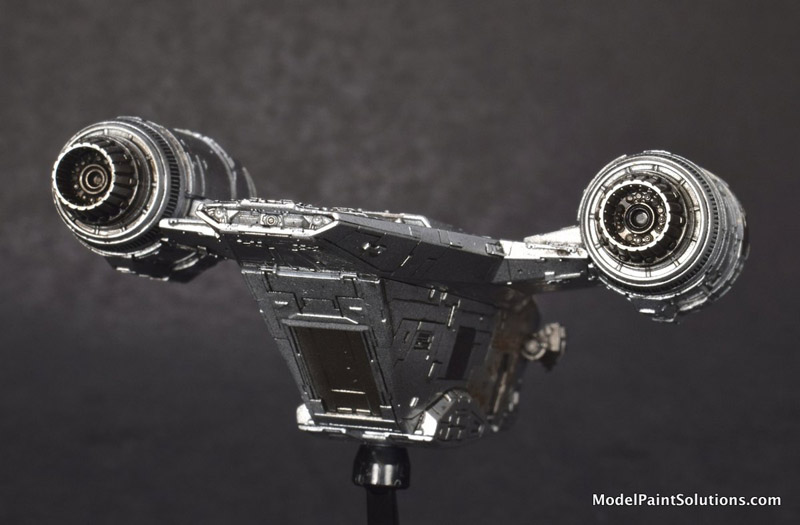
While I was busy testing Kaleido paints on a sheet of styrene, my modeling buddy, Grant “Model Dude” Schatz, jumped in head-first and painted a model with the same metallics. Luckily, for us, he was willing to share his results. Grant used Kaleido, Titanium, Silver and Stainless Steel to finish his very cool Bandai 1/220th Razor Crest.
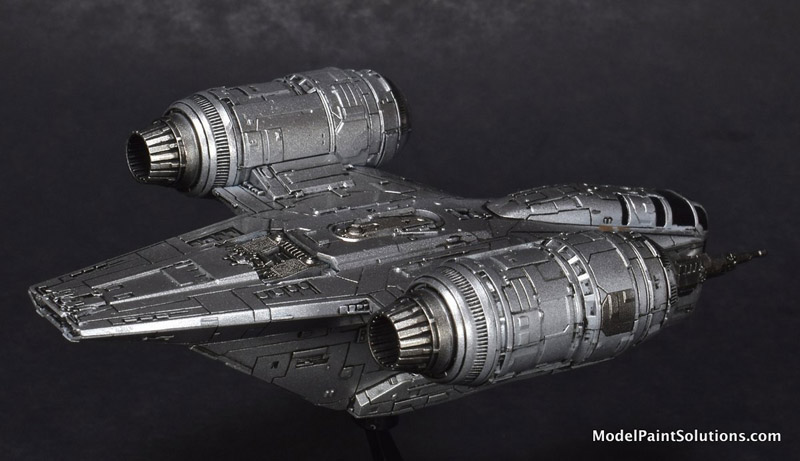
A fair amount of masking and handling were required for this scheme and Grant found the paints were as hardy and easy to shoot and clean as I did. Moreover, he used enamel Tamiya Panel Liners and Mona Lisa Odorless Thinner to accentuate the finish on his Razor Crest and none of the metallics used were affected by exposure to panel liner or the thinner. That’s going to make highlighting panel lines and surface details on a bare metal finish much easier.
Thanks, Model Dude!
Spraying Dry-Coats and Wet-Coatst |
In my experience enamel- and lacquer-based paints can be more forgiving than acrylics in that both can often be shot as Wet-Coats without a preparatory Dry-Coat. In contrast, many acrylic paints benefit from being applied first as a Dry-Coat followed, soon after, by a Wet-Coat. I think of the Dry-Coat as acting like a “catch” for the Wet-Coat, thereby permitting better coverage and decreasing the chances of the paint (or primer) spidering, running or sagging.
Firstly, it’s easier to differentiate between spraying a Wet- versus a Dry-Coat when the painting is done under very good lighting. A Dry-Coat is shot holding the brush 6-7 inches from the model with the lever (or trigger) pulled back so as to deliver a small-to-moderate amount of paint. Most importantly, while spraying a Dry-Coat (and Wet-Coat), attention should be focussed on the spot where the cone of paint is hitting the model. A properly applied Dry-Coat should not appear shiny (or Wet) as it hits the surface of the model. It should appear flat. Also, I don’t Dry-Coat the entire model at one time. I do a section at a time using mostly left-to-right passes of the airbrush. So, if I were priming an aircraft model, I’d start at the left wing-tip and move towards the fuselage. The rate at which the airbrushed is moved while spraying a Dry-Coat is slower than the rate needed when spraying a Wet-Coat. When the left wing is covered with a Dry-Coat, I switch to shooting the Wet-Coat. The time between the Dry- and Wet-Coats is 15-30 seconds, depending on the size of the model.
A Wet-Coat is shot holding the brush 4-5 inches from the model with the lever (or trigger) pulled back so as to deliver a moderate-to-large amount of paint. The rate the brush is moved is faster than when spraying a Dry-Coat. Most importantly, the spot on the model where the Wet-Coat is hitting while your spraying should be shiny or wet. The “trick” when shooting a Wet-Coat, is to “walk the shine” from left-to-right (or right-to-left) as you’re spraying. I got the phrase “walk the shine” from a customer that had owned an auto body/paint shop and used that phrase when instructing new painters. I think it accurately describes what a well applied Wet-Coat looks like.
As always, it’s best to practice spraying Dry- and Wet-Coats on a sheet of styrene or a “paint mule” to get the feel of the technique before reaching for your most recent master piece :)
Keep your airbrush wet!
Well, I have to say that I was pleasantly surprised with the results of this little test and the awesome finish Grant obtained on his Razor Crest. Kaleido Primer, Metallics and Gloss are easy to apply and and easy to clean from an airbrush.
When dry all of the Kaleido paints exhibit a very smooth and hardy finish that is surprisingly resistant to decal solvents and enamel thinner. However, the metallics are sensitive to over-application (i.e, too much paint), which results in a demonstrable change in the metallic sheen when dry. Fortunately, if that occurs, the change in sheen can be blended in with surrounding areas using a light dry-coat of the same metallic.
Highly Recommended!
—John
For more on this review visit ModelPaintSolutions.com
Text and images copyright ©2026 by John Miller/Model Paint Solutions.
Text by and Images by John Miller / Model Paint Solutionr
Page Created 31 July, 2026
Last updated
31 July, 2026
Back to HyperScale Main Page
Back to Reviews Page

|
 Home
| What's New |
Features |
Gallery |
Reviews |
Reference |
Forum |
Home
| What's New |
Features |
Gallery |
Reviews |
Reference |
Forum |