Arctic Vega – An Epic Journey
Model, Text & Photos by Tim Nelson
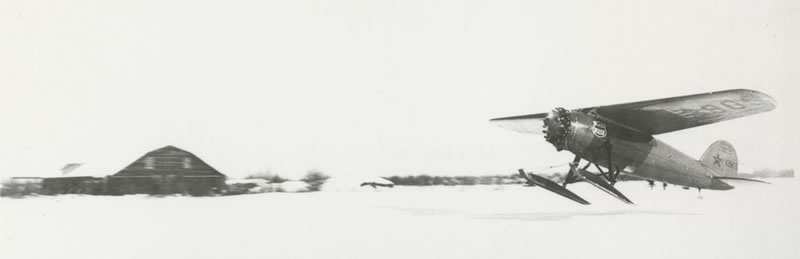
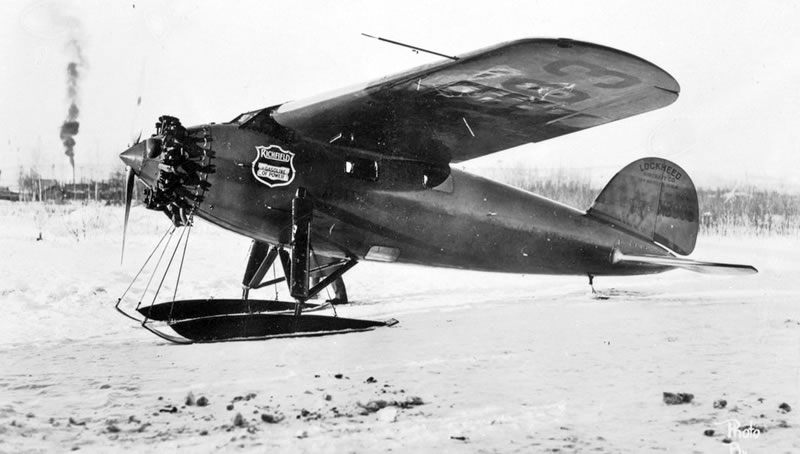
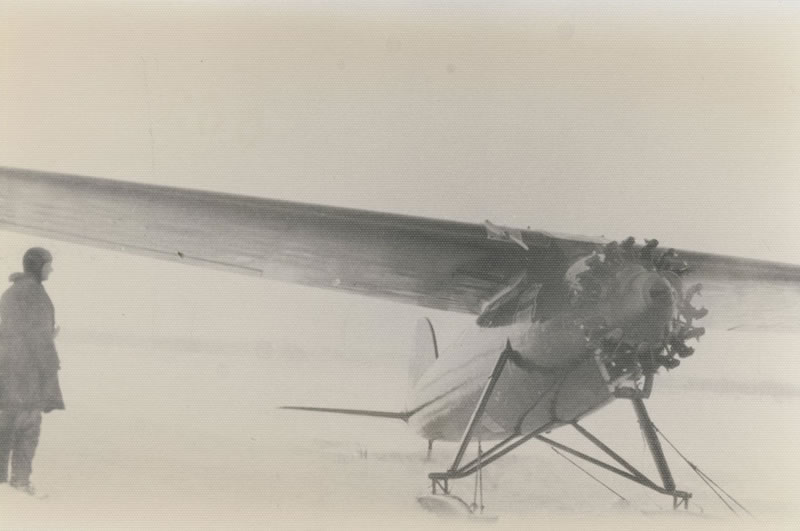
Lockheed Vega X3903 at Fairbanks, Alaska, 1928
(Douglas E. Young via Robert W. Stevens Alaskan Aviation Collection/The Museum of Flight)
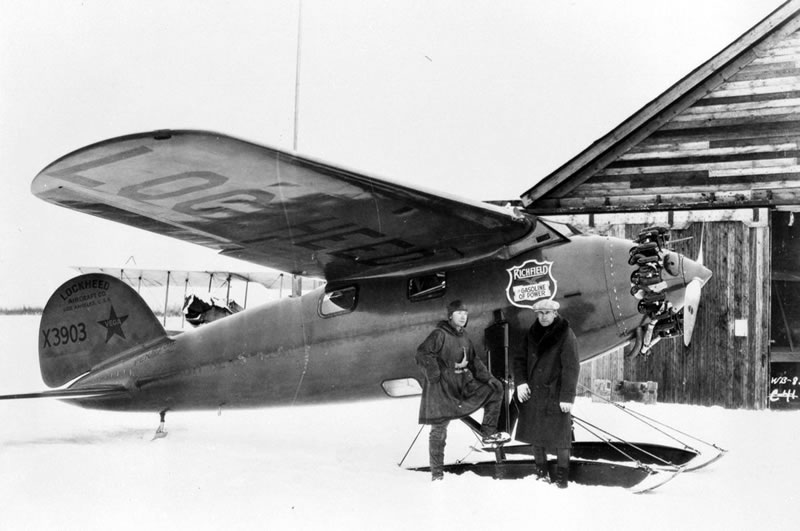
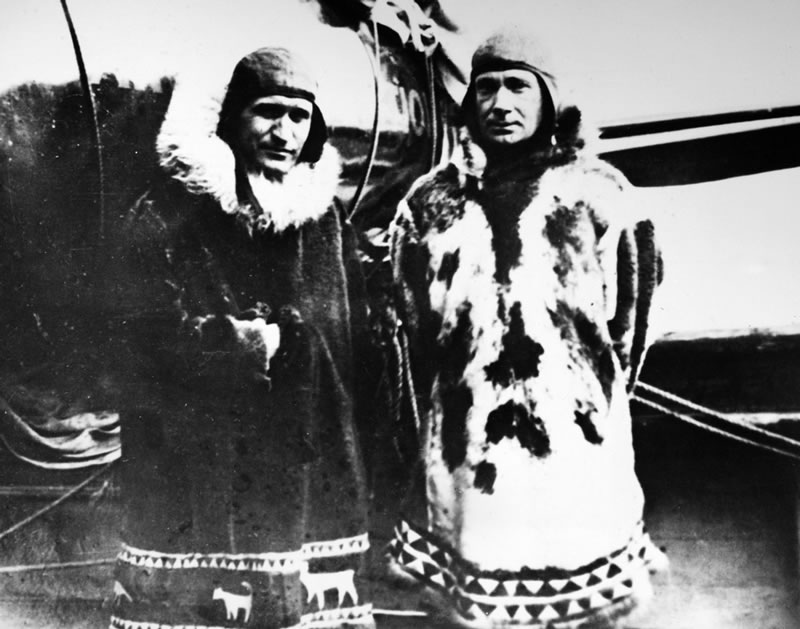
Probably the most famous photo of Vega X3903, with George Hubert Wilkins (L) and Carl Ben Eielson (R) at Fairbanks during preparations for their Trans-Arctic flight, Spring 1928
(Robert Stevens Alaskan Aviation Collection/The Museum of Flight)

The Vega was the first of a famous family of single engine monoplanes, introduced by Lockheed (a legally changed phonetic spelling of Allan Loughead’s last name) in 1927. Lead designers Jack Northrop and Gerald Vultee (who both would later establish their own famous companies) created a streamlined, wooden monocoque fuselage which was adaptable to a variety of configurations that quickly emerged: Vega, Air Express, Explorer, Sirius, Altair, and Orion. These machines established a highly accomplished and delightful family of aircraft, which excelled at racing, record-setting, exploration, and transport. They provide us with dozens of interesting and important examples to model.
In 1928, George Hubert Wilkins, a noted polar explorer, was looking for a more capable airplane than the Stinson Detroiter and Fokker Tri-Motor he’d been operating in the Arctic. For his intended Trans-Arctic flight from Barrow, Alaska to Spitsbergen, he’d need something with range, reliability, and decent speed. The buzz about Lockheed’s new design caught his attention - only months after the Vega’s first flight, Wilkins scraped together the financing to order Vega Constructor Number (C/N) 4 from the Lockheed factory.
Wilkins was primarily a navigator, but also a project manager, businessman, and evangelist for exploration. For piloting duties, he had recruited the already legendary Arctic pilot Carl Ben Eielson. These two shared multiple flights of exploration and worked closely together to pull off the Trans-Arctic flight.
For much more on the Vega in general, Wilkins, and Eielson, see References.
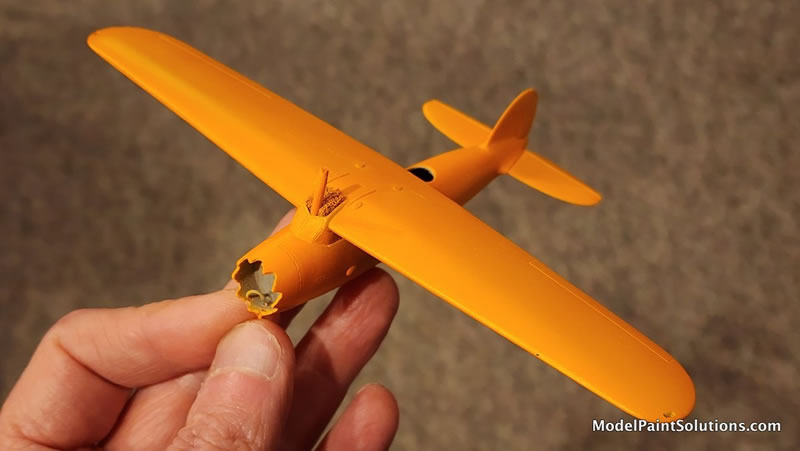
Vega C/N 4 was assigned the civil registration (N)X3903. It was an early “bullet nosed” Vega without an external engine cowling - I love the look of these early Vegas. Wilkins and Eielson journeyed to the Lockheed factory in Hollywood, California (just prior to the company’s move to Burbank) in January 1928 to take delivery of the machine. From there it was trucked to Rogers Airport for initial checkout, then Western Air Express Field, then eventually Muroc Dry Lake. Eielson put the airplane through its paces, and after resolving a couple of glitches, the pair quickly gained confidence that this machine would accomplish their goals.

Eielson and Wilkins inspecting their new Vega in California, spring 1928
(author’s collection – source unknown)
X3903 was then disassembled and shipped by sea to Seattle, where it was transferred to another ship for the journey to Seward, AK. From there, it travelled by train to Fairbanks where it was reassembled and test flown again before flying North to Barrow, and further prepared for the Trans-Arctic flight. Weeks of bad weather and technical glitches delayed the flight, but on April 15, 1928, Wilkins and Eielson departed Barrow heading northward into the unknown.
After over 22 hours of smooth flying, they encountered a terrific snow storm as they approached the Svalbard Islands and Spitsbergen. Running low on fuel, they landed on a small open patch of an unknown island to ride out the storm. It turned out they had alighted in the Northwest corner of the Svalbard Islands, which they determined (ominously) to be Dead Man’s Island, near Danes Island (Danskøya). Stranded for 4 days in the storm, the weather finally cleared and Wilkins and Eielson prepared the Vega for flight – involving much snow and ice removal, and heating the engine oil. The first two attempts at take-off had Wilkins pushing on the tail and falling, with Eielson then realizing he was alone in the air. Eielson circled back to land, and Wilkins was finally able to scramble aboard on the harrowing third attempt. It was just a few minutes flying time from Dead Man’s Island to the settlement at Green Harbour (now Barentsburg), where they landed on 21 April with little fuel remaining. Worldwide acclaim followed. The Trans-Arctic flight, leadup to it, preparations for it, and many X3903 details, are described in Wilkins’ book “Flying the Arctic” (see References).
Wilkins would ship X3903 to Antarctica later that year, to be used along with a second Vega, for exploration and mapping during 1929-30. It was the first airplane to fly over Antarctica. In the 1930s, X3903 was sold to the government of Argentina and intended for eventual museum preservation there, but sadly was allowed to deteriorate to oblivion in Buenos Aires. Such a significant airplane certainly deserved a better fate.
A rare view of the port side of X3903, Fairbanks, AK, 1928
(Robert Stevens Alaskan Aviation Collection/The Museum of Flight)
A combination of factors, including importance, aesthetics, and just plain coolness, resulted in a long-running infatuation with X3903 among certain modelers. I spent many hours discussing the many features of the airplane with my old friend, Jim Schubert, who sadly passed away in 2019. It was also a topic of great interest on the Wings of Peace discussion group (formerly Yahoo Groups, now Groups.io) in the mid-2000’s. This aircraft became a white whale / holy grail / unicorn subject for some of us, but its many quirks were a deterrent to tackling a model of it, with much hand-wringing and pearl-clutching. However, I am now curating an early 2027 NorthWest Scale Modelers display at The Museum of Flight in Seattle called “Epic Journeys,” timed to coincide with the centennial of Charles Lindbergh’s Transatlantic flight – this was the catalyst I needed to finally get underway!
The release by MPM of their initial Vega kit in 2003, “L. Vega model 5/UC-101” (No. 72522), the first decent Vega in 1/72 scale, caused much excitement for those interested in civil aviation in the “Golden Age” (see Jim Schubert’s contemporary review of this kit in References). I built the kit soon after (see References, Shell Vega article, Nelson 2005) and found it to have few major vices.
Other cool MPM Vega kits soon followed, but the 2004 release of the “Vega Model 5 Floatplane” (No. 72528) caused a particular stir. It included unmentioned parts for early Vegas such as the bullet nose, and the smaller vertical tails. This kit was the basis for my build, but little did I know it would lead to my first foray into end-to-end computer aided design (CAD) and home 3D printing.
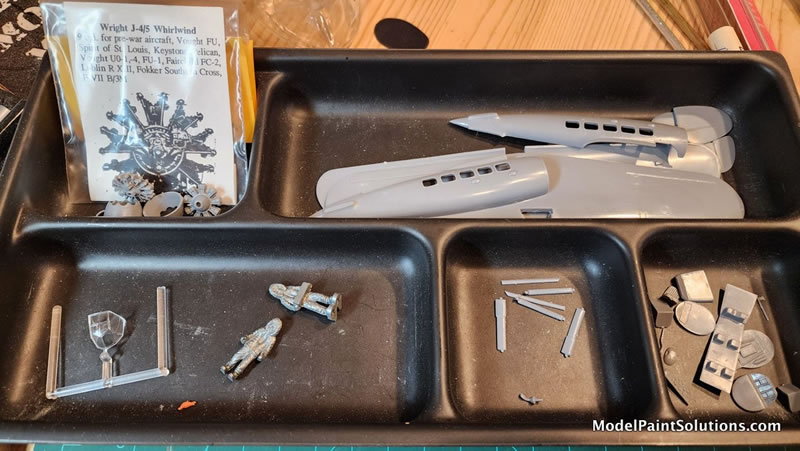
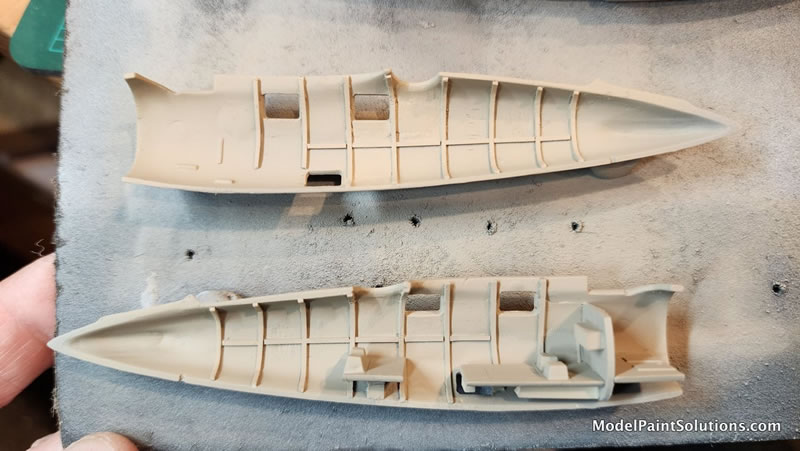
Separating the parts I planned to use for my X3903 build. I would later substitute another aftermarket engine. At the time, I was mulling the use of polar figures from the old Monogram Ford Tri-Motor but later found a better option.
Poring through Jim’s file, photos, and reading Wilkins’ narrative in “Flying the Arctic,” I decided on these modifications, additions, and tweaks to the MPM kit:
Vertical tail – the MPM kit comes with a couple of early Vega tail fins, and one of them was appropriate for X3903.
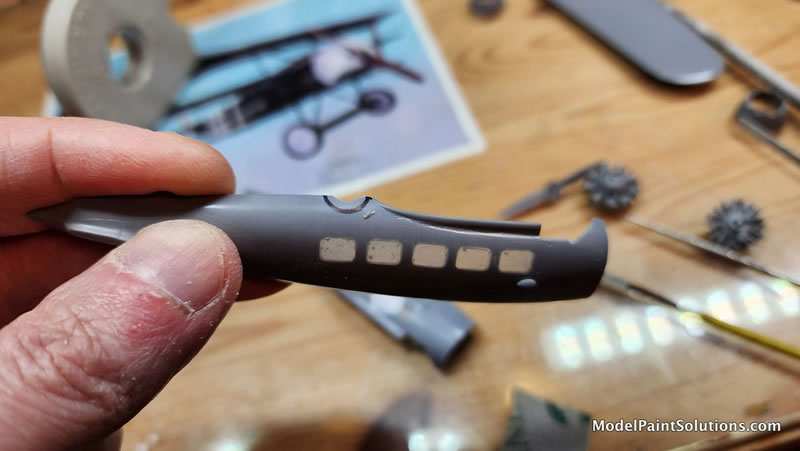
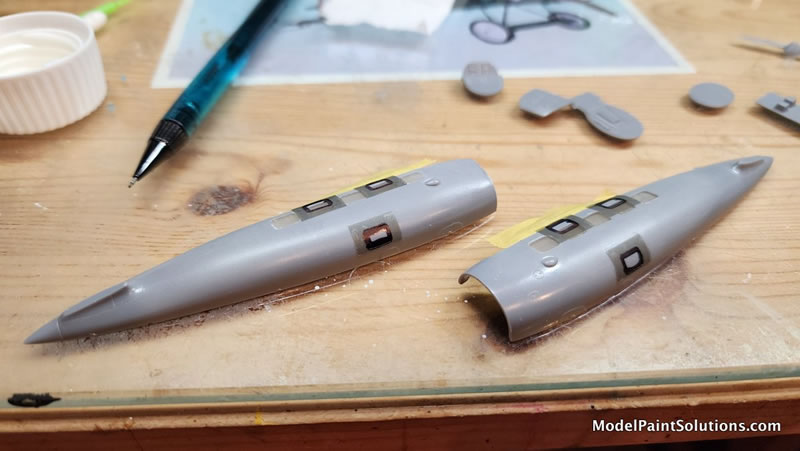
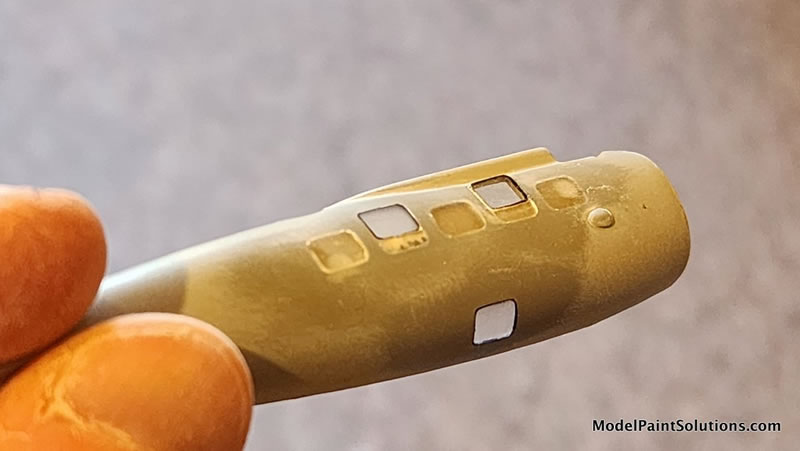
Fuselage - This early Vega had an unusual window configuration compared to later Vegas, leading quickly to the realization that all 5 kit window openings would need to be filled (using a spare kit’s window panes). On each side, X3903 had 2 cabin windows mounted higher than on later Vegas, and one window mounted very low to facilitate ground speed and drift measurements. These were cut and filled with more kit window panes, which were flat – I thus sanded them to fair with the fuselage curvature and polished out. I used my increasingly vintage, but eminently functional Silhouette Cameo 3 to cut templates for the new windows, and shapes for the surrounds that would later frame each cabin window.
Cockpit - Added some interior detail, but the canopy is the real rub. X3903 had a very early canopy style with fewer panels and more forward rake on the front panels. The best solution would be a scratchbuilt new canopy, but it is a complex shape that must integrate with both the fuselage and wing leading edge. To save many hours, I elected to stick with tweaking the kit canopy. I sanded off excess side frames, polishing them to get back to a clear finish. I tried to suggest the forward rake by installing hand-made standoff sloped styrene strips to the front frames, which also addressed the more prominent canopy frames seen on X3903. Small openable panels on each side were emulated with Scotch tape strips. This all worked out better than I expected, if not perfectly, and went a long way to capture the look of X3903’s canopy (at least in my opinion).
Cabin - Scratchbuilt cabin based on 2 photos, including large auxiliary fuel tanks, navigator station (some imagination here, including a map of Svalbard), and floor designed to accommodate those sightings through lower windows.
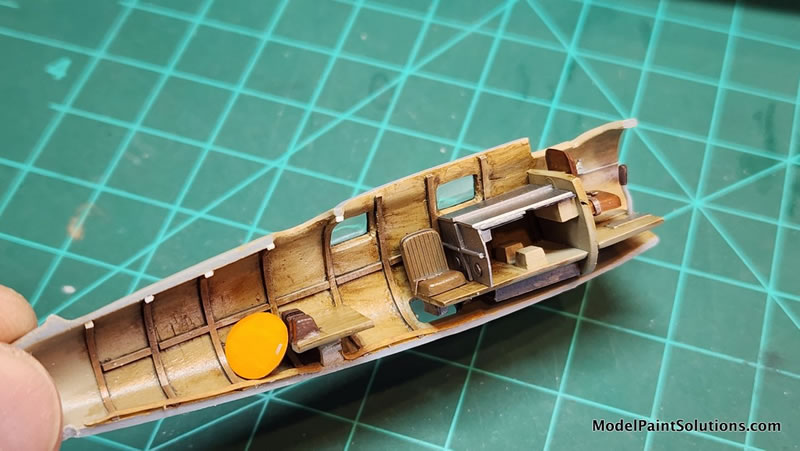
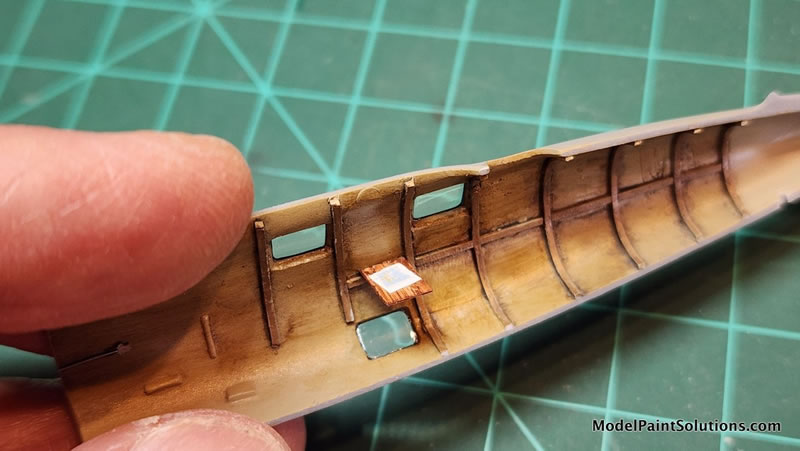
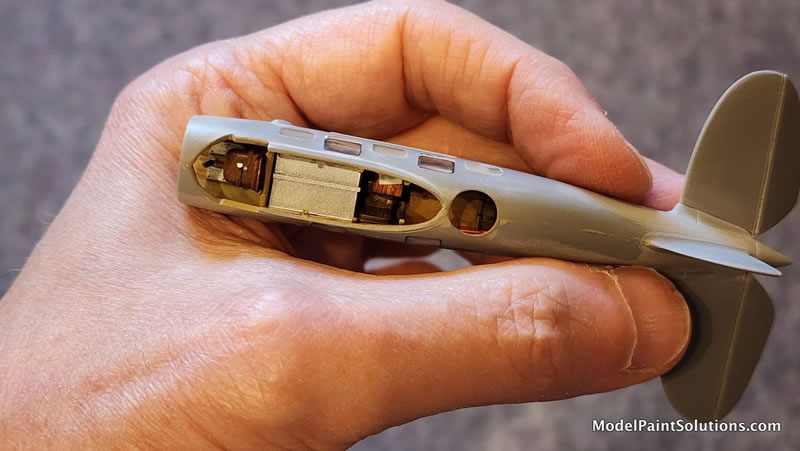
Entry/egress features – This Vega did not have the customary fuselage door. Instead, the pilot (Eielson) gained access via foot pegs mounted on the forward port fuselage. The navigator (Wilkins) had to work his way up to a custom dorsal hatch aft of the wing by a similar foot peg arrangement. Music wire looked about right for the pegs. I again employed the Cameo to cut shapes to guide cutting out the dorsal hole and fabricating a hatch out of sheet styrene. (This hatch can be seen by the curious stowed in the cabin below the hole.) Also, the cockpit canopy mentioned above was modified to separate the sliding hatch section on top (to accomplish cleanly, this required grinding away the top of the kit canopy, and destructively harvesting the top section of a spare Vega kit canopy).
Wing/body fairing – There is a small fillet at this junction, which I emulated with a bead of Perfect Plastic Putty (PPP), smoothed with a wet Q-Tip.
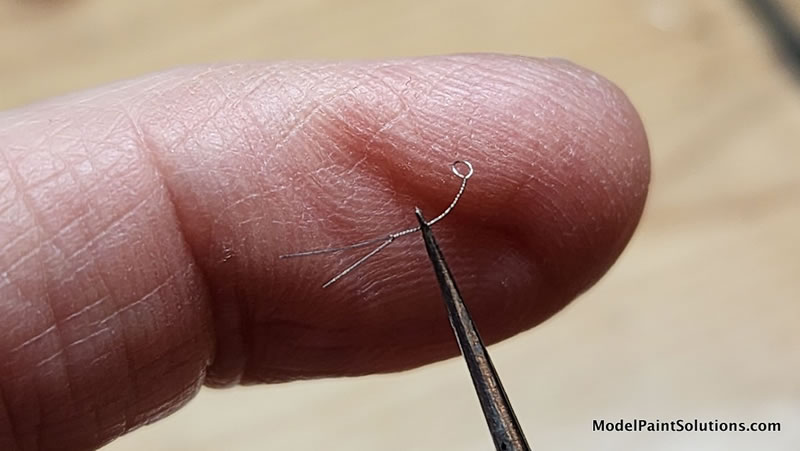
Wings – Each wingtip has a feature which at first glance appears to be a navigation light. However, close examination of multiple photos reveals that these objects are actually cutouts, presumably used as hand-holds or tie-downs. I cut and smoothed openings accordingly. Other details include four fuel filler caps, for which I found some suitable PE items in my spares box. A final feature are four lifting lugs, which were used to hoist the airplane on and off ships – I fashioned these from 0.003” wire twisted around a drill bit of suitable radius. They look delicate, probably too much so, but best to hedge toward delicate over chunky. (The kit has six “nubs” on the top of the wing - I sanded off two of them and flattened the remaining four the surfaces with drilled holes to accept the lugs.)
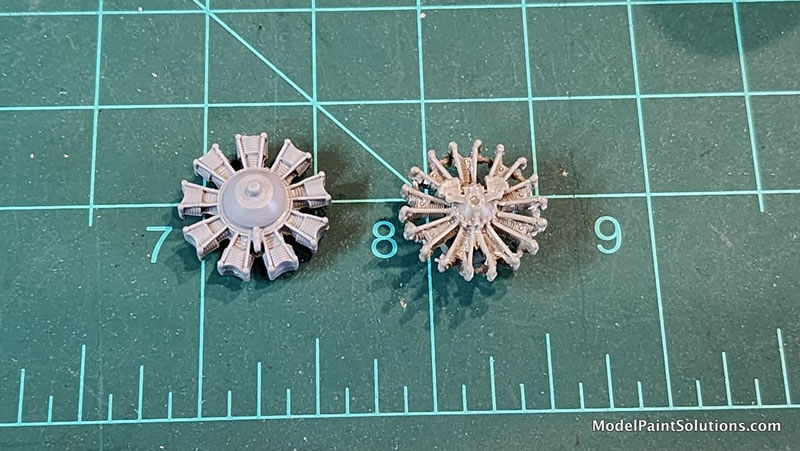
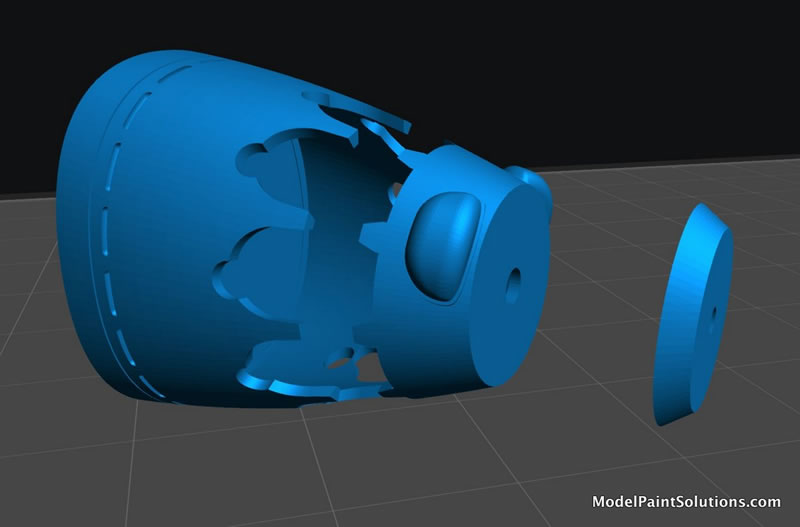
Engine – The kit engine is sort of a generic nine-cylinder radial, passable under a cowl but lacking if exposed as on X3903. The Wright J-5 Whirlwind engine was looking to be challenging until I realized the Valom Fokker F.VIIb-3m kit (Kit 72037) in my stash had three pretty decent resin ones. I have other plans for this kit, so I robbed the best looking of the three engines for the Vega. The nose section is the most daunting challenge, particularly the circumferential louvers aft of the engine as well as the bumps covering the magnetos in the front. The kit early Vega nose - so welcome to see on the sprue - looked too compressed, and carving louvers by hand seemed daunting. I thus decided 3D printing was the ticket. Local friend John McAvoy was kind enough to donate quite a few hours of his time helping me fabricate a new nose section with these features in Autodesk Fusion. I got the mating surface geometry reasonably accurate, but not the taper, hence a lot of puttying was required to fair the new nose to the fuselage.
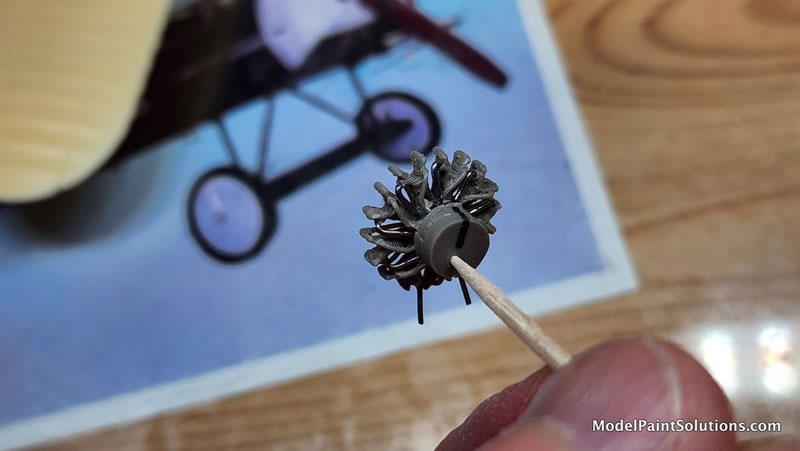

Engine peripherals – X3903 had an exhaust collector ring hidden under the cowling for seven of the nine cylinders, which flowed out two pipes on the bottom. It incorporated a carburetor heater at the six o’clock position, taking the exhaust from the remaining two cylinders and passing it through a heat exchanger before joining the port side exhaust pipe to go overboard. The intake air passed through the heat exchanger and flowed upward to the carburetor. I modelled these features with a small block of styrene and lengths of solder, and hand painted Mission MMP-104 Insignia White on the incoming exhaust lines to represent asbestos insulation.
Propeller and spinner – the MPM kit contains a decent early Vega propeller with spinner, but the spinner is too shallow. Along with the engine cowling discussed above, I fashioned a 3D printed extension for the undersized kit prop spinner cone as well.
Venturi – A venturi tube is visible on the starboard side of the fuselage. I used one of the beautiful 1/72 venturis made by SBS.
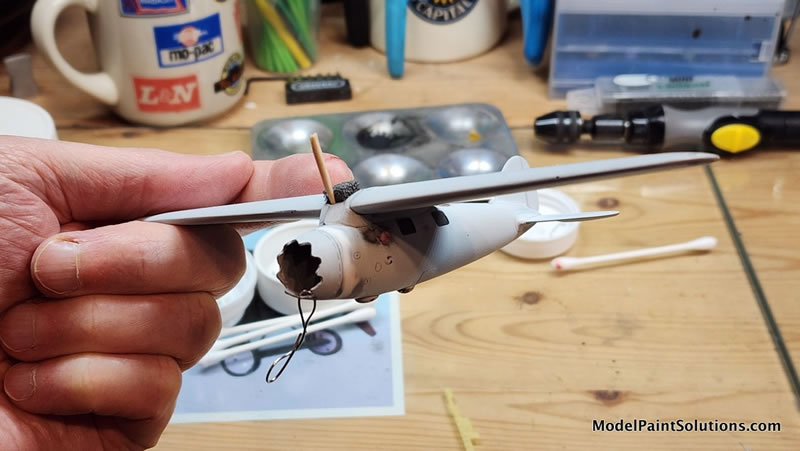
Trailing antenna leadout – X3903 had radio equipment, including an antenna which could be extended in flight via a tube in the aft starboard fuselage. I modelled this small detail with Albion brass tubing. (For the polar flight in April 1928, the transmitter was retained but the receiver was removed as a weight savings.)
Wind Driven Generator – The airplane was equipped with this device to power the radio equipment. The small propeller can be seen on the inboard starboard wing in many photos of the aircraft prior to the Trans-Arctic flight, but it is not readily apparent in photos appearing to be in Spitsbergen. However, it is a cool looking detail and I opted to include it, using music wire and a small propeller blade from Brengun’s wonderful “World War I Details” photo-etch set.
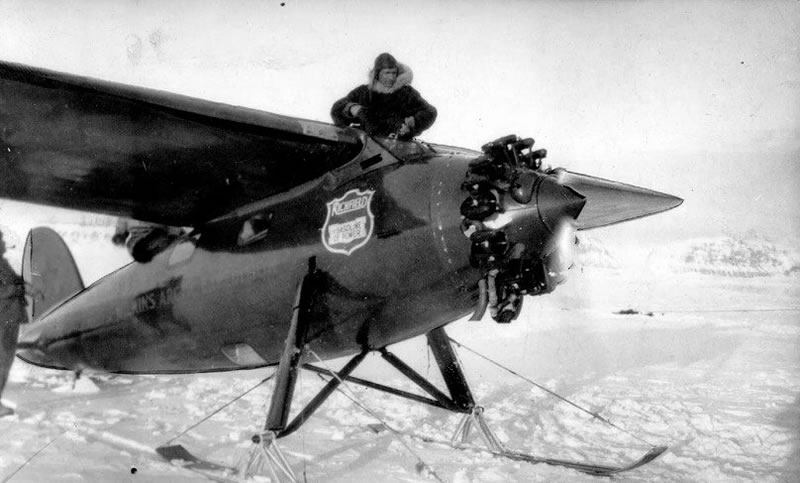
Wilkins alongside X3903 at Fairbanks, clearly showing the wind driven generator installation on the starboard wing root
(E.S. Reed via Robert W. Stevens Alaskan Aviation Collection/The Museum of Flight)
Pitot boom – X3903 had a straight boom, which I fashioned from Albion telescoping brass tubing.
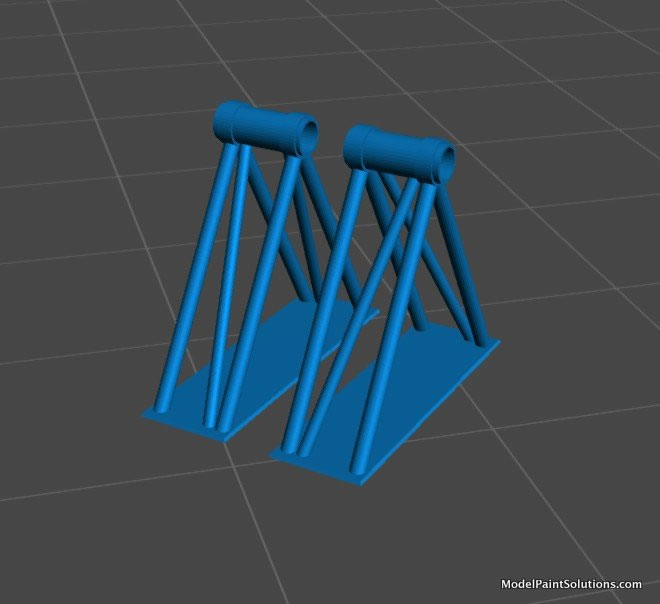
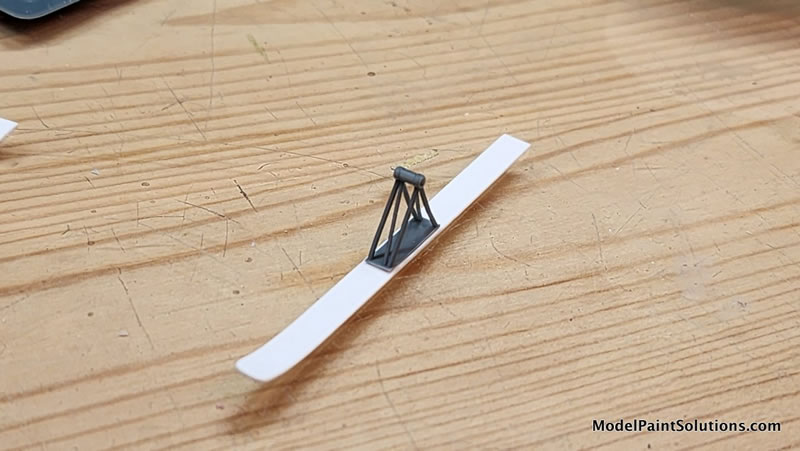
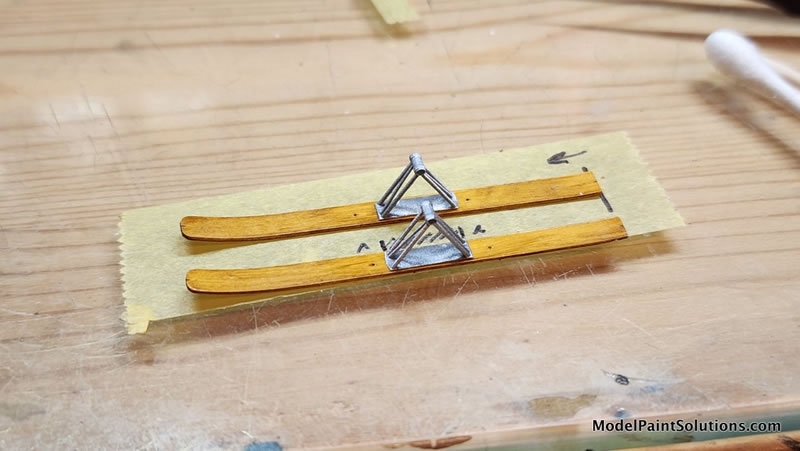
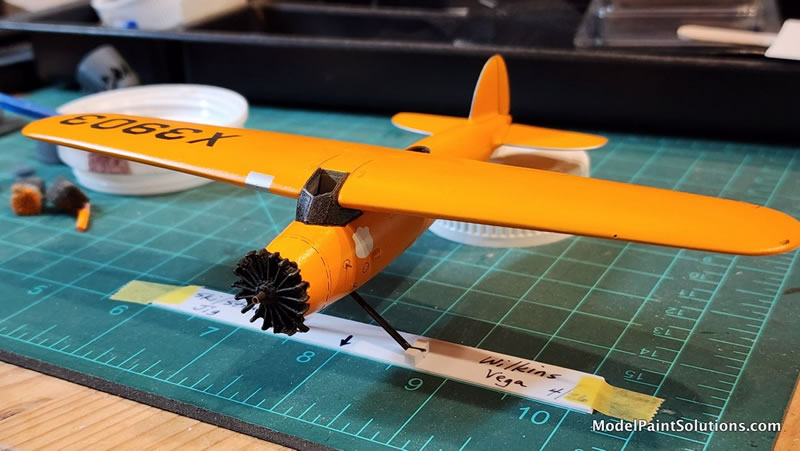
Skis – X3903 was delivered by Lockheed with wheels, which were then replaced with a set of diabolical looking Seversky metal skis, augmented with a hickory ski overlay. Most of the photos of the aircraft in Alaska depict these skis, however, they were found inadequate to cope with side loads during testing at Barrow. Thankfully for the modeler, a simple set of hickory skis was substituted, mounted via a tubular metal truss-like assembly. These later skis were still the source of much agonizing, but I eventually fashioned them from simple 0.020” sheet styrene and my first ever no-help-needed CAD design to deal with the truss assemblies. Note that these stanchions were handed left-right, so one side is the mirror image of the other. I replaced the kit landing gear axles with brass tubing to eventually accept the skis. Recalling my Shell Vega build of 20+ years prior (see References, Shell Vega article, Nelson 2005), I was dreading the buildup of the landing gear struts and installation of the skis. I did myself a favor and created a jig to aid this process. However, I forgot my own 2005 advice about the main landing gear oleo struts being a bit too long. The resulting stance here looks a little tall to me as a result, but then again, the airplane was running on fumes by the end of the journey.
Eielson in the cockpit, a photo I believe taken upon arrival in the vicinity of Green Harbour, Spitsbergen on 21 April, 1928. It is one of the best views of the replacement skis as installed for the Trans-Arctic flight
(author’s collection – source unknown)

Tail skid – Wilkins fashioned a 9”x12” scrap of aluminum to the tail skid to make it act as a third ski, which I deftly handled with an appropriate scrap of sheet styrene.
Stabilizer rub strips – The Lockheed single engine family incorporated a moveable horizontal stabilizer, which had rub strips to facilitate movement without scraping the fuselage. On previous Vega and Orion projects, I emulated these strips with painted decal strips, or even masked and painted directly on the model. Here I elected to model the strips with Aizu tape colored with a Sharpie.
These are noted features I elected to minimize, ignore, or live with in the interest of finally getting this project DONE:
Canopy shape is not right for this early Vega, approximated with sleight of hand as described above.
Nose geometry is still off – a little long with not enough taper, and too much separation between engine and louvers.
This early Vega did not have the small bump fairings around the landing gear attachments on the fuselage sides and bottom. By the time I recognized this, I had already strategized landing gear strut mounting strategy and was unwilling to further delay the project.
The colors and markings of this airplane have been studied and debated by enthusiasts for years, but this is what I gleaned from Jim’s notes, my own notes from years gone by, Wilkins’ descriptions, and additional studious review of photos:
Wilkins described the overall color as “deep orange,” and I figured it was something akin to International Orange, for high visibility in the Arctic. (See References for a surviving fragment of X3903 for an idea of this orange, in aged and weathered form.)
Close examination of photos shows that all the landing gear (ski) struts, canopy framing, and cabin window surrounds are very dark. I assumed these were basically black.
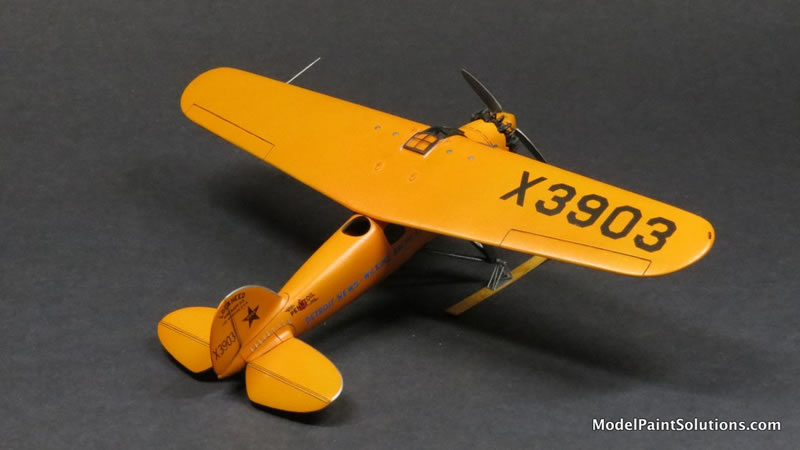
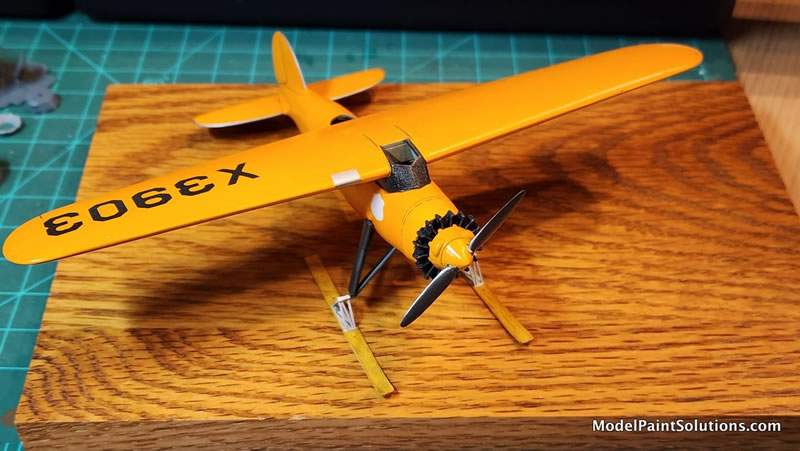
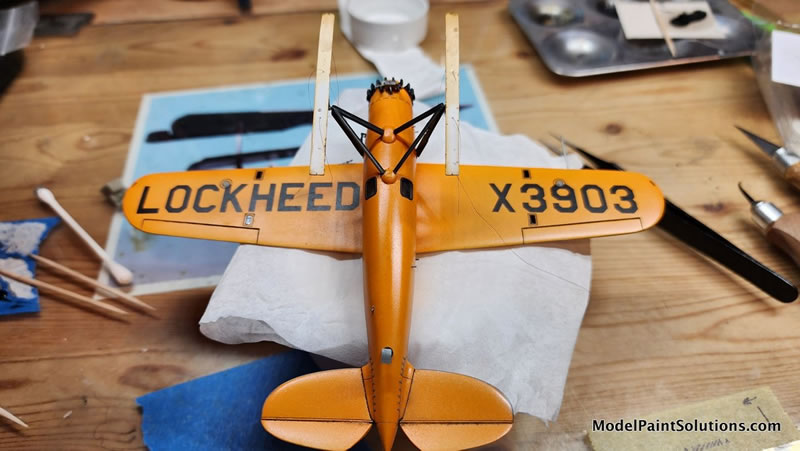
“X3903” was painted in large characters on the top right wing and the lower left wing. Charmingly, the manufacturer painted “LOCKHEED” in large letters on the lower right wing. As much as I’d love for LOCKHEED to also be emblazoned on the top left wing, top view photos of the airplane - upon delivery in California, and being hoisted on a ship months later bound for Antarctica – show the upper left wing as bare. Wilkins mentioned it on the underside only.
Wilkins described the side lettering “DETROIT NEWS – WILKINS ARCTIC EXPEDITION” as dark blue. (The Detroit News had sponsored previous Wilkins expeditions, if not this one directly, but Wilkins credited them as a goodwill gesture.)
The Richfield Gasoline logo was blue on white (perhaps cream) and the Pennzoil bell logo was likely red (perhaps with a yellow background but uncertain on this orange airframe). These companies provided the gas and oil, respectively, for the flight.
The metal propeller blades had Hamilton Standard stickers.
There is a metallic or silver strip on the leading edges of the horizontal and vertical tails.
P a i n t i n g a n d F i n i s h i n g |
Having accomplished or at least provisioned for the modifications discussed above, it was time to commence major assembly, and the best part – painting. After seam cleanup and masking, I primed the model with Squadron Colors acrylic Pink Primer, with a little Vallejo thinner and <5% each of Liquitex Flow Aid and Slo-Dri (henceforth referred to as “Additives.”)
After some remedial touchup and spot re-priming, I moved on to major paint with Tamiya X-6 Orange, thinned 50/50 with Vallejo thinner, a little Pledge Floor Gloss (for durability) and Additives. In an attempt to add some richness and luster to the finish, I then followed with a coat of Tamiya X-26 Clear Orange, 50/50 with Vallejo Thinner and Additives. I’m not sure if this step accomplished much, but it made me feel clever. Painting so far was delivered with a Harder & Steenbeck Evolution 24 with 0.28 mm tip.
Prior to decals, I treated the model to a clear coat of Mission Clear Primer, 30/70 with Createx 4011 thinner and Additives (John Miller’s concoction which he’s dubbed “CP30”). This CP30 provides a nice, durable, semi-gloss finish for the rigors of decals and setting solutions. I generally do clear coats with a Harder & Steenbeck Evolution fitted with a 0.40 mm tip.

Rather than masking and painting, I executed the tail leading edge silver strips by carefully running a silver Sharpie along each surface – quick, easy, and effective.
I had a set of beautiful decals for this Wilkins Vega which were developed by Vaso Hocmuth back in the mid-2000’s. This was my source for the small markings such as the Richfield and Pennzoil logos on the fuselage. My decals had become scuffed somehow in the ensuing years and I created a new set for other miscellaneous small markings, such as on the vertical fin (kindly laser printed by friend Bob Hill). I chose to fire up the venerable Cameo again for the larger “X3903” and “LOCKHEED” markings (painted Tamiya XF-69 NATO Black 50/50 with Vallejo Thinner and Additives along with other “black” items), and to make a mask for white painting the background for the Richfield chevron. This more surgical work was done with my old Harder & Steenbeck Infinity with 0.15 mm tip.


The propeller was treated to Tamiya X-1 Black, 50/50 with Vallejo Thinner and Additives, then after curing, Alclad ALC-102 Aluminum sprayed neat. Final touch was a couple of Draw Decal Hamilton Standard logo decals.
As a final clear, I applied Testors Metallizer Sealer to the model. This stuff is out of production, but leaves a nice, durable satin finish. Not to be left out, I fired up my ancient Paasche H to administer this coat.
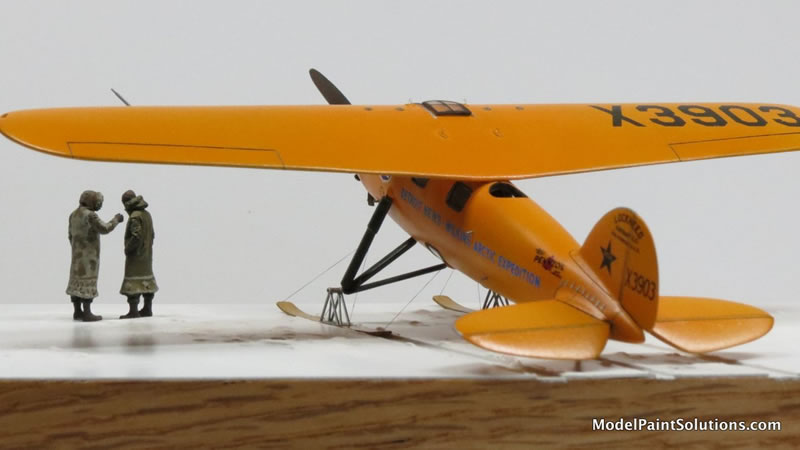
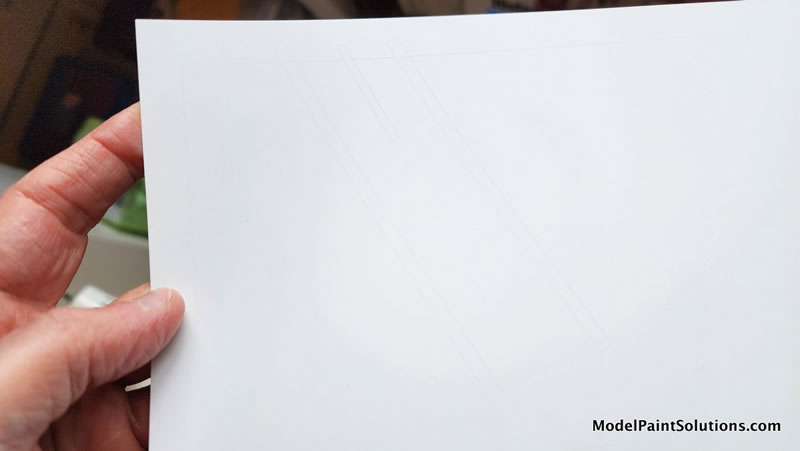
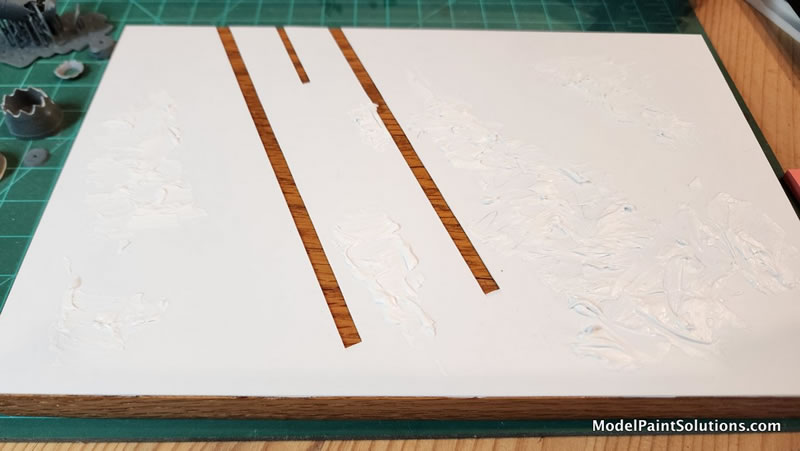
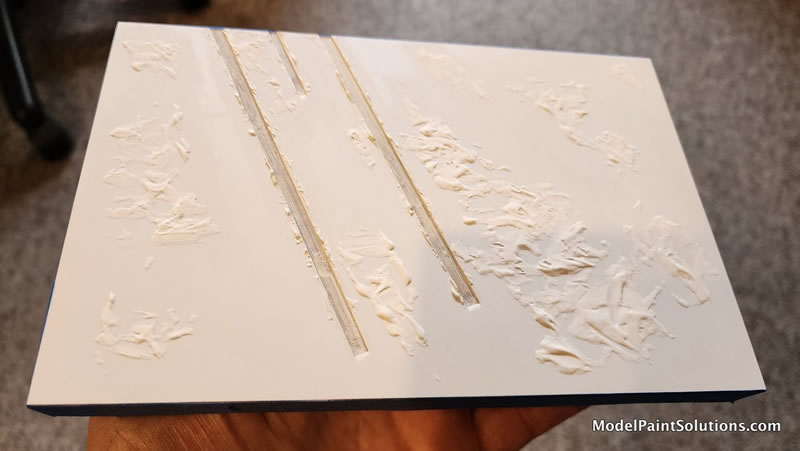
I knew years ago that I wanted this model to eventually appear on a base depicting a wintry scene in Spitsbergen. That meant this would be my first snow base project, not really a welcome complication to an already arduous build. But determined to press on, I tested various materials such as Woodland Scenics snow and Johnson Baby Powder - before concluding granular materials were either out of scale, too unpredictable, or likely to keep shedding in perpetuity. I opted to create a 0.020” styrene foundation (white, like snow!), later adding some shaped and smoothed Perfect Plastic Putty (PPP) blobs to break up the planar monotony.
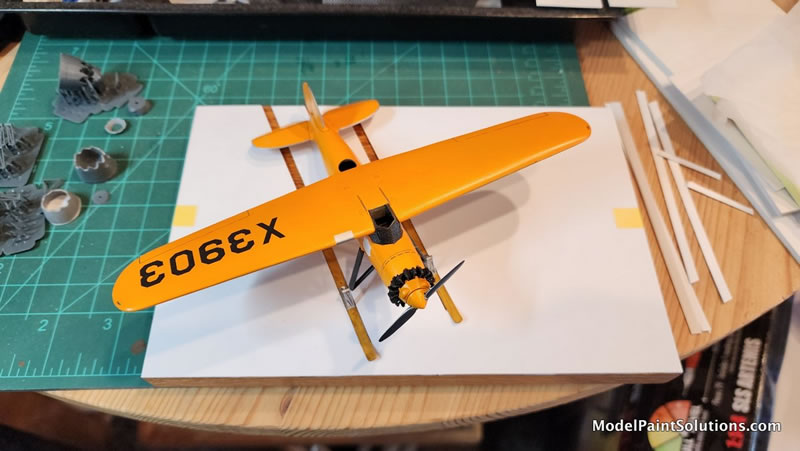
While test fitting the skis, I used the model to lay out the location of features on the base. An airplane having just landed on snow would leave tracks so – yet again – I made use of the Cameo (this time with ratchet blade) to create cutouts for the ruts. With styrene, only scoring is needed before the affected sections can simply be snapped off. It worked beautifully and saved me tons of tedious, and likely shoddy, hand work.
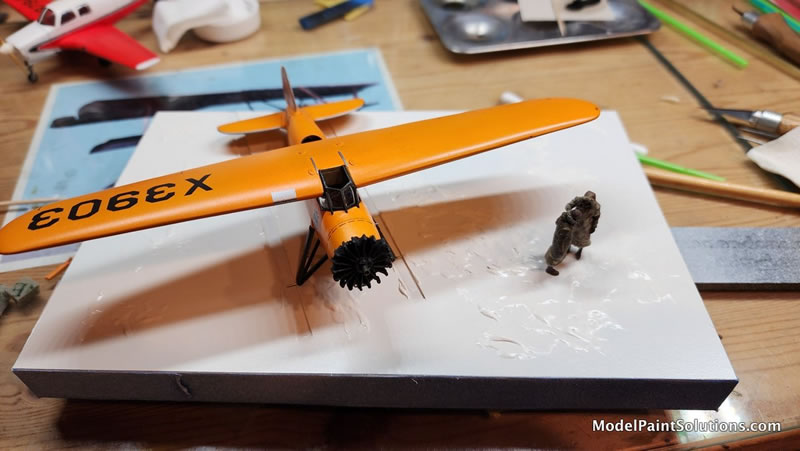
The scene would need some 1/72 boot prints, so I fashioned a tool to imprint them in newly moistened PPP. I overcoated all of this with Krylon rattle can ColorMaxx Paint + Primer in White Semi-Gloss. This gave a certain sheen reminiscent of icy snow. To further break up the visual impression, I carefully “spot shot” some Vallejo Satin (thinned as usual) in selected areas for variable sheen. As a final touch to shadow the boot prints, I stippled each of them with a little Mission MMP-116 Light Grey. Not hyper realistic overall, but it’s a simple, non-distracting base to put X3903 and its crew in proper context.
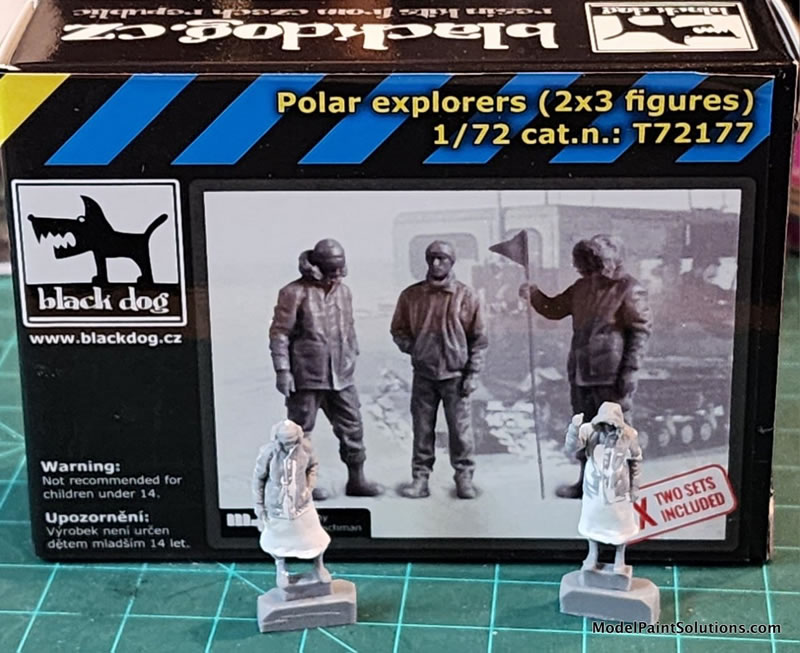
The final, but very important, element of the base would be figures of Wilkins and Eielson. Civil 1/72 figures in polar gear are not common, but I was pleased to come across the “Polar Explorers” set by Black Dog on Ebay. This was a great head start, but it was important to review photos of the pair in their Spitsbergen flight gear, and Wilkins’ own descriptions. For their unheated cabin and the possibility of going down in Arctic conditions, they choose Eskimo caribou parkas – so I built up full body length extensions on the figures using PPP, smoothed and shaped appropriately. I began painting with a base of rattle can Mr. Surfacer Black Finishing Primer 1500, followed by a zenithal treatment of Mission MMS-002 White Primer thinned 50/50 with Createx 4011 thinner plus Additives.
The parkas, including decorative details, were hand painted using a variety of acrylics: Vallejo 70.983 Flat Earth, Tamiya XF-55 Buff, and Tamiya XF-52 Flat Earth. Exposed skin was limited to hard-to-see faces under parka hoods, but those were painted with Vallejo 70.876 Brown Sand as a base flesh tone, followed by Abteilung ABT 135 Light Flesh and ABT 215 Flesh Shadow oils. The intrepid explorers were then glossed with Alclad Aqua Gloss before a wash of Abteilung ABT 502 Starship Filth thinned with Mona Lisa odorless thinner. After a final flat coat of VMS Matt, sprayed neat, each figure was treated to some parka highlights with selected AK pencils.
Eielson (L) and Wilkins (R) as outfitted for the polar flight
(author’s collection – source unknown)
After setting the skis with a minute amount of epoxy, using the base snow tracks as a “jig,” I rigged them (using photos and some guesswork) with Mig 0.02 mm (0.001”) rigging line. Ready now for final mounting, this elusive bird’s epic journey was finally complete!
After years of research and fretting, I started this actual build in April 2025. Various obstacles, hurdles, and snags caused it to be shunted aside several times – not necessarily to the Shelf of Doom, but to a sort of Modeling Purgatory or Penalty Box. I completed it in late April 2026. The finished model captures the vibe of accomplishment I was looking for, both for Wilkins & Eielson, and for this modeler.Special thanks to John McAvoy and also Lynwood Montgomery for 3D printing coaching and counsel. Jim Schubert’s X3903 file and my own file contains much feedback from the Wings of Peace discussion group, and Tim Kalina in particular.
My old friend Jim might raise a bushy eyebrow at that list of things I didn’t do, but I believe he’d otherwise be proud and pleased to see this unicorn model come to fruition. I raise a toast and dedicate this build to his memory.
Tim Nelson
REFERENCES
-
“Revolution in the Sky: The Lockheeds of Aviation’s Golden Age,” Richard Sanders Allen, Schiffer Publishing Ltd., Revised Edition, 1993. Probably the best single publication yet produced on the Lockheed single engined family. Chapter 4, “Over Polar Wastes,” is about Wilkins’ exploits.
-
“The Single Engine Lockheeds,” text by W.A. Kelly, IPMS/USA Quarterly Vol. 3, No. 3, 1968. A Magnum Opus on the subject (with a few inaccuracies that have been identified over the years as additional information became available).
-
“Lockheed Vega,” Wikipedia
-
“George Hubert Wilkins,” Wikipedia
-
“Carl Ben Eielson,” Wikipedia
-
“Flying the Arctic,” Captain George H. Wilkins, G.P. Putnam’s Sons, The Knickerbocker Press, 1928
-
Surviving fragment of Vega X3903, National Air and Space Museum
-
“MPM 1/72 Lockheed Vega 5C (UC-101),” Jim Schubert
-
“MPM 1/72nd Scale Lockheed Vega 5C ‘Shell No. 7,’” Tim Nelson, IPMS-Seattle Newsletter, November 2005
-
Wings of Peace discussion group
For more on this review visit ModelPaintSolutions.com.
Text and Images Copyright © 2026 by Tim Nelson
Page Created 8 May, 2026
Last updated
8 May, 2026
Back to HyperScale Main Page
Back to Reviews Page

|
 Home
| What's New |
Features |
Gallery |
Reviews |
Reference |
Forum |
Search
Home
| What's New |
Features |
Gallery |
Reviews |
Reference |
Forum |
Search