Revell 1/24 scale
Shelby 427 Cobra S/C

by Brad Huskinson

Revell 1/24 Shelby 427 Cobra S/C
This has long been one of my favorite cars, as I’m sure it has for just about any car enthusiast in the 60s!

I have seen many at car shows and vintage car races over the years, but had never built a model of one.
The kit is the Revell Shelby 427 Cobra S/C (Kit#14533). I start by bathing all of the sprues and body in a 50/50 bath of Windex and Denatured Alcohol (specifically marked to Clean Glass). Then, a good warm water rinse off.

I use an old pair of sprue cutters for the first cut of anything but very small parts. For final cuts or small parts I use GodHand clippers.
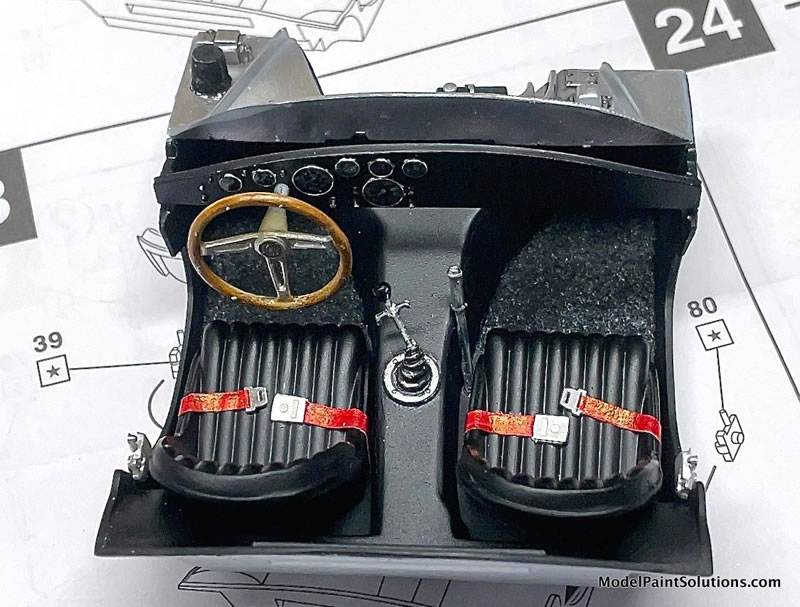
All of the chrome parts were stripped with Super Clean before re-chroming to get away from the toy-like appearance of kit chrome.

If I am gluing raw plastic parts together, I use Tamiya Thin regular or quick setting which creates a really great bond. The thin works great if capillary application is needed/desired.
If parts have been painted already, I will use difference densities of CA glue depending on size and set up time. As with any glues, you have to be super careful not to have it show on the painted parts. I usually apply with a sharpened toothpick or a variety of glue applicator tools.
For clear parts, I try to use UV-Activatable Glue. It is quite wonderful stuff. Touch small spots of glue in the most inconspicuous places, press window into place and aim your UV flashlight at it for a few seconds and it’s cured. And, it dries clear.
No fillers were used, but I sure needed a lot of abrasives. The fender tops were so out of proportion to the real car that I was afraid of sanding through the top of each fender before achieving an acceptable look. I mostly used GodHand sponge backed sanding pads which come in a wide range of grits.
Primer and Paint
Before priming, I deepened all of the panel lines and then wet sanded the entire body with 2,000 and 4,000 Micromesh. I then shot the model with Tamiya White Surfacer from the rattle can after heating it up in a warm water bath.

The first coat of “primer” for the inside of the body was AK Matte Aluminum (AK 488) diluted to ~70% paint with AK Extreme Thinner (~30%).

This was airbrushed at about 20psi with a H&S Evolution fitted with a 0.2mm tip. This primer became the final coat since the body is aluminum. I probably let the paint dry 24 hours before handling, though it does seem to cure much faster.

After drying thoroughly, the coat of Tamiya White Surfacer Primer was very lightly sanded as it hardly needed any smoothing. This white primer coat did double duty as the actual white paint too! If you want a white car, I highly recommend using the Tamiya White Surfacer and nice clear coat over that. Hard to beat.
The only other body paint was for the stripes that run head to tail. Guardsman Blue by Splash Paints was used straight from the bottle after very carefully taping off the stripes with various widths of masking tape. It is very important to get the edges of the tapes sufficiently burnished down to prevent paint wicking under the tape. For this job I use a burnishing tool or a toothpick.
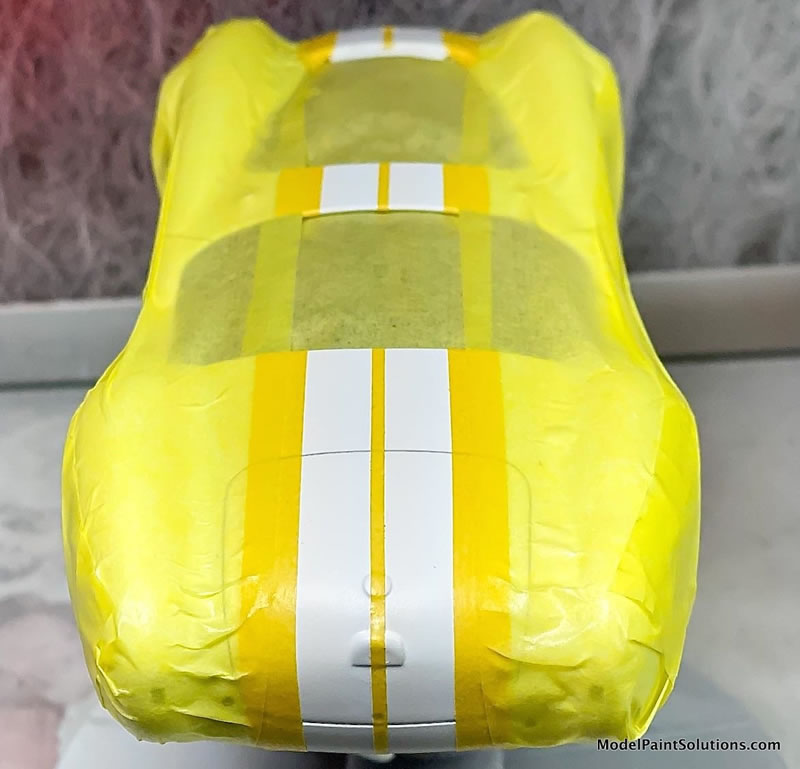
For applying the Guardsman Blue I used an H&S Infinity with a 0.15mm tip at approximately 18 psi. I pulled the tapes up shortly after spraying as it is a lacquer which dries very quickly and I wanted to make sure to get the tape up before it bonded to the body. The stripes turned out great.
They needed a small bit of sanding to knock down a tiny raised edge along where the tape was, but no paint had bled under the tape. I use 6,000 and 8,000 grit Microfine polishing sheets to wet sand the stripe.

Now comes the disappointing part of the build. John Miller and I were trying many variations of clear coats and thinners. We tested several and thought we had scored with AK Ceramic Gloss Coat diluted to ~20% with Mr. Color Leveling Thinner. That said, we never tried it over Tamiya White Surfacer…

The clear came out really smooth and nice with a shine that wasn’t too glossy. However, months later, it still isn’t totally dry. Go figure. I have to pick the car up by the wheels or exhaust headers to avoid leaving finger prints in the finish.

(Note: I suspect the issue with Brad’s slow-drying gloss coat described above was due to the use of Mr. Color Leveling Thinner. Additional tests run with AK Ceramic Gloss diluted to ~20% with Mr. Color Thinner (not Leveling) resulted in a gloss coat that was dry in 1-2 days. John Miller).
The kit looks great. Once again, I would like to have a 1:1 of this car just the way it looks… As far as the kit, I disliked the fit of the parts, in particular, the amazingly bad fender molding.

The molding was almost peaked in shape and required a lot of sanding to re-shape it to something that resembled the nice curves of the actual car.
Cheers!
Brad
Model, pictures and text by Brad “Model Car Czar” Huskinson
For more on this review visit ModelPaintSolutions.com
Model, Text & Images Copyright © 2026 by Brad Huskinson
Page Created 6 March, 2026
Last updated
6 March, 2026
Back to HyperScale Main Page
Back to Reviews Page |
 Home
| What's New |
Features |
Gallery |
Reviews |
Reference |
Forum |
Search
Home
| What's New |
Features |
Gallery |
Reviews |
Reference |
Forum |
Search