RB-51 Red Baron
Kitbashed, 1/48 scale

by John Meyer
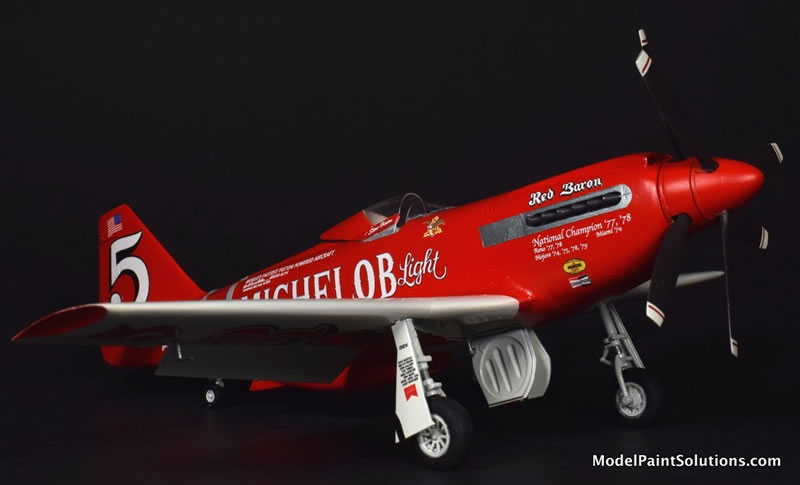
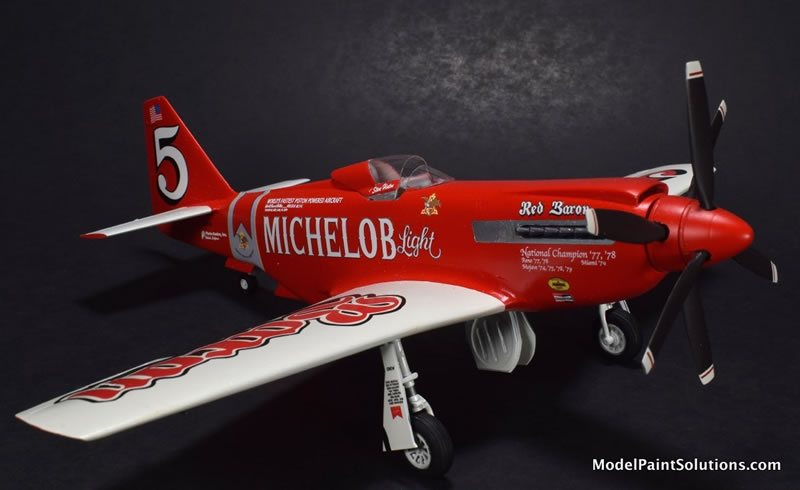
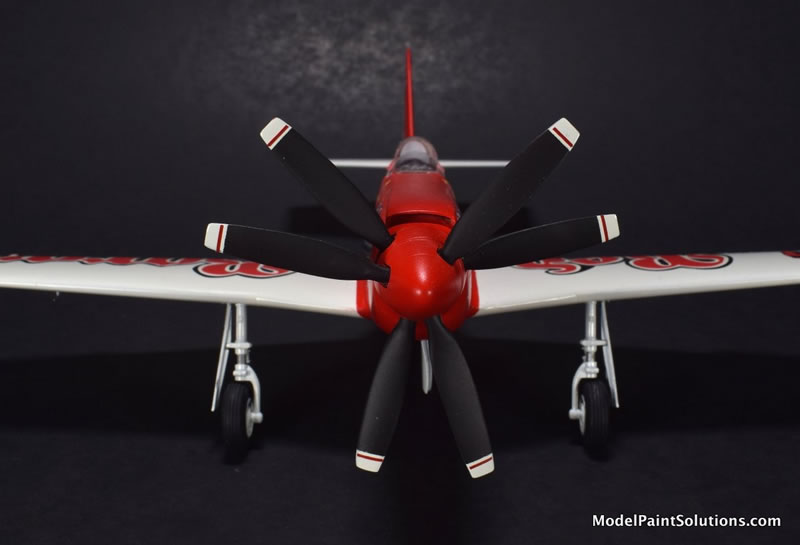
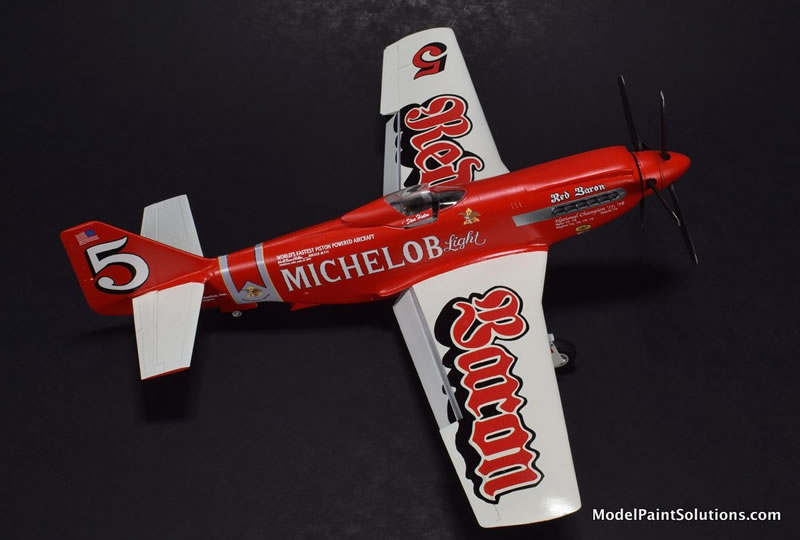
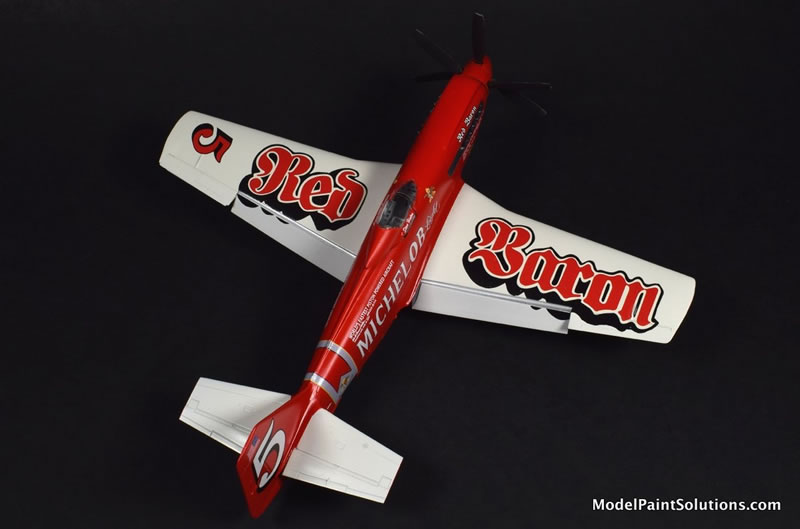
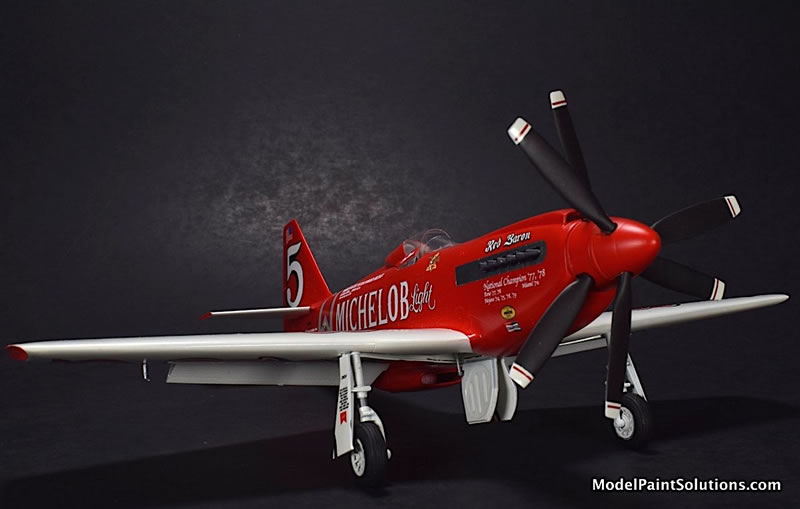
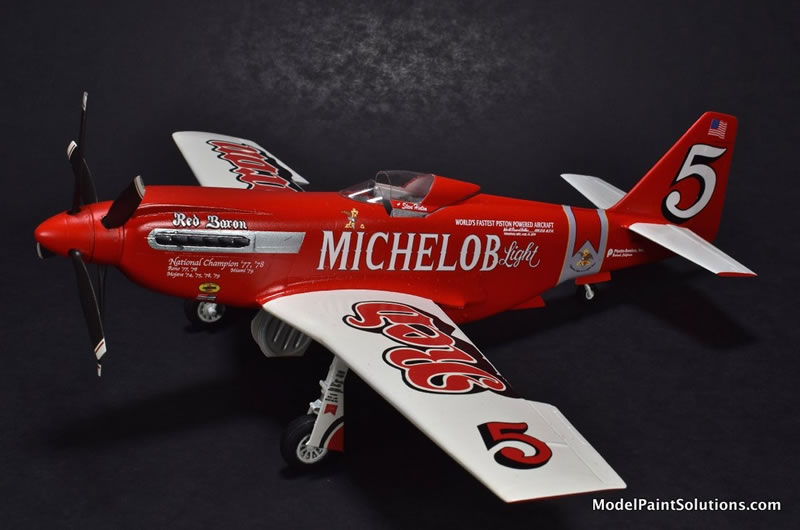
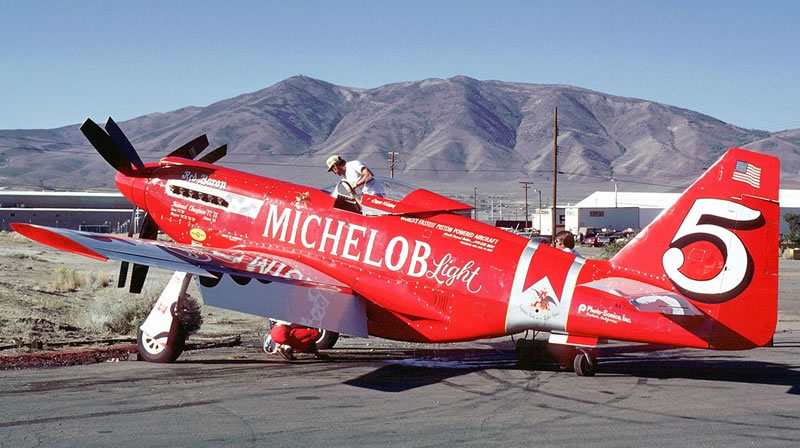
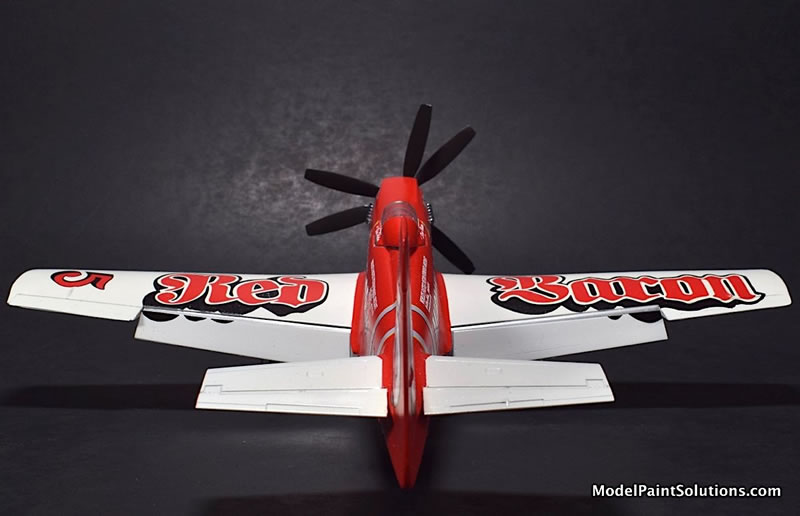
This is a 1:48 model of the Red Baron RB-51 Unlimited Reno Air Racer as it appeared in 1979. The Red Baron was a heavily modified P-51D Mustang that had a Rolls Royce Griffon engine installed driving a set of counter-rotating props.
This aircraft captured the world propeller speed record in the summer of 1979 at a little over 499 mph. A stock Mustang under the same conditions would have done about 370 mph. Sadly, a few weeks later the aircraft crashed during the Unlimited Gold race at Reno that September and was destroyed. It was one of the most iconic and colorful unlimited racers, and one that I have wanted to build for a long time.
I have been interested in Unlimited Air Racers - modified WWII fighters - since the Reno Air Races first started in 1964. They are an unusual subject for modelers as there have been very few kits of these race aircraft ever produced by major manufacturers. The kits that have been produced are mostly from small limited production resin companies.
The RB-51 Model
There is no good 1:48 kit of this aircraft so this model is a hybrid of parts from eight different kits and detail sets plus white styrene and a decal set from Draw Decals. I did use a few parts from a 1:48 Kiwi Resin RB-51, but it is an extremely rough resin kit that I did not attempt to build.
There is an amazing graphic artist in Japan, Taichiro Yamashita, who produces illustrations for most of the famous unlimited air racers. I found out about him on the Facebook Racing Aircraft Modelers Group – he is a frequent contributor.
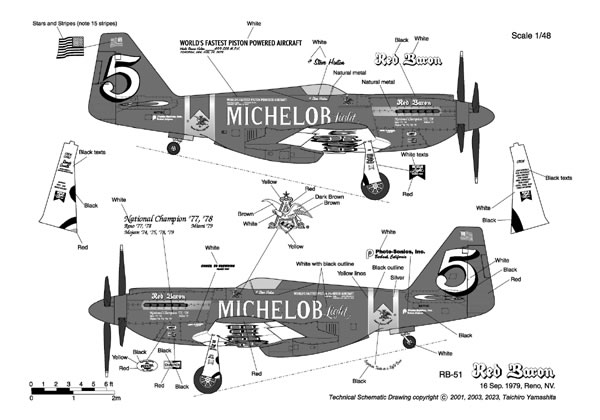
To start my model of the Red Baron, I first ordered a set of 3-view drawings in 1:48 scale from Taichiro. I then made copies of these drawings, which I cut into templates to use as references for the size and shape of the model.
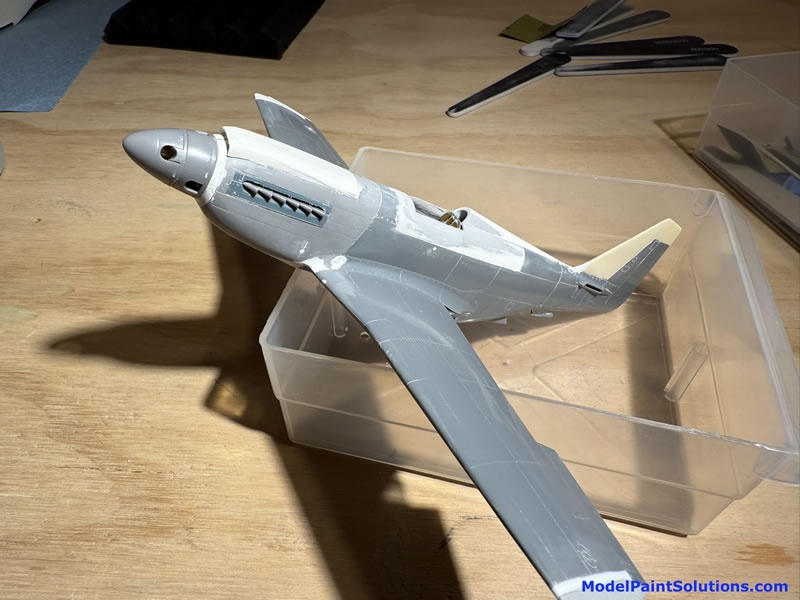
I built this model much like the actual aircraft was made. That is, start with a stock P-51D Mustang and then start removing parts that don’t belong, and adding parts that were the modifications to the stock airframe.
Here are sources of the parts I used:
1. Tamiya P-51D – main airframe
2. Accurate Miniatures P-51A – nose firewall forward – shortened and re-profiled
3. Eduard P-51D – re-positioned exhaust panels
4. Airfix Seafire FR46 – contra-rotating propeller and Griffon exhaust stacks
5. High Planes Models “Jeannie” Conversion – fuselage mod for racing canopy and wing tips
6. Kiwi Resin RB-51 – vacuform canopy, white metal prop blades and vertical fin extension
7. Eduard P-51D Detail Set – ribbed main tires and wheels
8. Obscureco Resin Detail – F2G Super Corsair intake cowling – adapted to RB-51
9. White styrene stock as needed for fabrication and blending of parts
Parts were cleaned first in a mix of denatured alcohol and Windex. Tamiya Extra Thin Cement was used for plastic parts and Zap-a-Gap Medium CA+ glue was used for much of the assembly given the mix of resin and styrene parts.
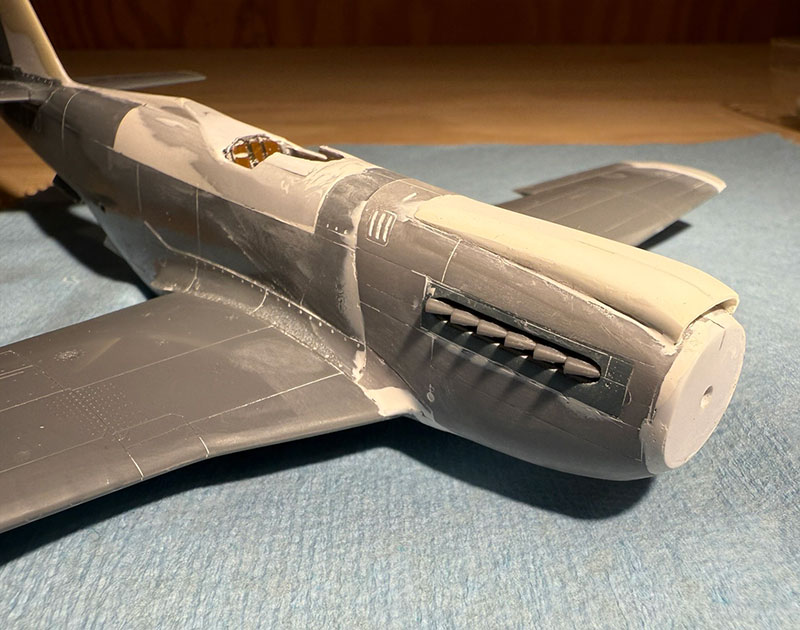
White styrene and Tamiya white putty were used in many locations to blend the parts together and to change the profile of the parts.
Abrasives of all kinds were used from about 400 grit up to 3500 grit. Many, many hours of shaping and sanding were required. Once the main assembly was completed, the model was primed using Mr. Surfacer 1500 White shot at about a 25% mix with 70% Mr. Color Leveling Thinner and 5% Mr. Retarder. This was shot with an HS Evolution airbrush fitted with a 0.2mm tip at about 15psi. Priming revealed many flaws in this composite build which had to be corrected followed by more sanding and then priming again (over and over and over…). I think I went through maybe 4 or 5 cycles of priming/fixing before I declared it done. I usually let each coat dry for about 3 days before continuing work. In the end, the model still had numerous small imperfections, but there comes a point where you have to move on…

Final paint was AK Real Colors Signal Red and Insignia White.
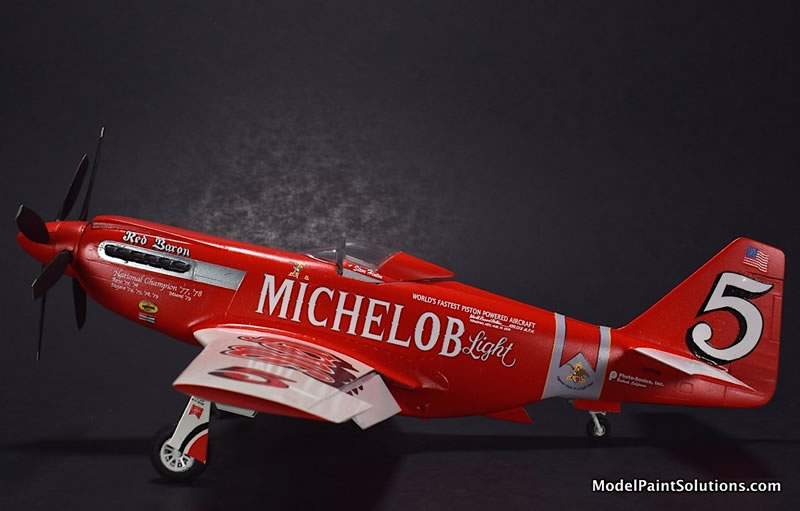
I used a mix of 25% paint to 70% Leveling Thinner and 5% Mr. Color Retarder. Again, an Evolution with a 0.2 tip at ~15psi. I shot the entire model with 3 coats of white first letting each coat dry for about 3 days, and then shot the red over that. Prop blades were shot with Tamiya Semi-Gloss Black. The tires were painted Tamiya Rubber Black.
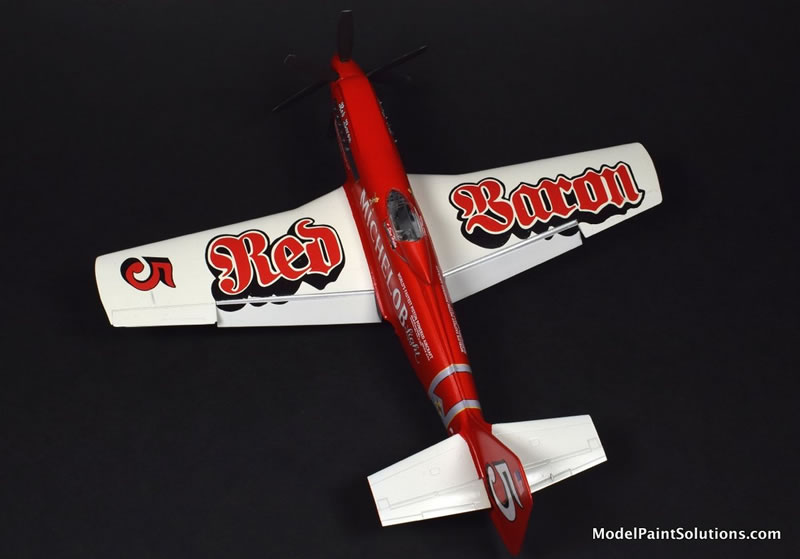
The model was then clear coated with AK Real Colors Gloss Varnish and allowed to dry. A gloss coat is the recommended prerequisite for applying Draw Decals.
The Draw Decals are not like most other decals I have used. Typical setting and solvent solutions have little or no effect on the decals. Draw Decals tells you that, and my experiments with John Miller have largely confirmed that. You cut out the decals as close to the printing as possible, place in warm water for a few seconds, and then place on the model. Roll of the excess water with a cotton swab and that’s it. They are very fragile until clear coated. Once clear coated, the clear carrier film largely disappears. I would apply all the decals to one surface (lower wing, upper wing, right side, etc.), let dry for about 2 days and then clear coat that surface to protect the decals. I would let the clear coat dry for about 3 days before moving on to the next surface.
I worked on the model on and off for about a year. Many periods of burnout. I am relatively happy with the final product. No model is perfect. I wouldn’t want it judged, but it looks pretty good on the shelf. I am tempted to say that “I never again want to build a model that is a composite of so many different parts,” but as most Unlimited air racers from the Reno days were heavily modified aircraft, I probably will end up going down this road again. Sigh…
Cheers,
John Meyer
For more on this review visit ModelPaintSolutions.com
https://modelpaintsol.com/builds/the-1-48th-rb-51-mustang-red-barron
Review Text Copyright © 2026 by John Meyer / Model Paint Solutions
Images Copyright © 2026 by John Miller / Model Paint Solutions
Page Created 19 March, 2026
Last updated
19 March, 2026
Back to HyperScale Main Page
Back to Reviews Page

|
 Home
| What's New |
Features |
Gallery |
Reviews |
Reference |
Forum |
Search
Home
| What's New |
Features |
Gallery |
Reviews |
Reference |
Forum |
Search