Eduard 1/48 Fw 190 A-8/R2
by Raj Menon
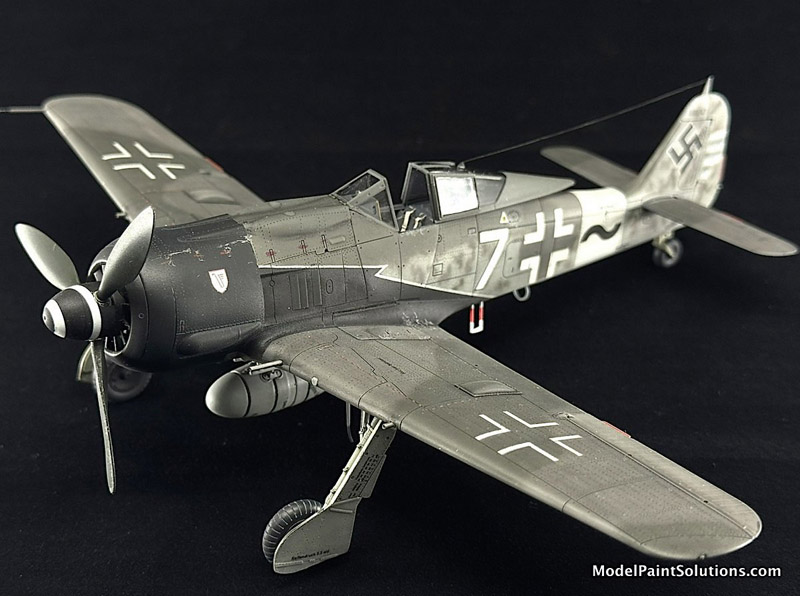

Eduard 1/48 Fw 190 A-8/R2 Kit #82145
Model, Text and Pictures by Raj Menon
When I started this build, I had no idea that I’d be working on an article documenting the same. Had I known before, I would have taken better pictures and made sure the bench was clean…. Having gotten that out of the way, let’s talk a bit more about the kit.
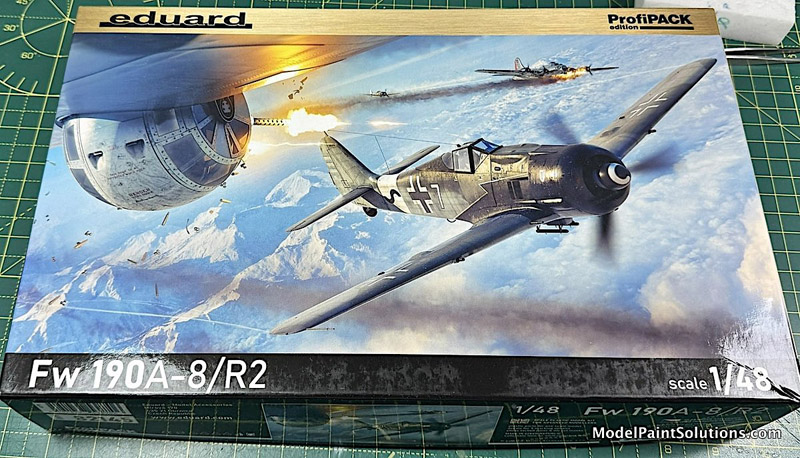
Pic 1: The Kit
I bought this kit last year when I was in Seattle on a work trip. I made my way to Skyway Model Shop, as one does when one is in Seattle. This was amongst a bunch of kits I picked up during that visit. Later that week I managed to get hold of John for a few hours and he gave me a masterclass on basically everything airbrushing. I had bought my H&S Infinity from him earlier and I was still struggling to master it until John gave me the tips. I was dying to try it once I got back home but work-related travels kept me away from my bench for almost a year.
Earlier this year I started on a pair of Tamiya 190s as part of an online group build which was a tribute to the late Shunsaku Tamiya. Halfway through that twin build a wave of madness washed over me and I decided to make it a triple build using the Eduard kit. I’ve built a few Tamiya 190s before and I’ve read a lot about how the stance isn’t accurate. So, what better way to see if that was true than building an Eduard 190 right?
The build was pretty straightforward. While it’s no shake and bake kit like the Tamiya, I ran into no major issues during the build. I started by washing the sprues in soapy water and leaving it overnight to dry. I followed the instructions as it is for the construction of the cockpit.
As this is a Profipack kit, I used the kit’s PE for this part of the build. The cockpit was painted in RLM66 and sealed with Alclad Gloss.
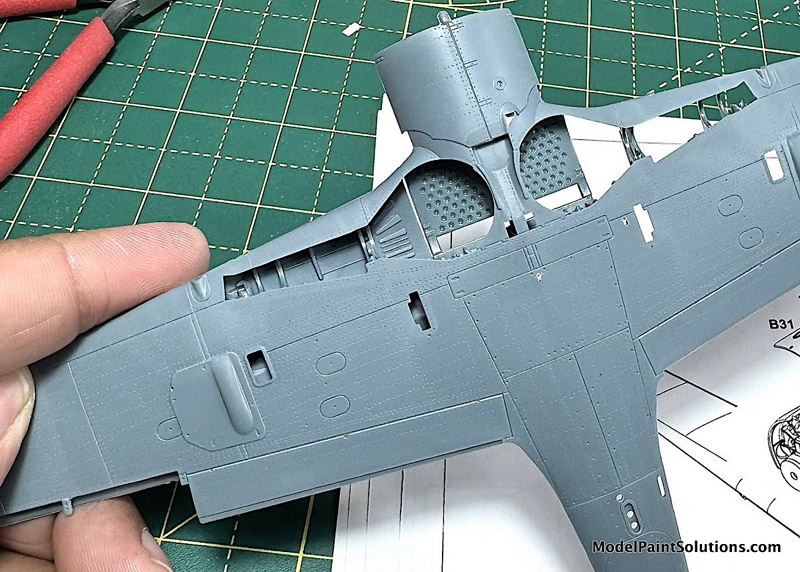
Please mind the gap
I ran into a small issue during the wing assembly. Part A32, which is the top of the wheel well, had a small gap where it met the top wing. Now this could very well be operator error, but I was unable to glue this gap shut. In the end I used a plasticard shim and trimmed off the excess after giving the glue a day to cure. I used some Tamiya grey putty to blend the plasticard and the excess was cleaned up using a Q tip dipped in Tamiya Lacquer thinner. The fuselage was glued using Tamiya Extra thin and Revell Contacta glue. The rest of the build went off without any issues.
I left the horizontal tailplanes and the landing gear off until final assembly. I leave the tailplanes off my Luftwaffe builds as I previously used an Iwata HP-CS brush and the paint cup used to make it difficult to get close to the model during the mottling process. The H&S has a smaller (and removable) paint cup and I can get way closer to the kit than with the Iwata but old habits are difficult to break and ended following my usual build flow.
The clear parts were dipped in Future floor polish and left in a dry box to cure for a day before I masked it with the kit provided masks. I left the armored canopy side panels till the end as it would make masking and painting easier for me. Once the assembly was complete, I proceeded to the paint booth.
Priming
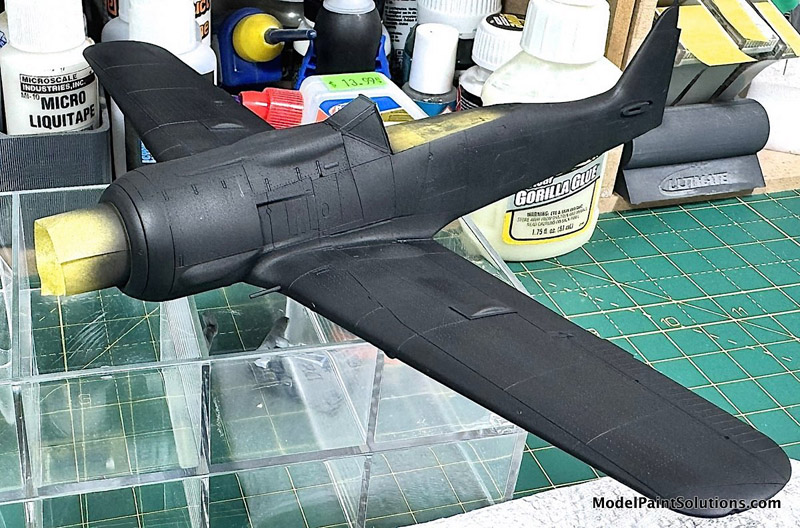
Primed and ready.
I wanted to experiment with some pre-shading and I decided to use Alclad Black primer instead of my usually grey one. I sprayed it with my Iwata airbrush at 15psi. I gave it 48 hours to cure fully before wet sanding it with a 6000 grit sanding pad. This was followed by a thin coat of Mr. Leveling Thinner and with that, it was time for some paint.
Painting
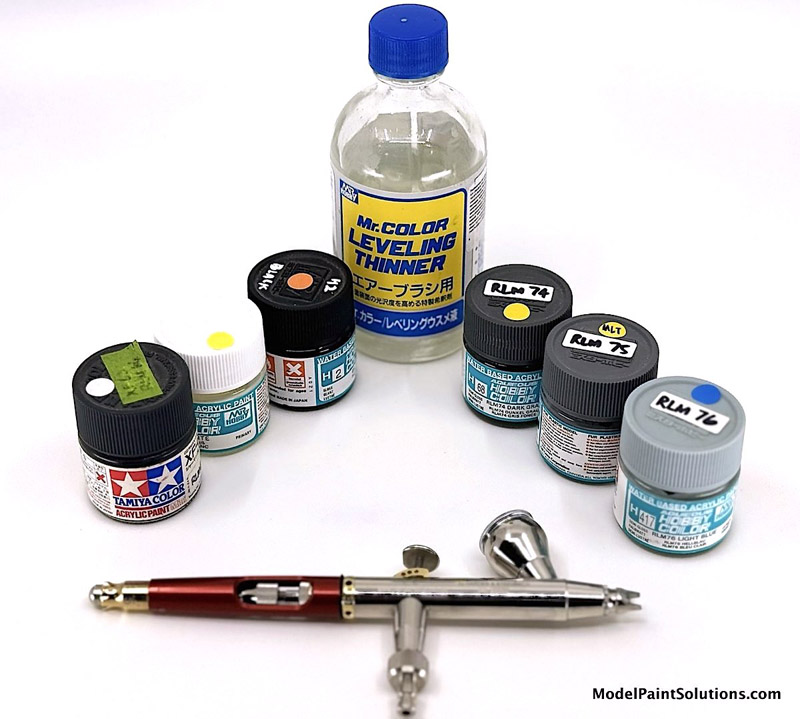
Paints used
My go to paints for Luftwaffe is the Mr. Color line of paints. I find them very forgiving when it comes to a freehand camo and mottling. I used Tamiya XF-63 for RLM66 in the cockpit and Mr Color C60 for RLM02 for the wheel well and gear before closing the fuselage and wings.
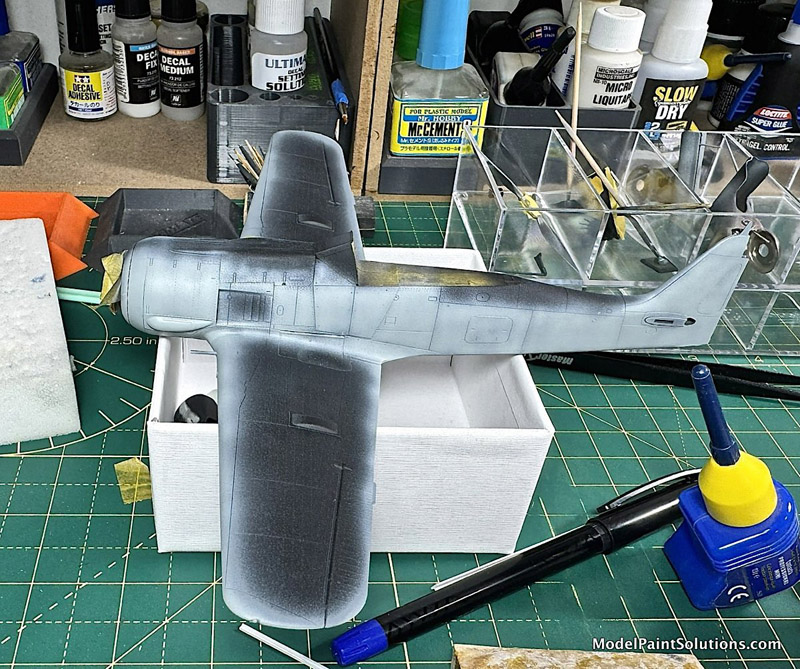
RLM76 sprayed
Once the primer had cured, I started the exterior painting with Mr Color H417 for RLM76. This was sprayed in a roughly 60:40 thinner to paint ratio at 20 psi using the 0.3 needle on my Iwata brush. I sprayed from the center of each panel with the edges receiving only a thin coat to keep the pre-shading visible.
It was at this stage that a second wave of madness washed over me. I was making this kit in the markings of Oblt. Hans Weik of 10.(Strum)/JG 3. In addition to the black cowl and white Reichsverteidigung markings of this unit, his aircraft also had a stylized Adlerflügel on the fuselage sides. The kit provides an excellent decal of the same, but I decided to mask and paint this. I usually give my Mr Color paints 48 hours to cure before masking. Once the RLM76 had cured fully I masked and painted the RV band, fuselage Balkenkreuz and the Adlerflügel’s white outline using Mr Color H1. Once this had cured, I masked and painted the Black using Mr Color H2.
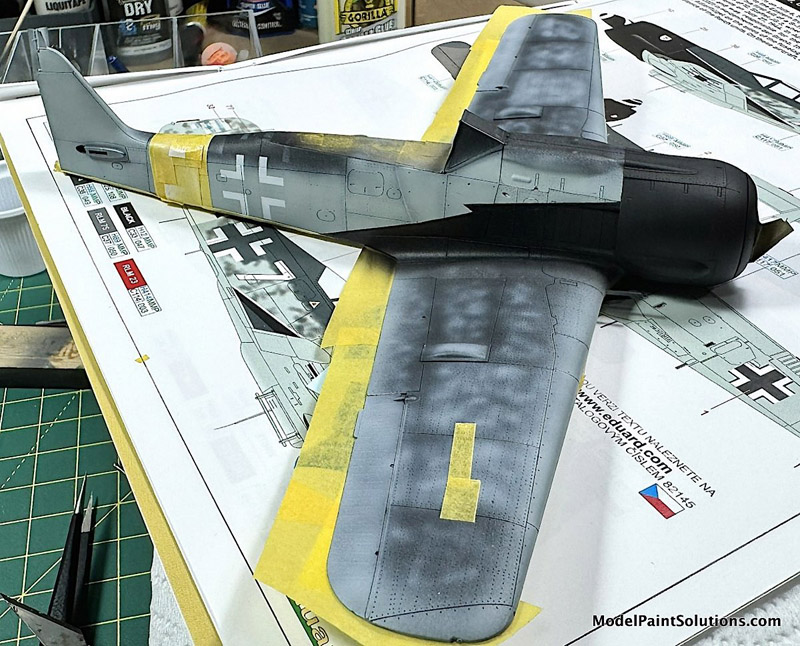
White painted and masked.
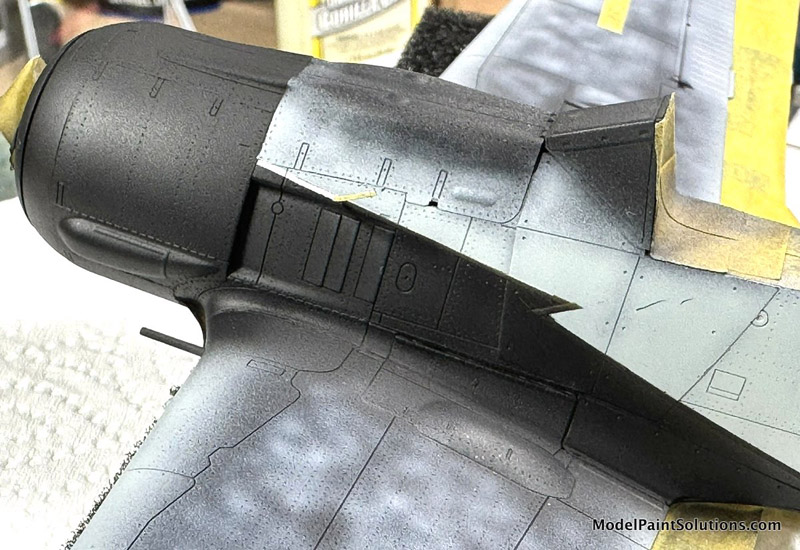
White outline masked
After the black was cured, everything was masked using a mix of Tamiya tape, post-its and painter’s tape. I experimented with marbling using the left over H1 which I sprayed at 15 psi. The main camouflage was sprayed freehand and as I wasn’t planning to mask it, I sprayed the second color right after the first.
I started with Mr Color H69 RLM75 in a 60:40 thinner to paint ratio sprayed at 20 psi using the 0.25 needle on my H&S Infinity. Thanks to all the tips John gave me, I was able to freehand the camo and make smaller mottles that ever before. I followed up almost immediately with Mr Color H68 RLM74 using the same paint ratios and airbrush setup. Once the painting was finished, I immediately removed the masks and left the model aside for 48 hours for the paint to fully cure. As we were experiencing a heat wave at that time with temperatures crossing 50°C (122°F), the paint cured rock solid in that time. I sealed it all with Alclad Aqua Gloss and set the model aside for 2 weeks as I left for my vacation. I used a clear box from IKEA as a dust free dry box which I lined with lint free kitchen towel. This meant by the time I returned to my bench, I had a fully cured gloss coat ready for the next stage of the build.
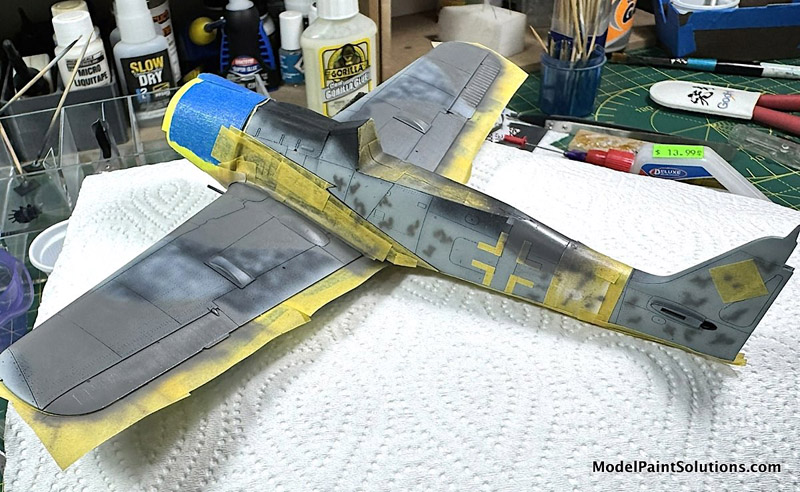
RLM 75
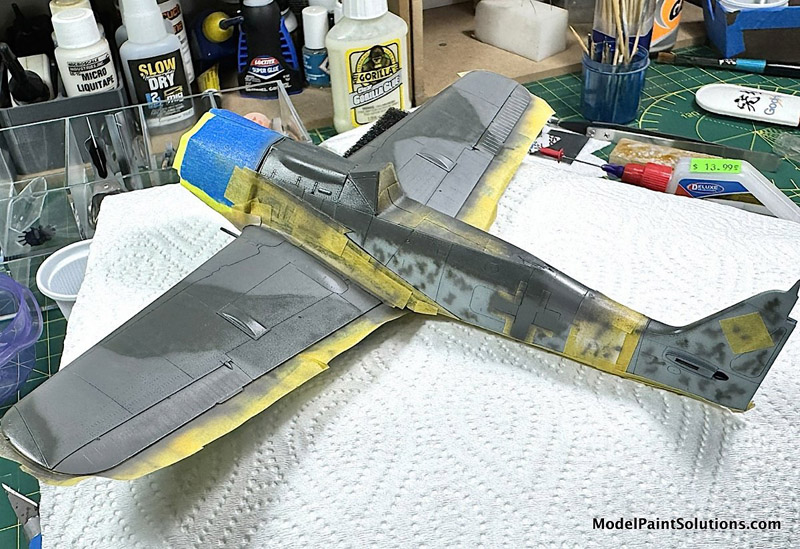
RLM 74
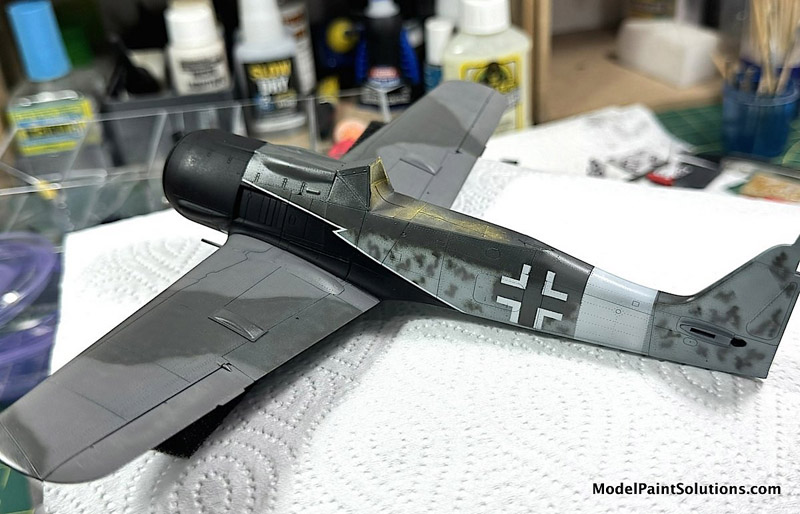
Unmasked
Decals and Markings
The kit comes with an excellent set of decals. Eduard used to ship with Cartograph decals, but I believe they started using in house decals from 2020 or so onwards. While they are not like Cartograph decals, they’re not that far behind. The ones in my kit had perfect registry and a very thin clear film. Now these decals have a trick up their sleeve – the clear film can be removed after the decal has dried. This results in a very matt finish, and the decals look painted on. I followed the instructions published online by Eduard themselves and I was happy with the results.
The process started by applying the decals after dipping them in a bowl of lukewarm water and then leaving the decals on a kitchen towel for about 30 seconds. While this was happening, I applied Mr Mark Setter on the kit and then applied the decal. I used some paper towels to wick off the excess liquid before gently rolling a Q Tip to remove any air bubbles. After this I applied Mr Mark Softer on to the decal and then gently tapped the decal with an old toothbrush. I saw someone’s build video on YouTube when he did this, and it resulted in the decals settling down better into the panel lines and rivet details.
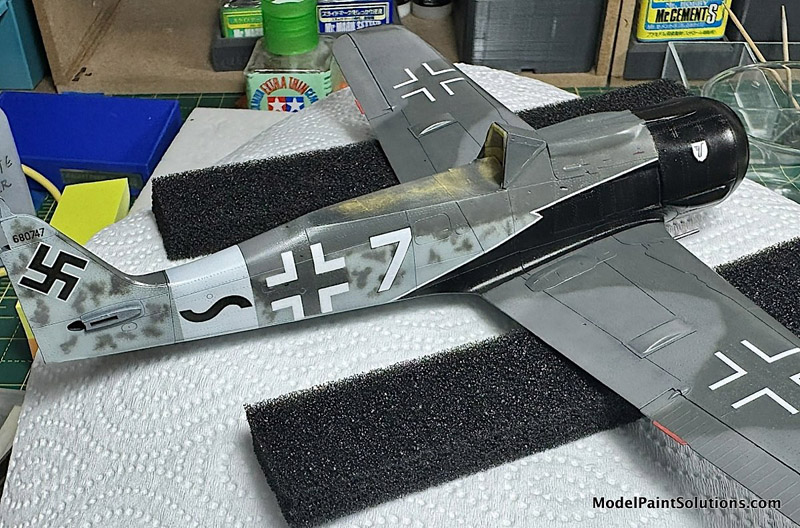
Decals are on
I waited for 24 hours before attempting to peel the clear film. I applied water over the decal and then using a pair of very fine tweezers, pulled away the clear film very slowly. Except for one instance, I was able to remove the clear film from the decals without any damage or issue.
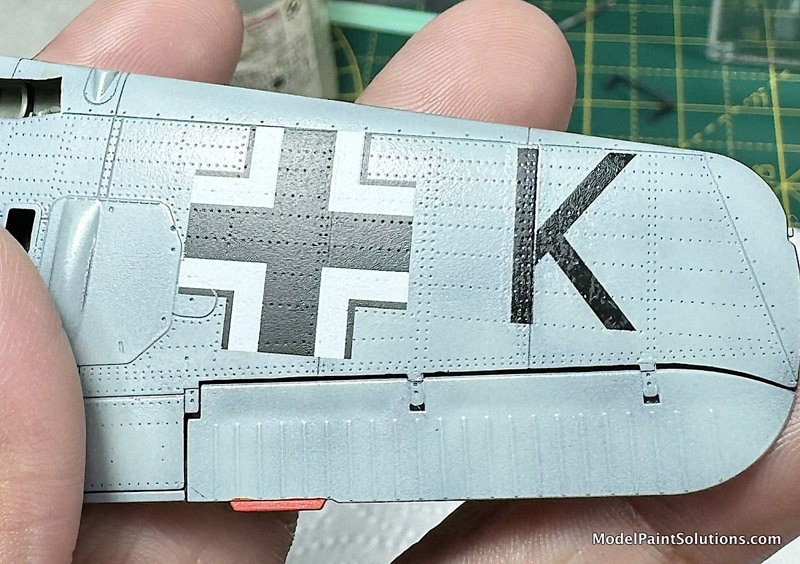
Clear film removed from the markings but not yet from the K
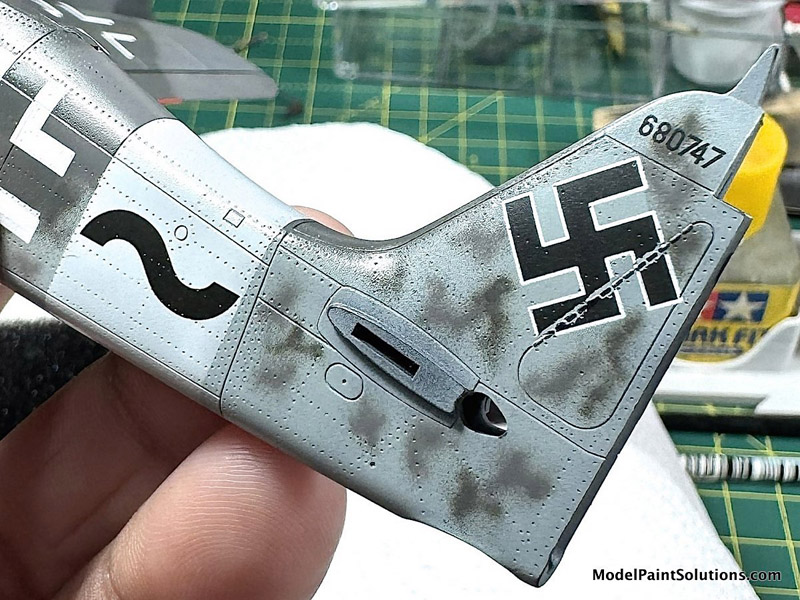
The damaged decal
The Hakenkreuz on the port side went over some hinge details and the decal in this area peeled off along with the clear film. I was able to fix this damage with a fine brush and an assortment of expletives.
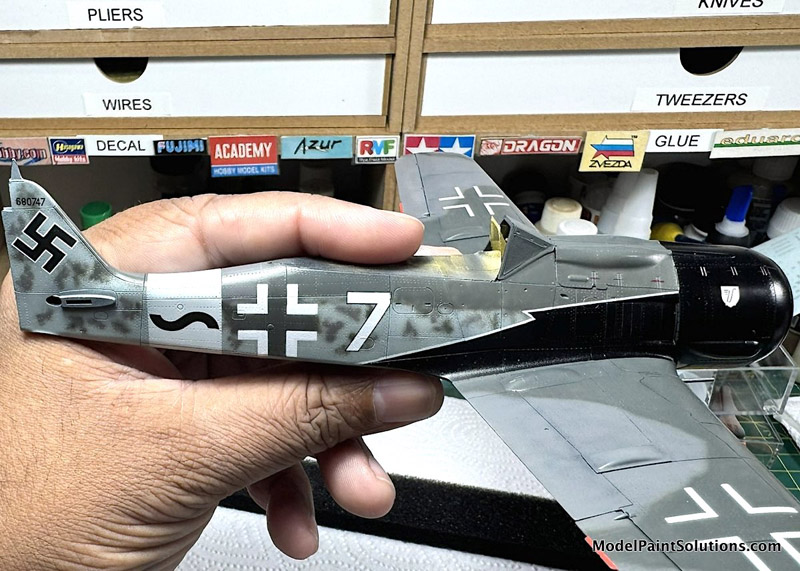
Decals are done.
Once all the decals had been applied, I sealed everything using VMS Satin varnish in preparation for the weathering stage.
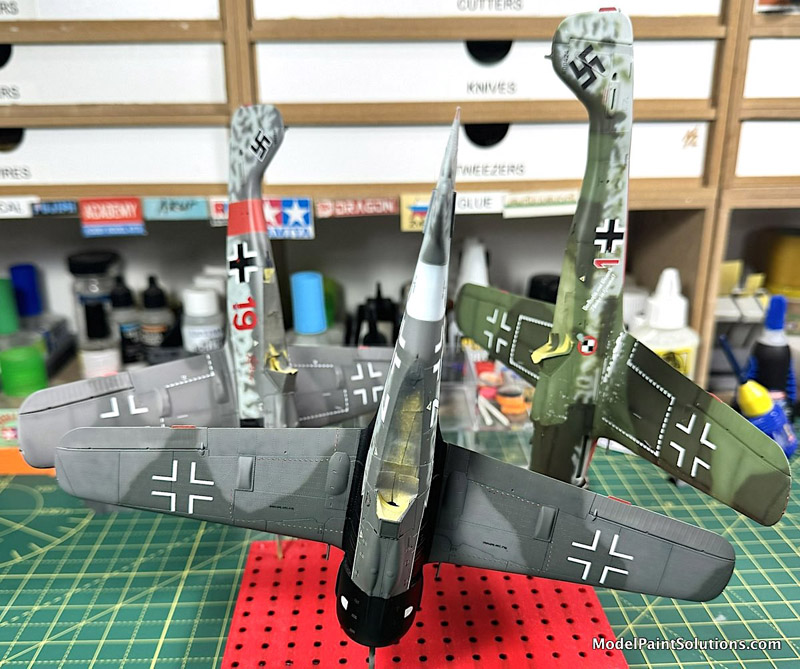
Hanging out with buddies.
Weathering
I usually use a combination of panel line wash and oil dot filters for weathering my models. For this build I also tried an oil wash. I used Abteilung-502 Oils (ABT), AK weather pencils and AK Real Colors markers for the weathering.
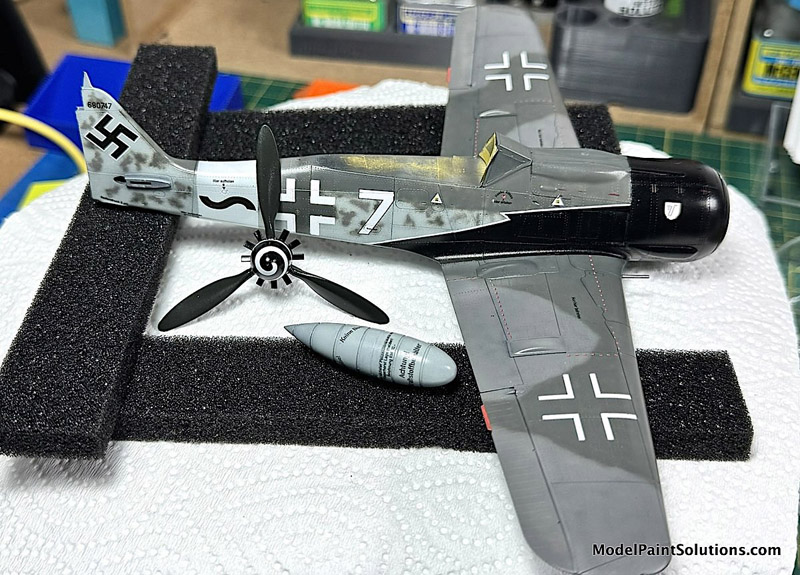
Weathering underway.
I made the oil wash using Abt-502 Burnt Umber and artist’s odorless thinner. This was applied liberally over the kit and after letting it dry for about 30 minutes, removed using Q Tips. I used “Wash On, Wash Off” method interspersed with some swear words.
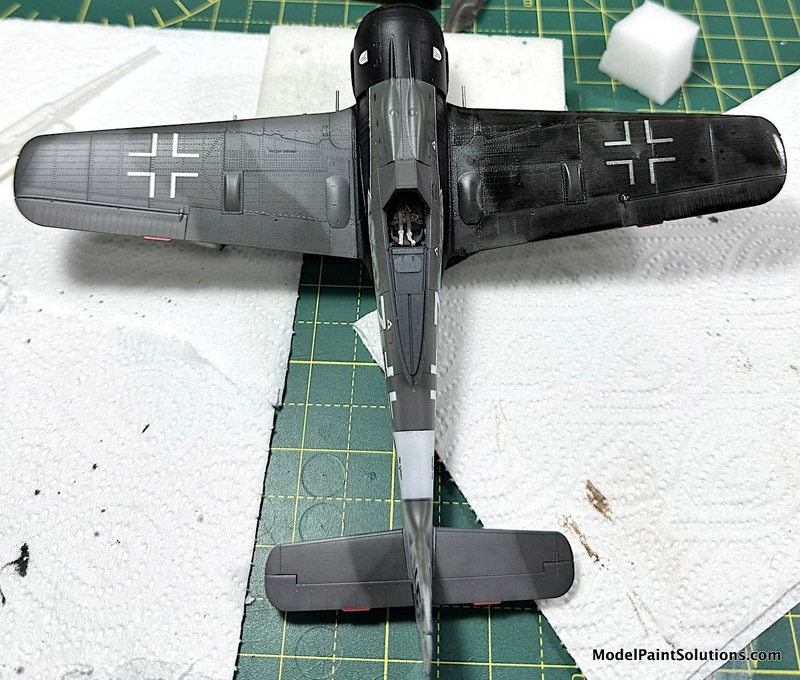
Wash On
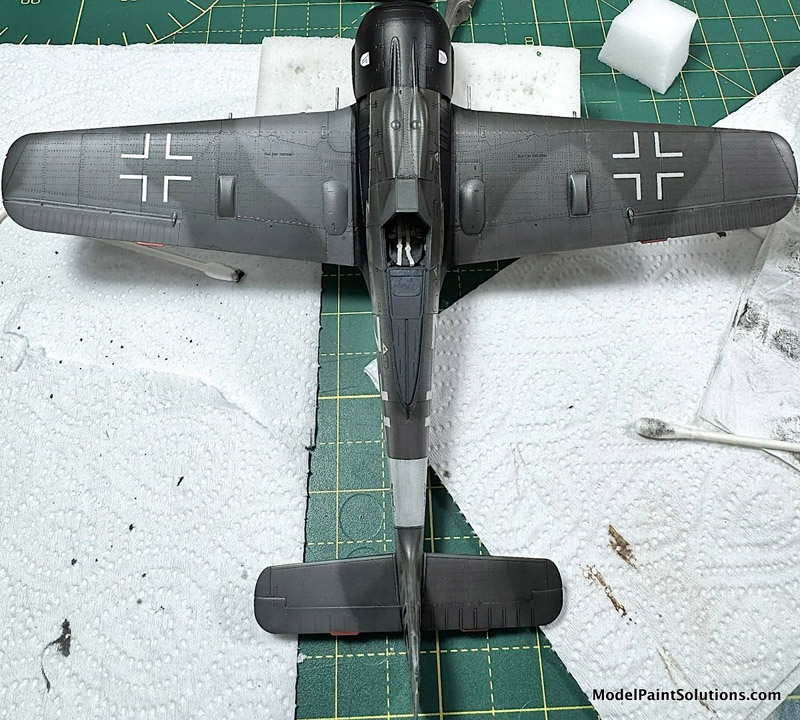
Wash Off
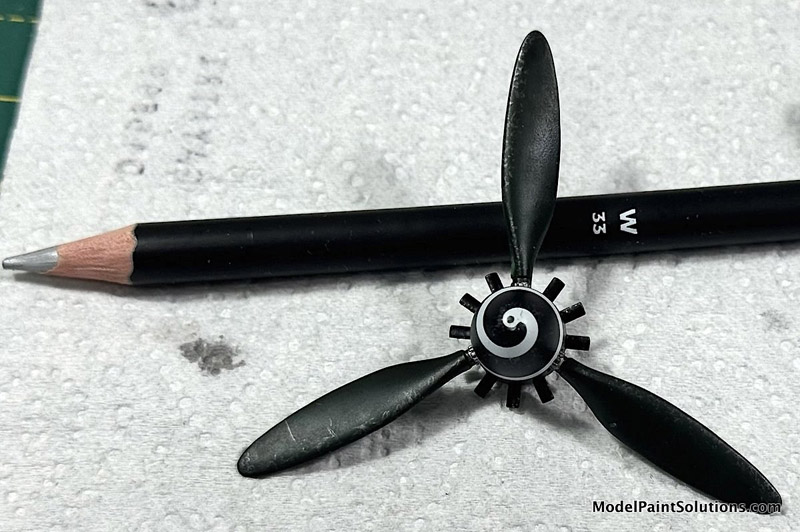
Prop Chipping
I used an AK Silver Weathering Pencil to depict the chips on the propellor. I made random lines and dots to try and create a random pattern on the propeller blades. I also used it for panel chipping near the wing roots and the engine cowls. I used Abt-502 Smoke oils to simulate gun smoke and engine exhaust but this isn’t that prominent due to the black paint underneath. I applied Alclad Klear Kote Flat as a final sealer for all the weathering and with that my build was complete.
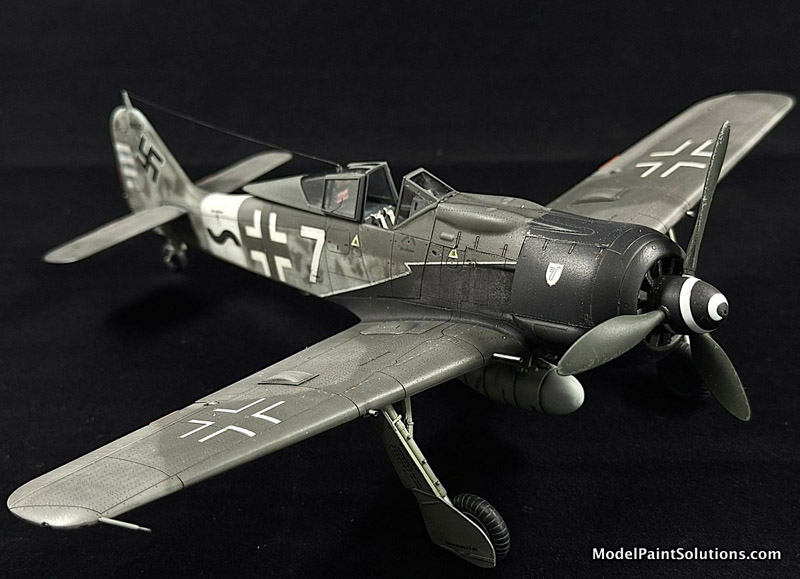
The completed build
After the flat coat was cured, I removed the canopy masks, added the armor windscreen and made the radio aerial using some rigging wire from AK.
I thoroughly enjoyed this build. The kit went together well and little to no filler was needed. I experimented with new painting methods and weathering techniques. I enjoyed this so much that I went ahead and purchased 5 more Eduard 190s and work permitting, I plan to build them all soon.
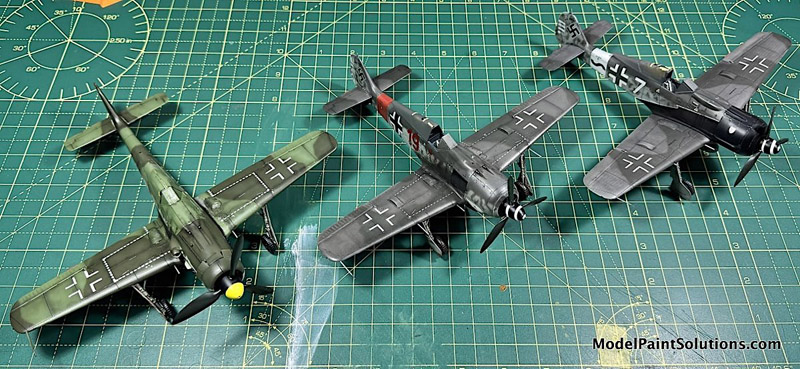
Thank you all for reading and I welcome all comments and tips to help me improve.
Cheers,
Raj
For more on this review visit ModelPaintSolutions.com
https://modelpaintsol.com/builds/eduard-48-fw-190a-8
Text and Images Copyright © 2026 by Raj Menon.
Page Created 18 September 2026
Last updated
18 September, 2026
Back to HyperScale Main Page
Back to Reviews Page

|
 Home
| What's New |
Features |
Gallery |
Reviews |
Reference |
Forum |
Search
Home
| What's New |
Features |
Gallery |
Reviews |
Reference |
Forum |
Search