Eduard's Royal Class 1/72 scale
Messerschmitt Bf 109 G-10 x 2
by Steven Hustad

Description:
Dual Build: Eduard ‘Royal Class’ 1/72nd Messerschmitt Bf 109 G-10
Kit No: R0022
Scale:
1/72
Review Type:
Build
The Bf 109 is one of my favourite WWII aircraft because it there are so many cool camouflage/markings schemes possible, probably because it was in production from well before World War II started to even a couple of years afterward. So there are endless schemes of models to build!
We’ve had a lot of 109s kitted over the decades in 1/72 scale; most not very successfully. So, when Special Hobby came out with their new Bf 109E back in about 2020, I had to jump on that right away, and did. This is a very nice series of ‘E’ variant kits. Then Eduard released their ‘109F, and I dropped everything to build that one, which was even better!
Now, finally comes Eduard’s late ‘109G series, my absolute favorites – especially the late war ‘refined cowling’ variants. So as soon as these first became available via Eduard’s ‘Royal Class’/Dual Combo Bf 109G10 kit, I had to dive in via an expensive order to Hannants. Once in the door, the bench was wiped clean. Okay, I lied, not really, as I’d conveniently just finished another modeling project so the bench was already clear – but I would cleared it if it weren’t!.
Now, I’d already built Eduard’s 1/72nd Bf 109F kit which was a pure delight, and these G10s were expected to be just as nice, if not better. You’ve heard the term “palate cleanser” in regard to model kits, usually referring to gaining some relief via building some Tamiya kit after a tough completion. But these days the best aircraft & armour kits are coming out of Eastern Europe (Eduard, IBG, ICM, Arma, etc.) – not from Japan except rarely anymore. And Eduard’s new 109 series truly fits the bill.
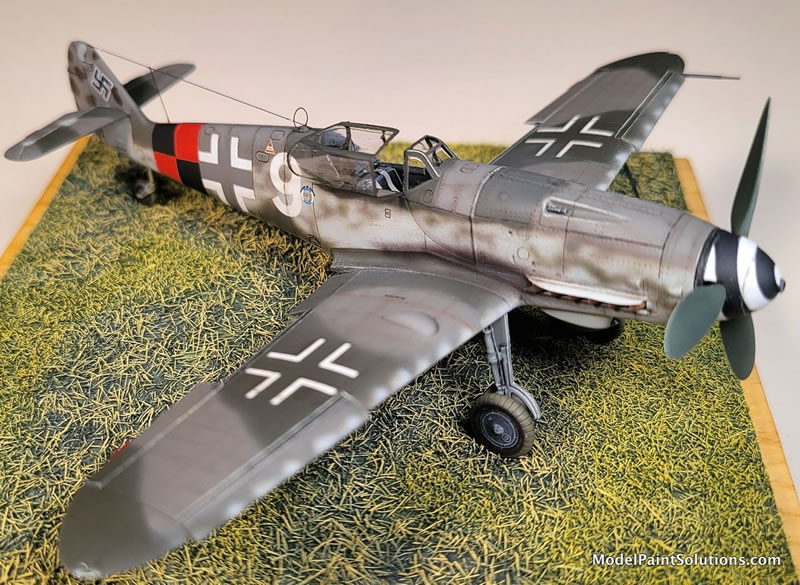
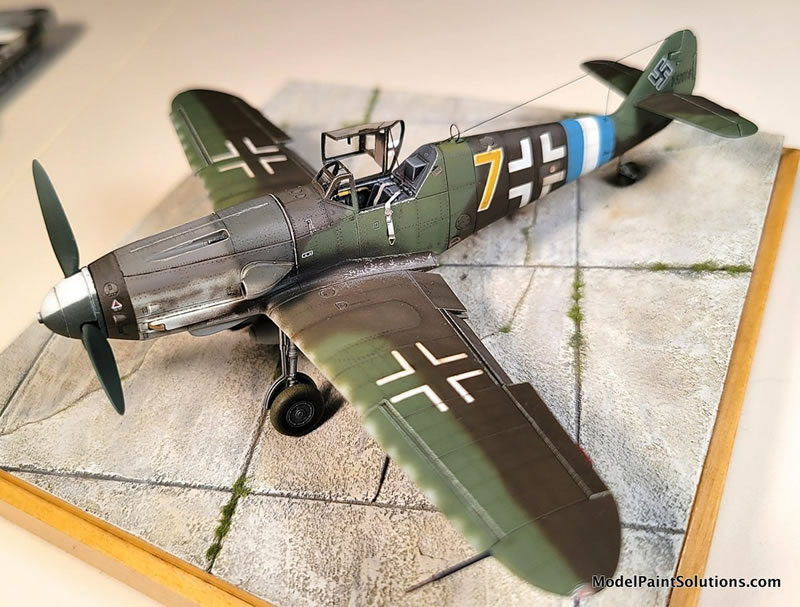
Eduard’s ‘Royal Class’ kits are similar to their ‘Profipak’ versions - but include even more of (what would usually be ‘aftermarket’ items) in the form of extra resin bits, and additional decal/markings schemes provided. This kit (No. R0022) has two of the G10s represented that especially called out to me - “Yellow 7” (an Erla built) of JG300 and “White 9” of 1./KG(J)6, with the more typical ‘refined cowling.’ I could have easily been as happy with any of four others provided, but ya gotta start somewhere, right? I often build two at a time of the same type - and/or when they’ll share a lot of colors to be airbrushed because I’m basically lazy…and the Eduard 109G10 is no exception, so dive in I did on the pair.
Enough with the prelims…
I always start a model by getting the boring and unpleasant bits out of the way first. In this case that means the dreaded ‘parts clean-up’ stage. And I employ a lot of small (now well-worn) zip-lock plastic bags to hold the cockpit parts, propeller & spinner, landing gear parts, cockpit, and so on. At the same time I’ll glue together any subassembly parts that can be joined prior to painting at this same time. Okay, now that the grunt work is done we can get on to airbrushing the interior colors. At this point I also mount up and also spray the exhaust stacks, landing gear, propellor and spinner, etc.
I substituted a few Eduard bits for aftermarket replacements - Quickboost resin 30mm gun breech (#QB72098), Quickboost’s resin Revi 16B gun sight (#QB72065) and Quickboost’s resin Bf 109G control column (#QB72097) all replaced the kit items as I thought the detail and scale effect of these were better. Then for the balance, all the kit parts were used as they’re all so nice - other that the clear hinged canopy which though very clear, is far too thick to pass the ‘scale effect eye test’! I seriously don’t know why Eduard doesn’t offer vac replacement canopies for their own 1/72nd scale kits. They seem to offer replacements for so much else, and most of those are unnecessary in my opinion because the kit’s part are already so good, whereas with the canopy in the scale is definitely needed.
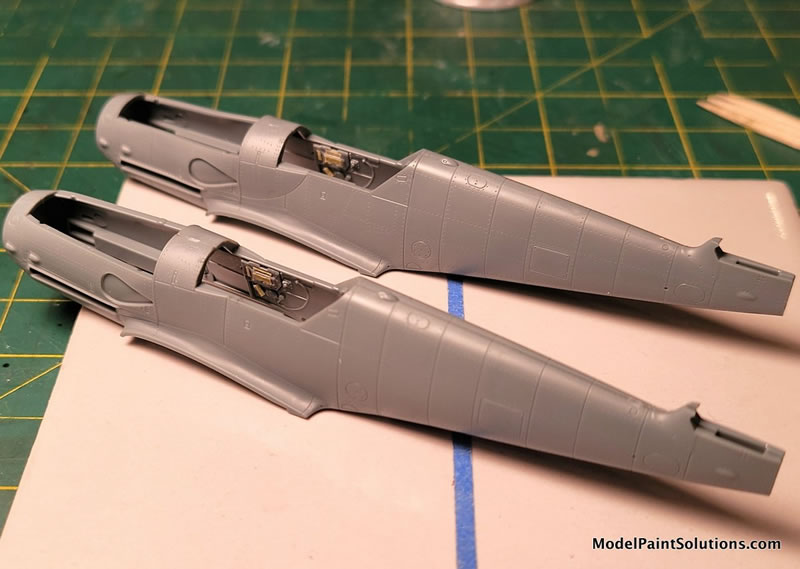
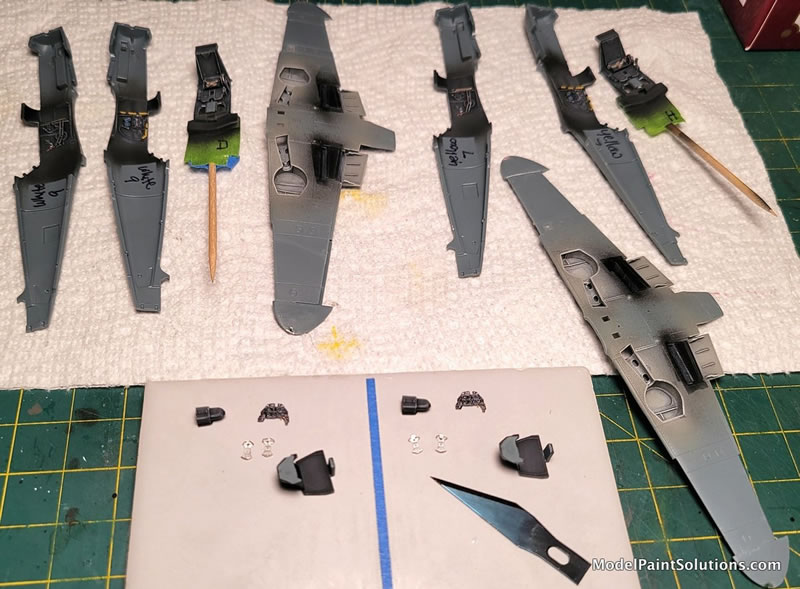
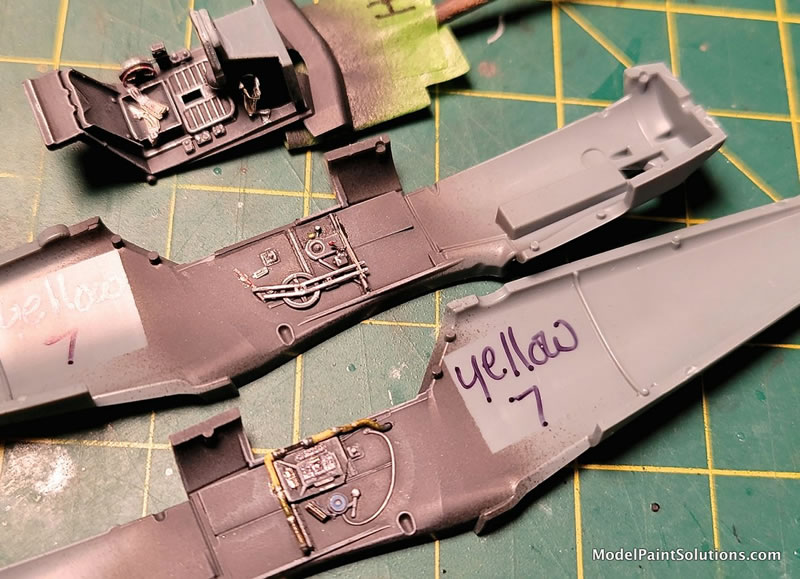
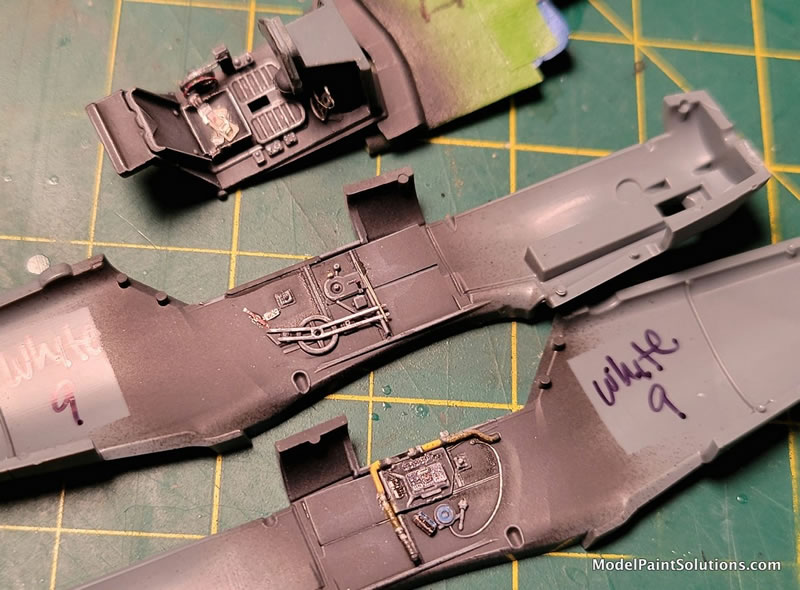
Next up was a ‘loose’ primer coat of Gunze’s Mr. Surfacer 1500/black airbrushed to all panel/rivet lines and join seams. This was followed by the natural metal portions of the wing undersides using AK’s Xtreme Metal paints – I used both their ‘Aluminum’ and ‘Dark Aluminum’ in order to vary the shades a bit. I let this dry for a couple days then masked the areas to remain natural metal with MIG/AMMO’s ‘Softouch Velvet’ purple low-tac masking tape. I made sure to use this atop the Xtreme Metal paint, as that paint has a tendency to hang onto the tape’s adhesive otherwise. The ‘Softouch Velvet’ doesn’t cure that problem entirely, but it helps. Finally, the underside RLM 76 was applied. I used a Humbrol enamel, #247, lightened about 25% for this because I KNOW it won’t ‘pull-up’ with subsequent masking necessary to paint the topsides! (And I like the color).
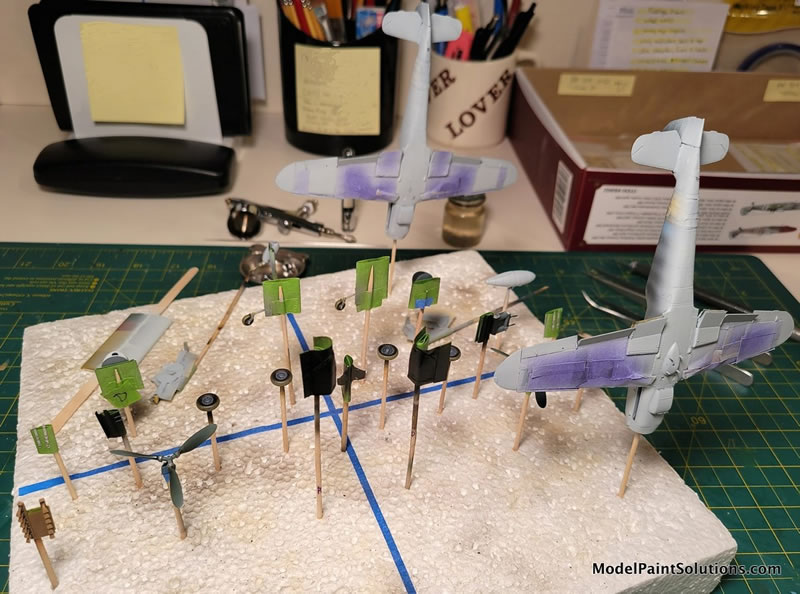
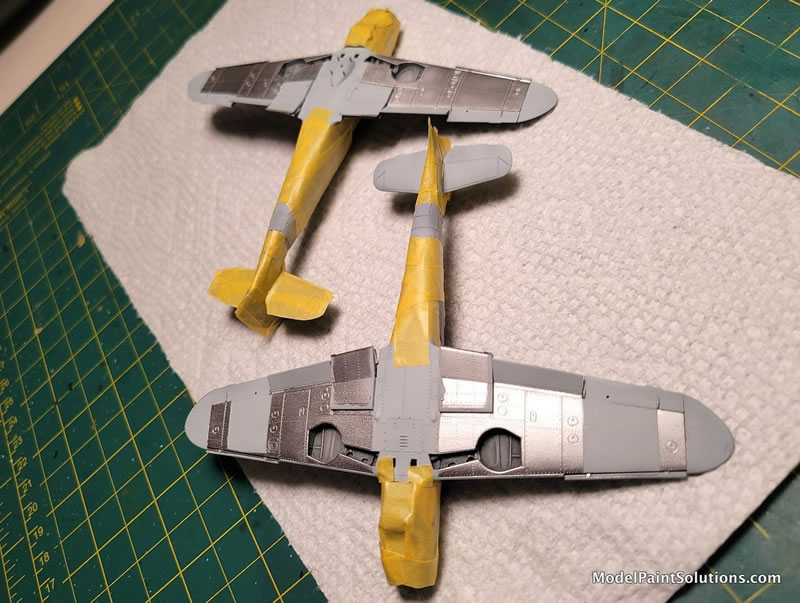
Now onto the topside camo…I used AK Real Colors here, but all were lightened a bit for scale effect. In addition, I added some red to the RLM 75, and some dark red brown to the RLM 81 to get closer to what I think is more appropriate. Both were tinted using colors from Tamiya’s XF range that play very friendly with AK’s Real Color paints. All of these ‘basic color’ mixes were thinned using Mr. Color Leveling Thinner (MCLT) using about 2/3rd’s thinner to 1/3rd paint. A few drops of Mr. Mild Retarder were added to each color while in the airbrush paint cup and sprayed. The Erla built “Yellow 7” had primarily an RLM 81 Brown Violet and RLM 82 Bright Green camouflage, but with the engine cowling in RLM 75 Gray Violet, and RLM 74, Dark Grayish Green. The Regensburg built “White 9” had the more typical RLM 74/RLM 75 scheme. So I could at least airbrush some common topside colors together (the 74/75). Both had undersides in partial bare aluminum and RLM 76.
A note on “Yellow 7s” camouflage; The wonderful JaPo books on late-war Luftwaffe aircraft has a small volume in their ‘red’ series entitled: “Messerschmitt Bf 109’s of JG 52 in Deutsch Brod, published in 2004. On pages 46–54 is a great explanation of the camouflage colors applied to a certain group of Erla Leipzig early 1945 manufactured Bf 109G10/R6s of the 150XXX to 152XXX werk number blocks that were allocated to JG 300. Many (most/all?) of these were re-manufactured and updated aircraft. JaPo maintains these aircraft had a solid, one color upper camouflage scheme of RLM 83 Dark Green (now thought to probably be the ‘greener’ shade of RLM 81). Also, that this color extended down to the bottom edge of the fuselage on both sides, and that the leading edge of the wings had a rather ragged color separation (to the undersides RLM 76 Light grayish Blue), rather than the more typical scalloped leading edge. Eduard’s instructions indicate a solid upper wing color (per JaPo), but a fuselage in both RLM 81 AND RLM 81. What to do, what to do,…?
Interestingly, on the bottom of page 53 of the “Deutsch Brod” book referenced above is a photograph that (I think) clearly shows a straight, span wise color separation on the wing upper surfaces, but not extending all the way to the fuselage. So I went with a ‘combo-platter’ of Eduard’s, JaPo’s and my own interpretation of this aircraft’s camouflage for my model of “Yellow 7”. “White 9” I didn’t find to be nearly as controversial, so it was a straight rendition of Eduard’s scheme which also happily agrees with JaPo’s interpretation of that aircraft’s camo. (Note: See pages 134–137 of Japo’s “Messerschmitt Bf 109s of KG(J) 6”. This is another book in Capo’s red series published 2017).
For upper camo I always start with the wing topsides by themselves to divide up the work and improve the focus. So starting with the RLM 82 and RLM 75 as the base color on each, I laid down those base colors with the airbrush trying hard to achieve the wing leading edge scalloped effect – ‘ala our ‘109 master Barry!’. Then I “soft-mask” the camo division with green Frog tape, keeping the tape about 2-3mm above the surface to achieve a soft, but still relatively tight edge with the RLM 81 and RLM 74 that completes the upper wing schemes. I could achieve this with my airbrush too, but this way I can control the pattern more exactly and it goes quicker.
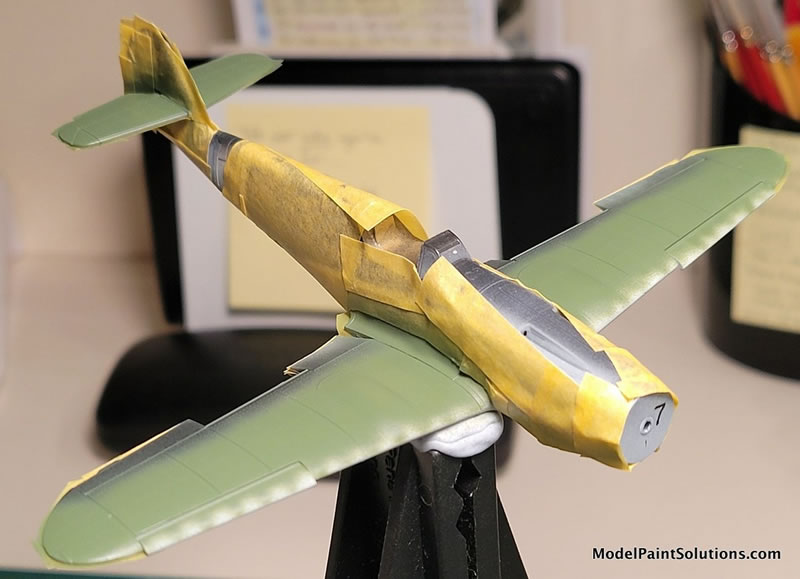
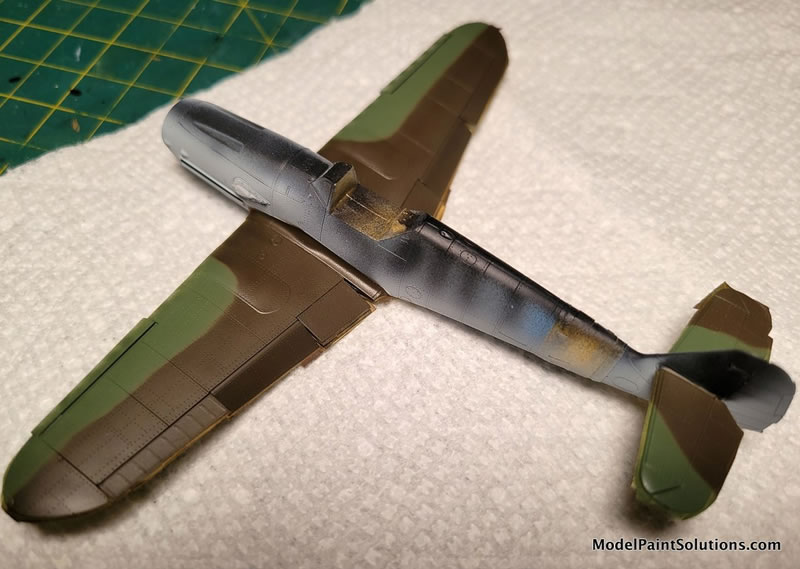
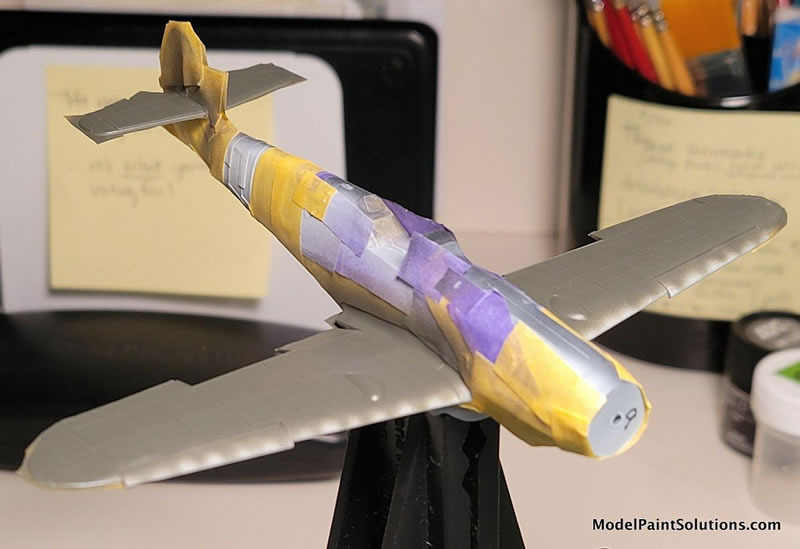
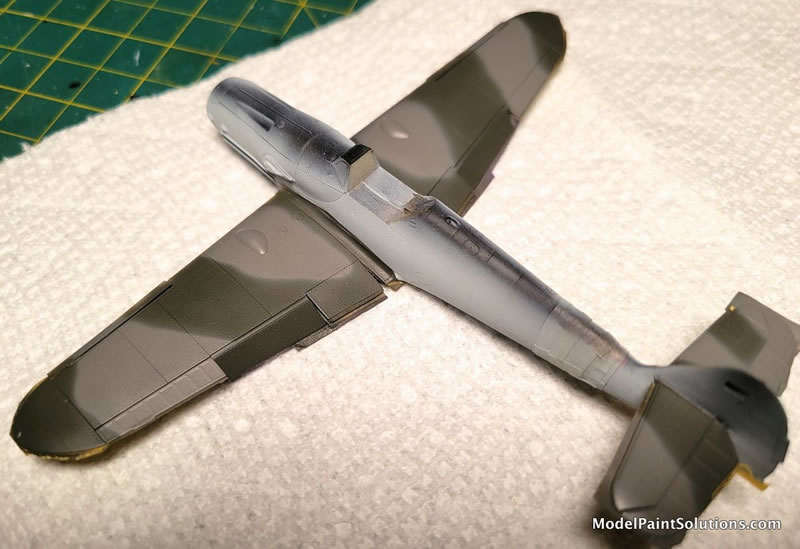
Next up is the fuselage camo, so the wings get masked…and for the fuselage its’ the same drill, base color first, then a ‘soft mask’ with the stiffer Frog tape for the exact camo pattern desired. I will draw the fuselage outline on the tape, then draw the exact camo pattern on that. It gets cut out along those lines and positioned exactly where I want it on the model to achieve the precise pattern. Again, it could be ‘freehanded’, but this is more exacting – especially for 1/72nd scale where precision is especially necessary to achieve the exact shapes desired in such a small space. The RLM 74 and 75 on “Yellow 7’s” cowling were airbrushed at the same time as “White 9’s” basic 74/75 fuselage camo.
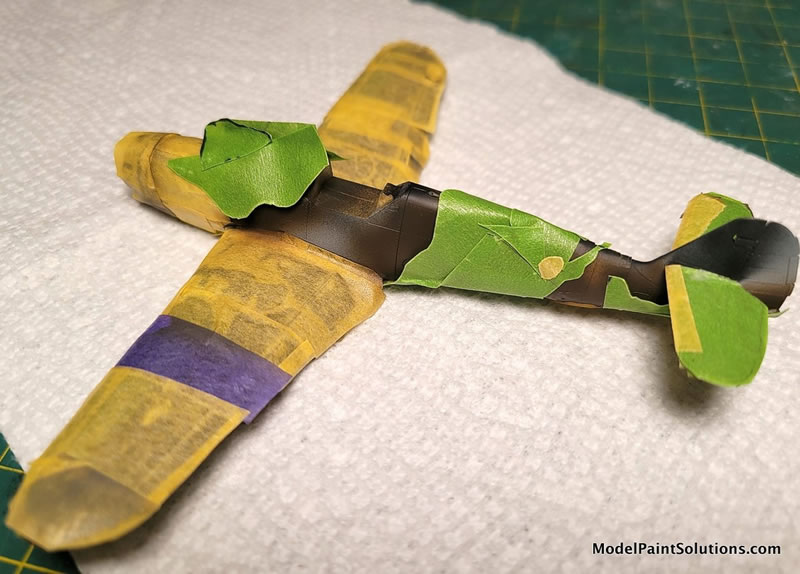
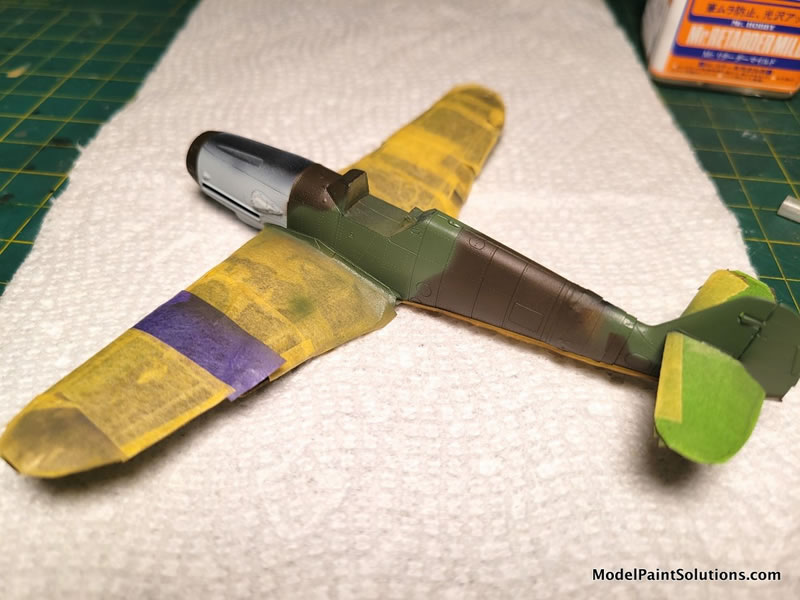
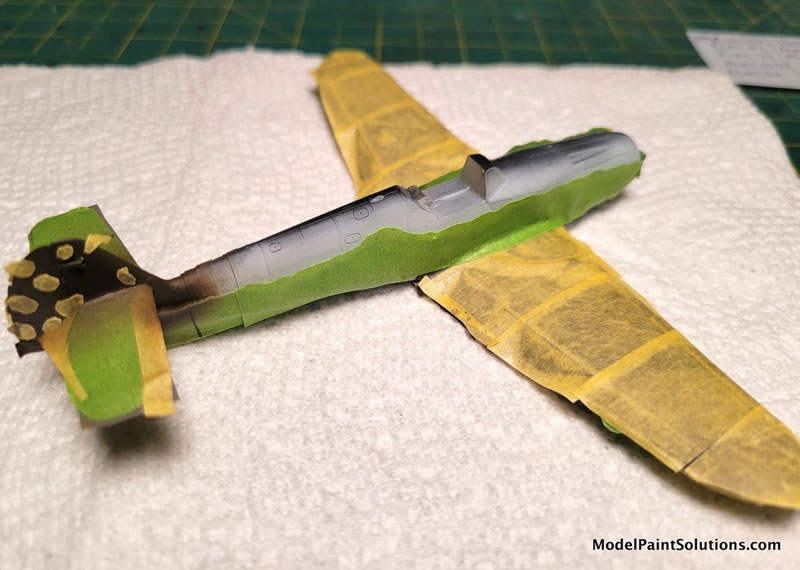
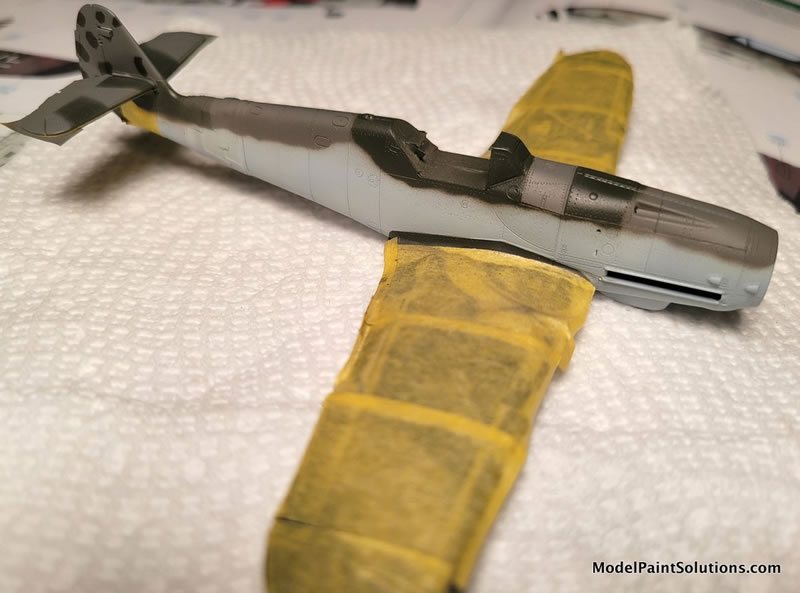
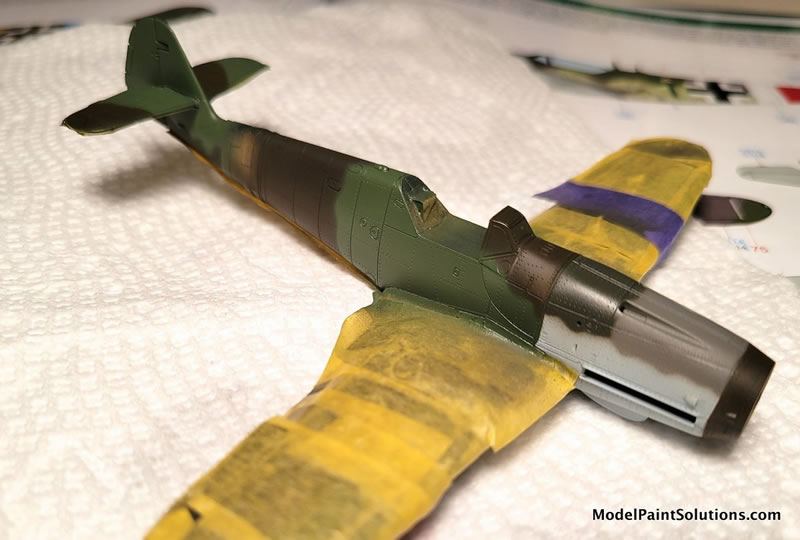
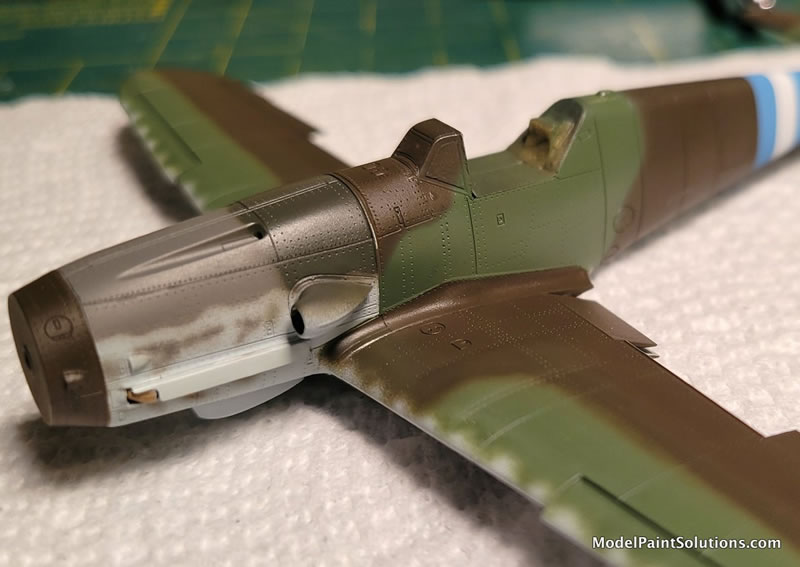
Now time for the mottling. This is the point where I switch airbrushes to the finest tip (0.15 - 0.18), and thin the above mentioned paint mixes further down to about 20% paint with 80% MCLT. A bit more of the Mr. Mild Retarder is added to each color cup here as well. I’ll also dial down the compressor’s pressure to around 8psi or so…a ‘paint mule is essential here to practice on, as are some MCLT thinner wetted Q-Tips for regularly cleaning the needle tip. I also remove the airbrushes’ protective head exposing the needle’s tip so I can see what I’m doing better, so extra attention and care is required here. I can get in close (about 5-10mm) to spray the mottle. Practice is essential. “White 9” required a normal amount, following the profiles in the JaPo book, as well as the little bit found on “Yellow 7’s” cowling. Not very much overall, so it went rather quickly! Afterward, off came all the masks so we can finally see what we’re left with. A number of small touch-ups were necessary with all colors at numerous locations – always using the fine tipped airbrush and thin paint mixes for these as well.

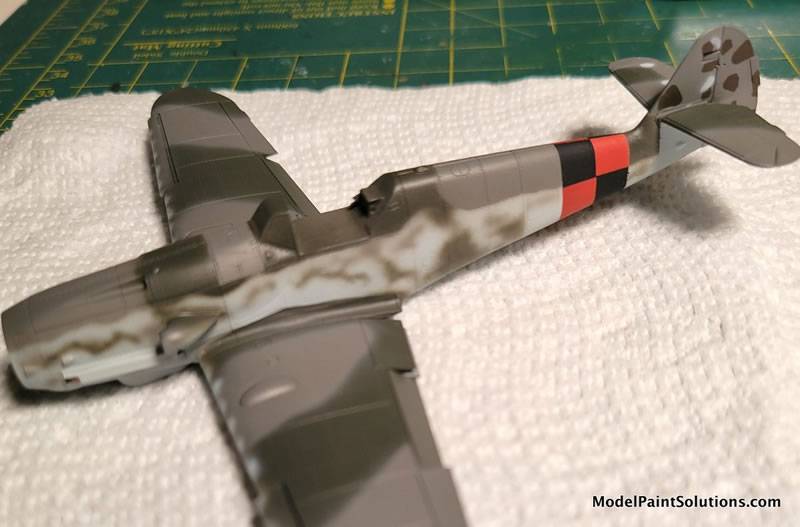
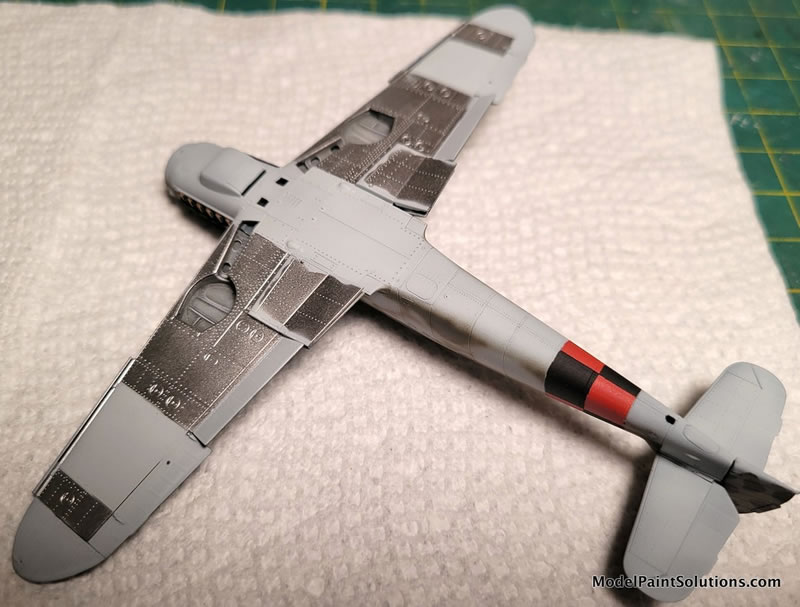
The exhaust stains were next. I use similar thinned paint mixes as were used for the mottling here, but with Tamiya’s XF-1 flat black plus XF-10 dark red brown. Four parts flat black to two parts dark red brown. This was freehand airbrushed using photographs as guidance for each side as the pattern was slightly different port to starboard. These will be enhanced later using pigments…
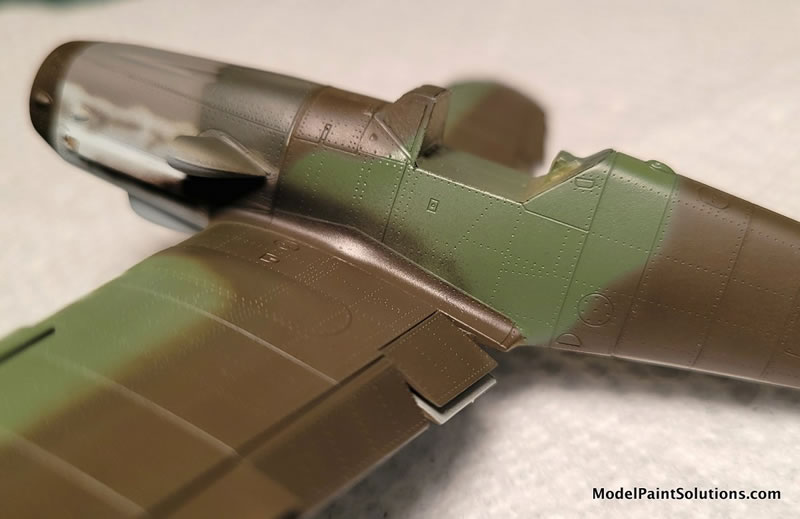
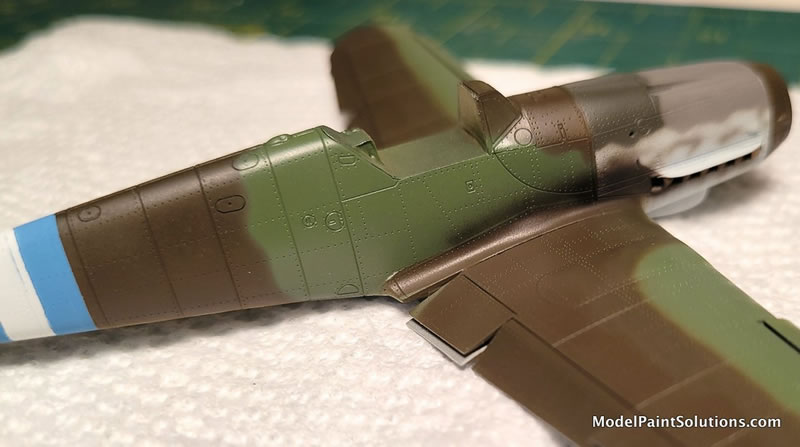
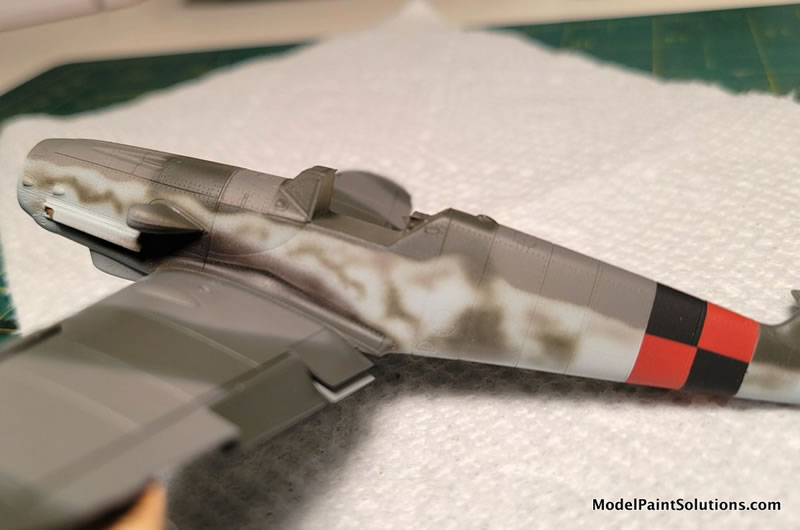
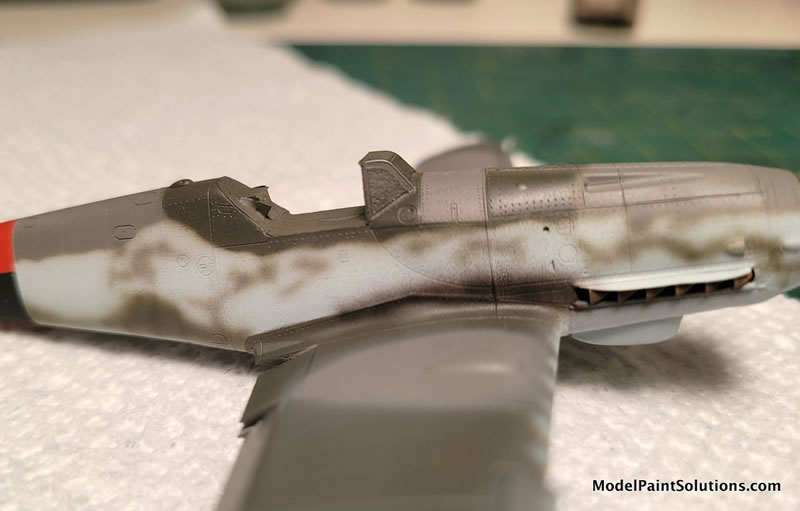
After a suitable ‘pre-decaling’ gloss coat was airbrushed (I use Gunze’s Mr. Color GX-100 or Future – each can be thinned with MCLT), it was time for the decals! These were applied in the usual manner using Microscale ‘Set’ and ‘Sol’ solutions. Though this kit included Eduard’s recent kit decals I didn’t attempt to “peel” away the clear film afterward, but did do an experiment with ones I knew I wouldn’t be using. And that clear film peeled away beautifully on the mule - but they must be down solid to avoid pulling up part of the printed markings. For the white & black ‘simplified’ balkenkreuz national markings on the wing upper surfaces and fuselage sides I always cut away all clear film anyway, and just apply the “L” shaped arms of the crosses. Tedious? Yes, but no ‘silvering’ to worry about. But next time I’ll give ‘peeling’ a go on the final actual model(s).
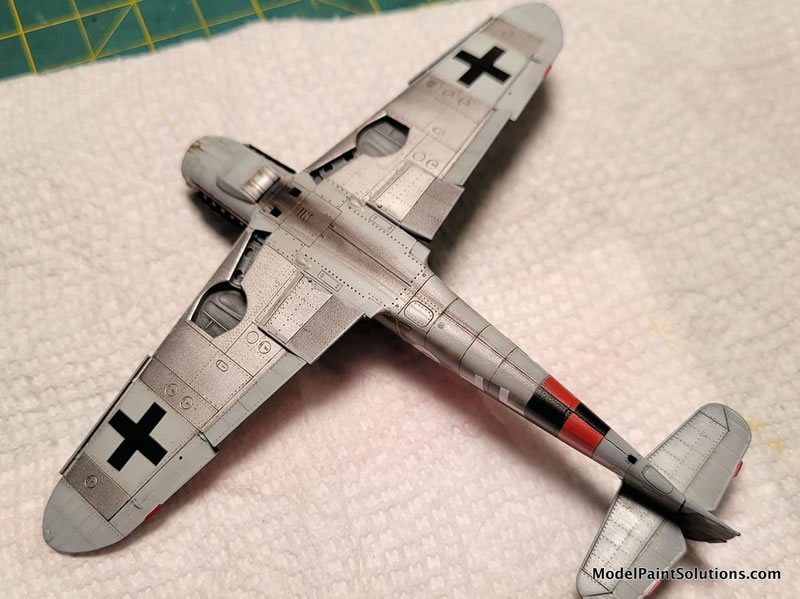
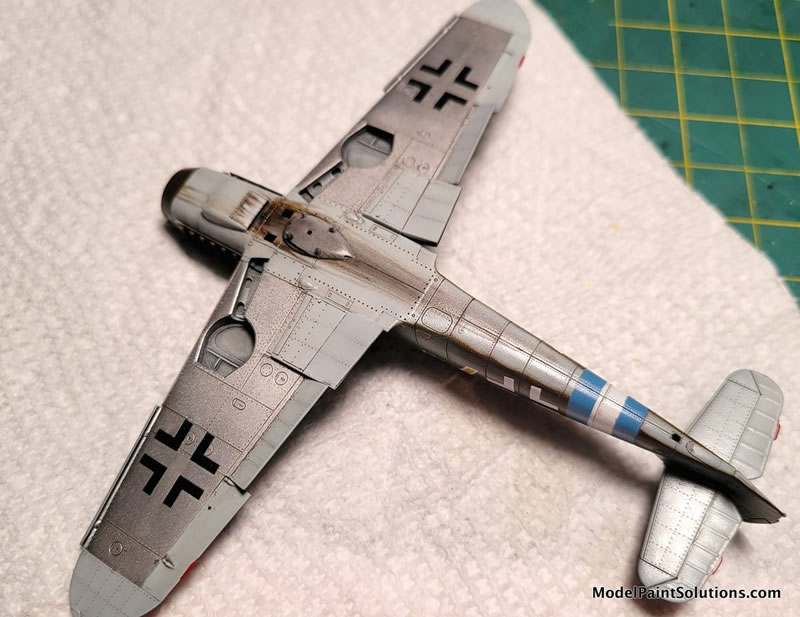
Prior to the weathering stage I apply a satin or semi-gloss acrylic clear coat to seal in the decals and to act as a barrier to the oil paint weathering techniques that follow. First off, I apply an oil paint pin wash made up of Vandyke Brown and Payne’s Gray into all the underside’s panel lines, and Vandyke Brown and black into the topside panel lines. Let dry, then I wipe in the direction of air flow with parts from an old torn T-shirt dampened slightly with mineral spirits. That’s the basis for what follows which is most effective on solid color camo schemes to ‘liven things up’ a bit!
To replicate the worn and faded look that I see so often in vintage photographs of late-war Bf 109s (and others) I devised a method to vary tones from panel to panel slightly using oil paints. These could be merely rivet lines, riveted ‘squares’ multiple panel areas, or actual single panels. Maybe I wasn’t the first to use this method, but I stumbled across it by accident while trying to correct a paint mistake on a previous model a few years ago, but has now become part of my finishing routine. To do this I mix up an oil paint color that’s a bit lighter, and another that’s a bit darker than the base colors (in this case) the RLM 81 and 82 applied to “Yellow 7s” top and sides. Also mixed for use was some very dark brownish black oil paint. These colors are carefully applied by brush directly to those small areas – lighter in top and side areas, darker in the lower and crevice/corner areas. The brownish black is sparingly applied to the rivet and/or panel lines with a very fine tipped brush. Warning! - after this initial application the look is absolutely horrible!
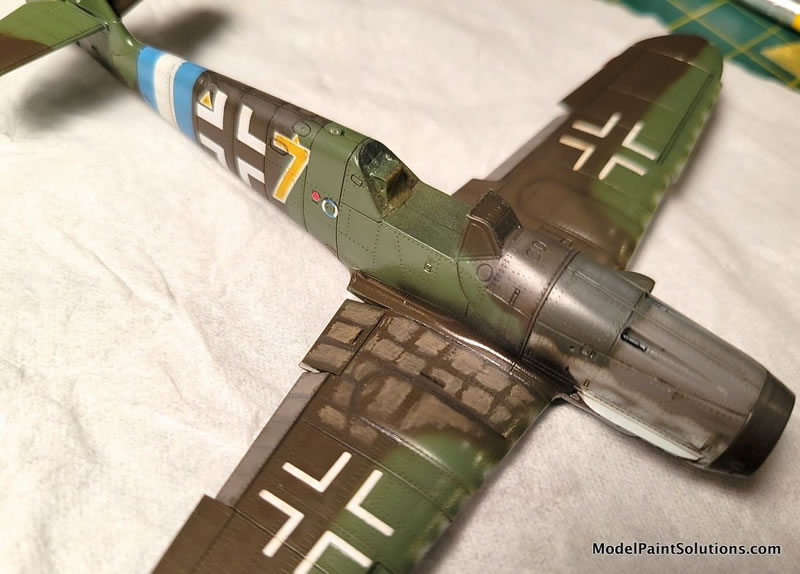
Now I take a large, and very soft brush and just ‘whisk’ back and forth over the surface of the applied oils until it feathers/blends down into the effect I want.
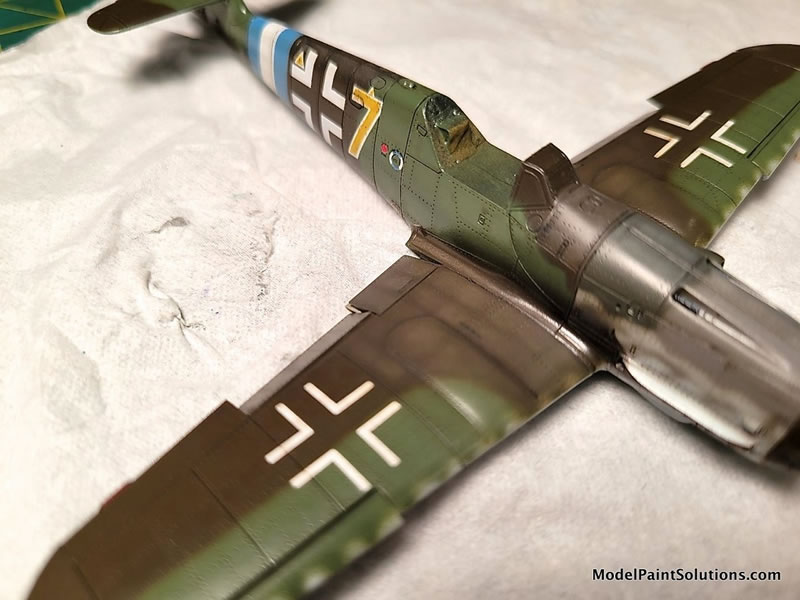
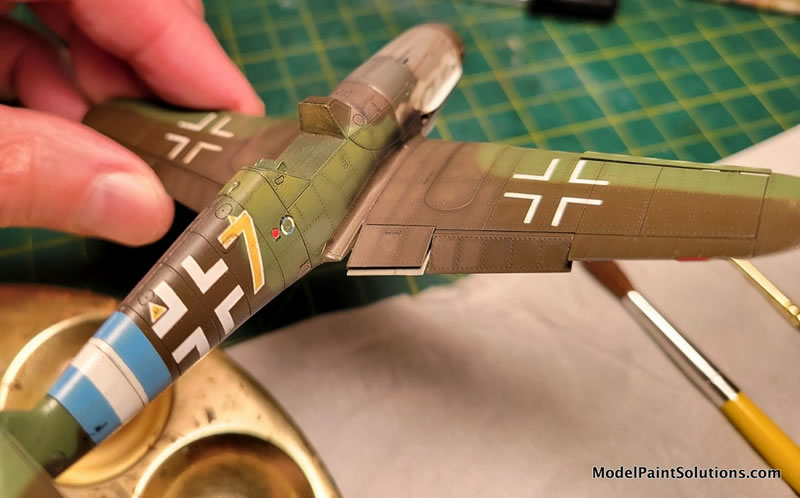
The nice thing about this is you can accentuate it less or more depending upon your taste and the subtlety (or not) of the wear and fading look that you’re trying to achieve. I offer a better explanation of the technique on Episode #127 of the very entertaining Plastic Model Mojo Podcast.
Finishing weathering touches were achieved with Mig/AMMO pigments and Prismacolor colored pencils (especially their wonderful ‘silver’ color for paint chipping and wear on aluminum). These need to be applied atop your final flat or flat/satin coat of choice. A Falcon vac canopy was used for each model’s hinged ‘Erla Hood’ portion as the kit’s canopy is clear, but far too thick. The kit’s windscreens were used (perfect fit by the way…), but the visible edges were thinned a bit. Antenna wires are stretched sprue, super glued at each end, then tightened using the hot smoke from a just blown out match. Plop on the propellor and we’re done!
Note: The bases were custom made using AK’s “Concrete” for the tarmac one and two heights of static grass (2mm & 4mm) for the grassy base.
Steve Hustad
(aka “The Mad Norseman”)
For more on this review visit:
https://modelpaintsol.com/builds/eduard-72-messerschmitt-109g10-r0022
Text and images copyright ©2025 by Steve Hustad.
Text and Images Copyright © 2025 by Steve Hustad
Page Created 10 January, 2025
Last updated
10 January, 2025
Back to HyperScale Main Page
Back to Reviews Page

|
Home
| What's New |
Features |
Gallery |
Reviews |
Reference |
Forum |
Search