Douglas A-4M Skyhawk

Magic Factory, 1/48 scale
S
u m m a r y : |
Description and Item No.: |
Magic Factory Kit No 5002 - Douglas A-4M Skyhawk |
Contents and Media: |
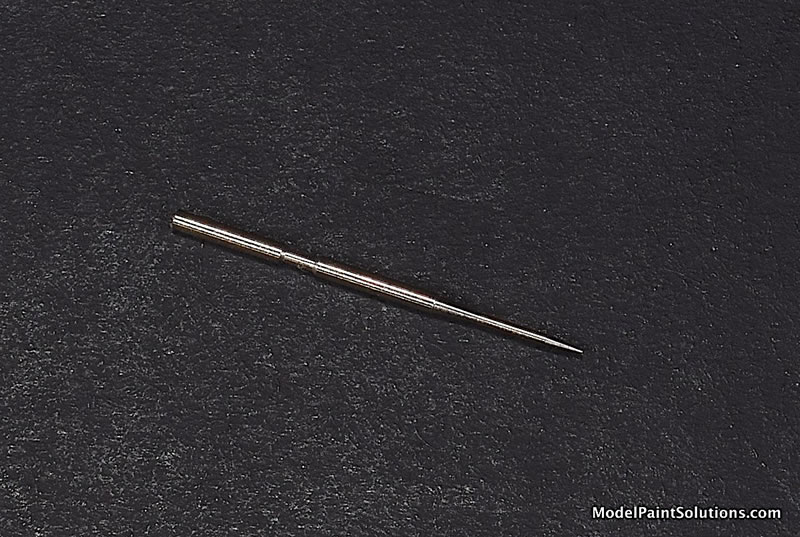
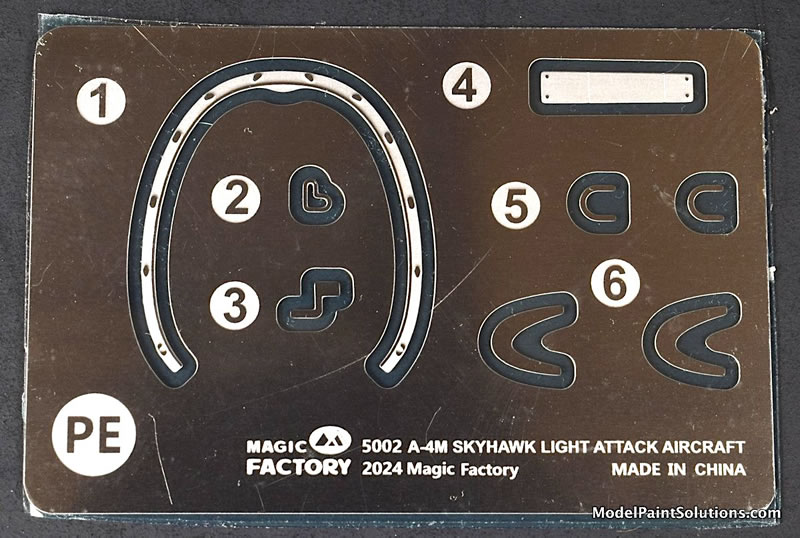
23 sprues and includes a PE fret, canopy masks, rear view mirror stickers, a metal pitot tube, counter weight shot, vinyl tires, and markings for two schemes and airframe stencils. |
Price: |
TBA |
Scale: |
1/48 |
Review Type: |
First Look |
Advantages: |
The kit is beautifully molded with an abundance of crisply inscribed surface detail and many (many) building options. A full-load out with drop tanks and ordinance is also provided. |
Disadvantages: |
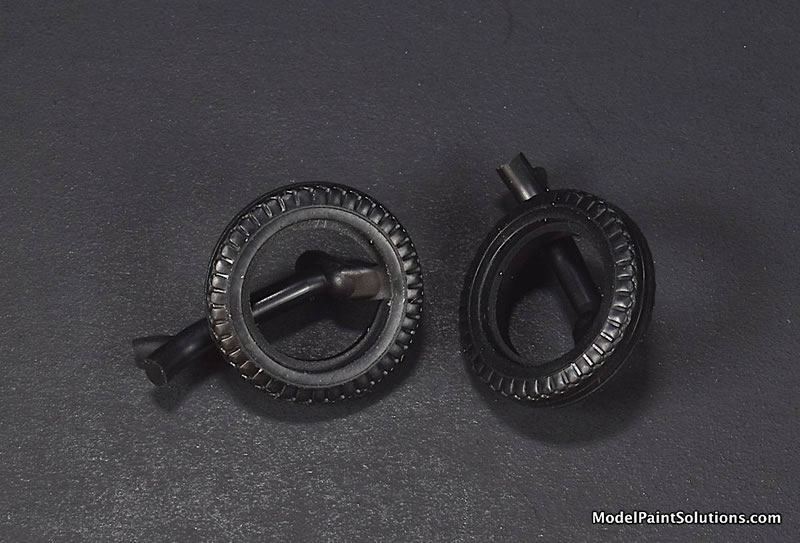
Vinyl tires… |
Recommendation: |
Wow, what’s to say! I’m out of superlative adjectives.
This is the most detailed 1/72nd scale kit that I have ever seen—period. The high level of detail maintained throughout the kit is nothing short of amazing.
Once assembled, with the canopy and gun bays in the opened positions, this is going to be a stunning kit. Just be sure to have some good light and a pair of magnifying glasses before getting started.
Highly Recommended! |
Reviewed by John Miller

The Douglas A-4 Skyhawk or “Scooter”—my favorite nickname for this small, agile, aircraft—played a pivotal role in the air war over Vietnam. The Scooter has been treated well by model manufactures with examples in 1/72, 1/48, and 1/32 scales. That said, I had high hopes for this new-mold Skyhawk from Magic Factory given their recently released and very nice 1/48th Corsair. After taking a good look at this Skyhawk, I think they have another winner on their hands. This is a beautiful model that drips detail from literally every angle. Awesome!
Keep ‘em coming, Magic Factory!
Background
The Douglas A-4 Skyhawk is a single-seat subsonic carrier-capable light attach aircraft designed and produced by the Douglas Aircraft Company, and later, McDonnell-Douglas. It was originally designated A4D under the U.S. Navy’s pre-1962 designation system.
The Skyhawk was developed during the early 1950s on behalf of the U.S. Navy and U.S. Marine Corp as a replacement for the propeller-driven Douglas A-1 (AD) Skyraider. The A-4 is by comparison, a compact, straightforward, and lightweight aircraft for the era. Its maximum takeoff weight of 24,500 pounds (11,100 kg) being roughly half of the Navy's weight specification. The Skyhawk has a short-span delta wing configuration, a tricycle undercarriage, and is powered by a single turbojet engine. The U.S. Navy issued a contract for the aircraft on 12 June 1952. On 22 June 1954, the XA4D-1 prototype performed its maiden flight; it went on to set a world speed record of 695.163 mph on 15 October 1955. On 1 October 1956, the Skyhawk was introduced to operational service.
The Skyhawk's five hard-points support a variety of missiles, bombs, and other munitions. It is capable of carrying a bomb load equivalent to that of the World War II era Boeing B-17 bomber, and can deliver nuclear weapons using a low-altitude bombing system and a “loft delivery” technique. Furthermore, it pioneered the concept of “Buddy” air-to-air refueling, enabling an aircraft to supply others and reduce the need for dedicated aerial tankers. The Skyhawk was originally powered by the Wright J65 turbojet engine; from the A-4E onwards, the Pratt & Whitney J52 engine was used instead. The Skyhawk was in production through to February 1979, by which point 2,960 aircraft had been delivered to a variety of operators. 555 aircraft alone were built as dedicated two-seat trainers.
The Skyhawk saw active combat on several occasions. The U.S. Navy operated the type as its principal light attack aircraft during the Vietnam War, carrying out some of the first air strikes by the U.S. during the conflict. The Skyhawk was the Israeli Air Force’s main ground attack aircraft during both the War of Attrition and the Yom Kippur War. In the Falklands War, Skyhawks of the Argentine Air Force bombed Royal Navy vessels, sinking the Type 42 destroyer Coventry and the Type 21 frigate Ardent. Kuwaiti Air Force Skyhawks saw action during Operation Desert Storm. In 2022, nearly seven decades after the aircraft's first flight in 1954, a number of Skyhawks remain in service with the Argentinian Air Force and Brazilian Navy.
Text edited from Wikipedia
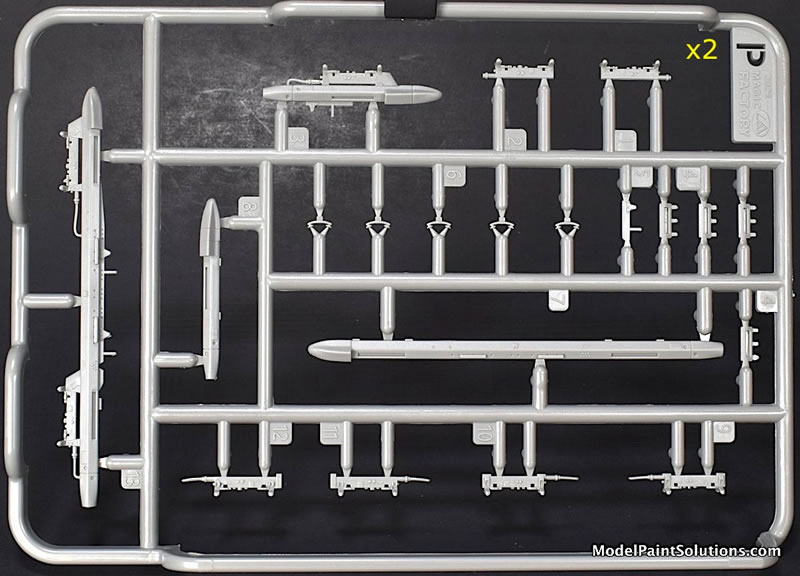
The lidded box is adorned with nice artwork of a A-4M loaded for bear, in the act of jettisoning the centerline drop tank. The kit is conveyed on a total of 23 sprues and includes a PE fret, canopy masks, rear view mirror stickers, a metal pitot tube, counter weight shot, vinyl tires, and markings for two schemes and airframe stencils.
This is not going to be a weekend build by any means.
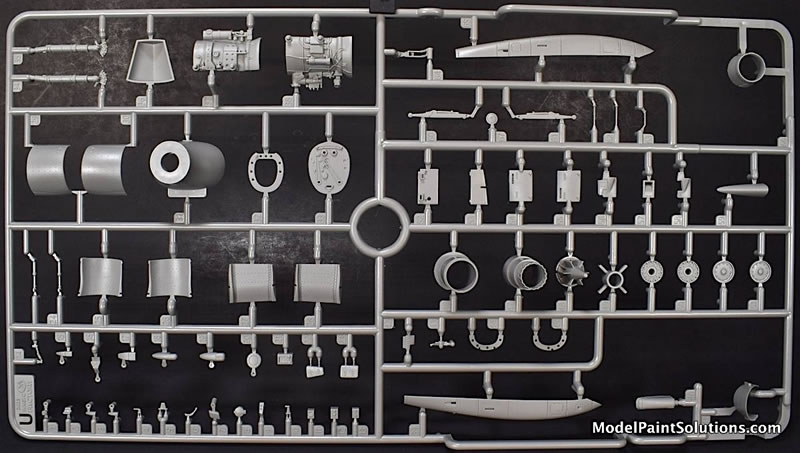
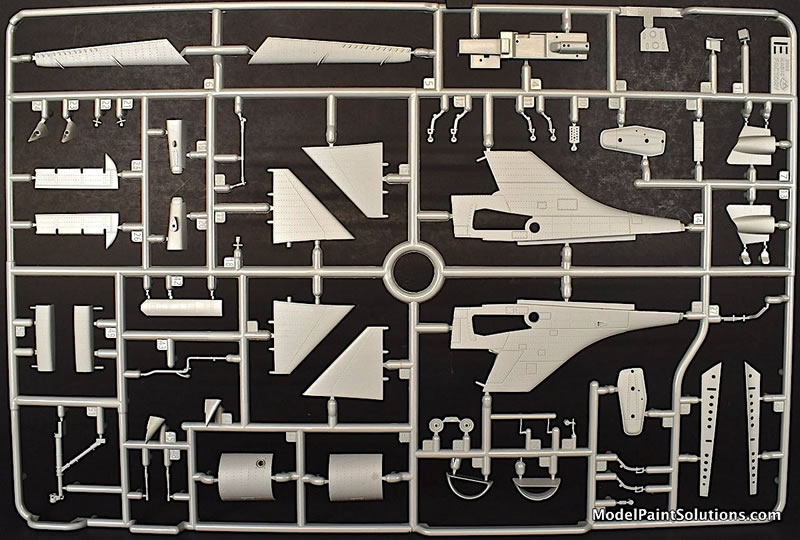
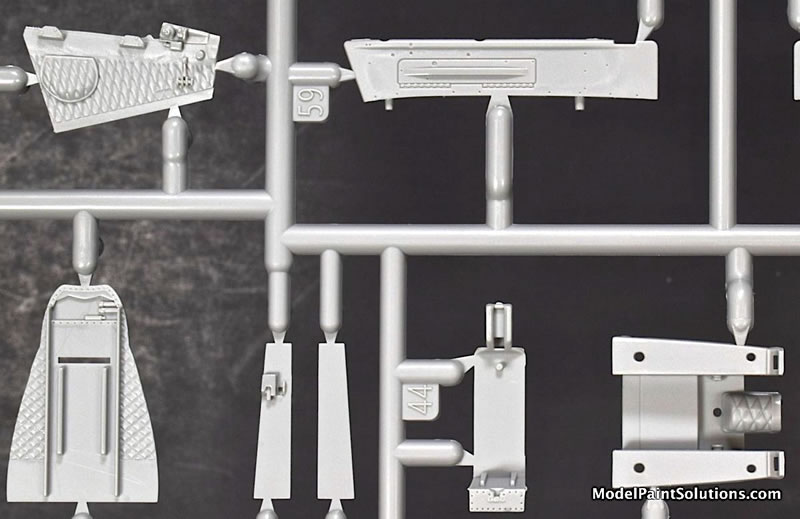
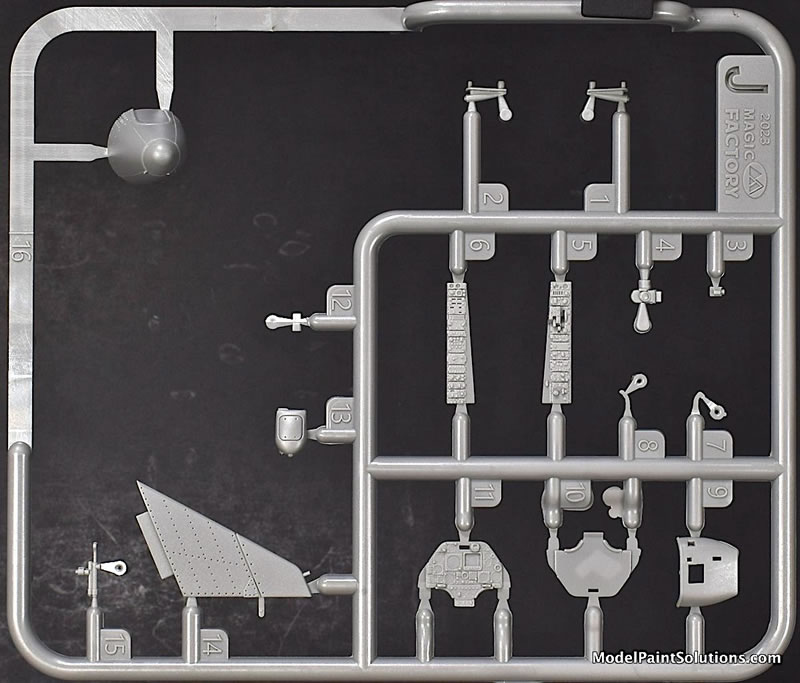
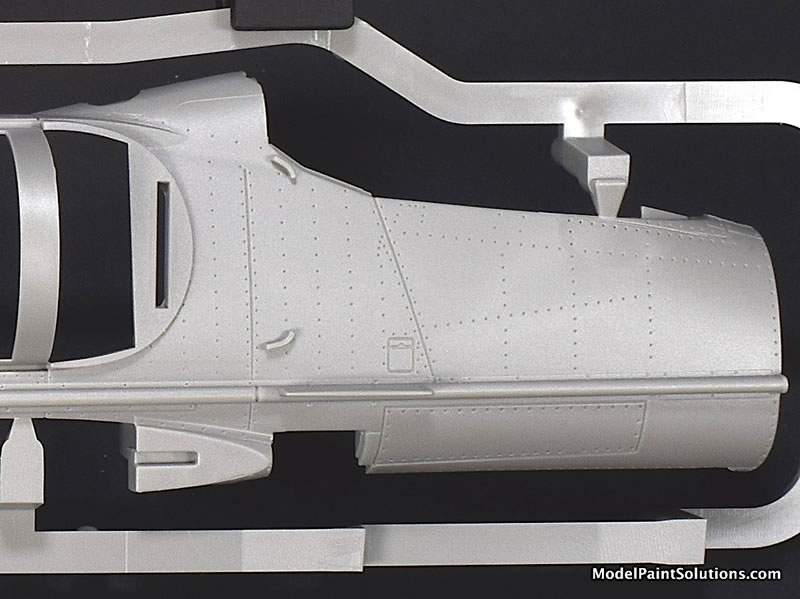
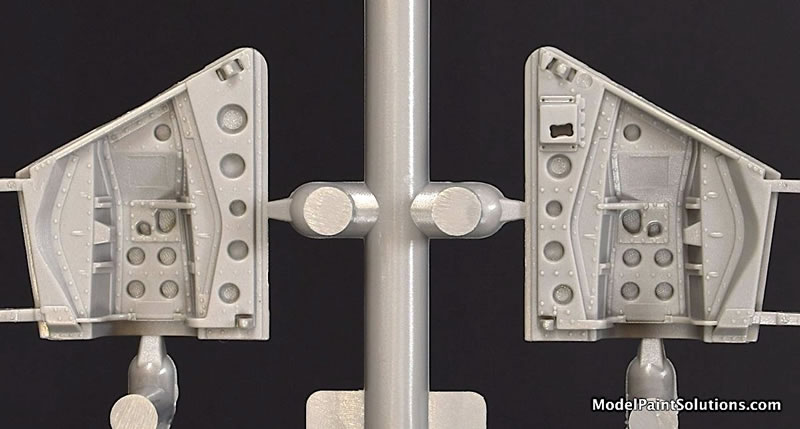
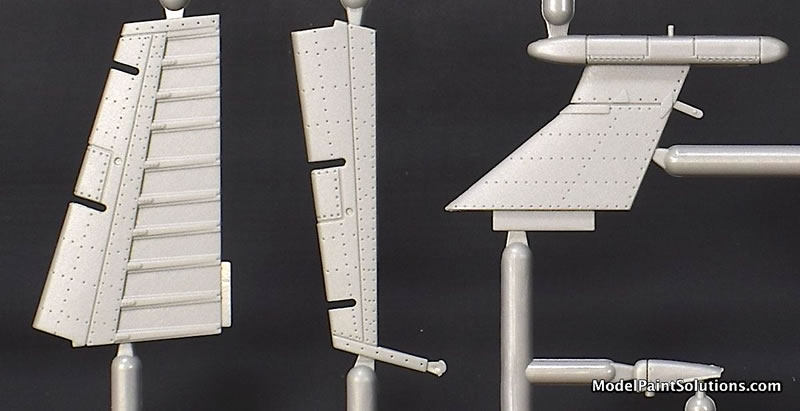
What strikes you after the high parts count is the very nice surface detail, both recessed and in relief. There is no flash, sprue gates are appropriately small, and most parts will require little-to-no refreshing with a blade and files prior to use. There is some very nice molding here that is very much on par with their previous Corsair kit, meaning it’s crisp and very clean.
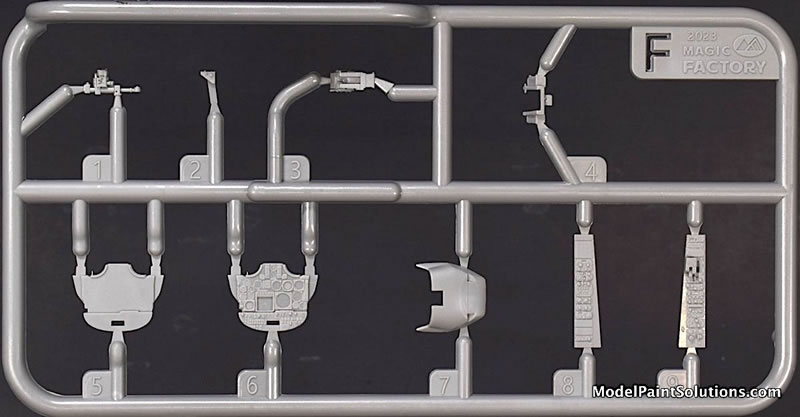
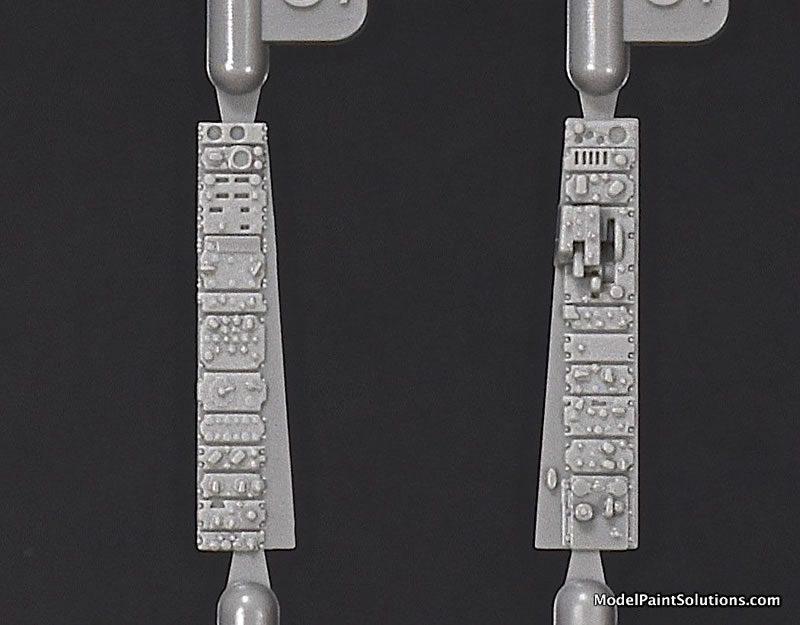
The kit follows conventional engineering so assembly begins with the cockpit where a lot of detail is provided right of the box. The multi-piece ejection seat has the lab belt molded into the seat cushion with separate shoulder straps. Both the main instrument panel as well as the side panels have amazing details molded in that will look very convincing if you’re really good with a brush. If not, details for the main and side panels are also provided via crisply printed decals.

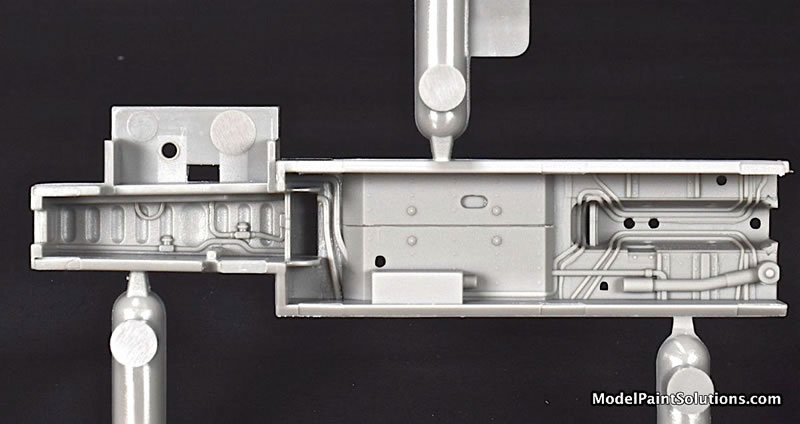
The cockpit assembly sits on top of a very nicely detailed nose wheel well, which is then trapped in between the fuselage halves. In fact, all of the wheel wells and wheel well doors are beautifully molded and will look awesome under a coat of paint and a wash.
During assembly of the fuselage, pieces that replicate parts of the engine that are seen through opened access doors, are added in preparation for posing the section open should you choose.

Ditto that for the nose section and radome, each of which can be built with multiple access doors opened (complete with details) and in the raised (for maintenance) or lowered positions. An impressive list of the various access doors and such that can be built in the opened or closed positions is provided below.
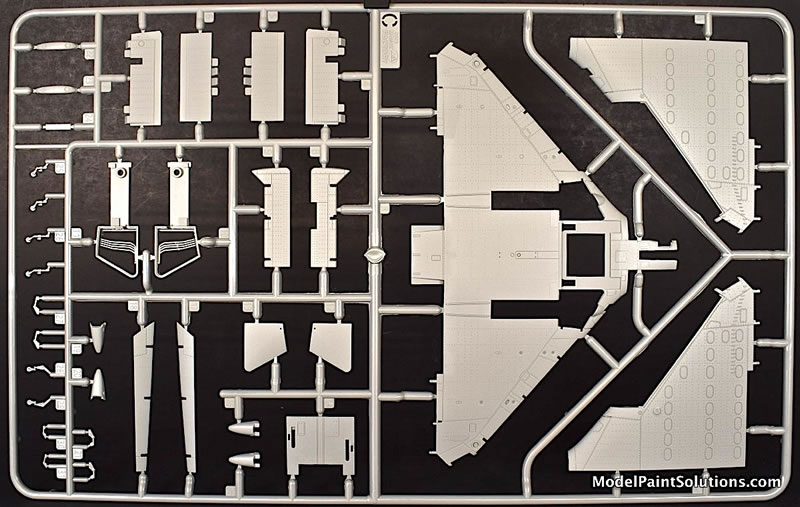
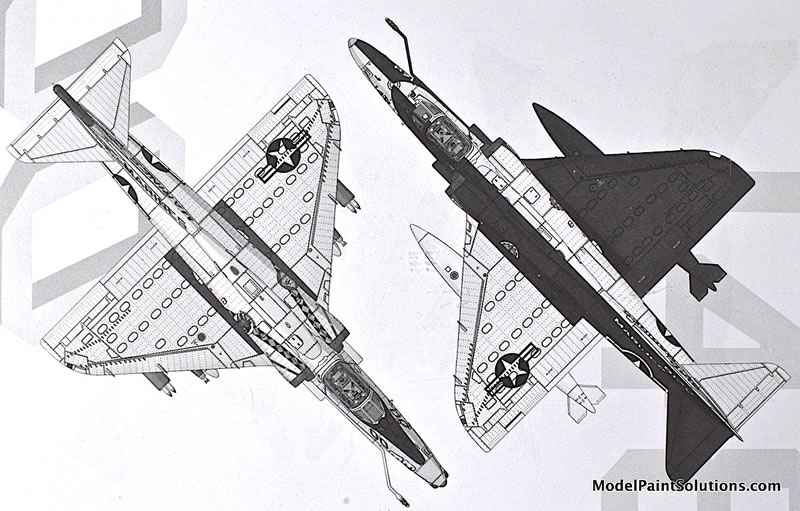
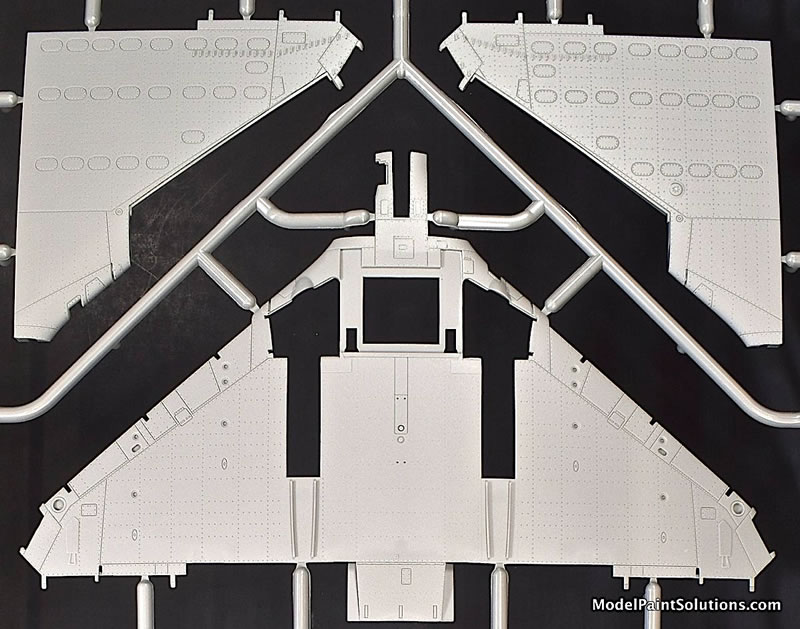
The wing is comprised of a full-span lower wing with left and right upper halves. As with the fuselage, the surface detail is just beautiful. Most notably, the wing can be built with the flaps up or down, ailerons neutral or deflected, spoilers closed or open, and the slats up or deployed. Really. A tip of the hat to the folks at the Magic Factory for taking on such a complex wing and giving the builder so many choices; well done.
Moving on to the landing gear I find the only thing in this box that gives me a moment of pause—vinyl tires……Now some folks do well with vinyl tires but, in general, I’m not one of them. I have no doubt resin replacements will quickly become available in the form of aftermarket parts.
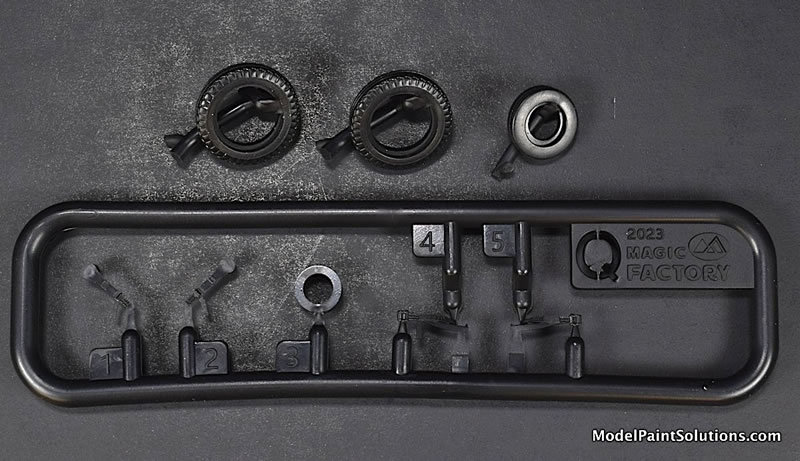
Beyond the tires, the gear is like the rest of the kit, an example of very high-end, injected plastic. The details on the gear legs are crisp, scale appropriate, and will look awesome under paint.
With the amazing level of detail within the wheel wells and gear doors, the landing gear will be a focus of the assembled model.
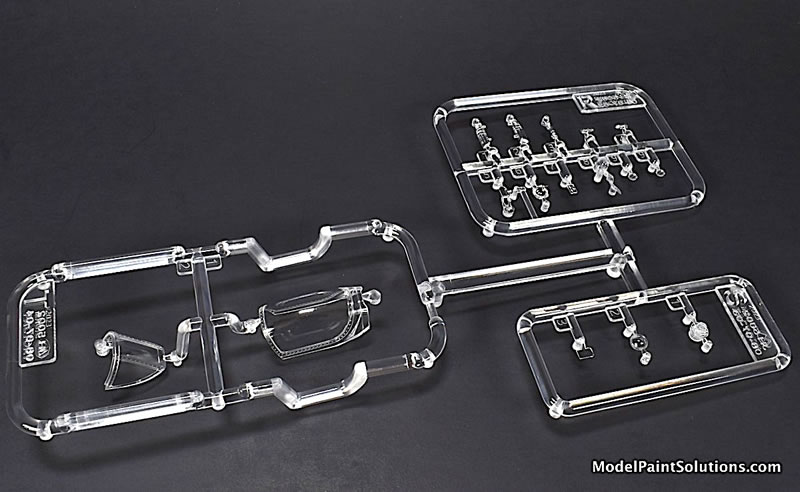
Clear Parts
The windscreen and main canopy parts are beautifully molded and crystal clear.
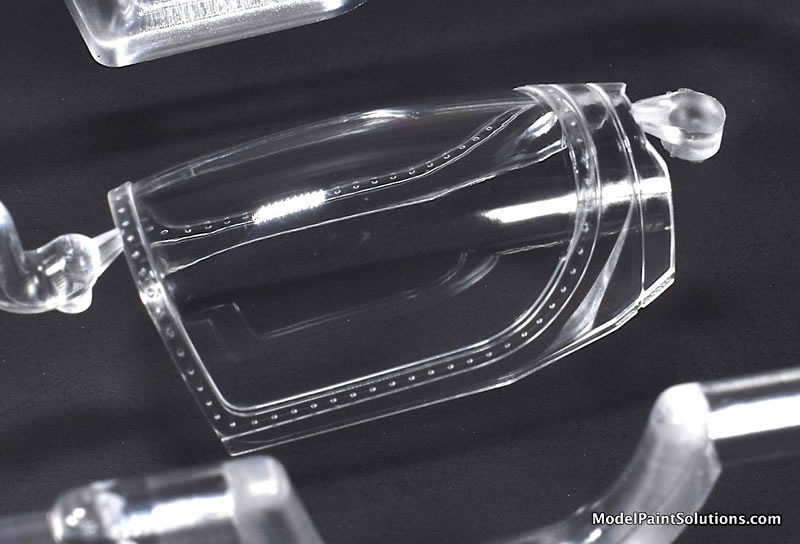
The inner aspect of the canopy is augmented with additional styrene details as well as shiny stickers that replicate rear-view mirrors—very nice.
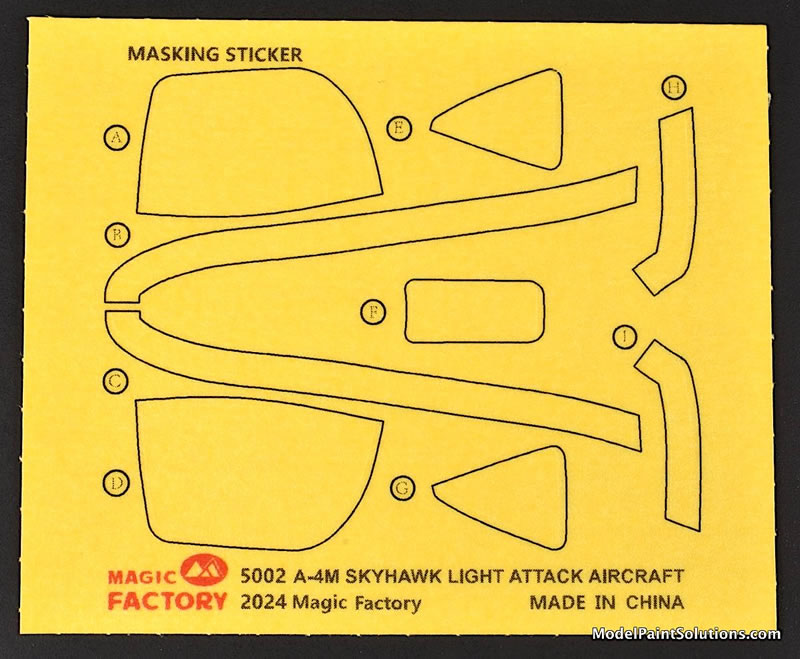
Quality die-cut masks are also provided.
Building Options
1) Early or Late Cockpit: A quick comparison reveals differences between the main instrument panel, side panels, and gun sight.
2) Open or Closed Engine Access Doors: Parts are provided to pose the access doors on each side of the fuselage just aft of the intakes in the open position. Nicely detailed engine panels, installed inside the fuselage, provide the required details—very nice.
3) Early or Late Pilot Sun Visor Assembly: These assemblies are part of the early vs late gunsight option.
4) Wing Spoilers Opened or Closed. This is a very nice option and one not found on previous kits to my knowledge. Modification of the wing is required during assembly.
5) Flaps Up or Down: Slight modification of the wing is required during assembly.
6) With or Without Wing Cannons: Should you wish to not add the cannons in the wing roots, appropriate leading edge fairings w/out gun ports are provided.
7) Slats Retracted or Deployed: Should you wish to build your Skyhawk with the slats deployed, the guide rails (visible when slats are deployed) are provided—another very nice.
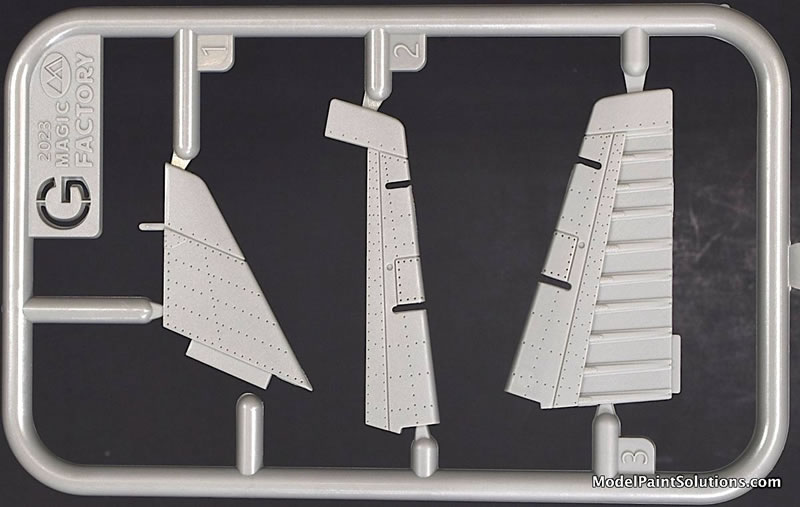
8) Elevators Neutral or Drooped: The elevators are separate from the horizontal stabilizers permitting them to be posed neutral or ?
9) Early or Late Rudder Assembly: The later rudder has an electronic pod on top of the vertical stabilizer versus the early version.
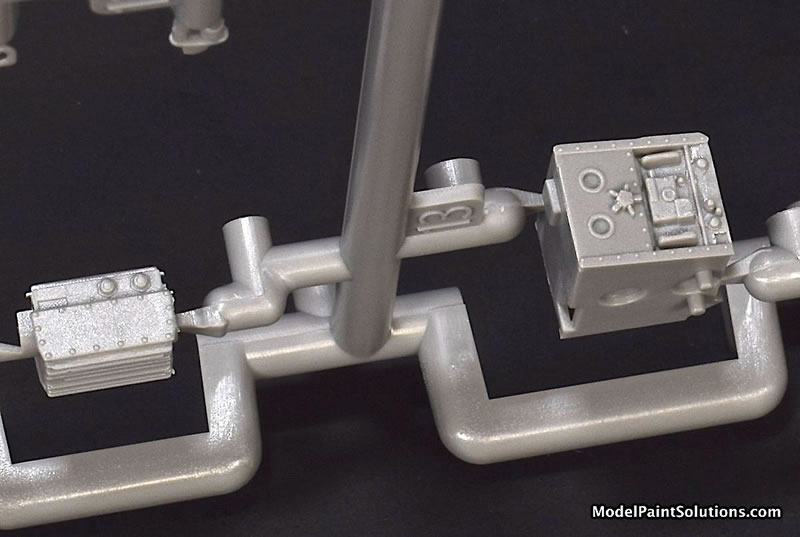
10) Early or Late Upper Avionics Package: There are differences between early and late versions of the avionics package located on the dorsal fuselage just aft of the cockpit.
11) Ailerons Neutral or Deflected:‘Nuff said.
12) Ram Air Turbine Closed or Opened: The Ram Air Turbine (RAT), located on the starboard ventral fuselage, can be posed closed or opened. Should you opt for open, a very well detailed, multi-part RAT is provided—yet, another very nice.
13) Early versus Late Nose Gear: There is a difference in what appears to be the nose gear shimmy dampener. Appropriate parts for both versions are provided.
14) Early versus Late Nose Wheel Well Door:
15) Speedbrakes Opened or Closed: Should you opt for the opened position, the speedbrakes are very detailed as is the inner portion of the speedbrake wells. This will be a head turning feature of the built kit.
16) Nose Electronic Compartment: The access doors on each side of the nose just ahead of the cockpit can be posed open to reveal a very detailed array of avionics boxes.
17) Nose Section Opened or Closed: The entire nose section just ahead of the cockpit is hinged at the top permitting the nose to be raised during maintenance. If you choose raised, a nicely-detailed hinge mechanism is provided.
18) Early or Late Radome Assembly: There are notable differences between the early and late radome assemblies. As with the nose section, both the early and late radomes can be posed in the closed or opened position.
19) Canopy Closed or Opened:
20) Air Inlet Covers: A set of inlet covers with grab handles is provided. This is a very nice touch.
21) Boarding Ladder: The very nicely detailed, three-piece boarding ladder will look awesome along with the canopy posed open.
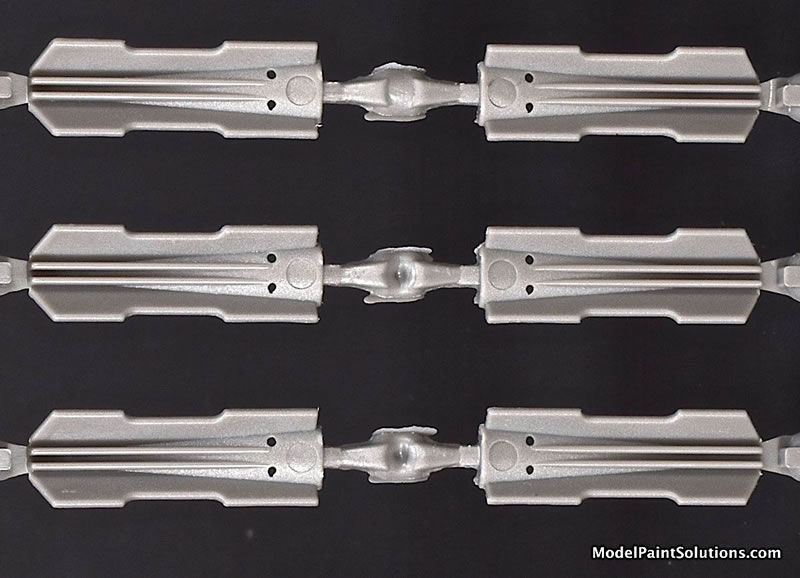
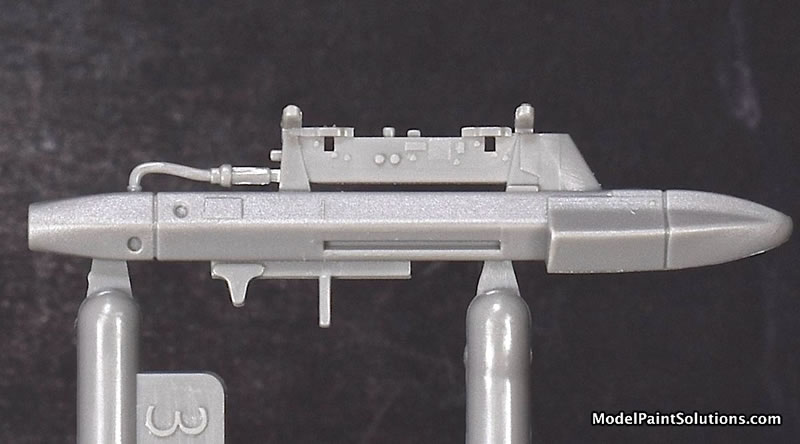
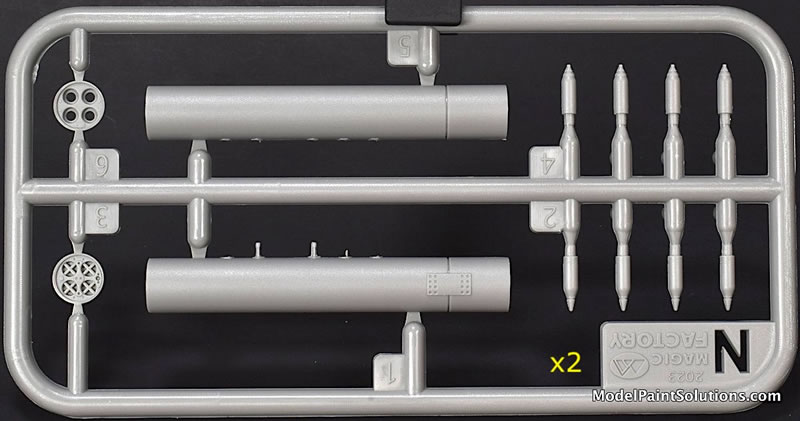
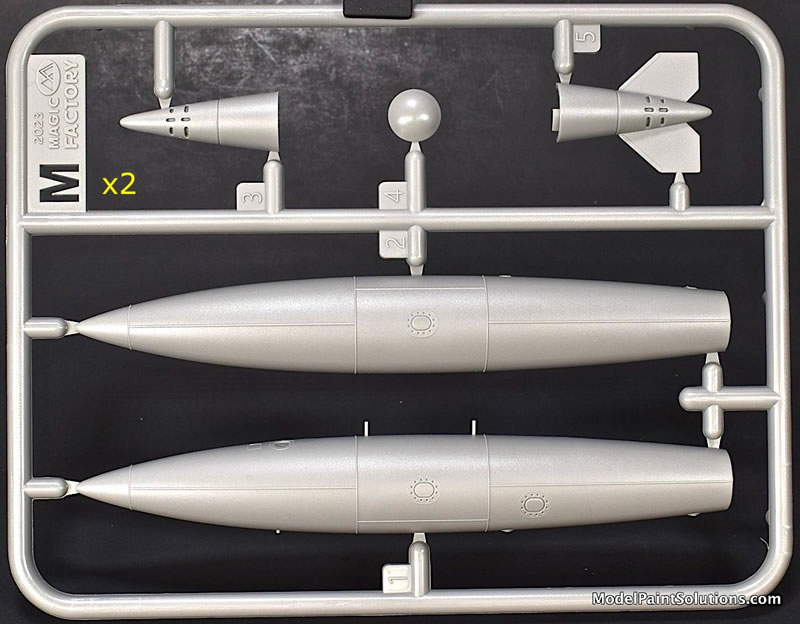
22) Parts are provided for the following underwing stores. Note that each of these parts is comprised of multiple, detailed pieces:
-
Drop Tanks
-
LAU/10A Zuni Rocket Pods
-
Mk. 82 500lb Bombs
-
Mk. 81 “Snakeye” 250lb Bombs
-
Triple Ejector Racks (TER)
-
Multiple Ejector Racks (MER)
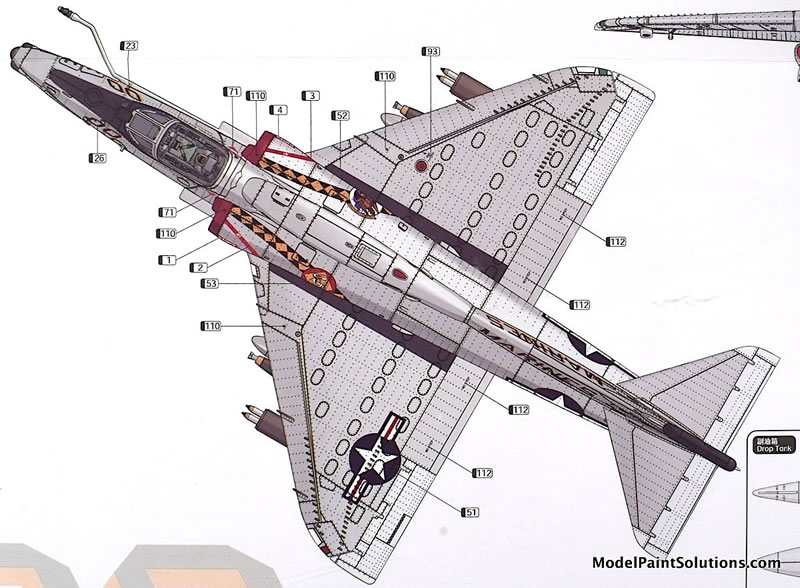
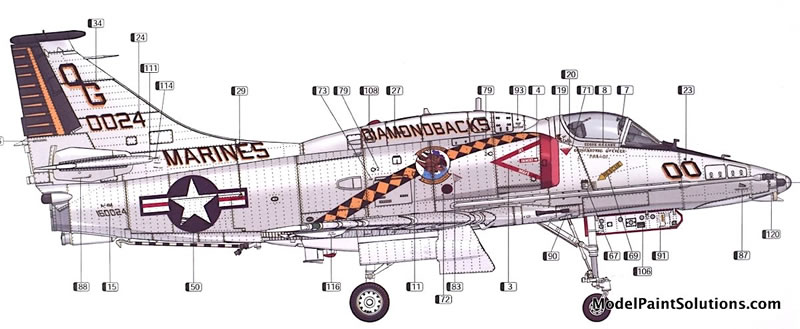
Color and Markings
The decals, by Cartograf, are crisply printed with good registration and color density.
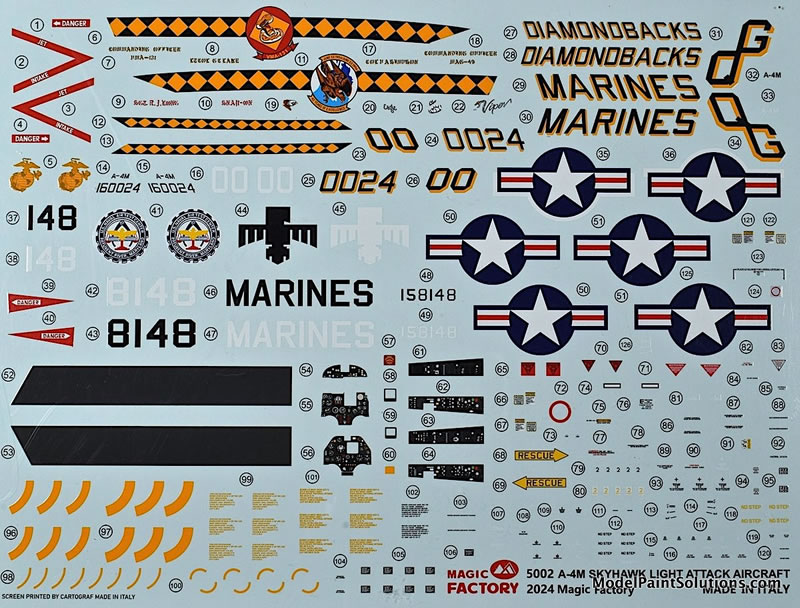
Markings are provided for two very colorful schemes and airframe stencil data for one aircraft.
Uh….Wowza—I need a libation. We airplane guys have been blessed with an abundance of amazing models in the last few years, have we not? If you’re a Scooter fan, you’ll want to pick one of these up. The details are abundant, crisp, and consistent throughout the model; from fuselage to wings to ordinance. If this kit builds half as well it looks, it’ll be a dream. That said, you’ll want to study the well-illustrated instructions prior to committing with glue; there are many (many….) options that will require thinking ahead with regards to shooting primer and paint. For Scooter fans, this kit is a must.. For the rest of the aviation-minded, Very Highly Recommended!
Keep your airbrush wet!
John
For more on this review visit ModelPaintSolutions.com
Text and images copyright ©2024 by John Miller/Model Paint Solutions.
Review Text and Images Copyright © 2024 by John Miller
Page Created 23 August, 2024
Last updated
23 August, 2024
Back to HyperScale Main Page
Back to Reviews Page

|
 Home
| What's New |
Features |
Gallery |
Reviews |
Reference |
Forum |
Search
Home
| What's New |
Features |
Gallery |
Reviews |
Reference |
Forum |
Search