Messerschmitt Me 163 B-1
Komet
GasPatch Models, 1/72 scale
S
u m m a r y : |
Description and Item No.: |
GasPatch Kit No. 72317 - Messerschmitt Me 163 B-1 Komet |
Contents and Media: |
Grey 3d printed parts; three injection moulded clear plastic parts; self-adhesive vinyl masks; colour instructions. |
Price: |
36 Euro plus shipping available online from GasPatch Models' web store |
Scale: |
1/72 |
Review Type: |
First Look |
Advantages: |
An amazing level of detail is apparent on practically every part. This will be a stunningly detailed model when assembled. |
Disadvantages: |
Prior experience working with 3-D printed parts is advisable. |
Recommendation: |
Wow, what’s to say! I’m out of superlative adjectives.
This is the most detailed 1/72nd scale kit that I have ever seen—period. The high level of detail maintained throughout the kit is nothing short of amazing.
Once assembled, with the canopy and gun bays in the opened positions, this is going to be a stunning kit. Just be sure to have some good light and a pair of magnifying glasses before getting started.
Highly Recommended! |
Reviewed by John Miller

I spent many (many) hours taking pics of the GasPatch Me-163 for this review; more hours than on any other kit of this scale I’ve reviewed previously. This is due to both the high number of parts as well extra time spent setting up shots so all the detail could be captured—on practically every part……There are details so fine, they’re hard to see without good magnification or zooming the pictures of some parts with PhotoShop—really. In my experience, this is simply the most detailed 1/72 scale model that I have ever seen.
Except for the canopy parts, the kit is entirely the product of 3-D printing. This is not your grandfathers old Heller Me 163 nor is it your fathers’ Academy Komet. The GasPatch -163 is a different critter entirely. Between the state-of-the-art 3-D printing, crystal-clear injected canopy parts, and quality decals, I suspect this kit will be high in the running for Best 1/72 Kit of the Year.
Thank You, Gas Patch!
Background
The Messerschmitt Me 163 Komet is a rocket-powered interceptor aircraft primarily designed and produced by the German aircraft manufacturer Messerschmitt. It is the only operational rocket-powered fighter aircraft in history as well as the first piloted aircraft of any type to exceed 1,000 kilometres per hour (620 mph) in level flight.
Development of what would become the Me 163 can be traced back to 1937 and the work of the German aeronautical engineer Alexander Lippisch and the Deutsche Forschungsanstalt für Segeflug (DFS). Initially an experimental program that drew upon traditional glider designs while integrating various new innovations such as the rocket engine, the development ran into organizational issues until Lippisch and his team were transferred to Messerschmitt in January 1939. Plans for a propeller-powered intermediary aircraft were quickly dropped in favor of proceeding directly to rocket propulsion. On 1 September 1941, the prototype performed its maiden flight, quickly demonstrating its unprecedented performance and the qualities of its design. Having been suitably impressed, German officials quickly enacted plans that aimed for the widespread introduction of Me 163 point-defense interceptors across Germany. During December 1941, work began on the upgraded Me 163B, which was optimized for large-scale production.
During early July 1944, German test pilot Heini Dittmart reached 1,130 km/h (700 mph), an unofficial flight airspeed record that remained unmatched by turbojet-powered aircraft until 1953. That same year, the Me 163 began flying operational missions, being typically used to defend against incoming enemy bombing raids.
As part of their alliance with the Empire of Japan, Germany provided design schematics and a single Me 163 to the country; this led to the development of the Mitsubishi J8M. By the end of the conflict, roughly 370 Komets had been completed, most of which were being used operationally. Some of the aircraft's shortcomings were never addressed, and it was less effective in combat than predicted.
Capable of a maximum of 7.5 minutes of powered flight, its range fell short of projections and greatly limited its potential. Efforts to improve the aircraft were made (most notably the development of the Messerschmitt Me 263, but many of these did not see actual combat due to the sustained advancement of the Allied powers into Germany in 1945.
After being introduced into service the Me 163 was credited with the destruction of between 9 and 18 Allied aircraft against 10 losses. Aside from the actual combat losses incurred, numerous Me 163 pilots had been killed during testing and training flights. This high loss rate was, at least partially, a result of the later models' use of rocket propellant, which was not only highly volatile but also corrosive and hazardous to humans.
One noteworthy fatality was that of Jose Pöhs, a German fighter ace and Oberleutnant in the Luftwaffe, who was killed in 1943 through exposure to T-Stoff in combination with injuries sustained during a failed takeoff that ruptured a fuel line.
Besides Nazi Germany, no nation ever made operational use of the Me 163; the only other operational rocket-powered aircraft was the Japanese Yokosuka MXY-7 Ohka, which was a manned flying bomb.
Text edited from Wikipedia.
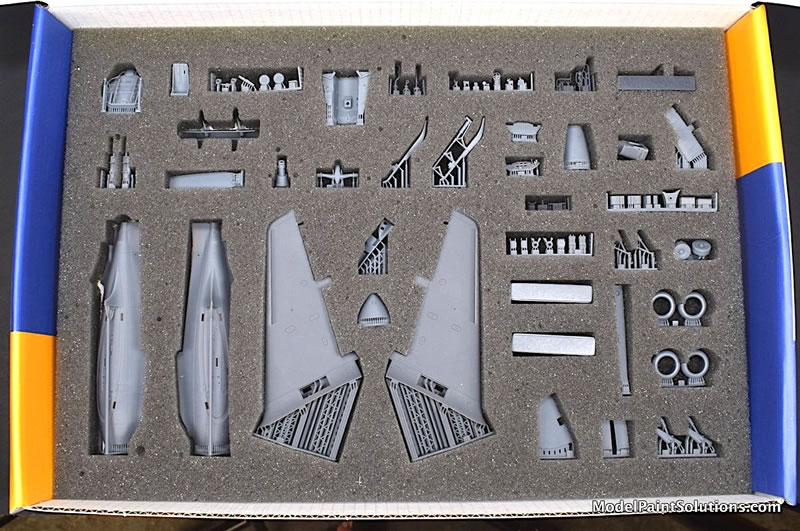
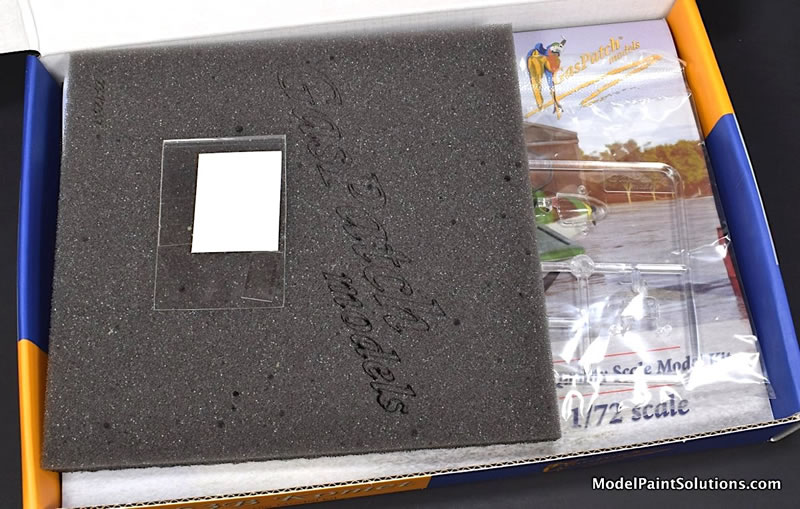
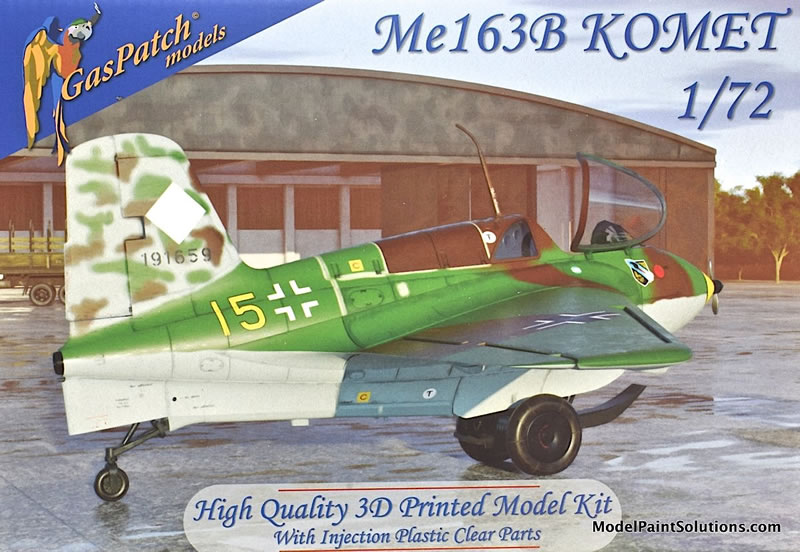
The packaging of this kit is the best I’ve ever seen. The kit comes in a very sturdy, top-opening box with a very attractive depiction of an Me 163 B sitting on the ramp, canopy open, looking ready to launch. Once opened, you’re greeted with a piece of grey foam with a laser-etched “Gas Patch” logo that in itself is pretty amazing. Under the foam is the kits hefty and very-well written instruction booklet and under that is a feast for the modelers eyes; a piece of grey foam within which every part or group of parts is held in it’s own, tight fitting, laser-cut, hole. Amazing.
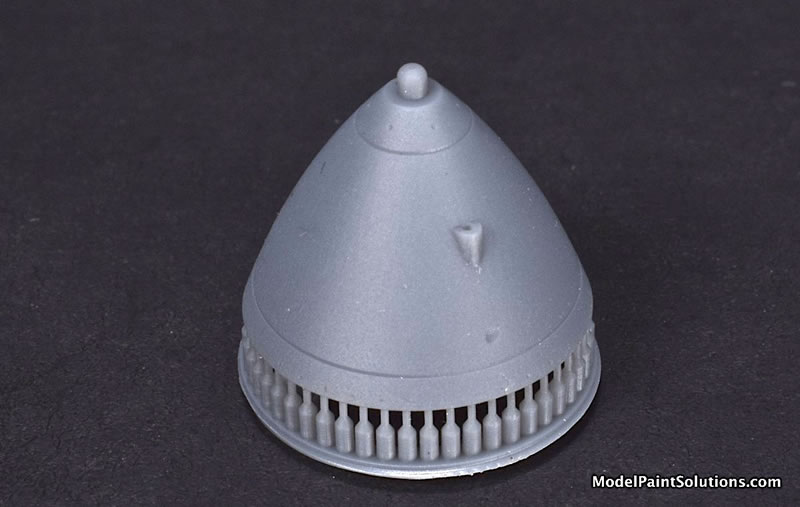
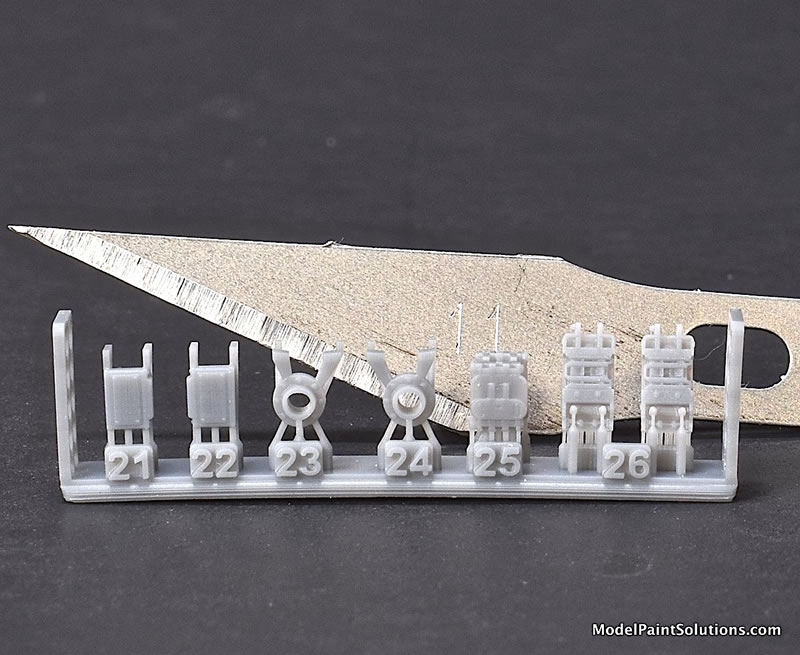
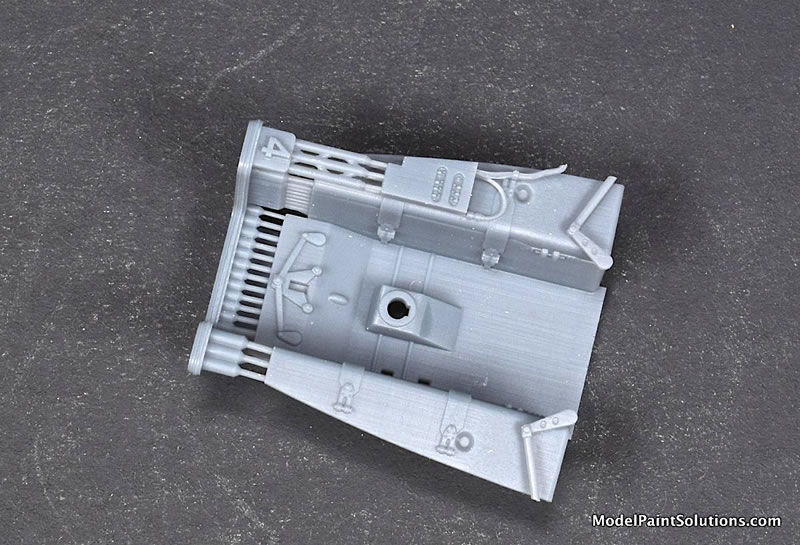
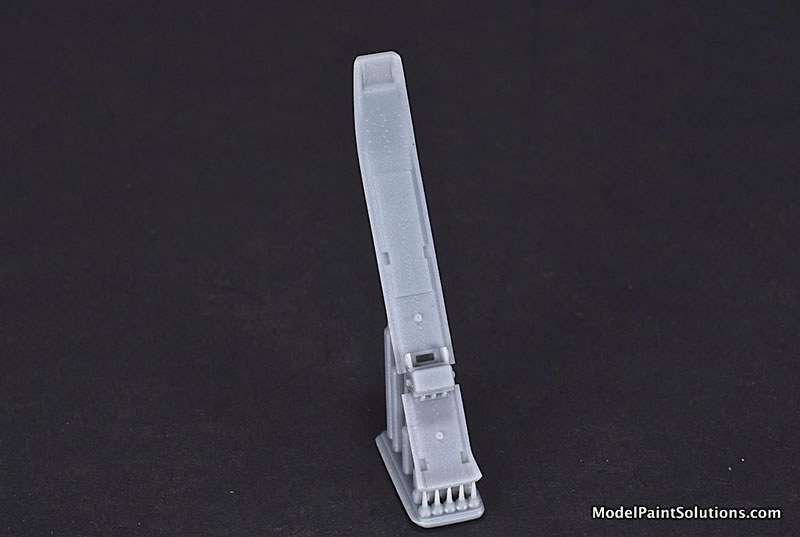
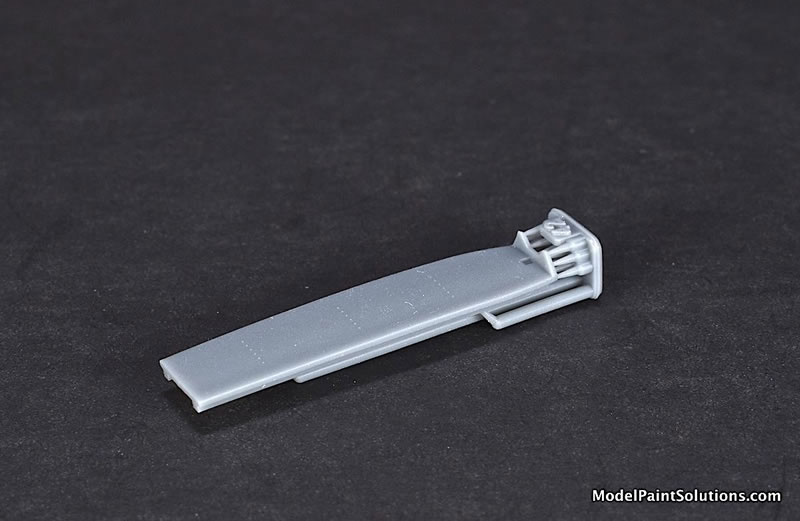
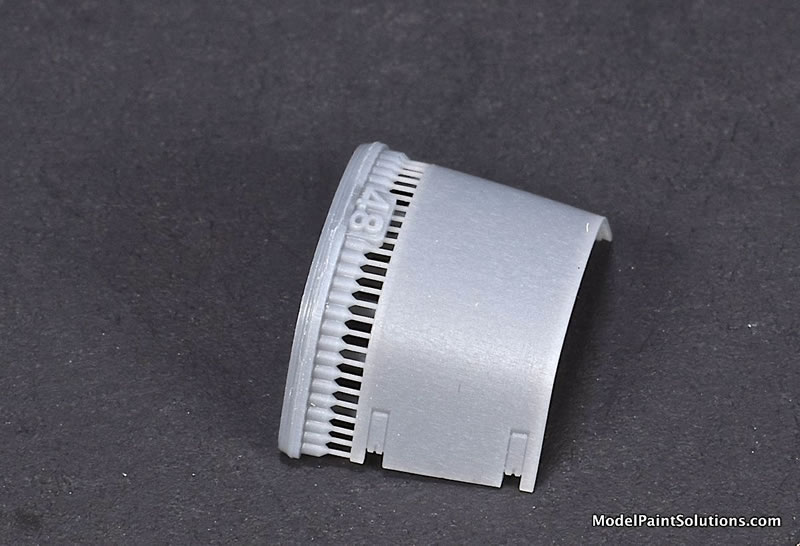
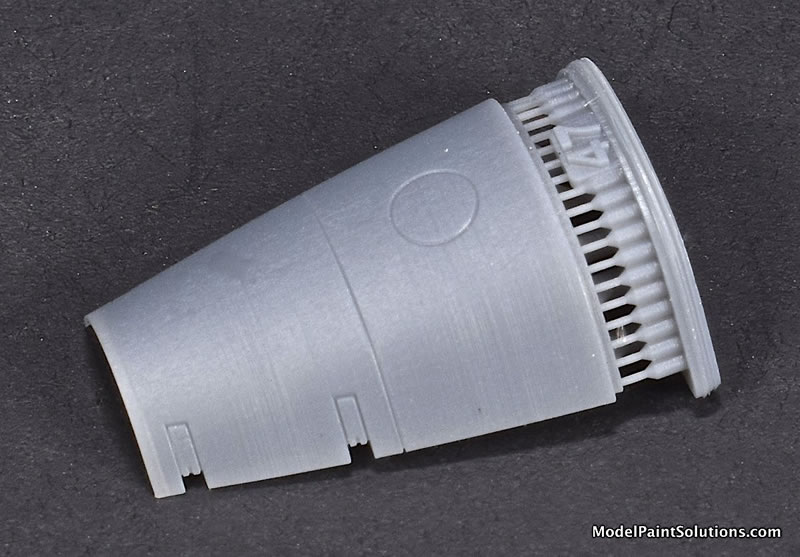
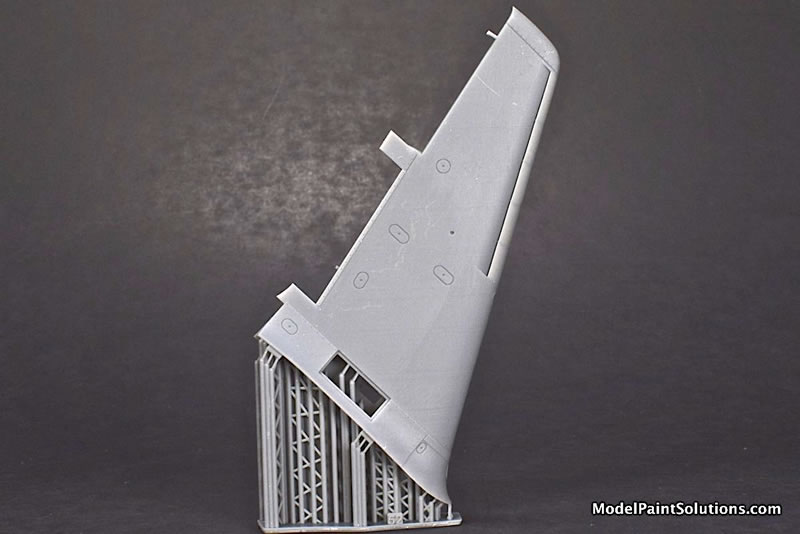
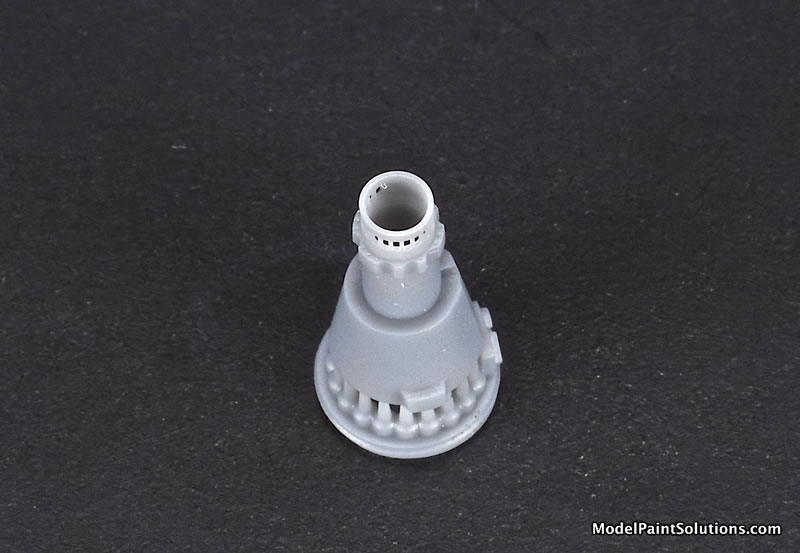
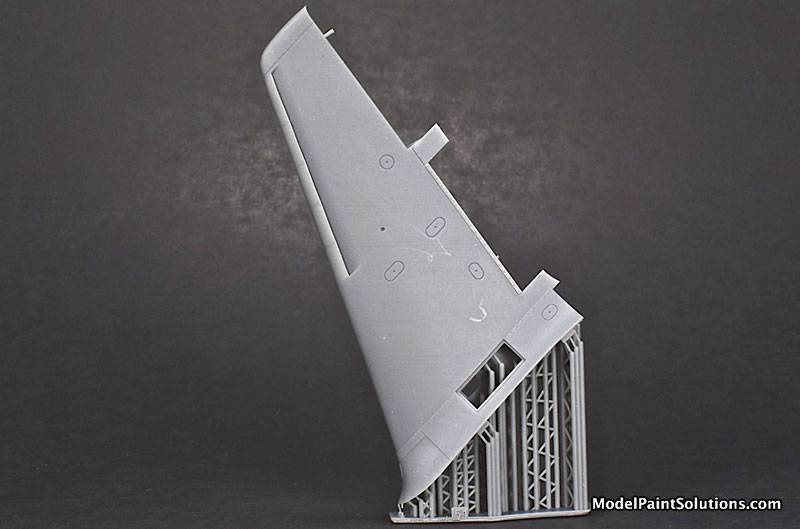
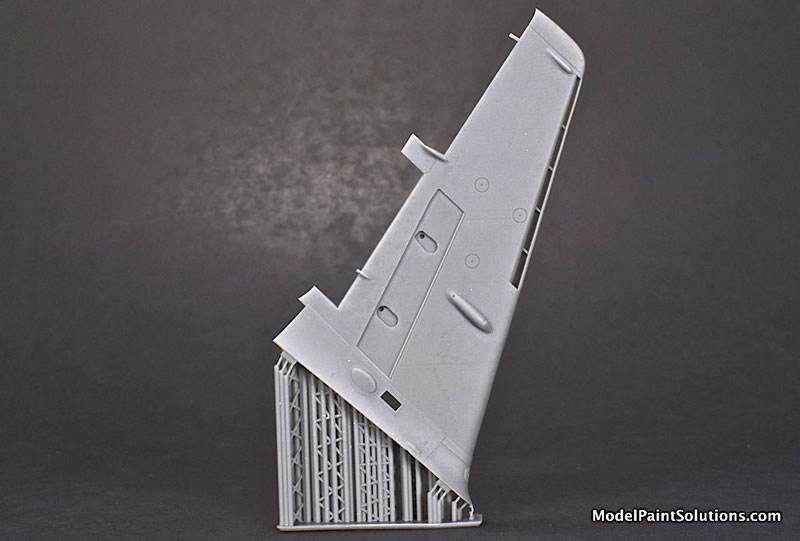
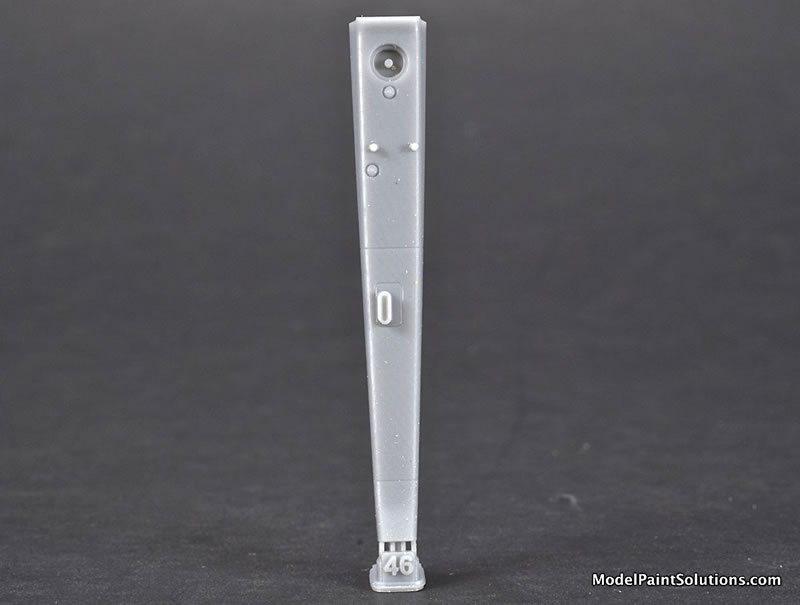
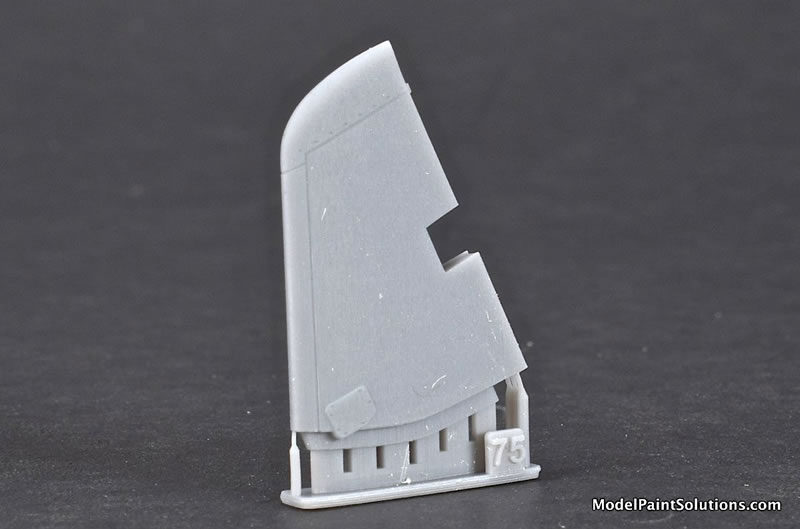
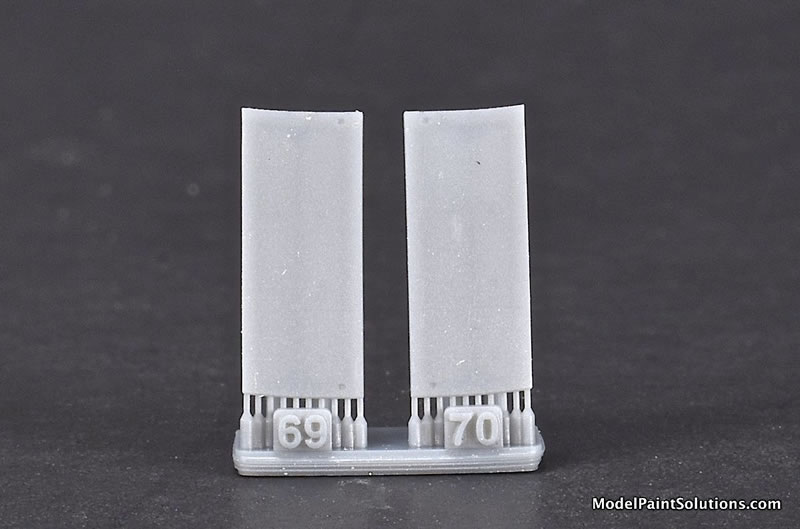
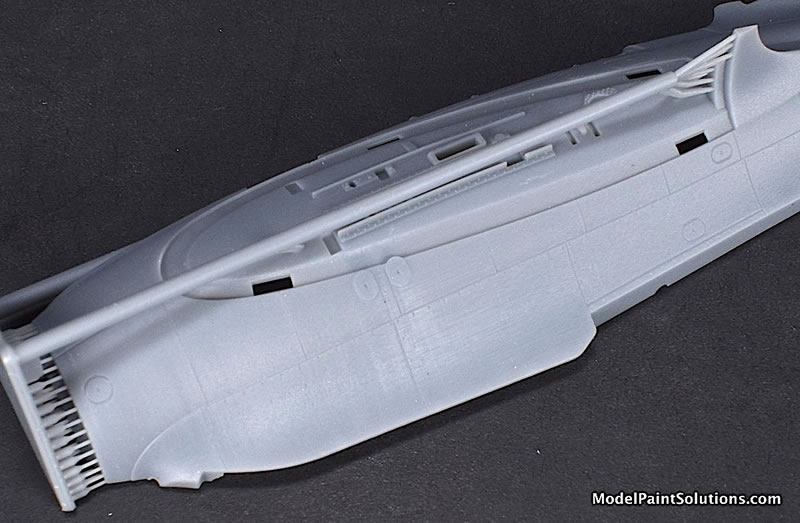
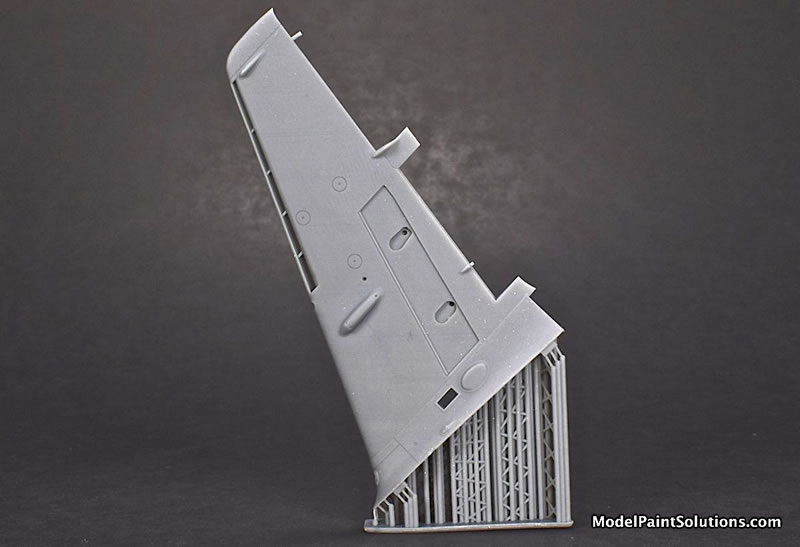
Surface details are scale-appropriate and amazingly crisp. Details rendered in relief (raised panels, etc) are also crispy rendered. “Crisp” is the word. In addition, the “layer lines” or “woodgrain” effect, so common on kits produced with first generation 3-D printing technology, are practically gone. Only on the ailerons and flaps could I detect layer lines and only then under a correctly angled, bright light. Whatever layer lines there are, they are sufficiently minor so as to be filled with a good coat of primer.
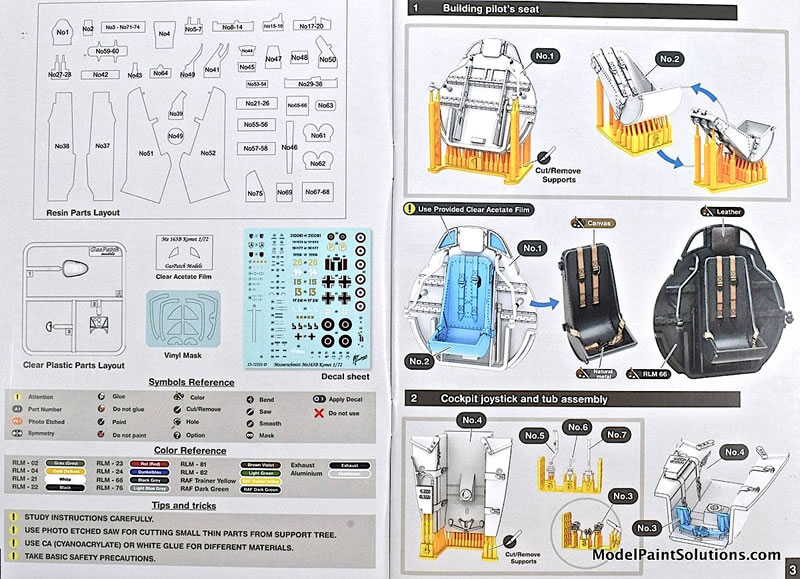
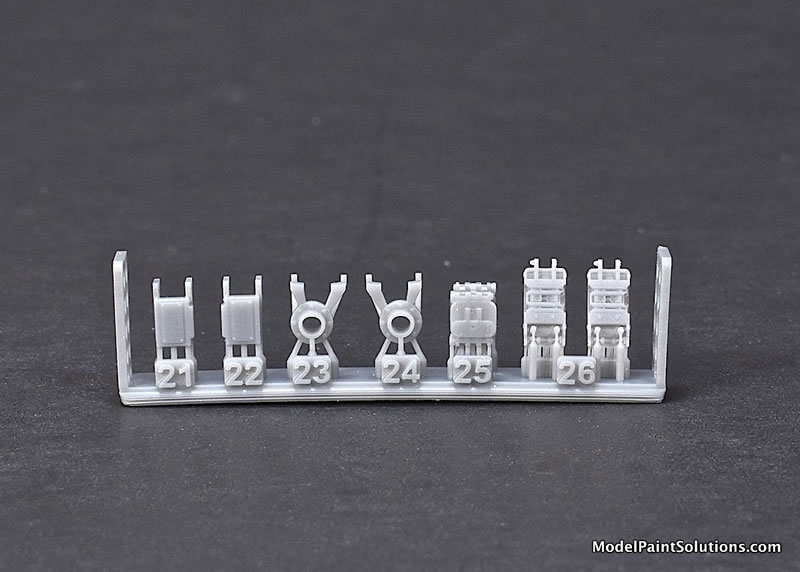
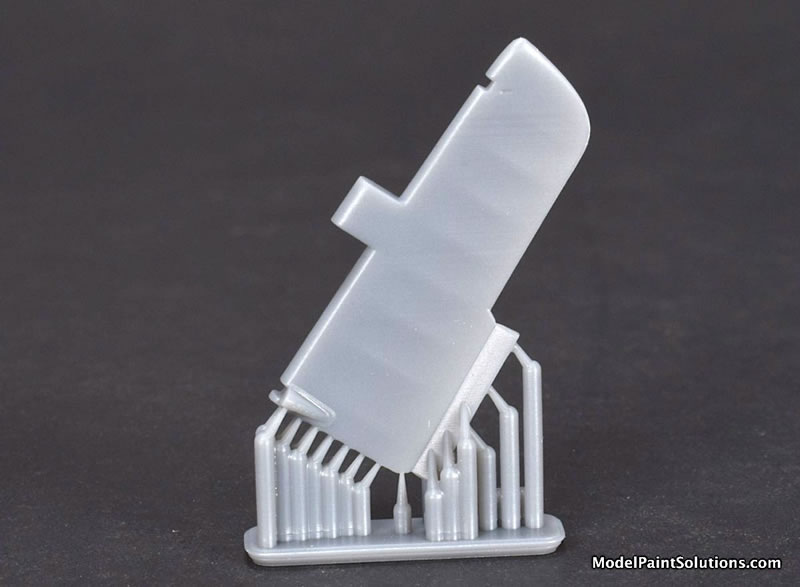
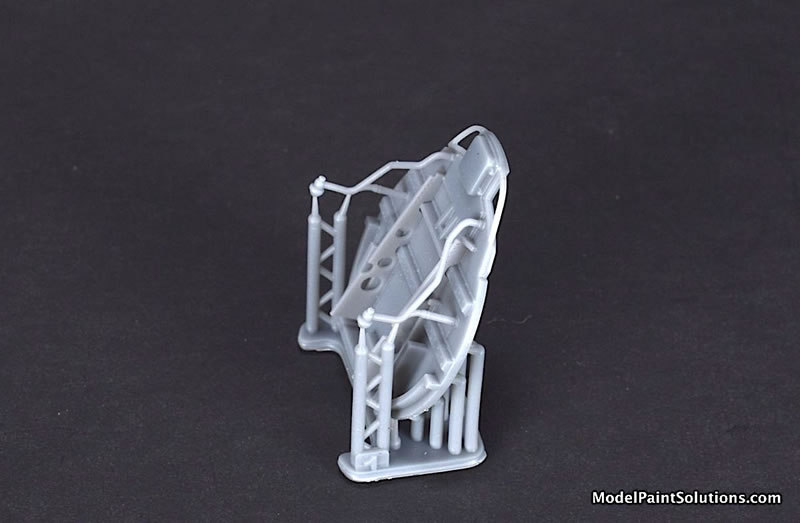
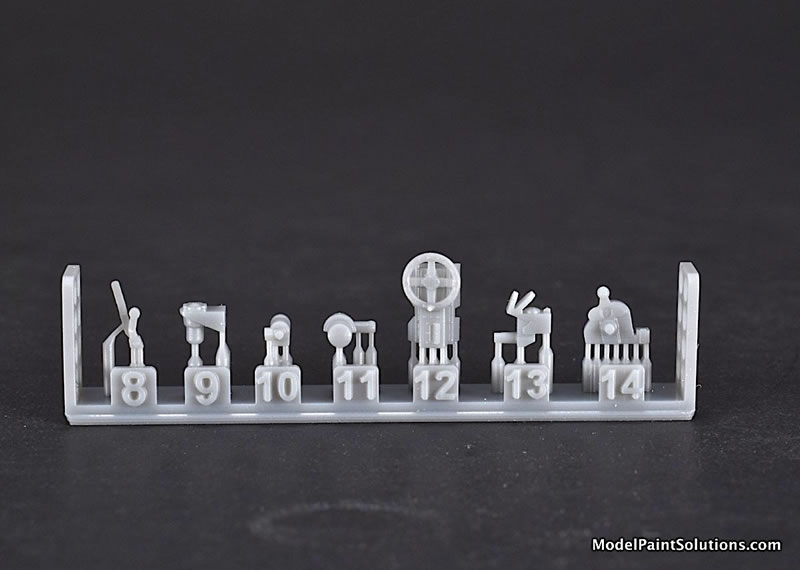
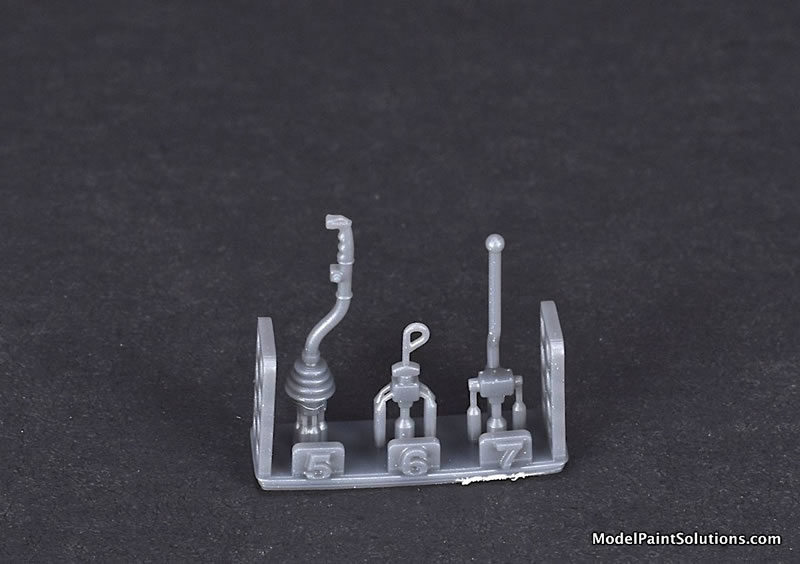
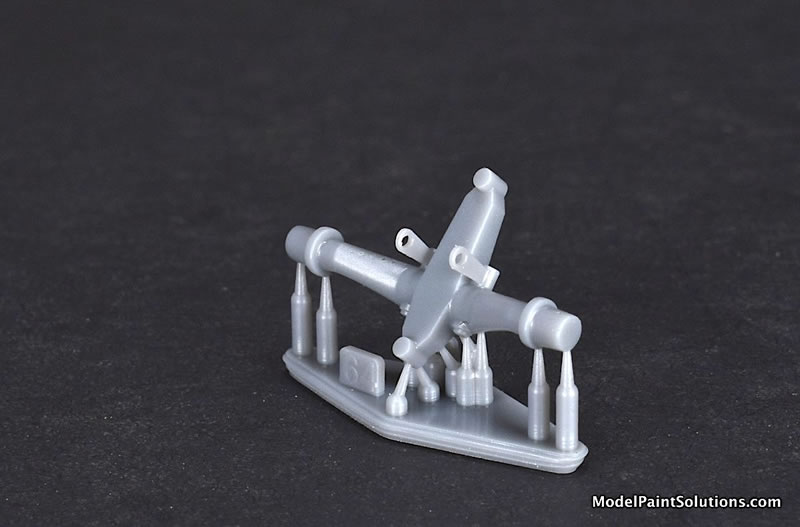
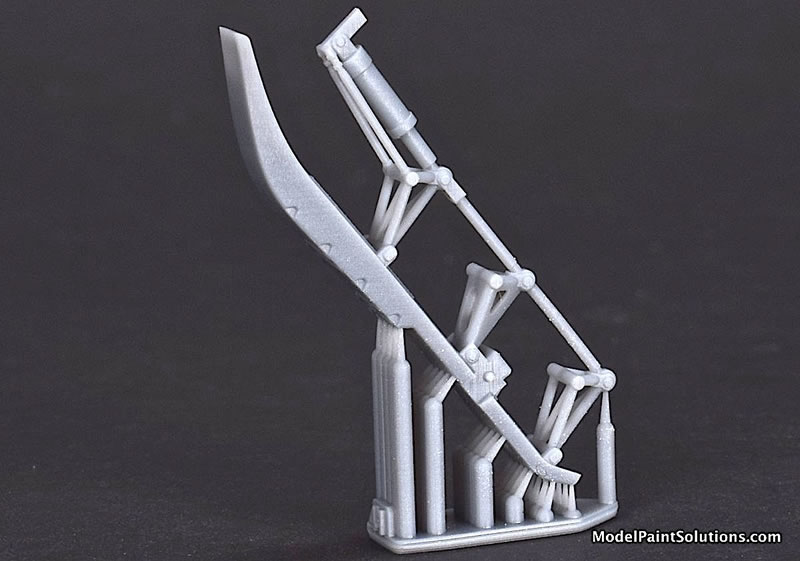
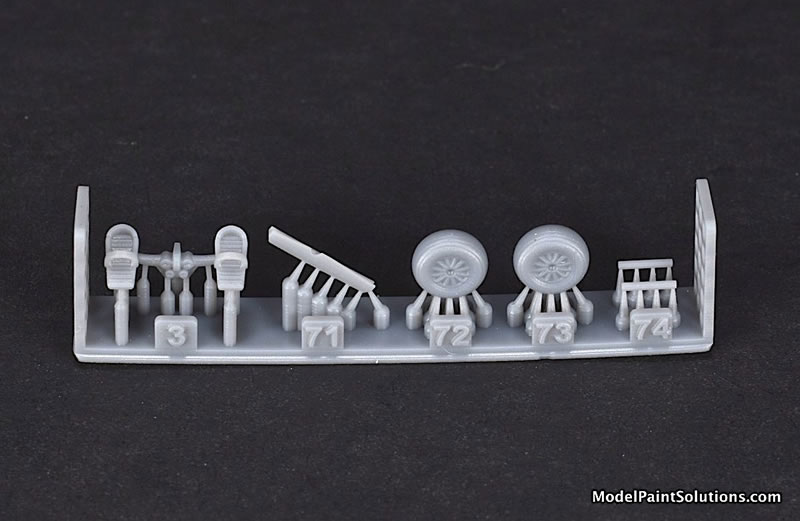
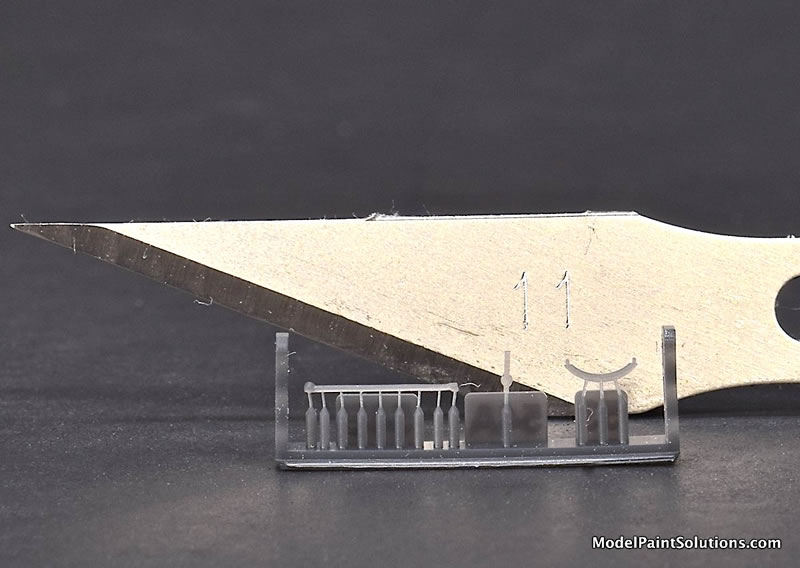
All the parts are surrounded by a fine latticework of resin; a consequence of being a product of 3-D printing. I suspect the primary challenge of building this kit will be the removal of this latticework from each part. Considering the very small size of some of the parts, a bright light with good magnification, a sharp blade, and micro files will probably come in handy. To help with this process the very well-done assembly booklet provides color-coded pictures of each part with the latticework that must be removed highlighted in yellow; very nice.
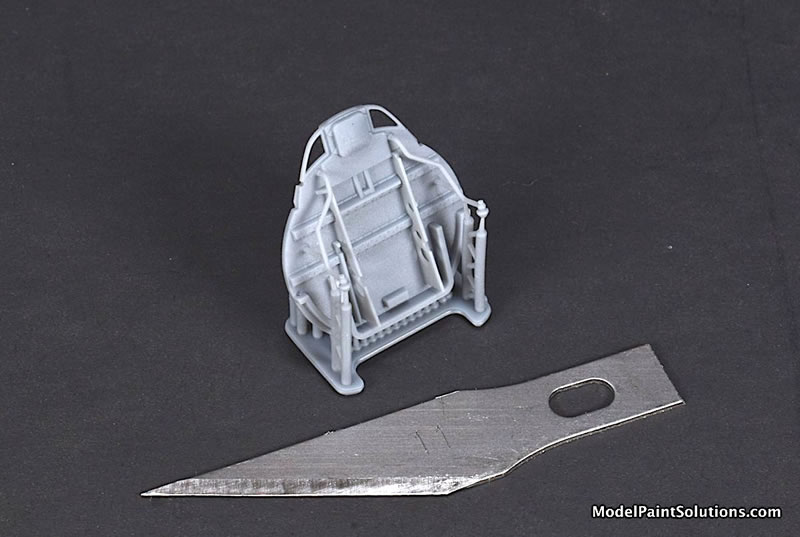
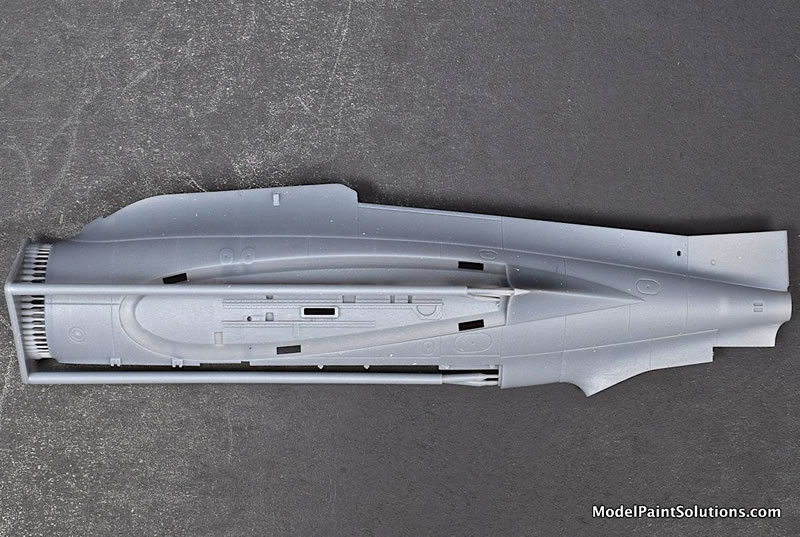
The overall layout of the parts is conventional with a cockpit assembly, left and right fuselage halves, single-piece wings and vertical stabilizer. As with more conventional kits, assembly begins with the cockpit where this kit provides as much detail as one could expect from a quality 1/48 scale kit. Unreal.
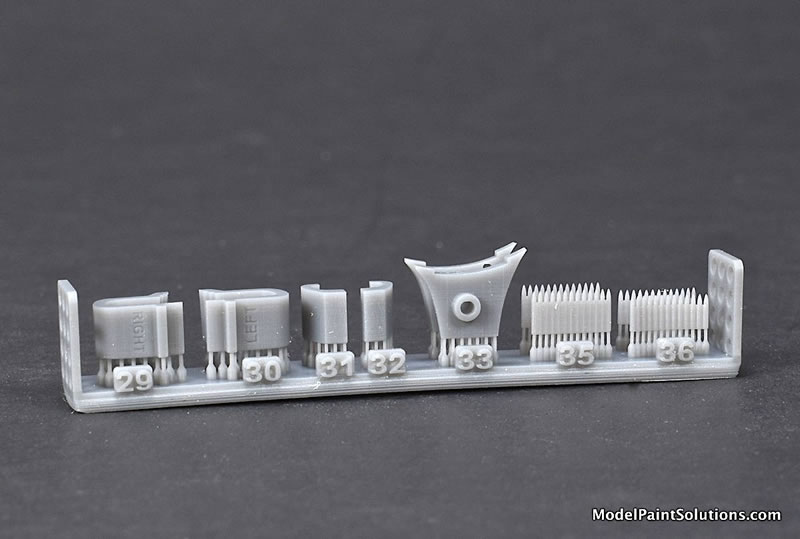
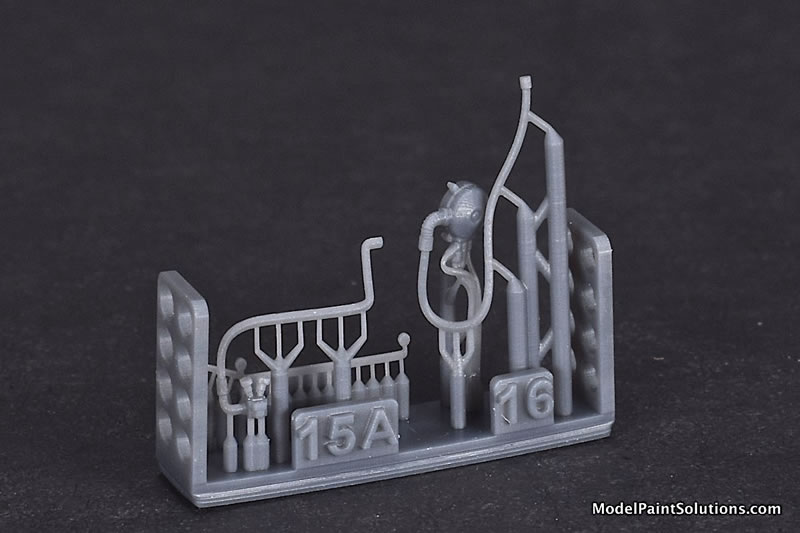
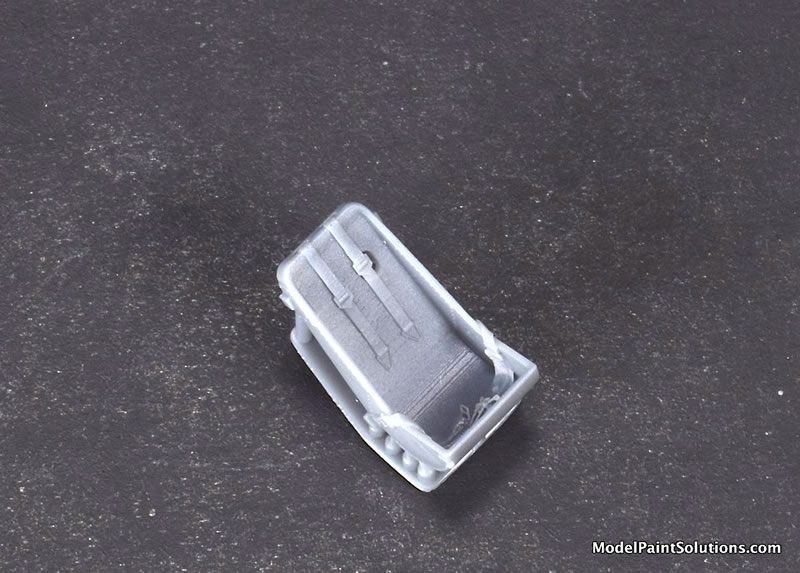
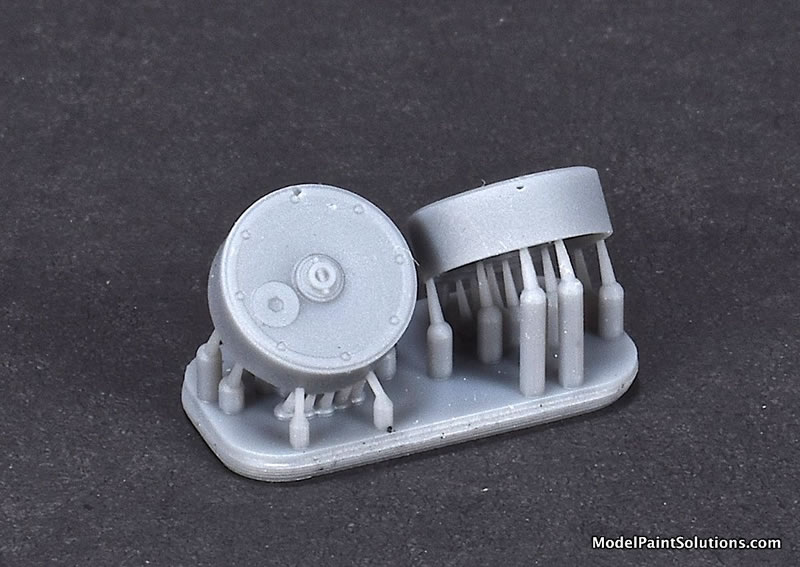
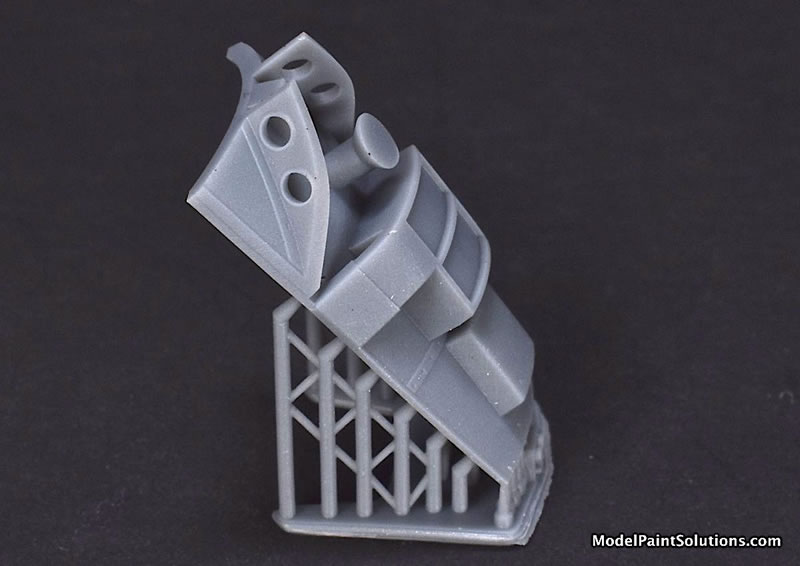
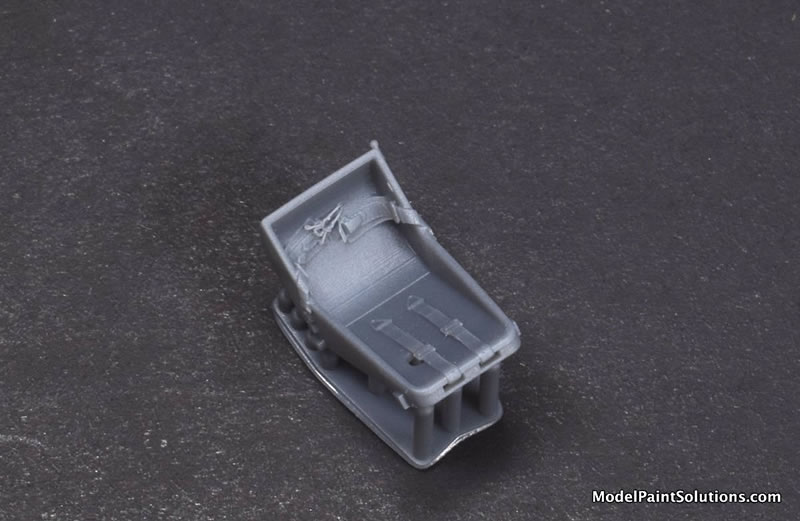
The seat has an amazingly detailed harness in situ that will require a steady hand for painting and detailing. The aft cockpit bulkhead that the seat glues onto is a good example of the three-dimensional nature of the parts in this kit. Ditto that for the pilots oxygen regulator and its associated lines and tubing. Care will have to be taken when cleaning these parts up less some of the details could be lost to heavy handling.
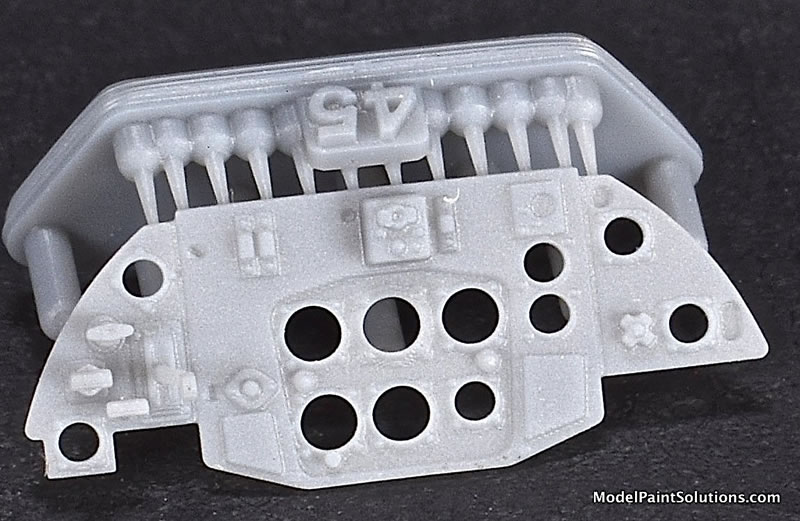
As with so many of the smaller parts of this kit, the main instrument panel is simply amazing. Gauge details are provided by a decal that is sandwiched in between the panel and a backing plate. As with the seat harness, the main panel will require some skill with a “hairy stick” and paint but the result will be very convincing.
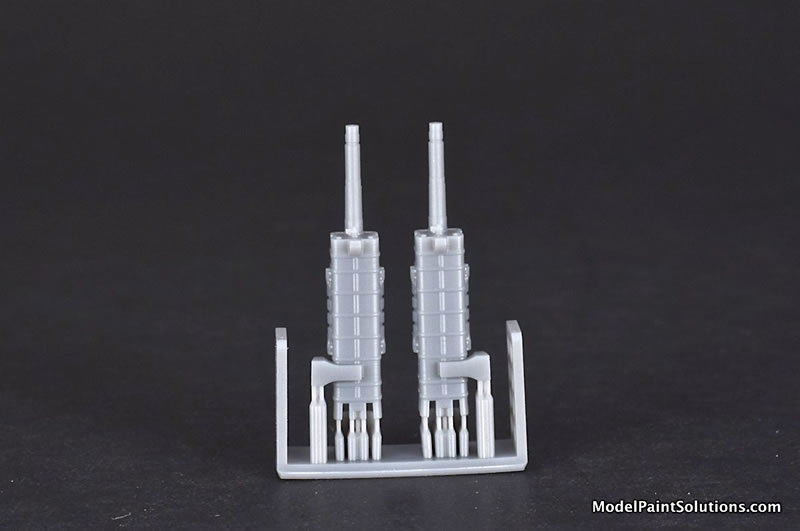
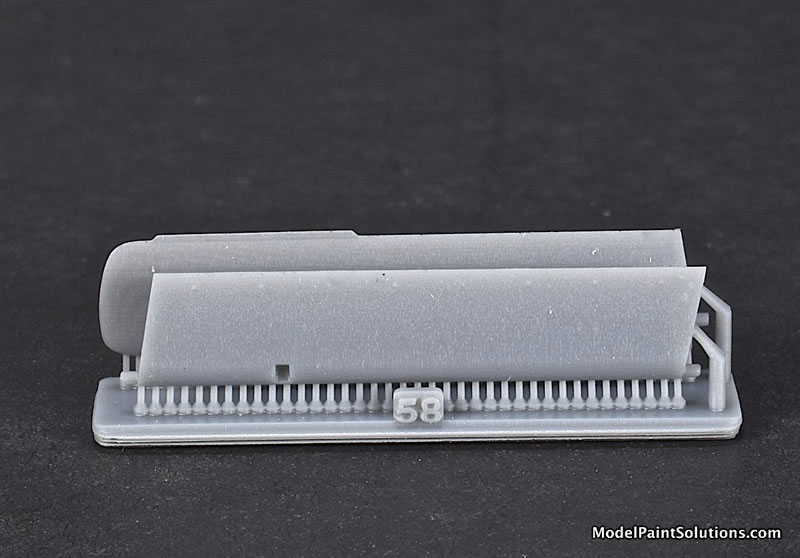
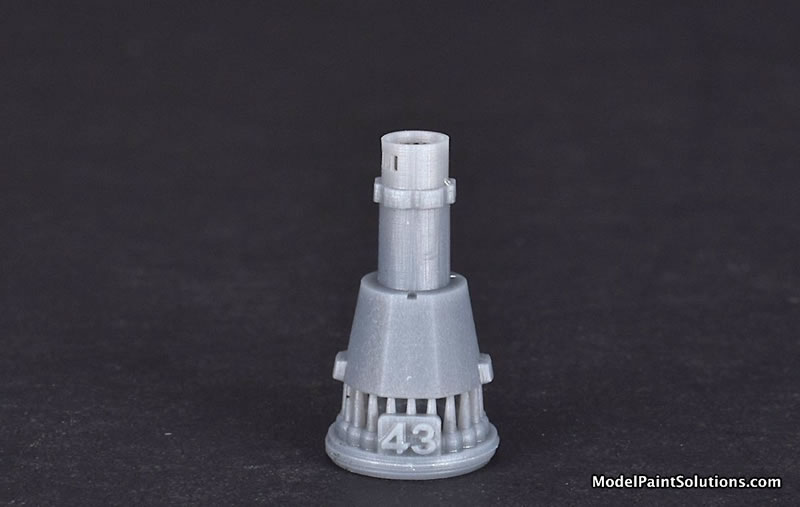
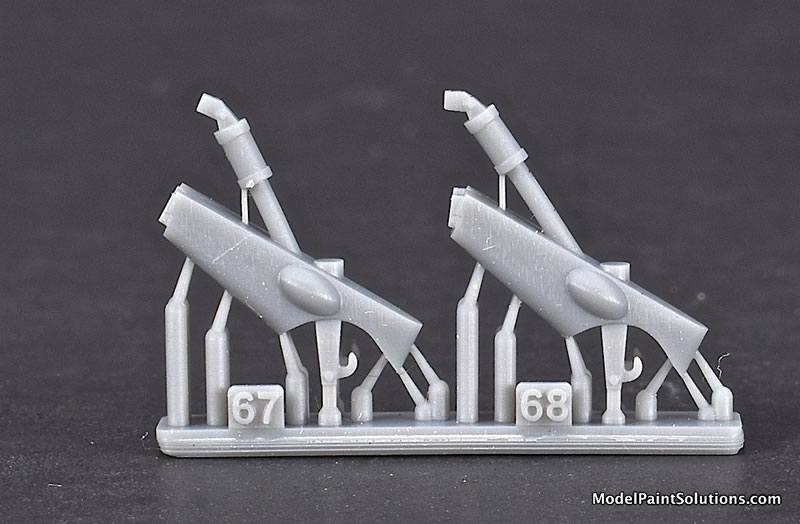
Once the fuselage halves are together, the builder is instructed to assemble and add the very detailed MK 108 cannons onto the left and right wing attach points; interesting.
After the wings are attached, each gun is perfectly positioned under the gun access panels within the wing roots; this is some pretty cool engineering.
Access panels are provided allowing the left and right gun bays to be displayed opened. In addition, the dorsal fuselage fairing that covers the ammo feed mechanism is also provided permitting this area to be displayed as well.
Individual ailerons, elevons, flaps, and the rudder are included permitting all the control services to be posed. In addition, the center skid can be posed up or down and the tail wheel can be posed down or retracted. To round out the presentation, tires with and without weight are provided; very nice, indeed.
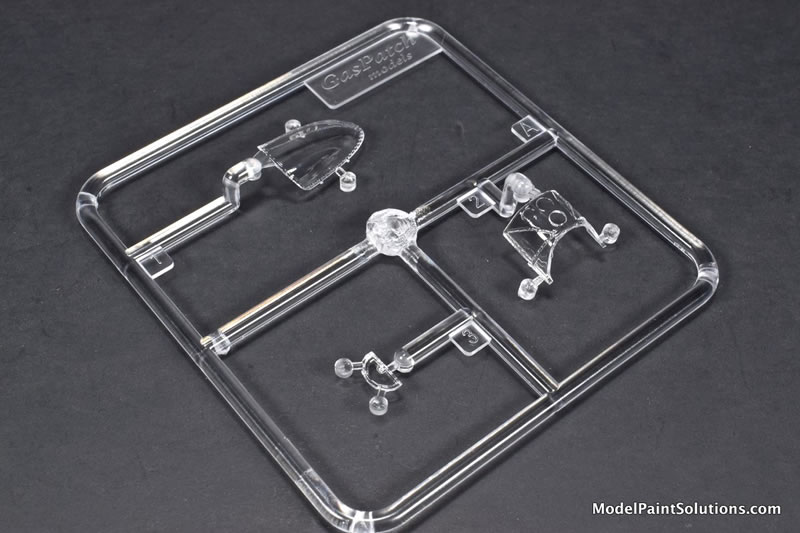
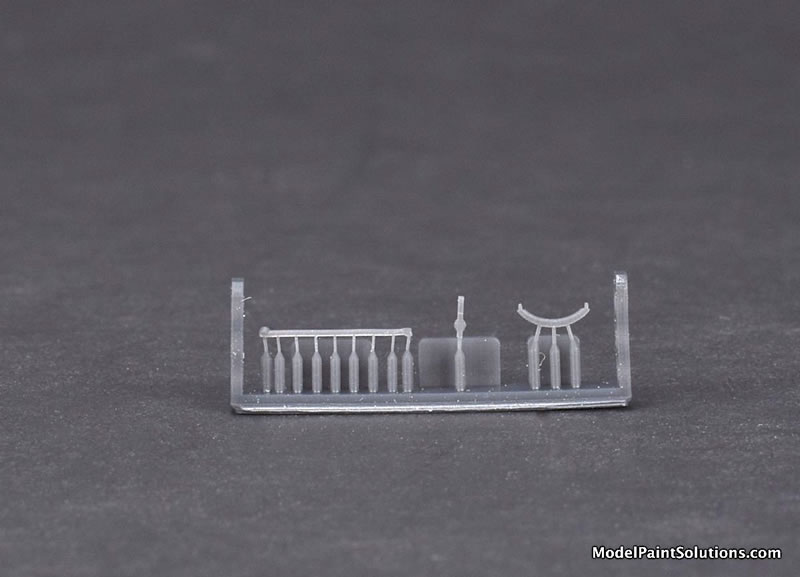
Clear Parts
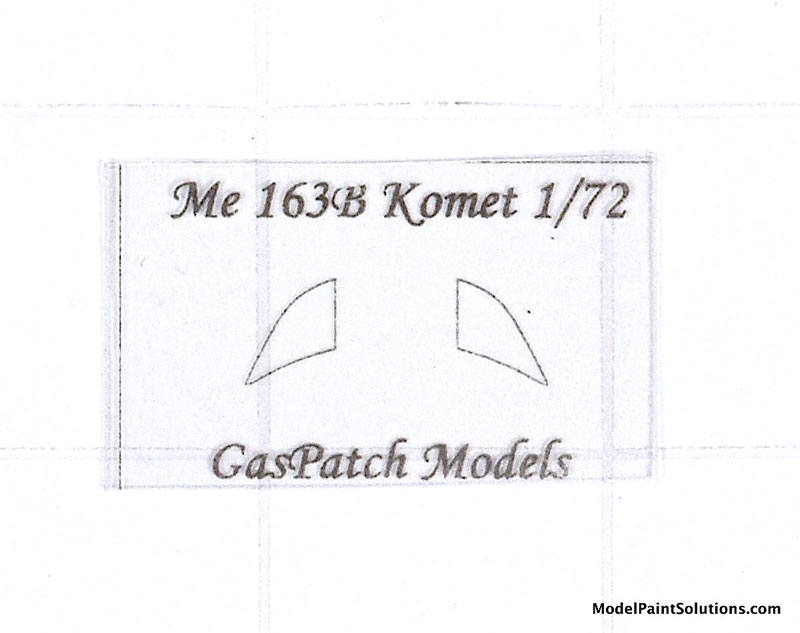
The crystal clear parts are the only components of the kit that are not 3-D printed. The canopy and a section of the fuselage just aft of the cockpit that has two triangular windows are beautifully molded with scale-appropriate framing. Latches (barely visible to the naked eye) are provided for inner framing of the canopy.
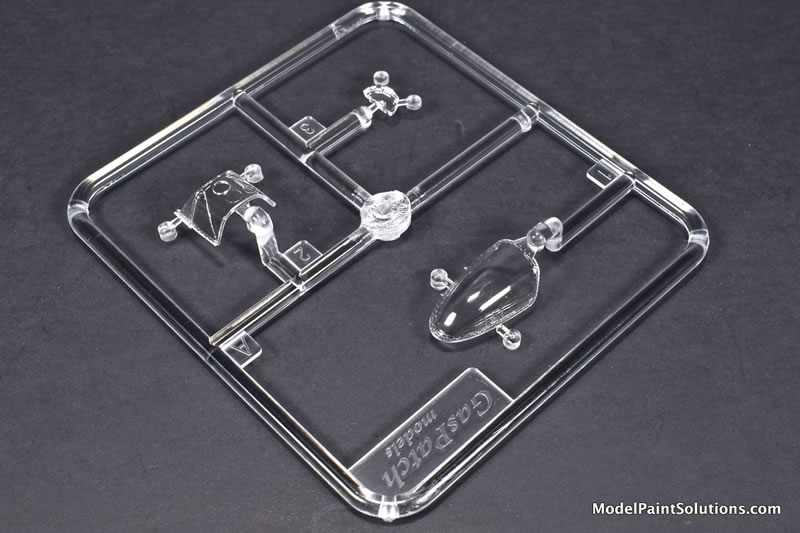
Masks are provided for the canopy, rear windows, and pilots glass armor plate complete with Revi gunsight or wet compass.
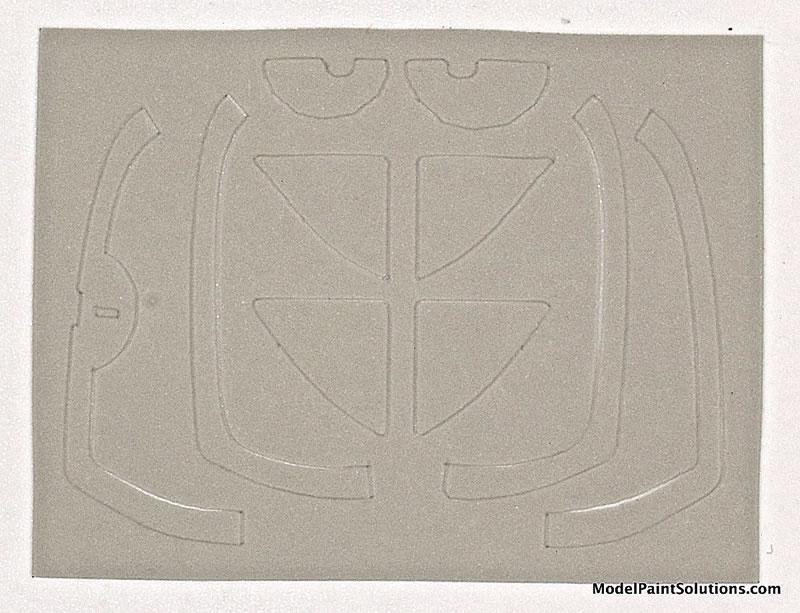
Wow!
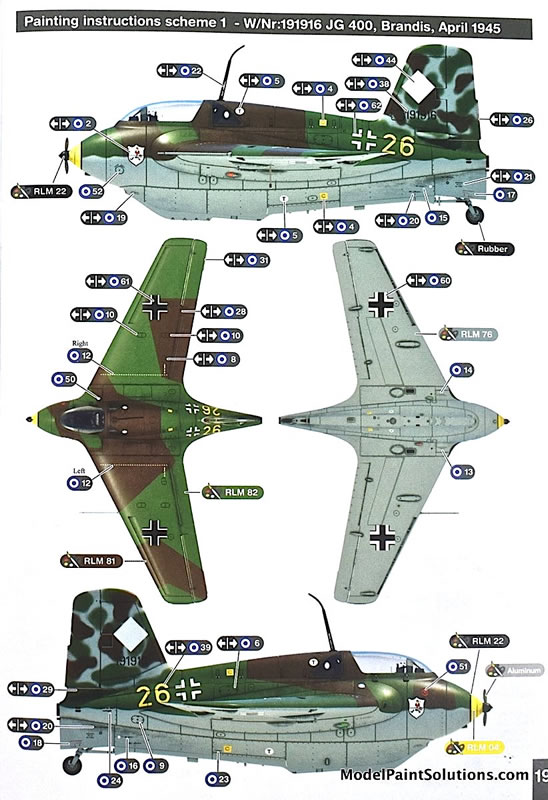
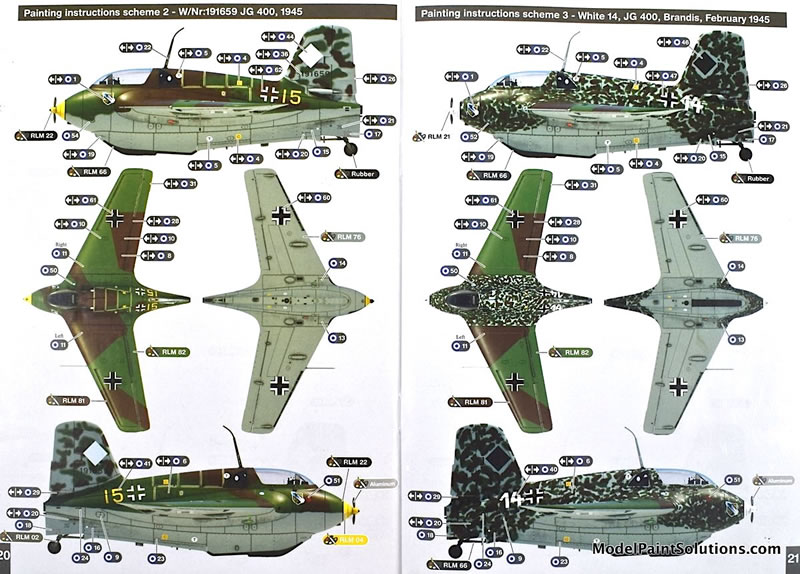
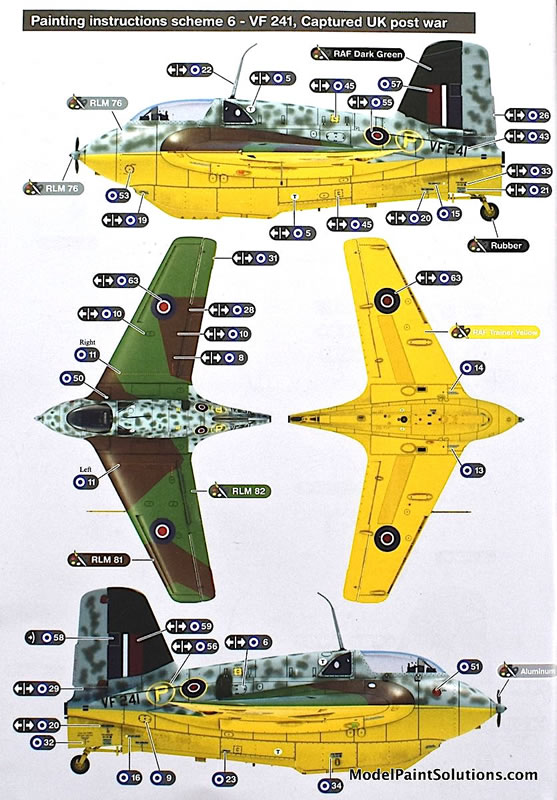
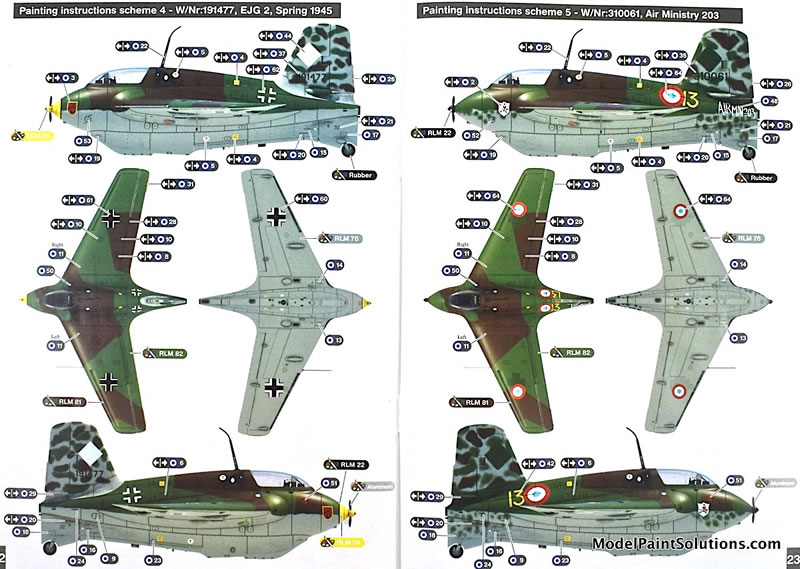
Color and Markings
The decals, by GasPatch, provide markings for 6 colorful airframes. Unfortunately, my kit arrived sans decals but since they’re the same manufacturer as the decals with 1/48th GasPatch Me 163 B, I can report that they are crisply printed with good registration and color density.
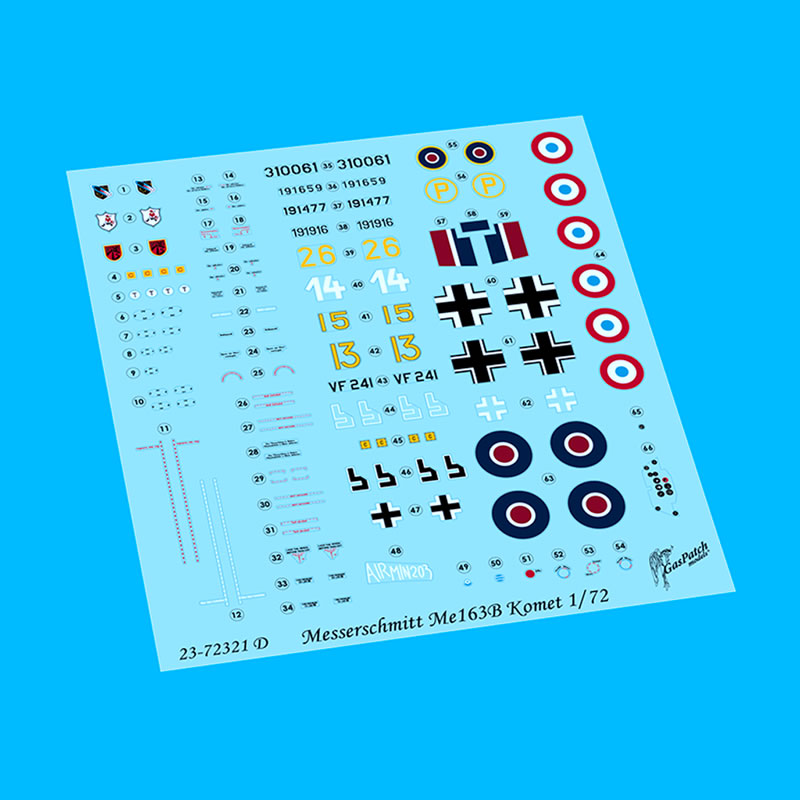
The picture of the decals for this article was “borrowed” from the GasPatch website. (Note: I informed the folks at GasPatch and a sheet of decals is on its way. Thanks, Guys!)
Wow, what’s to say; I’m out of superlative adjectives. This is the most detailed 1/72 scale kit I’ve ever seen—period. The high level of detail maintained throughout the kit is nothing short of amazing.
Once assembled, with the canopy and gun bays in the opened positions, this is going to be a stunning kit. Just be sure to have some good light and a pair of magnifying glasses before getting started.
Highly Recommended!
Keep ‘em coming, GasPatch!
Keep your airbrush wet!
—John
For more on this review visit ModelPaintSolutions.com
Text and images copyright ©2024 by John Miller/Model Paint Solutions.
Review Text and Images Copyright © 2024 by John Miller
Page Created 6 August, 2024
Last updated
6 August, 2024
Back to HyperScale Main Page
Back to Reviews Page

|
 Home
| What's New |
Features |
Gallery |
Reviews |
Reference |
Forum |
Search
Home
| What's New |
Features |
Gallery |
Reviews |
Reference |
Forum |
Search