Italeri / AIMS 1/72 scale
Dornier Do 217 N-2
by Steven Hustad

Description:
Italeri/AIMS 1/72 Dornier Do 217N2
Scale:
1/72
Kit:
Italeri-#125
AIMS-#72P008
Review Type:
Build
Introduction
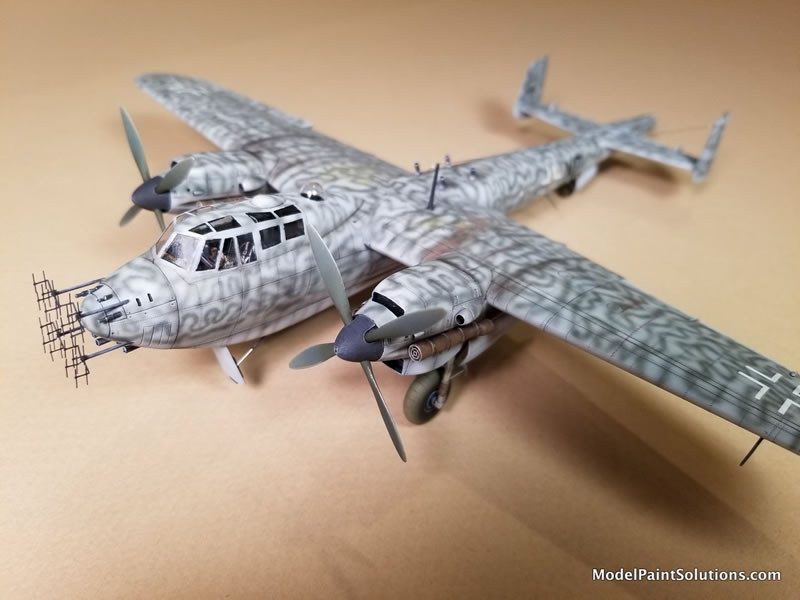
I’d always wanted to build a night fighter version of the Dornier Do 217N but not in the all black paint scheme. So when AIMS came out with their resin conversion kit (#72P008) to turn Italeri’s Do 217 N/J into an N2 - A LONG TIME AGO (possibly AIM’s very first release?), I bit at the hook! (Okay, it was actually a Hannant’s order).
-
What’s the difference between an N/J and an N2 I hear you musing? No?, Well I’m gonna tell you anyway. There were six main differences:
-
The N2 dispensed with the cockpit’s rear/upper gun position, substituting a faired in replacement with a small clear window or dome.
-
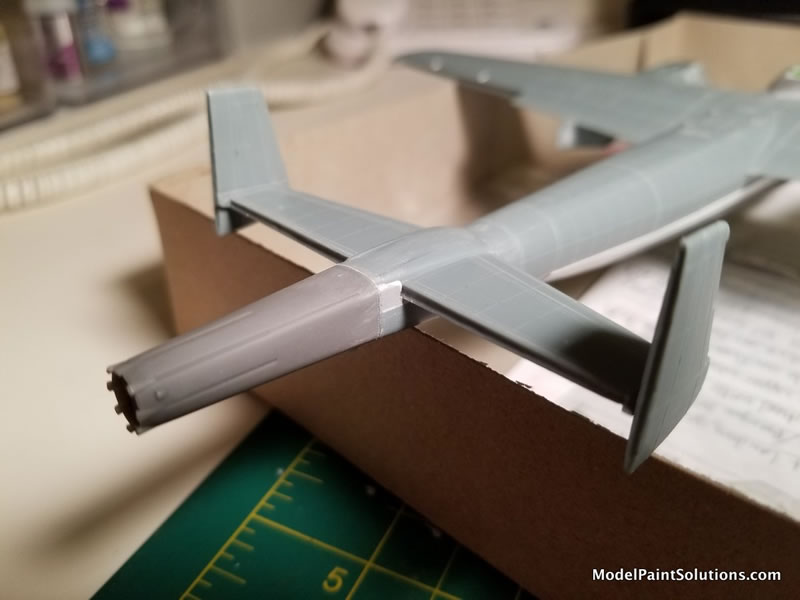
Also, the nose was solid like an N1, but with four muzzle/flare-ended 20mm cannon protruding from it. Correspondingly, four very large magazines were installed in the lower cockpit to feed them.
-
Then there is the very fussy looking nose mounted radar antenna array – the FuG 202.
-
The underside/rear firing defensive gun position was eliminated (to accommodate those four large magazines – these for the upward firing 20mm cannons no doubt!) which was then replaced with a continuous blended-in solid section.
-
In addition, four mid-fuselage mounted, upward firing (and at an angle) 20mm cannon (Schräge Musik – “Jazz Music”, or “Oblique Music” depending upon your source material) were installed.
-
Lastly (and most strangely because the Do 217 was known to be a slow and ponderous beast) the fuselage tail was greatly extended to fit a parachute system! Maybe to slow it down from 180mph to 160mph? Don’t want this thing hurtling through the air TOO fast ya know!
The Italeri Do 217 kits have been around since about 1977 but remain the only realistic 1/72 option today in 2024 – 47 years old now!. The truly ancient Airfix E/N/J variant kits date from 1963 or even before and are best relegated to the kit collector crowd…(shudder). Despite it’s now geriatric heritage, these Italeri kits are reasonably accurate and basic kits that lend themselves well to many different versions as Italeri has obviously taken advantage of over the years. I decided to build this N2 conversion alongside an M1 variant intended for a diorama to save time detailing cockpits, painting, etc.
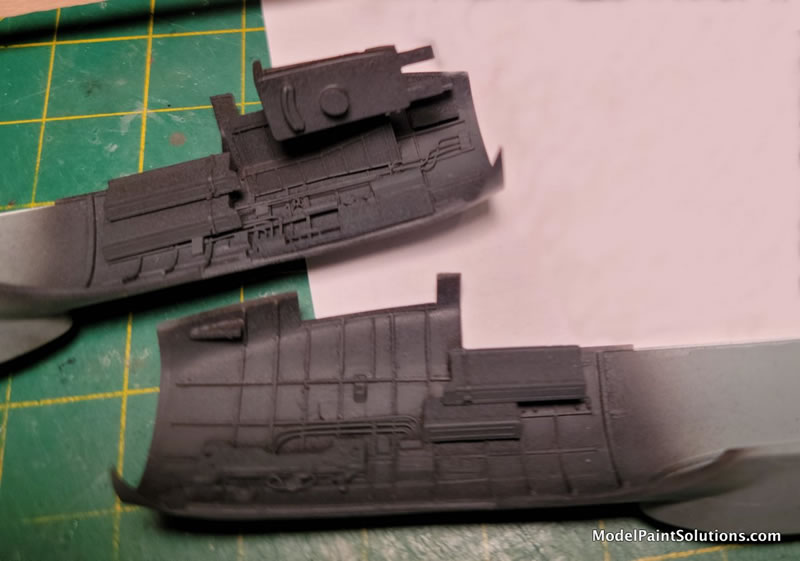
When beginning any modeling projects I usually start with getting all of the ‘grunt work’ out of the way first. Unpleasant things like parts clean up – removing mold lines, filling ejector pin marks, and sanding/smoothing sprue attachment points, etc. Also test fitting of all of the components so there aren’t unpleasant surprises later. This is also the stage where I hack away at the parts for articulating flying surfaces – cutting out the ailerons, flaps, elevators, rudders and so on. The AIMS ‘N2’ conversion set instructions also directed some additional ‘selective demolition’ (an Architectural Specification term from my ‘working days’). This involved cutting away a large section along the lower/middle fuselage, bashing out the upper rear cockpit area, and surgery at the tail where the parachute attaches (more on this later…).
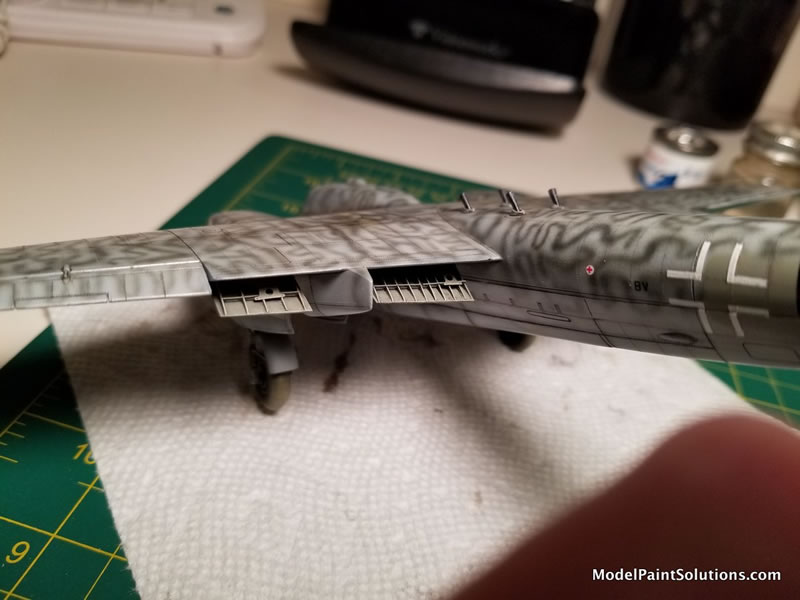
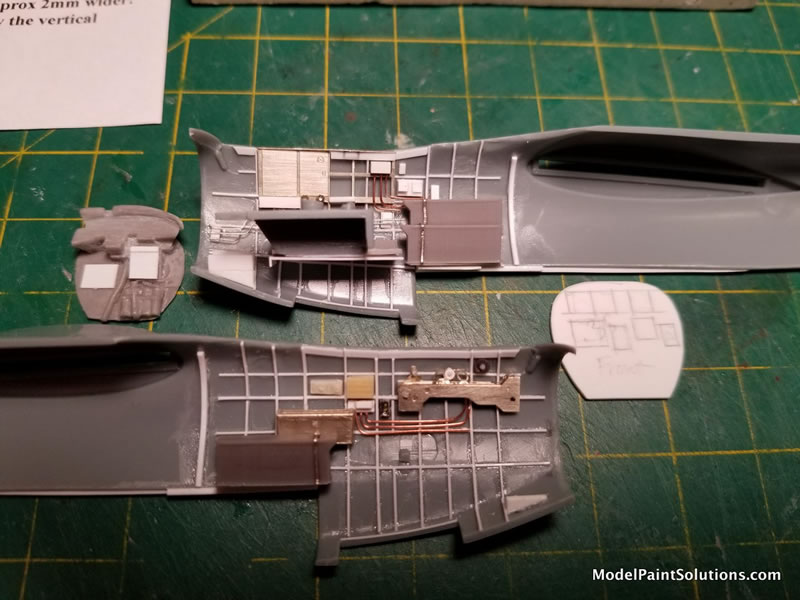
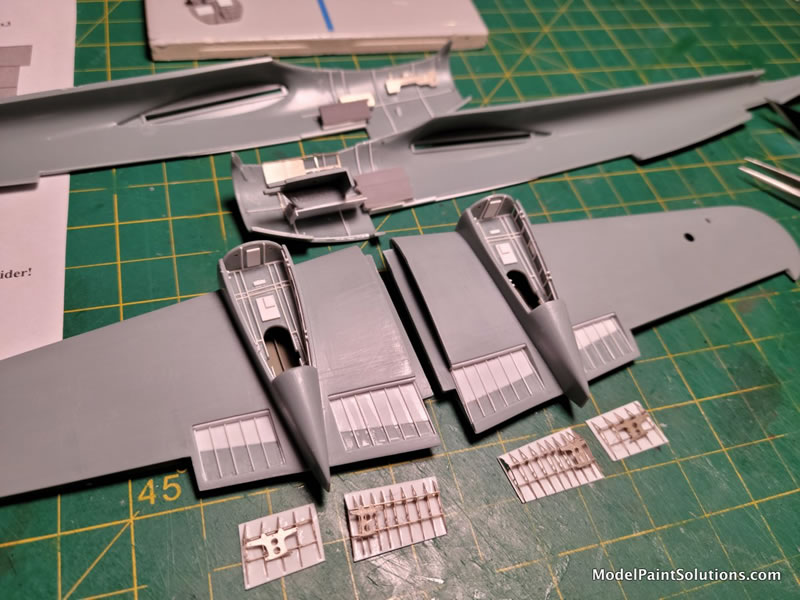
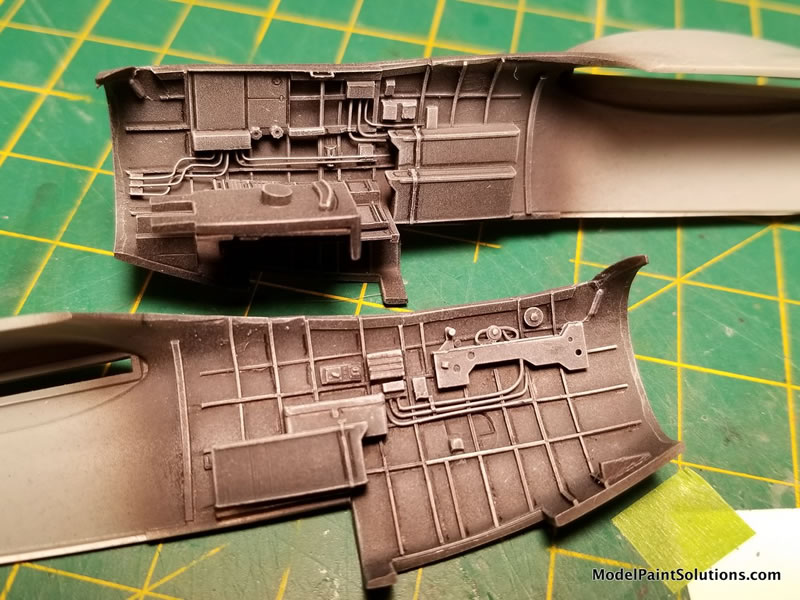
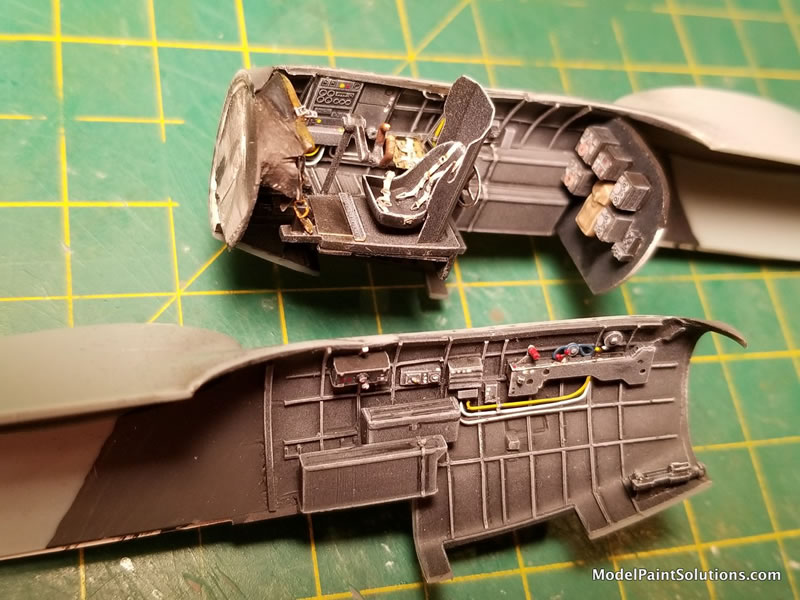
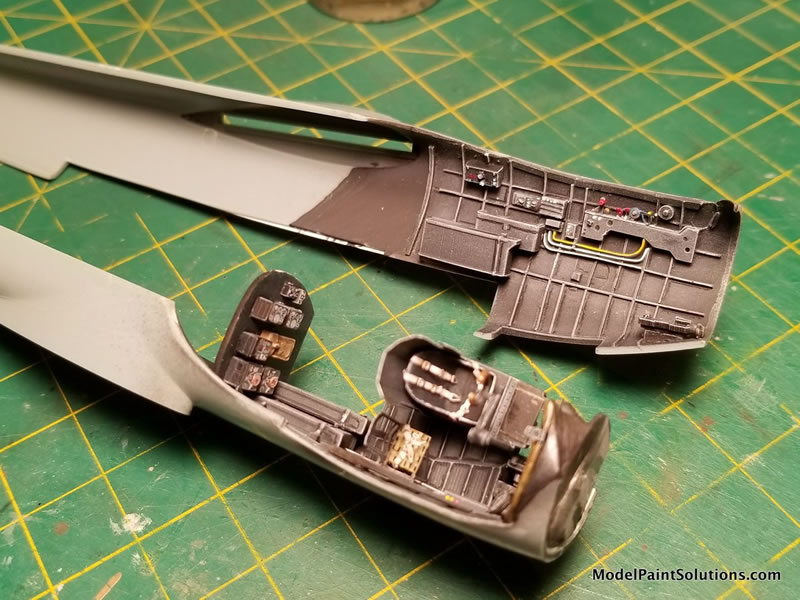
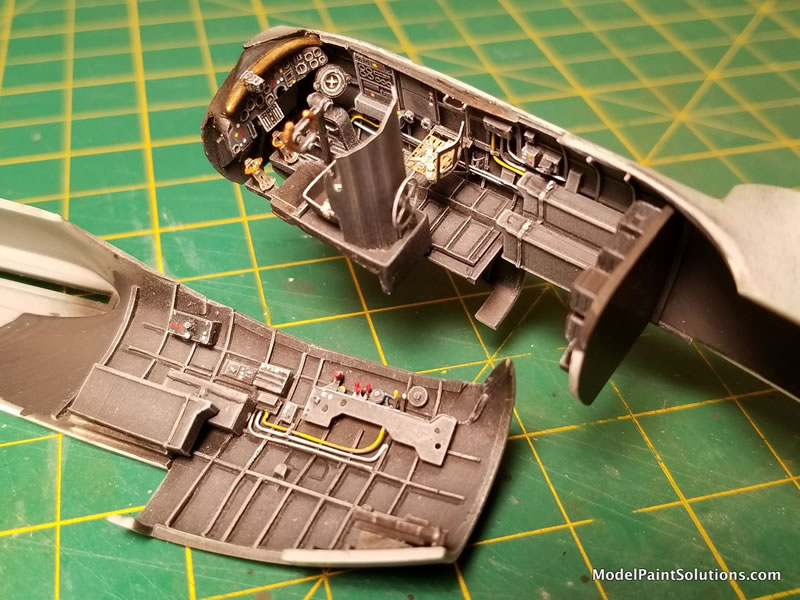
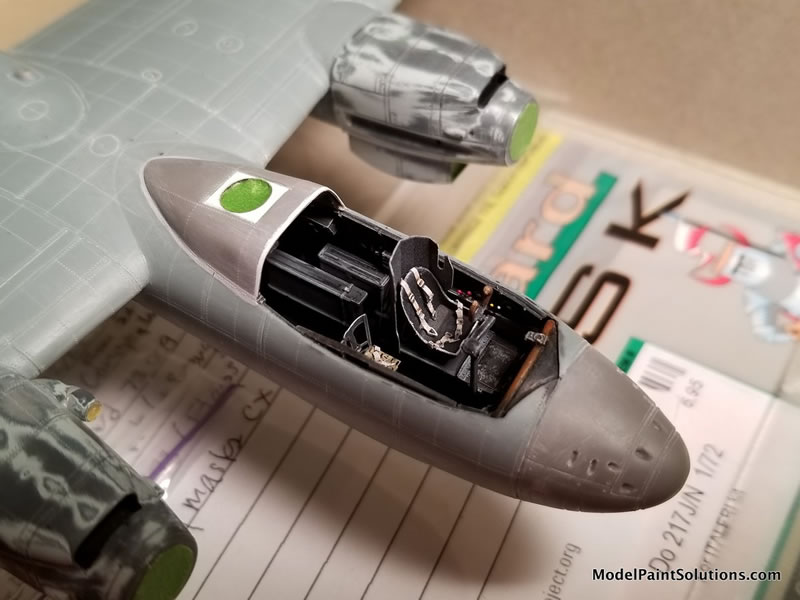
The cockpit was detailed using some of the resin components provided in the AIMS conversion kit - while some others from the same set ended up being rejected and scratch built due to crude castings (as I said, probably their first release). Parts from Brengun’s #72273 photo-etch detail set were also used in the cockpit. Additional cockpit details were scratch built using wire, plastic rod, and strip stock. The kit’s flaps were cut out (see above) and replaced using those provided in the very nice Brengun Photo Etch set (No.72273). Though the upper wing half flap sections were scratch built using plastic strip stock, as this detail was not provided in the Brengun PE set. Wheel wells were entirely scratch built by the same methods as described above; plastic strip, wire, and spare PE bits, etc.
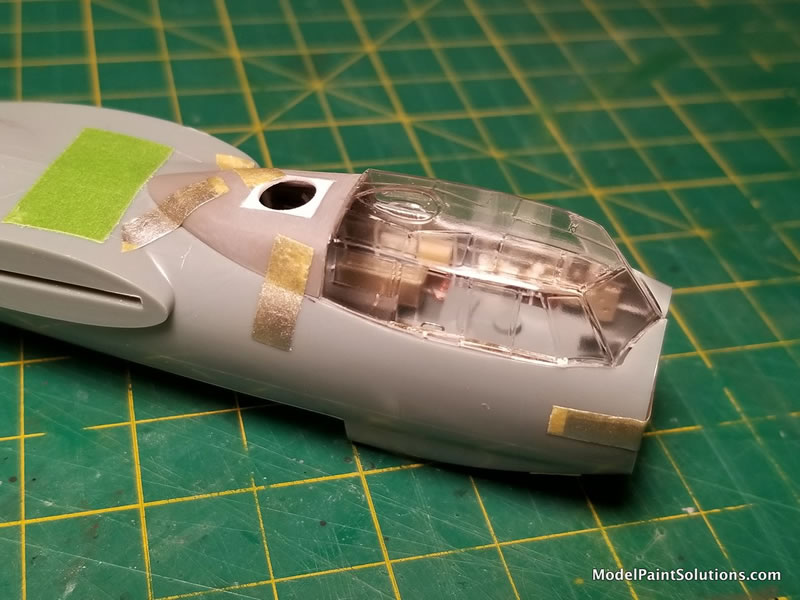
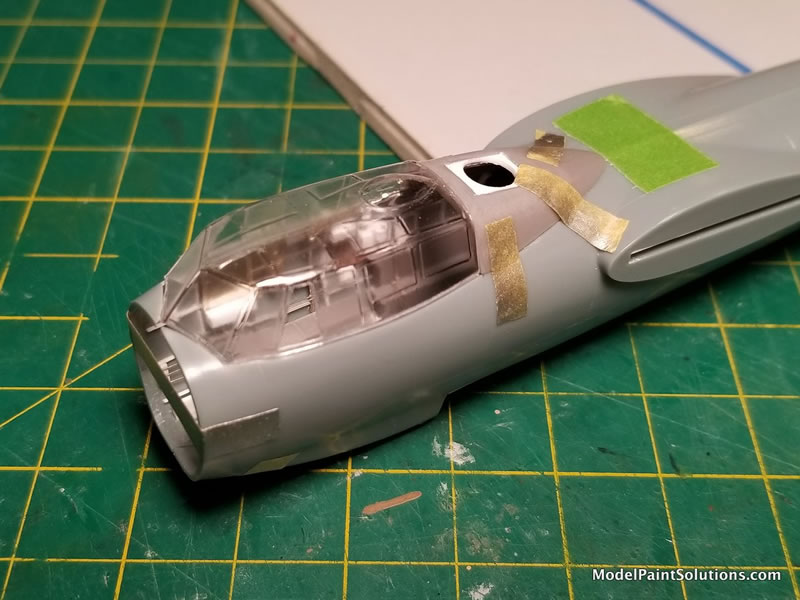
Now is also the time to figure out the clear parts (Did I mention I don’t like late-build surprises?). Happily, the still very nice vacuform replacement canopy from Falcon (Set No. 15, Luftwaffe Part 3) fit quite well with careful fitting and trimming. I think this is available individually as well(?). I also did a home-made ‘heat & smash’ clear dome for the upper rear cockpit insert because the conversion kit piece provided was not accurate for the specific aircraft I was modeling. To do this, I just created a male mold in the needed dome size, fixed it on the end of a long sprue, clamped the (non-business end) of that sprue upright in a vise, heated some clear plastic over a flame until soft and ‘wobbly’ (I use the thin clear plastic lids that greeting card boxes have), and then plunged it down over the master. Three or four attempts were necessary to get a good enough example.
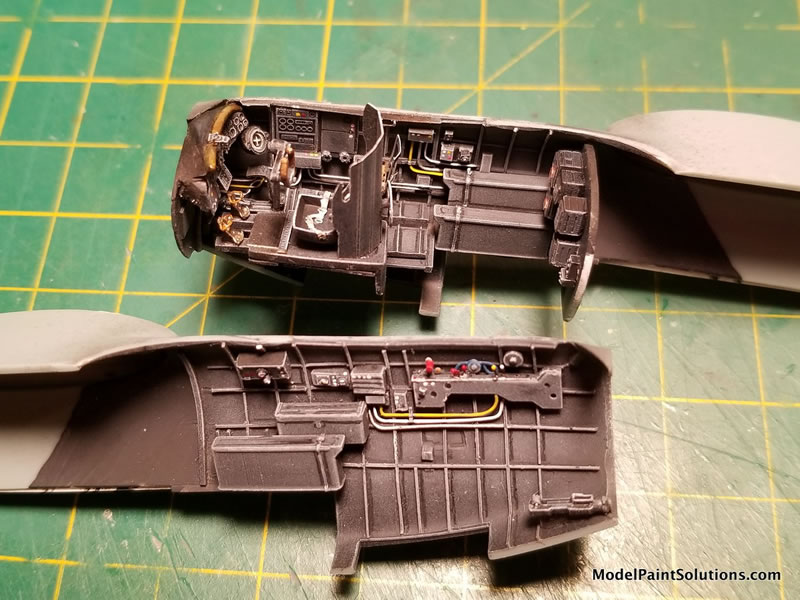
Next up, lay down the basic cockpit colors. In this case a slightly lightened RLM 66 – dark gray. I sprayed this atop Mr. Surfacer 1500/Black, spraying only from above to create easy and dark shadows in the lower areas. The sidewalls were then carefully dry-brushed using oil paints to pop out and contrast the structure and main details.
This was followed by adding final details; instrument panels and picking out individual components with a small paint brush (a ‘hairy stick’ to our Aussie friends!). Add the seats, seat belts, and all the other cockpit components that if added earlier would have gotten in the way.
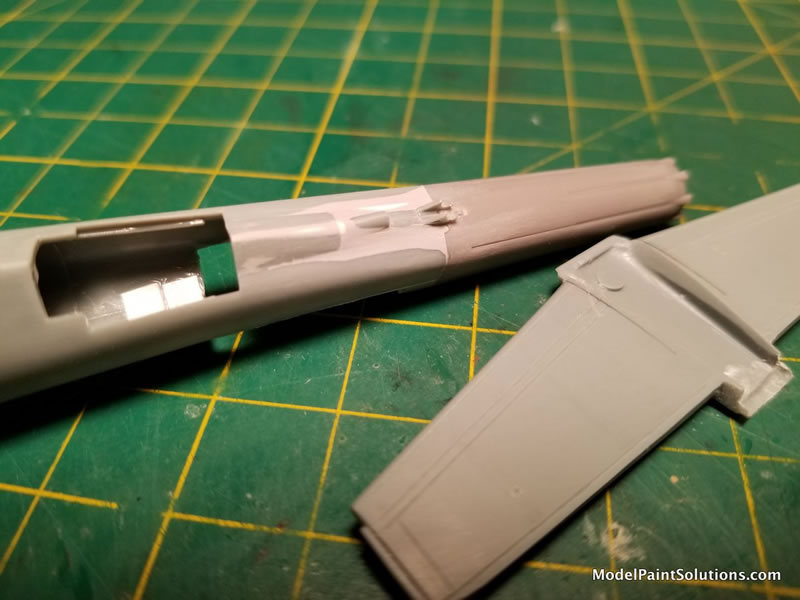
The strange, odd (and unnecessary IMO) parachute tail unit fitted to the Do 217 N2 variant - and provided in the AIMS conversion set doesn’t fit. In fairness to AIMS, their instructions say so and imply that some adjustments will be necessary - because they made the resin part to its actual/correct dimensions - unlike the Italeri kit’s tail it’s meant to be fitted too! Okay, the ‘some adjustments’ comment was a gross understatement.
It was time to get that figured out so the rest of the build could proceed without too much anxiety about what lies ahead…so I dived right in with my CMK razor saw.
The kit’s fuselage at the tail is a bit narrow in plan view, and since the conversion part was made to correct dimensions – which means it’s the kit parts that needed to be sacrificed to the gentle attentions of the Saw, Dremel grinder, and knife…
In short, the middle/underside of the kit’s horizontal stabilizer meant to receive the top/rear of the kit’s fuselage needed to be widened. And, the kit’s fuselage itself from the forward edge of the horizontal stab to its rear needed to be widened. Whew! Starting with the fuselage, I clamped the rear/mid fuselage and then super glued the resin piece in place at the tail resulting in longitudinal gaps that were then filled with 40 thousandths Evergreen styrene.
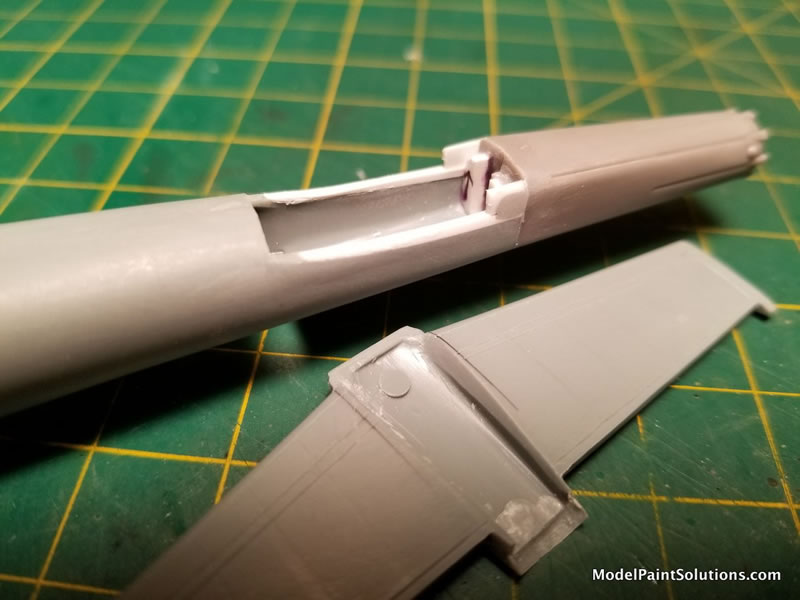
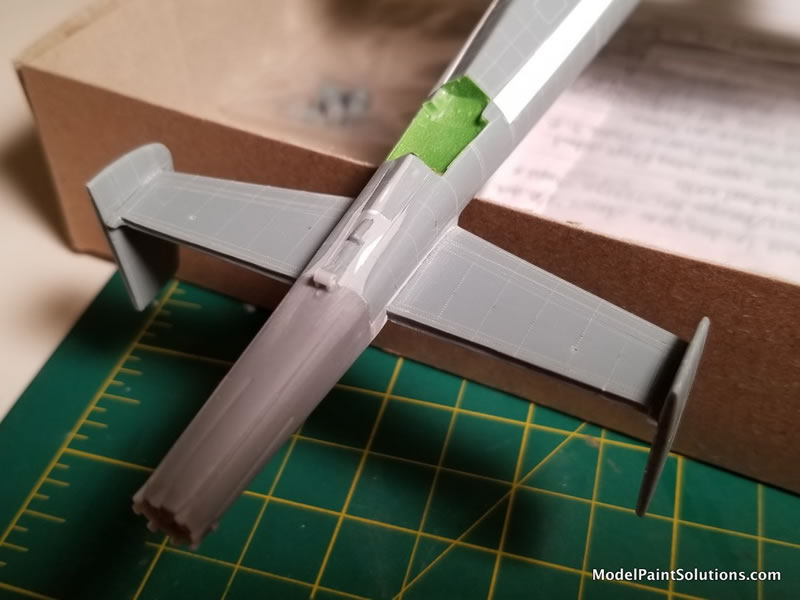
Once solid, further gaps were filled with Apoxie Sculpt 2-part putty, and after that set up, it was followed by Mr. Surfacer 500 to finish off the filler stage. Now, the horizontal stab was test fitted and shaped into the mess just finished; building up the receiving opening with more styrene sheet and putties. Once satisfied with the fit of all of these components at the tail, the whole thing was brought together - but not before the main wings were attached first so as to make sure proper alignment was maintained visually from front to back.
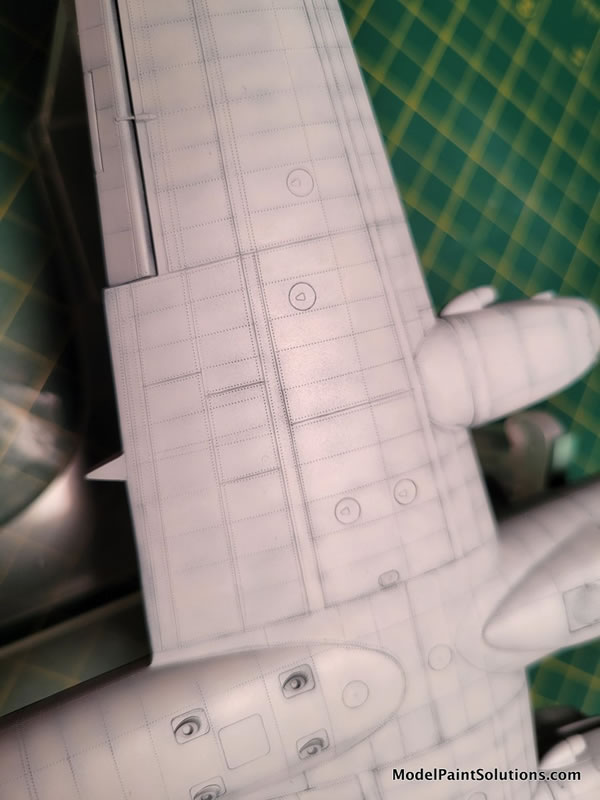
Before the wings and fuselage were glued together, the entire airframe was cleaned of Italeri’s raised panel lines (a tedious task). This was followed by re-scribing with UMM’s #3 ‘push/pull scriber which I’ve grown to love. Some corrections in the kit’s panel line layout were necessary. Also, additions and subtractions were made to correspond to more recent (and I hope!) more accurate plans. The scribing of panel lines was followed by riveting the whole aircraft using a ‘Rosie the Riveter’ .040 riveting tool. Rivet lines were marked off with a .05mm pencil first, and the riveter was guided mostly by a thin clear plastic ruler for the more flat(-ish) surfaces, or by 3mm wide clear scribing tape for the rounded areas.
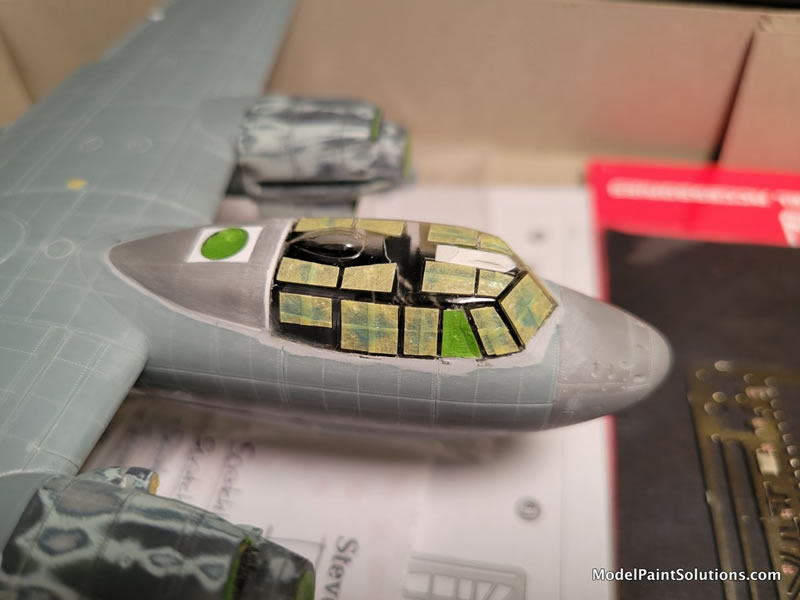
After cutting out the main canopy’s two forward sliding side windows on each side, the Falcon vacfom canopy was attached with clear Gorilla Glue (gotta let this stuff cure overnight). The vac canopy was then fared in for a seamless fit using a layer of Mr. Surfacer 500 along any fuselage to canopy seams that needed that extra attention. I used an Eduard canopy mask (CX142) for painting - some adjustments were necessary here because this set is made for the kit canopy, whereas the vac replacement’s glazings are a bit different in places. But it is still worthwhile.
I left the homemade ‘heat & smash’ clear dome off at this stage, as that’s more easily added near the end.
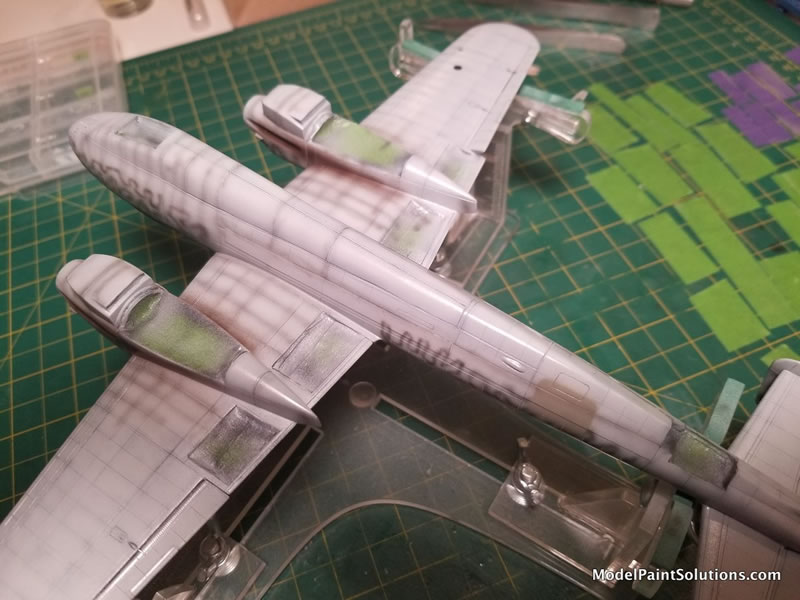
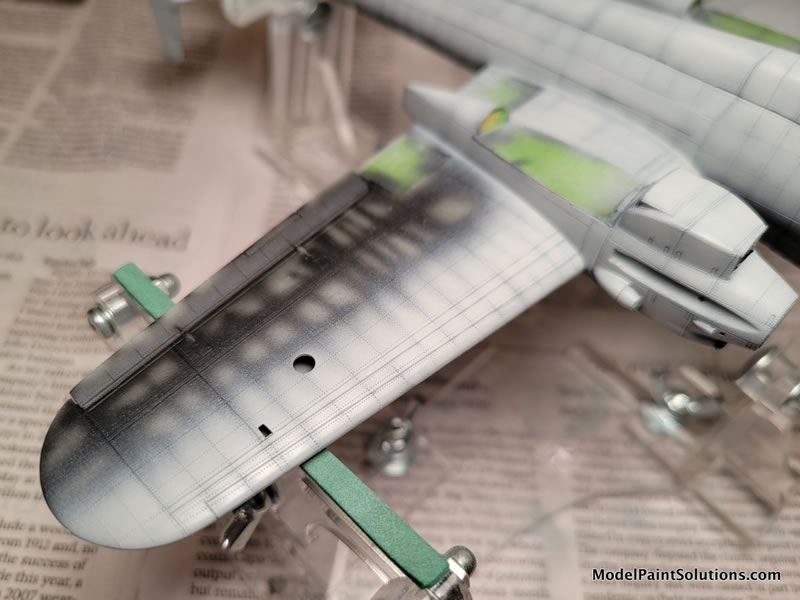
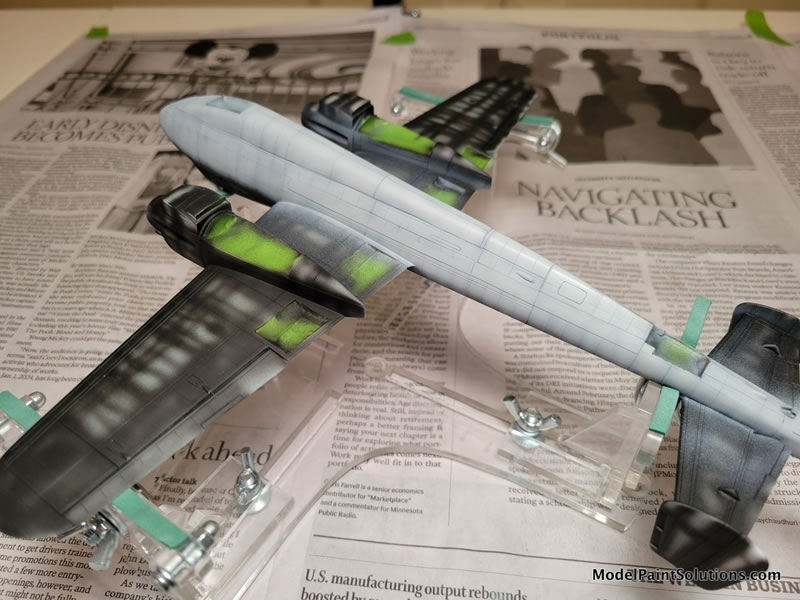
My next step is typically a light, but deliberately placed airbrushed primer using Mr. Surfacer 1500/black. I thin this with Mr. Color Leveling Thinner (“Unicorn Tears” to the Plastic Model Mojo podcast guys—Dave & Mike!) - by at least one third. I airbrush this following the panel lines, rivet lines, inside corners and other deep and not so deep crevasses. This is a sort of pre-shading technique, and also to provide a better surface for the subsequent acrylic paints to grab onto. Everyone who HATES paint ‘pull-up’ when you remove your paint masks raise your hands…yeah, thought so.

As I mentioned above, I built this model alongside another Italeri Do 217 (an M1 variant) intended for a diorama. I often build multiples that are of similar types that will receive similar camouflage colors. This is because I’m basically lazy and always trying to speed up my builds by airbrushing the same colors on multiple models at the same time.
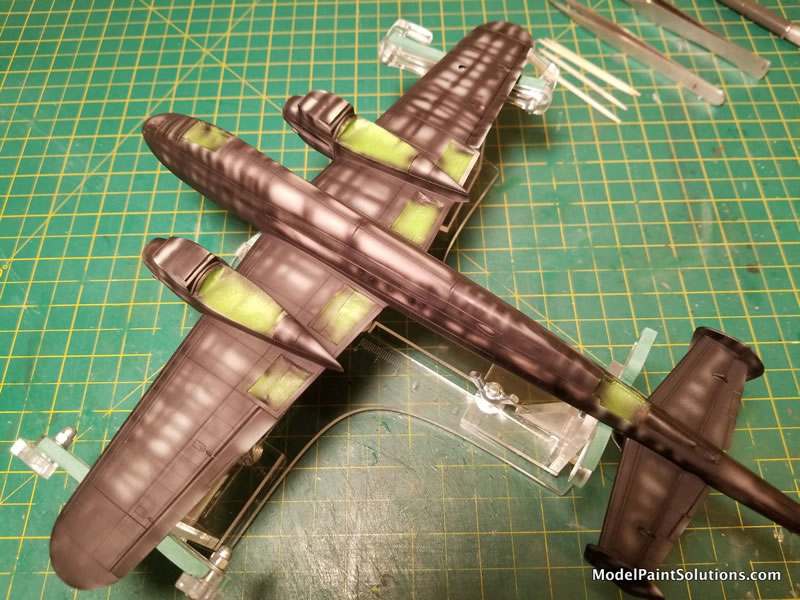
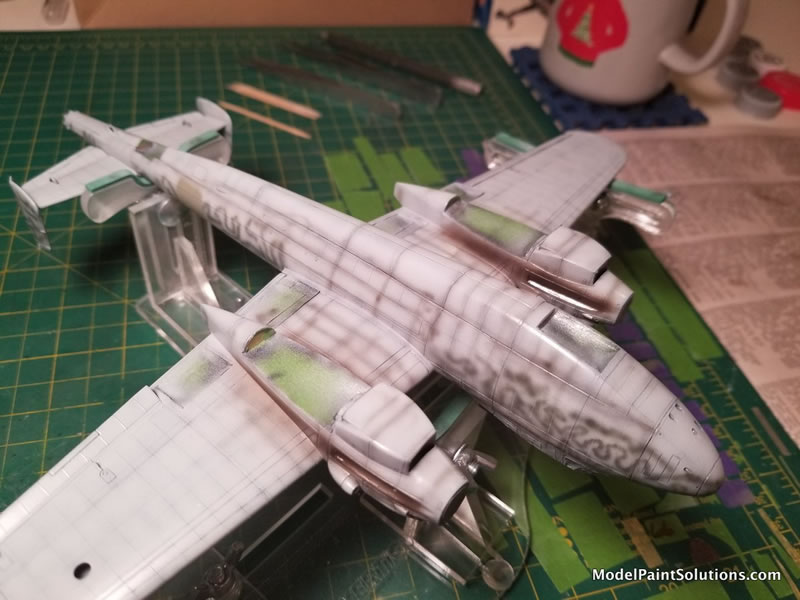
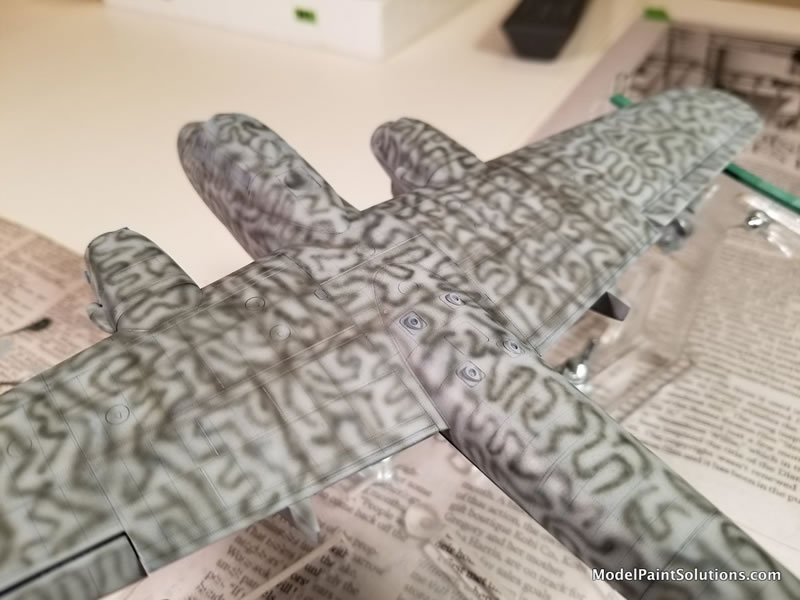
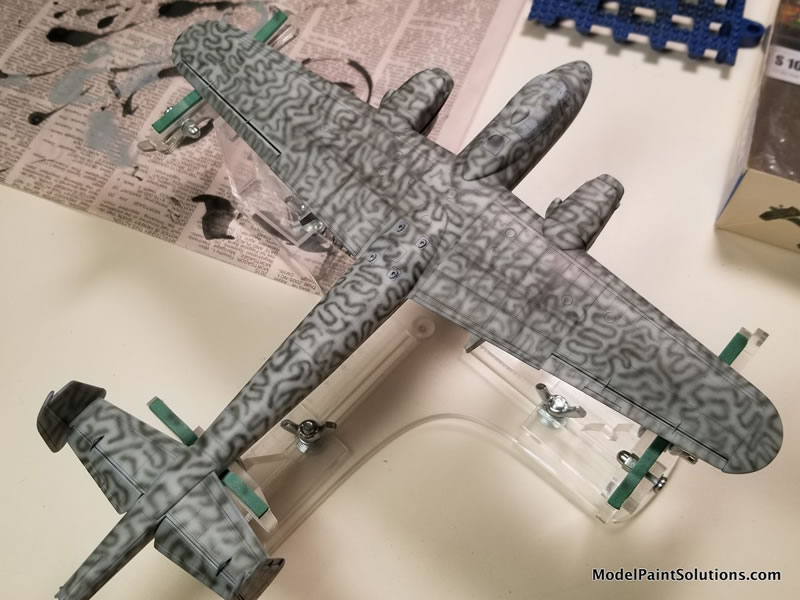
It also means the same N2 & M1 cockpits and wheel wells are detailed at the same time with the same references out on the bench, etc. In this case, both models would share a (nearly for the M1) overall camo (for the N2) of RLM 76 Light Blue/Gray, followed by a ‘squiggle’ camo of RLM 75 Gray/Violet for the N2, and RLM 74 Dark gray/green for the M1. I used Vallejo Air RLM 76 (because I had it on hand), lightened with their flat white and thinned with Vallejo airbrush thinner and some acrylic retarder (I used Gunze’s Mr. Mild Retarder). Probably around a 50/50 mix of paint/thinner sprayed at around 15 to 18psi because fine detail is not needed for this stage. Starting with the center of each small panel line or riveted area, working outward from the center (more opaque) toward the edges (less coverage) you can take advantage of the pre-shading done in the previous stage to create an interesting but subtle patchwork effect. I used an Iwata HPC-Plus for this stage.
(Insert photos 18 thru 28, 31 thru 34here).
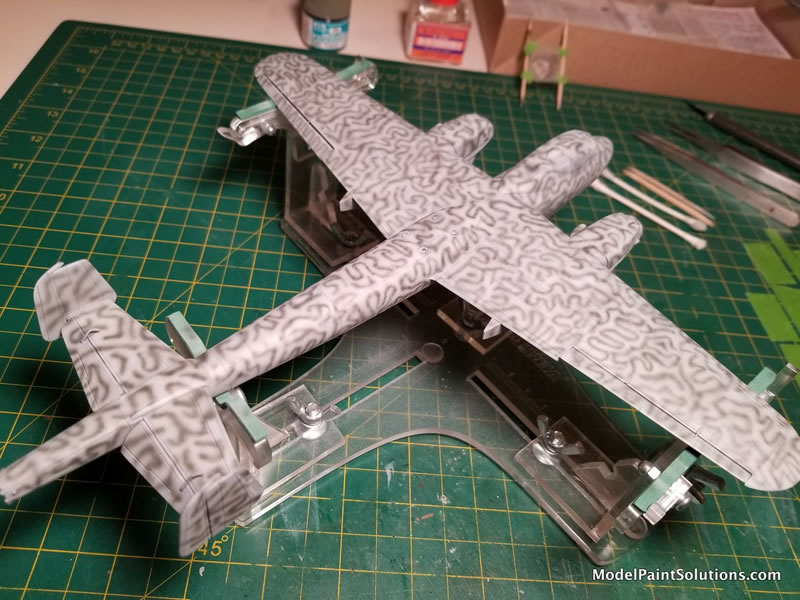
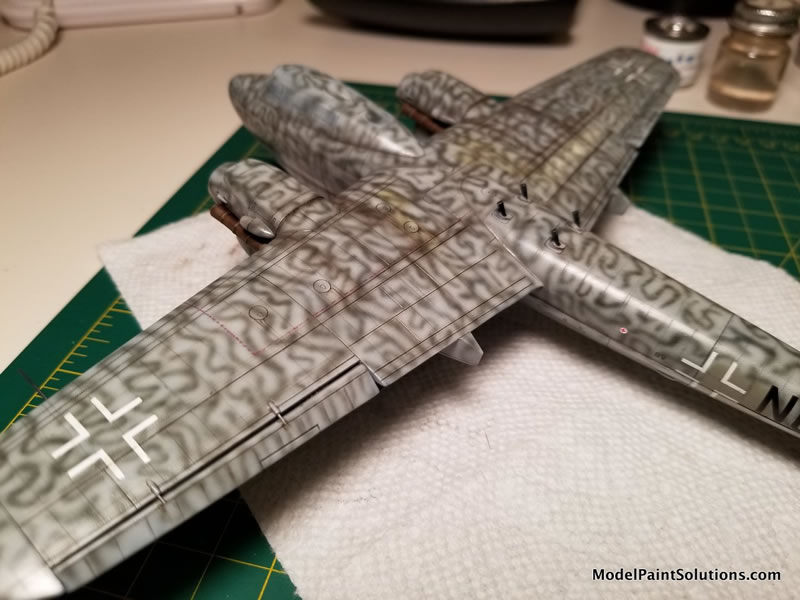
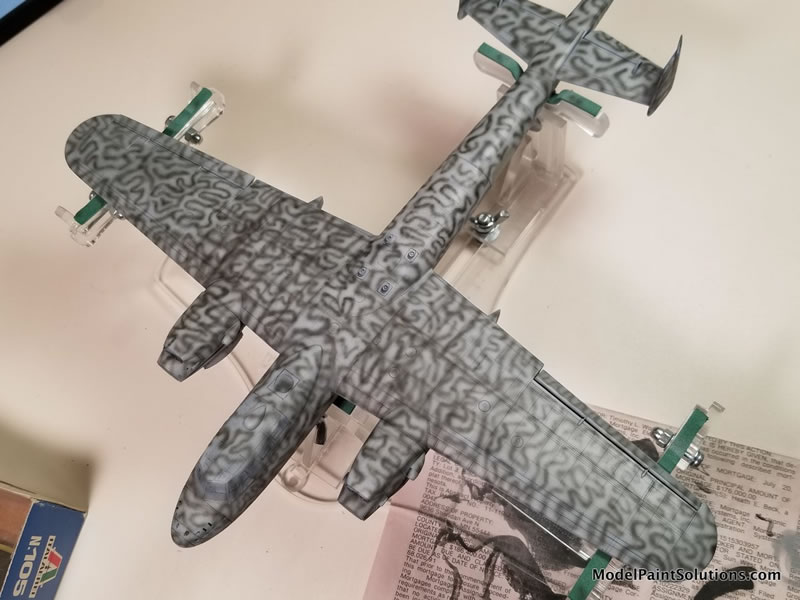
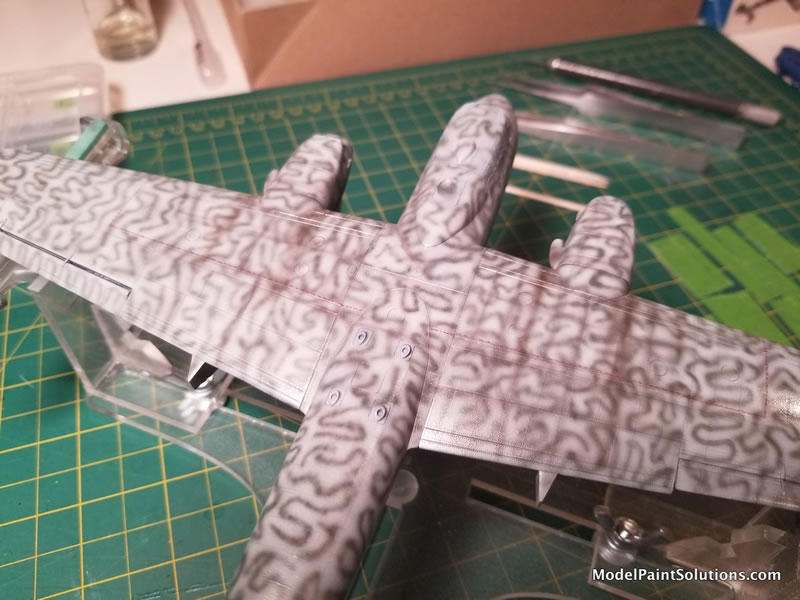
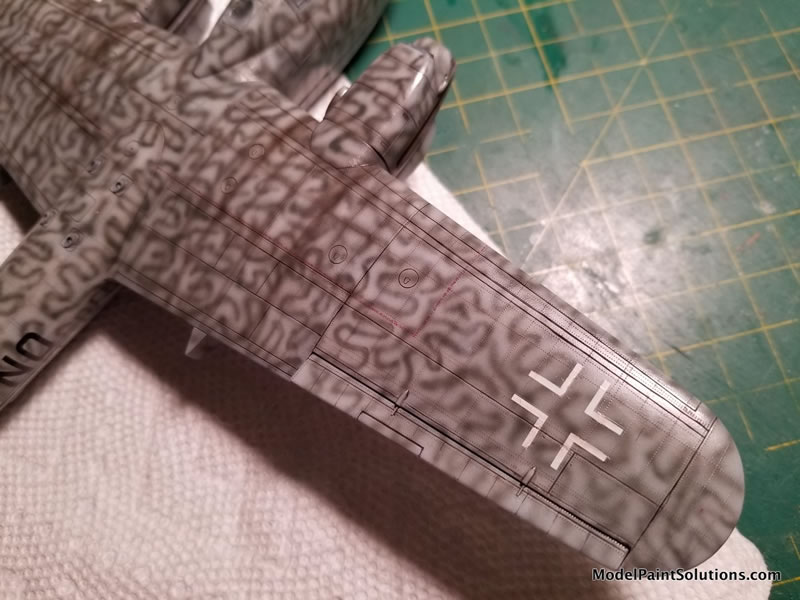
Squiggle time! This camo scheme is always tricky and filled with anxiety but with sufficient practice on a mule testing various mixtures of paint to thinner, retarder, and spraying pressure, etc. we can approach the actual model with at least a modicum of confidence that we’ll be able to pull it off. I used Gunze’s Mr. Hobby Aqueous RLM 75, thinned about 80% with Mr. Color Leveling Thinner, and about 4 to 5 drops of Gunze’s Mild Retarder per airbrush color cup and using an Iwata Micron B airbrush. I settled on 8 to 9psi with this mix & airbrush. Go slow and deliberate. If things aren’t ‘singing’ properly, it just may not be your day (it happens). Somedays the airbrush Gods smile on us, and other days they laugh. I have yet to discern the reasons for the differences. Fortunately, it worked this time and after about an hour of on and off airbrushing, I had the squiggle camo laid down reasonably well. A bit of back and forth touch ups between the RLM 76 and RLM 75 were necessary (always are), so mistakes could be corrected. At this stage I also laid down some selected panel line shadows using Gunze’s Aqueous RLM 66 at/near the central third of the model that likely gets dirtiest. At this point I also laid down the basics for the exhaust stains using the fine-tip in the airbrush and a brownish/black concoction of Gunze Mr. Hobby Aqueous that I’d mixed up for exactly this purpose.
I used a dark red Prismacolor pencil and a thin clear plastic ruler straight edge to lay down the wing walk area markings – taking time to stop and re-sharpen the pencil after about each 10mm to maintain some finesse. This was followed by a clear gloss (Future, because I still have a large stock) in preparation for the decalling & weathering phases that follow.
Decals followed, trying to use the decals provided in the AIMS conversion kit. Today AIMS makes some of the VERY BEST decals (in my opinion) on the market with their myriad of wonderful Luftwaffe sheets. But (and this is a BIG BUTT!), the decals included with THIS set must have been their earliest effort or were farmed out to an inferior 3rd party because they were downright awful. They looked great on the sheet, were nicely printed, in register, and nice, and thin but these suckers just wouldn’t lay down. Solveset & Sol had no effect. Tamiya’s Mark fit Strong had zero effect as well. I ended up replacing almost all of them with aftermarket items from old Aeromaster & Tally-Ho! sheets.
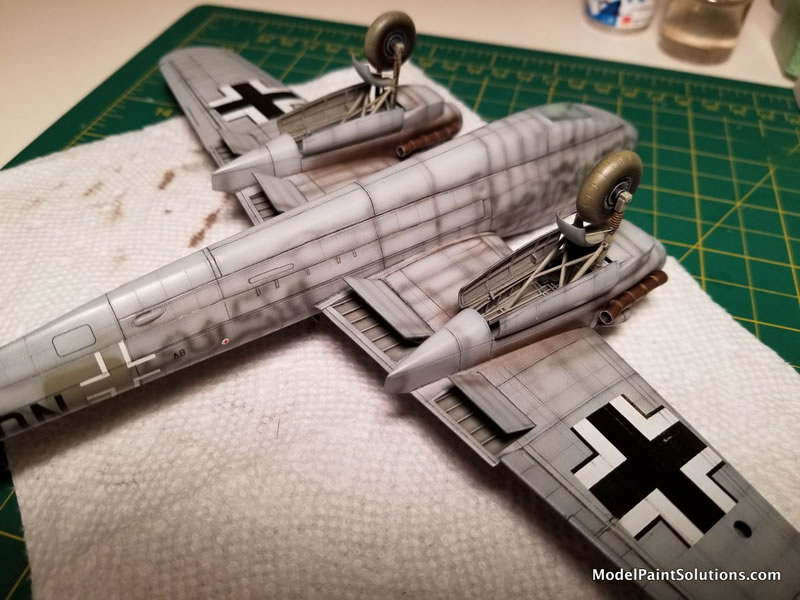
The weathering begins! (continues actually because some weathering was achieved with the airbrushed paneled areas earlier…but who’s counting?) After laying down another layer of clear satin acrylic (VMS this time) to seal in the decals and provide a good substrate, the model was ready for the weathering steps that follow. I always start with an oil paint wash in the panel lines, and along the riveted lines to pop those out a bit – the panels a bit more than the rivets. This was made from Vandyke Brown and Black Windsor-Newton oil paints for the topsides, versus a mix of Paynes Gray and Black with a touch of Brown for the RLM 76 undersides.
The washes were followed by treatment of independent wear-prone areas with more oil paints (those trafficked by maintenance crews especially). Mixing up a rough equivalent of RLM 76 and RLM 75 from oil paints I divide them into two each – make one a bit lighter and the other a little darker. Now I work within each individual ‘paneled’ area (actual panels, or even those areas defined by rivet patterns) around engines, fuel refill access panels, the areas where crew would climb onto the wings, or cross over the fuselage between them and so on. Looking at photos to get ideas is the best way – I’d earlier identified reference pages with Post-It notes marked with a big Sharpie marker “W” at the top for quick reference later - just for this stage…
Letting the oil paints dry for a few days, I then over coat using Testors Dullcote (thinned about 40% with lacquer thinner which yields a nice finish somewhere between dead flat and satin.
Prismacolor pencils come back into play here – silver especially to pick out worn areas (around the kinds of areas mentioned above), and wing leading edges, etc. Anything that moves, gets rubbed against, is exposed to wear, or gets walked on essentially! Other Prismacolor pencils were used to highlight certain edges and accentuate certain crevices to add more contrast.
Lastly the pigments/pastels were applied for accentuating the exhaust stains, and any other areas that needed a bit of subtlety or finesse; fuel spills, oil leaks, cannon residue, etc. Then peel off the canopy masks (and the inevitable touch-ups that that always results in), add landing gear (pre-prepared and pre-fitted), gear doors, and all the fiddly bits everyone hates to deal with at the end of a build like this. Stretched sprue aerial wires (dark gray) with white glue insulators, painted light gray.
This build also required the daunting construction and delicate installation of the fussy nose mounted radar array – the FuG 202 (provided in the Brengun #72273 PE set). The kit parts are a joke (FAR too thick and crude) so we’re stuck with the PE here. This required a fair amount of forward planning and thought. Good (and clear) close-up photo reference material is essential. I prepared each of the four horizontal pole mounted arrays ahead of time. And I was lucky to have purchased another Brengun 72273 PE set for the M1 variant (for the flaps mostly), as it turned out I really needed those extra radar bits for this N2! Very delicate work. They were each pre-prepared and mounted/taped onto individual toothpicks for airbrushing. The nose received much attention also to ensure that the receiving holes were properly spaced and could be re-opened easily after painting. The final fitting was achieved with much trepidation and sweat - along with a few choice words being uttered. Oh, and the use of some super glue and the ol’ ‘Mk. I eyeball’ to align them all one…by…one…by…one. Not perfect, but I think it looks good. Whew!
That’s it for this one folks!
Steve Hustad (aka The Mad Norseman!)
For more on this review visit Modelpaintsolutions.com.
https://modelpaintsol.com/builds/italeri-dornier-do-217
Text and Images Copyright © 2024 by Steven Hustad
Page Created 16 May, 2024
Last updated
16 May, 2024
Back to HyperScale Main Page
Back to Reviews Page

|
 Home
| What's New |
Features |
Gallery |
Reviews |
Reference |
Forum |
Search
Home
| What's New |
Features |
Gallery |
Reviews |
Reference |
Forum |
Search