A Year in Review
Models Completed in 2022
by Brett Green

2023 was a highly disrupted year, modelling-wise, with the sale of our 30-year family home, a move to a temoporary house, storage of all my modelling materials and finally moving into our new mountain home in the Central West of New South Wales a few months ago.
We are just putting the finishing touches on my office / workshop garage conversion so I can get back to modelling. We also have a brand new 7 metre x 7 metre shed being built in the back yard for storage.
I only managed to finish three models this year - my lowest tally since returning to the hobby 30 years ago.
Here they are, in order of completion:
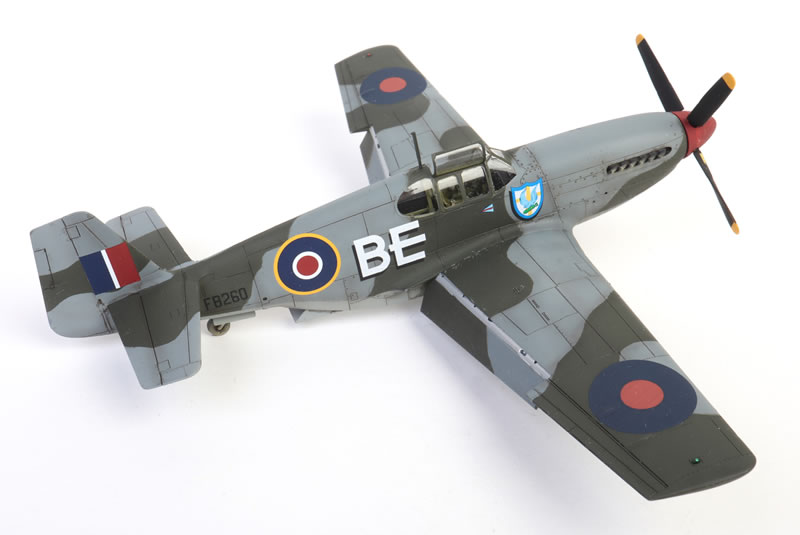
1. Arma Hobby’s 1/72 scale P-51B/C Mustang
Here is my first completion of 2022 - Arma Hobby’s brand new 1/72 scale P-51B/C Mustang.
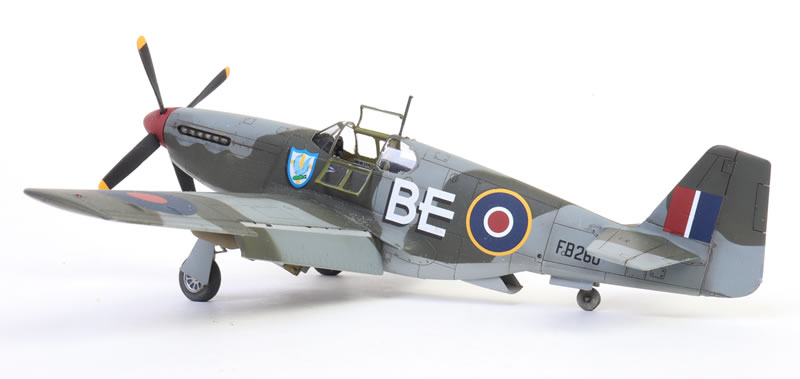
The finesse of surface textures and high level of detail is really impressive, with almost no concessions to the small scale.
Arma supplies a modest photo-etched fret in this “Expert Series” boxing. This provides harness straps, radiator faces and a few other small details.
Extensive use of stencil and instrument decals is made in the cockpit. They really add a lot of authenticity to the front office.
Once the cockpit is painted and assembled, assembly proceeds very quickly.
Flaps are separate parts and they appear to be designed to fit in the lowered position only.
Fit is generally excellent throughout. The wing to fuselage attachment needed some careful test fitting but was good once the front join was taped as the glue dried.
I was a bit concerned about the multi-part open canopy but I had no trouble at all obtaining a gap-free and smear-free assembly. I glued the rear quarter windows and the windscreen in place before painting, fitting the supplied masks. These are translucent grey vinyl masks. In general I prefer the more flexible yellow Kabuki paper masks but Arma’s vinyl masks settled down nicely and worked perfectly. I used the “closed” version of the framed canopy to effectively mask off the centre canopy section during painting.
The main undercarriage legs have some play, so check your references to determine the correct rake and be prepared to hold the legs in place while the glue sets (I used small balls of Blu-Tack for this job).
This is a great model but it is not for beginners. There are some small and fiddly parts in the cockpit, and there are some large sprue attachments, especially on the leading edges of the wings and the mating surfaces of the fuselage halves. You’ll need to take plenty of time and care removing these.
I managed to gouge a couple of chunks out of the leading edges of the wings and the fuselage spine. These were filled with Milliput.
I have been looking for an excuse to use one of DK Decals’ excellent decal sheets for a while now. This is a Czech company but to my eternal gratitude they offer a surprisingly large selection of Australian WWII aircraft subjects - some quite obscure.
These markings represent RAAF Group Captain Brian Eaton’s Mustang Mk.III. He is an Aussie with a remarkable combat record and a long streak of good luck with the Desert Air Force in North Africa and Italy.
The unique markings are found on DK Decals Item No. 72099 – DAF Mustang RAF, RAAF and SAAF Squadrons Over Italy.
Both the DK Decals and the kit decals were a little bit sticky but they work fine as long as you use plenty of water or decal setting liquid under the decals to ensure that they will slide on the surface of the model. DK Decals are printed by BOA Agency in Brno in the Czech Republic.
I wrote this one up for a big article in Issue 200 of Model Airplane International magazine.
2. Tamiya 1:35 M18 Hellcat
My second completed model for 2022 is Tamiya's lovely new 1:35 scale M18 Hellcat.
The model was built straight from the box and in the sequence listed in the instructions.
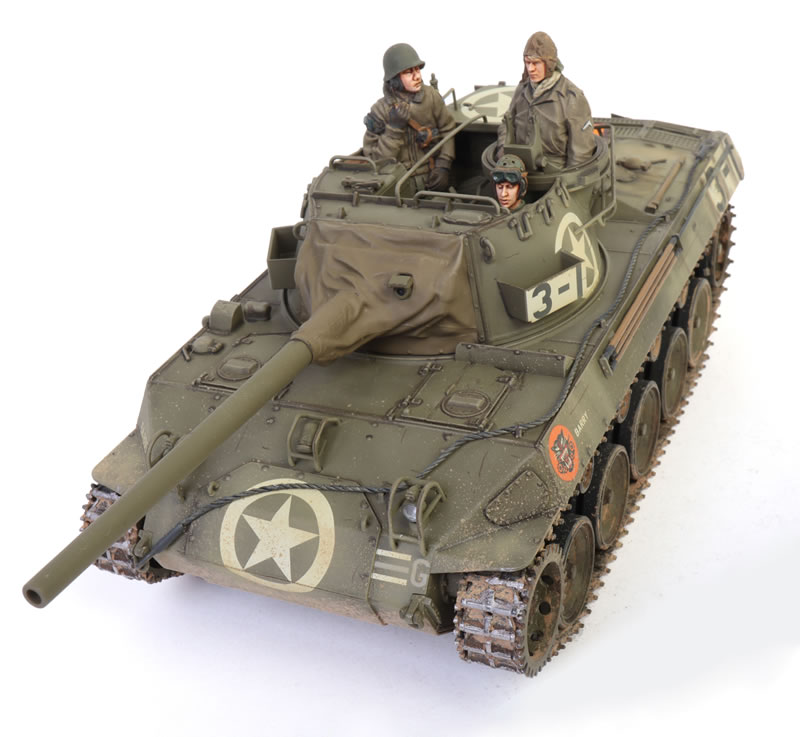
I did not spend any time detail painting the interior of the fighting compartment. This area is well detailed but I didn't think much would be seen in the shadowy recesses of the vehicle.
This also made assembly faster, with no paint applied until the model was nearly complete.
Fit was flawless throughout.
The link and length tracks offer the best of both worlds with crisp detail but fast assembly, being only 18 plastic pieces per side. The flat bottom run is moulded with two locating pins that correspond to a locating hole on the bottom of each road wheel. Having this precise anchor point guarantees the perfect alignment of the links and lengths for the entire run.
The only parts left off for the painting stage were the clear headlight lenses and the tow cable.
I recently picked up a can of Vallejo’s 28005 Aerosol US Olive Drab. This is presented in a big 400 ml can, and includes two spray nozzles – one (relatively) fine and one with a wider spray pattern. I was curious to see how it performed.
I sprayed straight onto the bare plastic using the small nozzle. The paint went on smoothly and quite specifically directed without much billowing vapor.
Tamiya supplies a very nice single standalone figure in a generic casual pose. Detail and sculpting are excellent, as is fit.
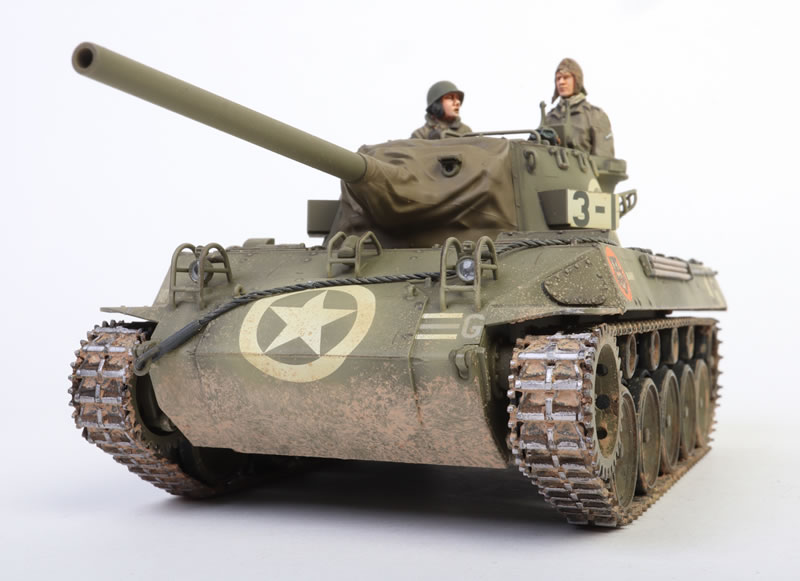
I painted him up with Vallejo acrylics applied by brush.
However, I really wanted to crew up my Hellcat so I took a look at what I had that might fit into the tight confines of its turret. I eventually unearthed a US armour crew packed in tissue paper and a ziplock plastic bag. These were originally assembled and painted for Tasca’s M4A3E2 Sherman back in 2015.
This blonde guy in the cupola is from Alpine, the figure in the helmet from an decades-old Yanks set, and the gunner is made up from a Warriors upper body and a Hornet head.
I wrote this one up for a big article in Issue 192 of Model Military International magazine, which was accompanied by a new research article on the M18 Hellcat by Bruce Culver - always something to look forward to!
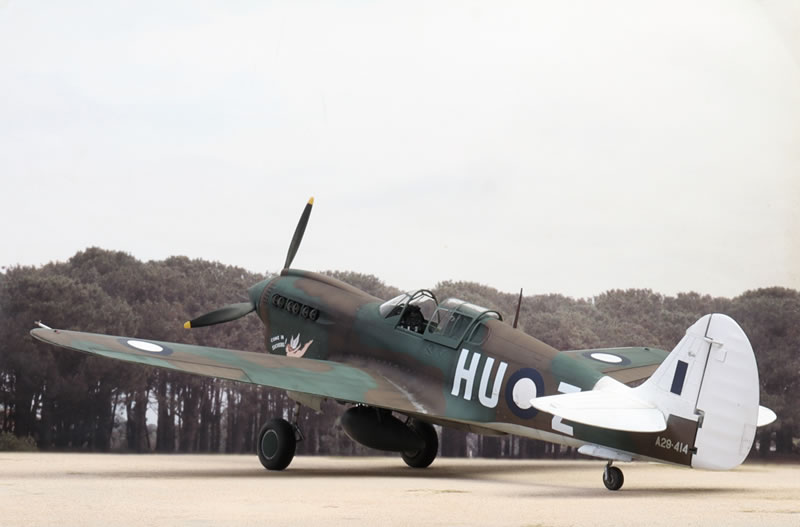
3. Trumpeter 1/32 Curtiss P-40M (P-40N-1) / Kittyhawk IV
Here is my Trumpeter 1/32 scale P-40M Kittyhawk, finished as the almost indistinguishable P-40N-1, my final but only my third model completed in 2022.
Trumpeter's 1/32 scale P-40M suffers from many, many faults and inaccuracies.
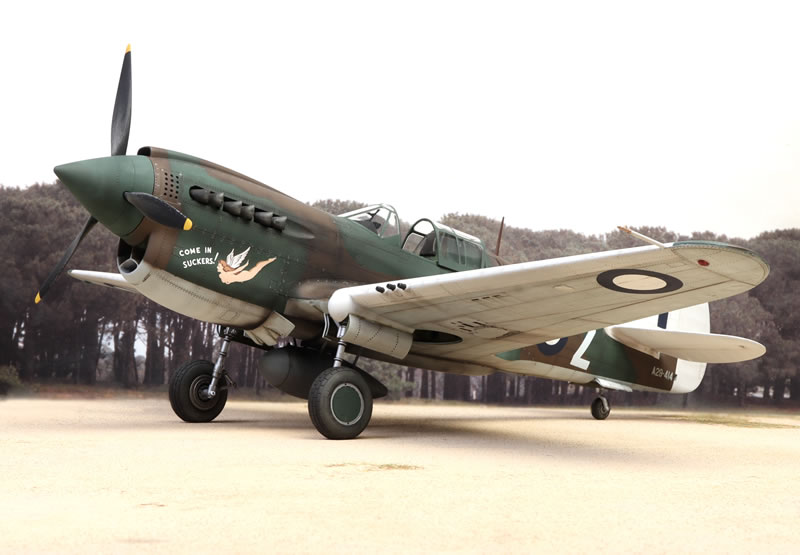
The worst of these is the cockpit, which is mostly fictitious and perpetuates Trumpeter's flawed flat floor that first appeared nearly 20 years ago on their 1/32 scale P-40B Tomahawk and has been pointed out on that kit and all subsequent releases. Sadly, the criticism has fallen on deaf ears.
I replaced the kit cockpit with CMK's multimedia P-40E cockpit set. Although it is intended for the Hasegawa kit, it wasn't too hard to adapt it to Trumpeter's Kittyhawk.
I won't list all the other problems with the kit here, but there are a number of redeeming features.
Fit of this kit is exemplary. Building it was a true pleasure.
Surface textures are really nice too, made up from recessed panel lines, rivets and fasteners.
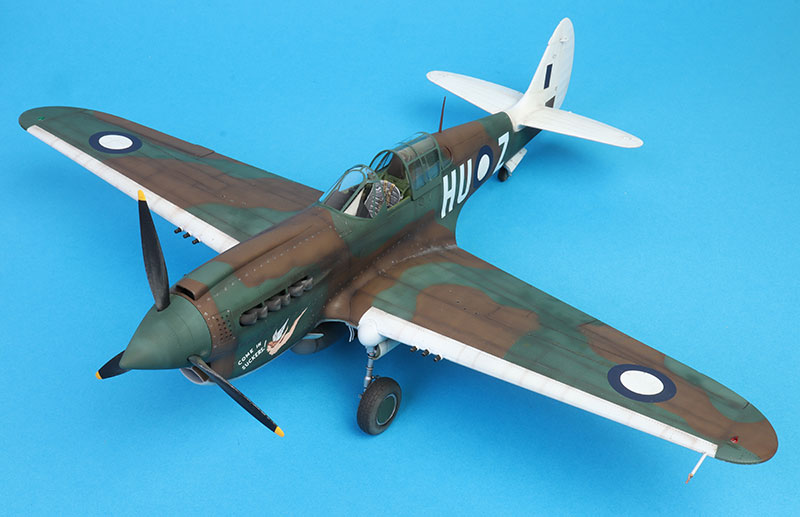
I finished my Kittyhawk in SMS lacquer paints' RAAF Foliage Green and RAAF Earth Brown upper surfaces and Sky Blue below.
Markings are from DK Decals' Item No. 32004, P-40N Warhawk / Kittyhawk Mk.IV.
I wrote this one up for a big two-part article in Issue 131 of Military Illustrated Modeller magazine.

Model, Images and Text Copyright ©
2023 by Brett Green
Page Created 3 January, 2023
Last Updated
3 January, 2023
Back to
HyperScale Main Page |
 Home
| What's New | Features | Gallery | Reviews | Reference | Resource Guides | Forum |
Home
| What's New | Features | Gallery | Reviews | Reference | Resource Guides | Forum |