Academy's 1/72 scale B-24D Liberator
Square Deal
“Wham Bam” Assembly Ship
Model, Text & Photos by Tim Nelson

Back in 2022, we broke through the neutral color palette which plagues the modeling world with the technicolor B-17 Assembly Ships “Spotted Cow” and “Birmingham Blitzkrieg.” At that time, a B-24 was promised to complete a geometric trilogy of circles, lines, and squares. We now fulfill that prophecy.
History
The Consolidated B-24 Liberator, along with the Boeing B-17 Flying Fortress, formed the basis of the U.S. Eighth Air Force’s daylight bombing campaign against Germany in World War II. There has been longstanding debate about the relative merits of the two types, which we won’t settle here. In short, the newer B-24 design offered better range and payload, while the B-17 exhibited better handling qualities, altitude capability, and robustness to icing and battle damage. Over 18,000 B-24s were manufactured, making it the most produced military airplane in U.S. history. The first Reference provides a B-24 overview and a bibliography for anyone wishing to dig deeper.
In our previous B-17 experience, we described the role of the Eighth Air Force “Assembly Ships.” We won’t repeat all that here, but for the uninitiated, the idea was to repurpose “war-weary” aircraft to assist in joining up each Bomb Group’s formations over England. The machines were transformed into highly visible targets with imaginative, brightly colored schemes which often included arrays of lights.
Roger Freeman’s classic “The Mighty Eighth,” Chapter 16 (see References), includes a description of the role of the Assembly Ship worth repeating:
“It was the procedure, prior to a mission, for the Assembly Ship to be first off the airfield, to fly to the assembly area and commence orbiting with its signs illuminated, while the crew fired a continual succession of flares from the large supply carried. When the formation was complete the Assembly Ship would break away and return to base. Several of these machines expired in flames; there being a high fire risk with the vast number of pyrotechnics carried.”
Freeman includes a 2-page spread of selected B-24 profiles in the back. The Jackiewicz & Bock book (see References) is by far the most in-depth guide to individual assembly ship aircraft, with a plethora of photographs and art which depicts the subjects in vivid color. There are occasional discrepancies in the artwork but it is nevertheless the undisputed “bible” of these unique birds.
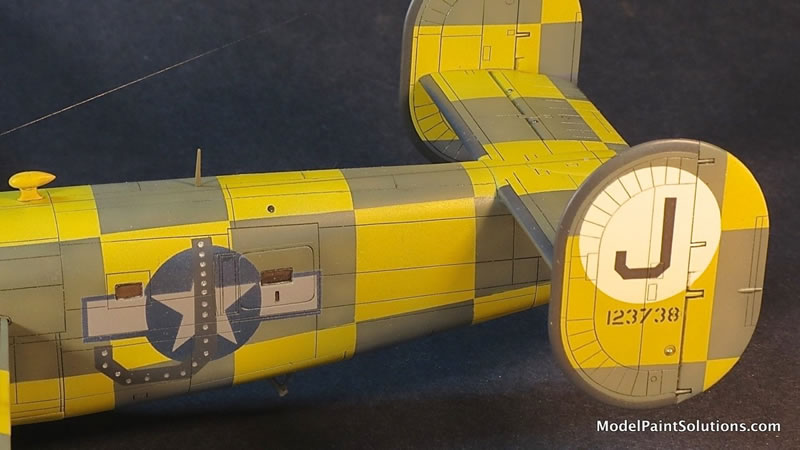
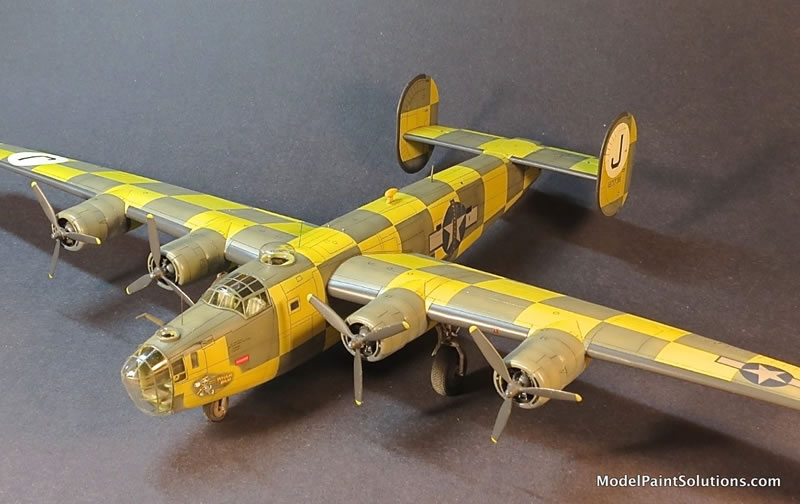
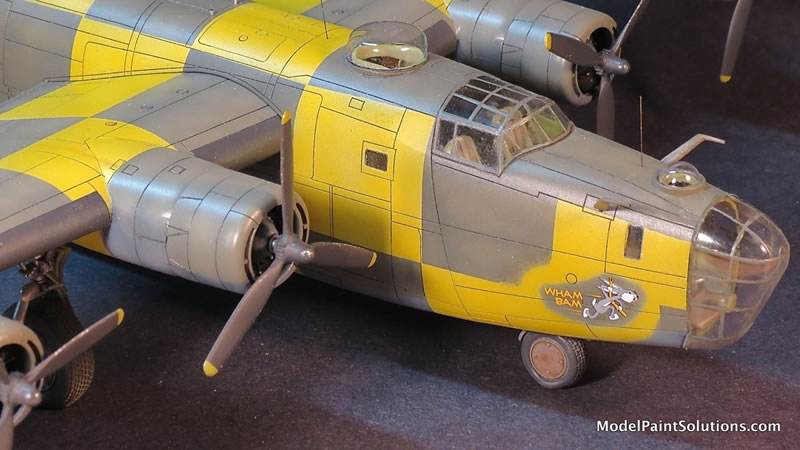
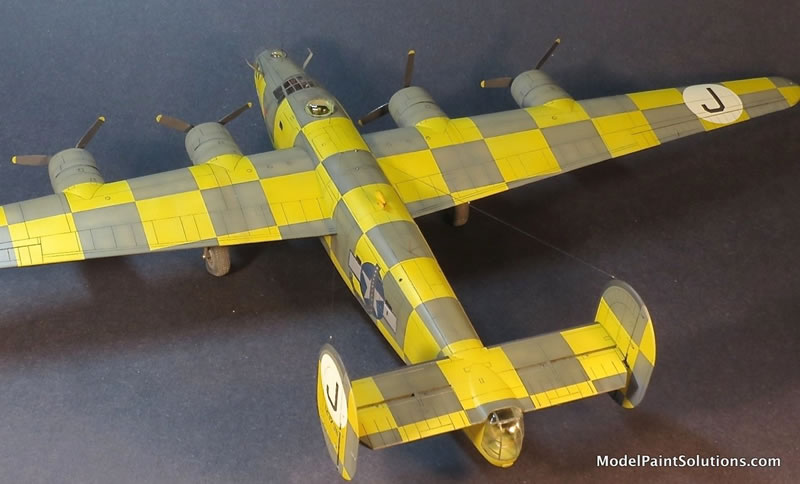
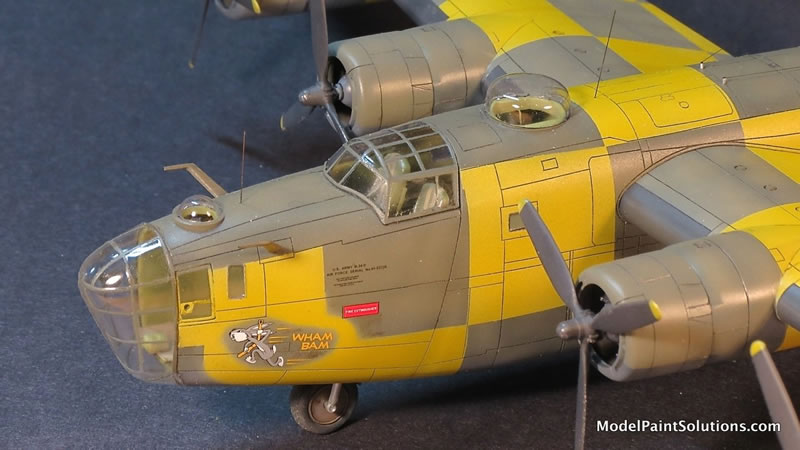
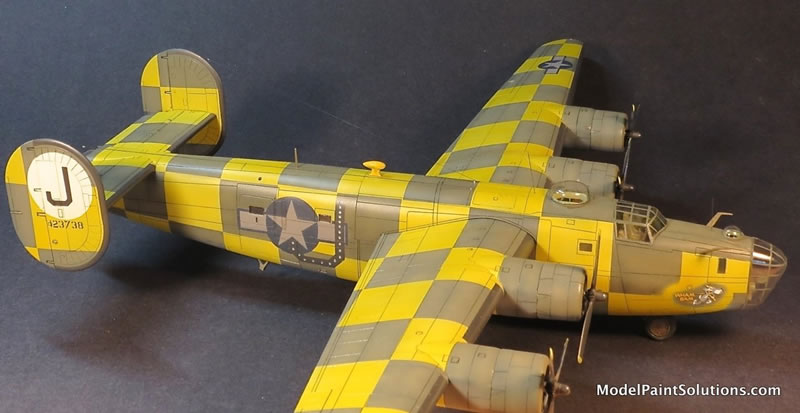
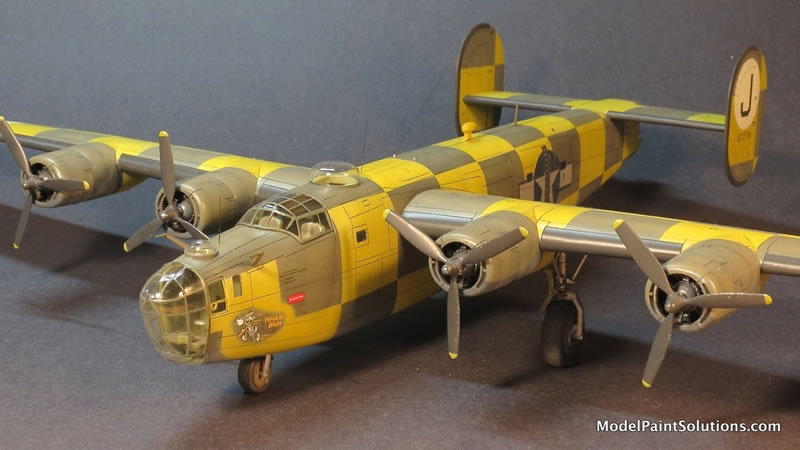
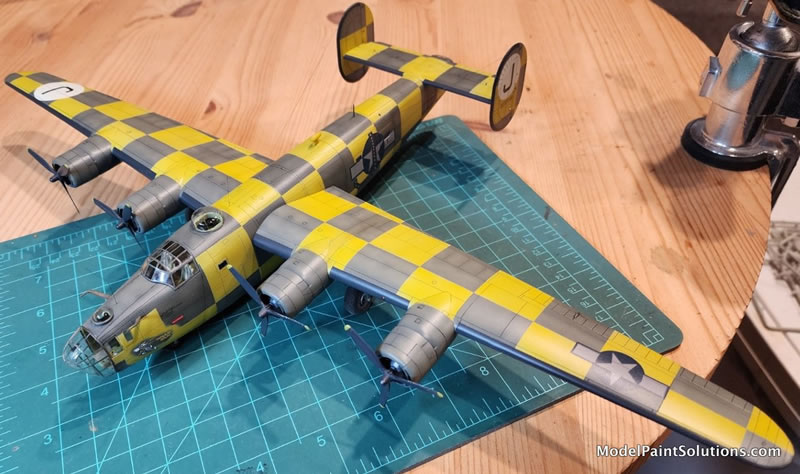
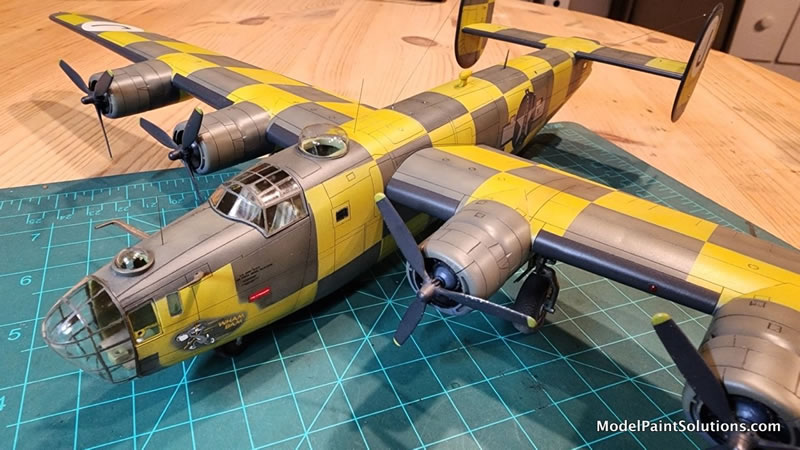
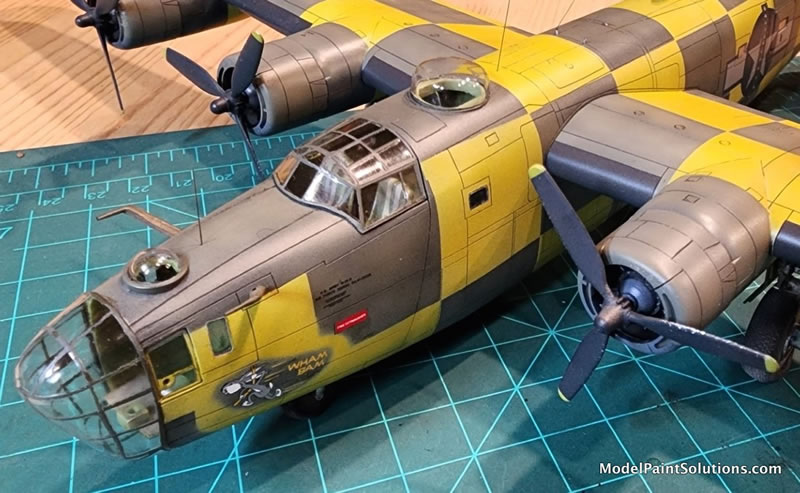
Our local club, NorthWest Scale Modelers (NWSM), is privileged to meet at The Museum of Flight in Seattle. We collaborate with the Museum on rotating lobby displays, and we stage model shows. One upcoming display (June 2023) features these outrageous but overlooked Assembly Ships. We anticipate 10 1/72 B-17s and B-24s inside the display cases, with at least one 1/48 model hanging in the area above. As the curator of said display, I’ve had to set some kind of example, first with the two B-17s previously documented. Now we move on to Consolidated B-24D-1-CO "Wham Bam," of the 453rd Bomb Group, based at Old Buckenham, England. The aircraft originally served with the 93rd Bomb Group but was transferred in early 1944 after being declared war-weary. Assigned Assembly Ship duty and given a bold yellow checkerboard pattern, the paint crew carefully preserved “Wham Bam’s” distinctive Bugs Bunny nose art. The tail turret was replaced with a “greenhouse” for presumably an observer to watch over the developing formation. During the summer of 1944, a large lighted “J” was installed on the fuselage sides. Suitably inspired, and continuing to develop the display, we move to the kit that will serve as canvas for all this color.
Not heeding my own advice from the recent B-17 experience, I fell upon Academy B-24D Kit FG071, box art featuring “The Goon,” resident in my stash since (I reckon) the late 1990s. Similar to the B-17 kits, it has a plethora of problems despite its modern-looking fine recessed panel lines. Among the issues:
-
A multitude of sink marks throughout, especially fuselage top and wing upper surfaces (above main landing gear wells); I filled as best I could but actually ignored the wing (let’s call it “oil-canning.”)
-
Thick clear parts (mostly replaced with Squadron canopy set in the stash, but fit to model was not great)
-
Poor fuselage fit and misaligned panel lines (filled, sanded, re-scribed)
-
Poor fit of nose section (designed to accommodate multiple B-24 variants) to fuselage (filed and sanded)
-
No left wing aileron tab (manually scribed)
- Soft / vague panel lines in places (scribed or re-scribed)
These were the significant modifications I made to spruce things up:
-
Installed internal fuselage blanks to block potential sight lines
-
Added selective cockpit detail
-
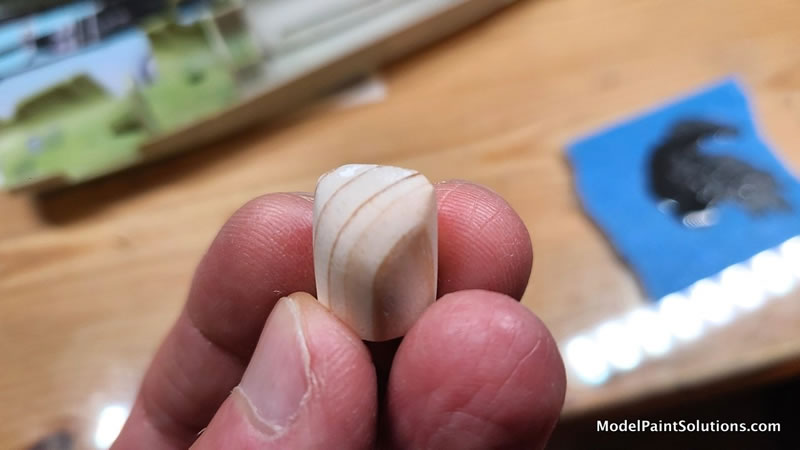
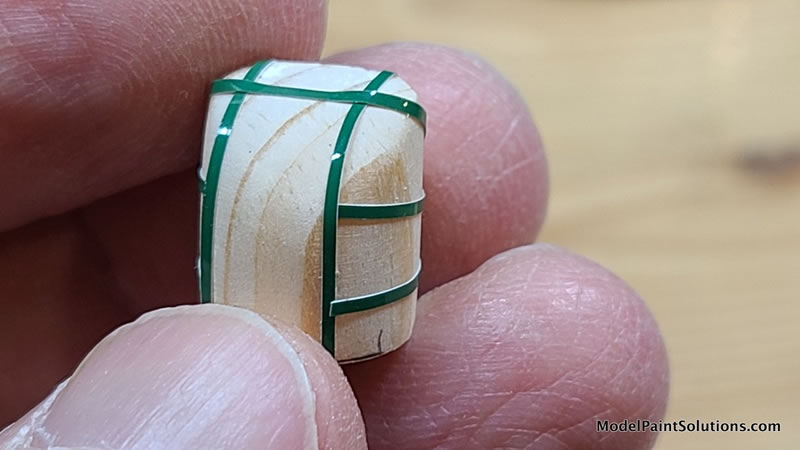
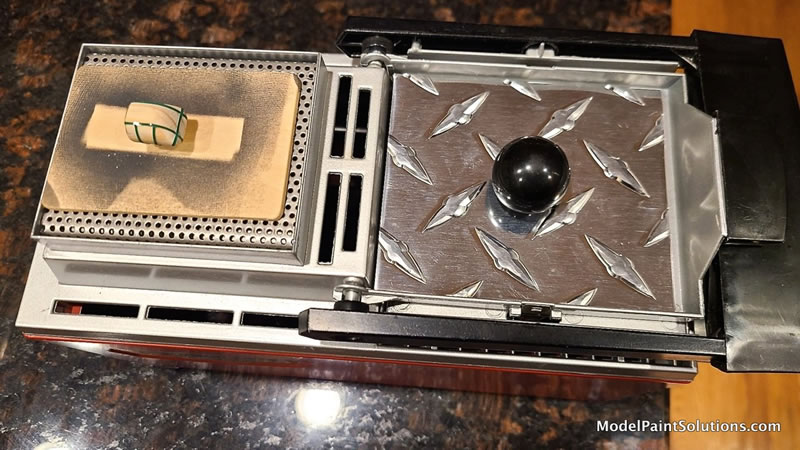
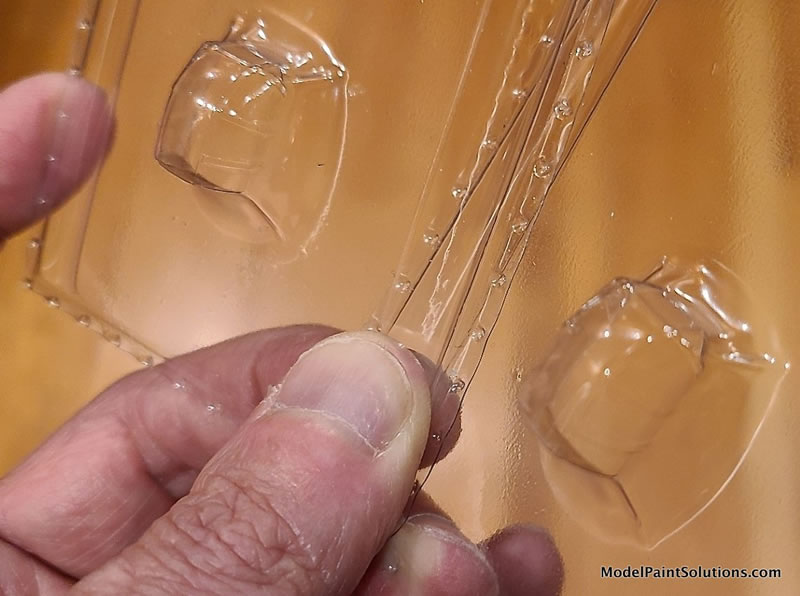
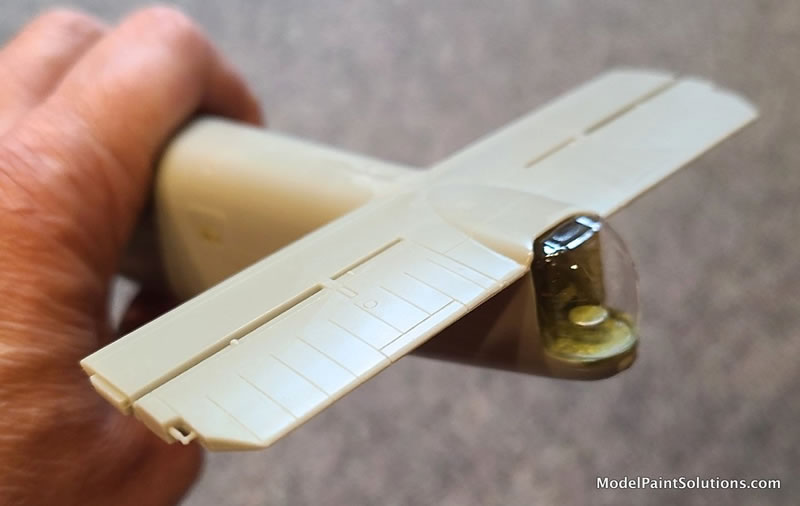
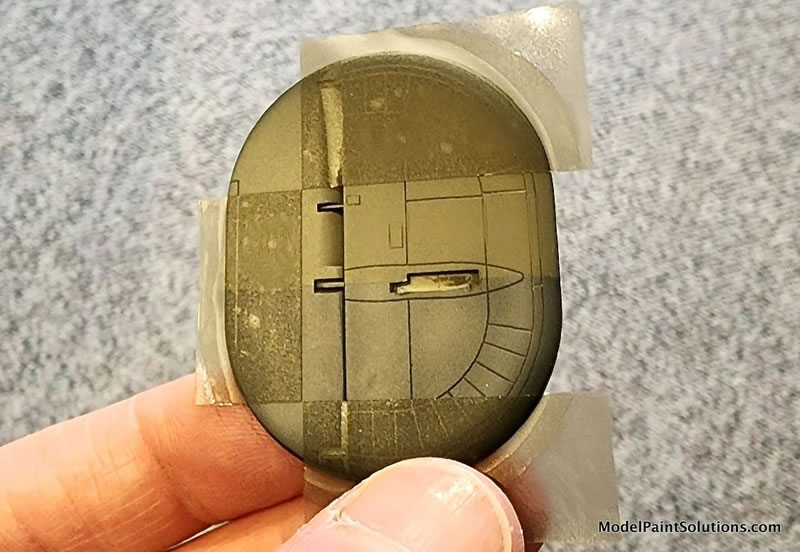
Scratchbuilt tail observer position and glazing, shaping a wood master, applying Chart-Pak tape for framing, and using my old Mattel vacuform machine
-
Scratchbuilt top fuselage observer position
-
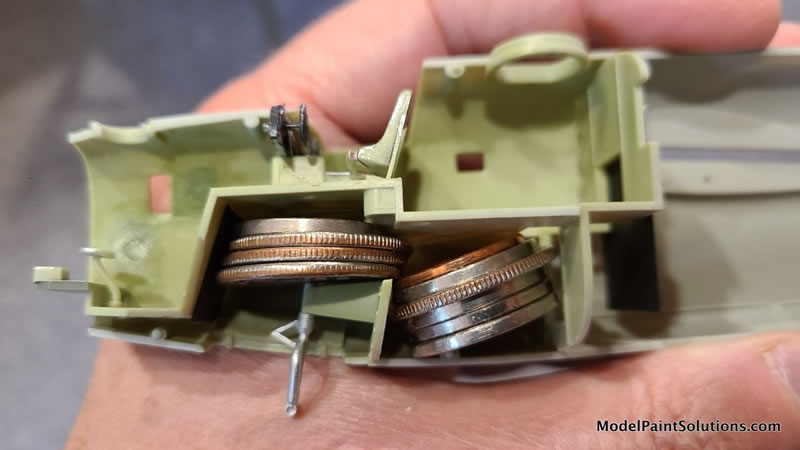
Substituted True Detail resin wheel set (you know, the “flat tire” look), and modified the nose gear mount scheme to add a shim allowing the “fender” to contact nose gear post (to carry a lot of ballast weight). This contact point is above the base of the nose gear well, and not visible at normal viewing angles.

-
Installed several whip antennae and aerials
-
Scribed “rolltop desk” bomb bay doors
-
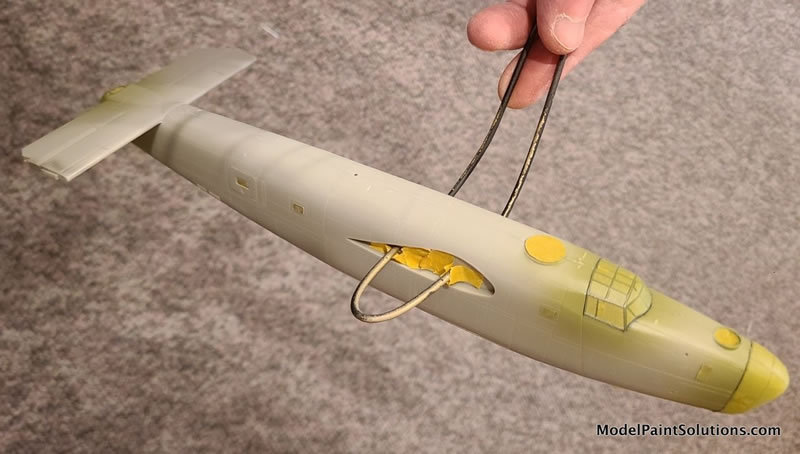
Dropped fuselage and repaired horizontal tail and fuselage joint!
-
Used Hussar Productions D72001 “Assembly Ships” decals for nose art and stencils; all other national insignia, unit markings, and serial numbers applied using custom masks I worked up on a Silhouette Cameo.
-
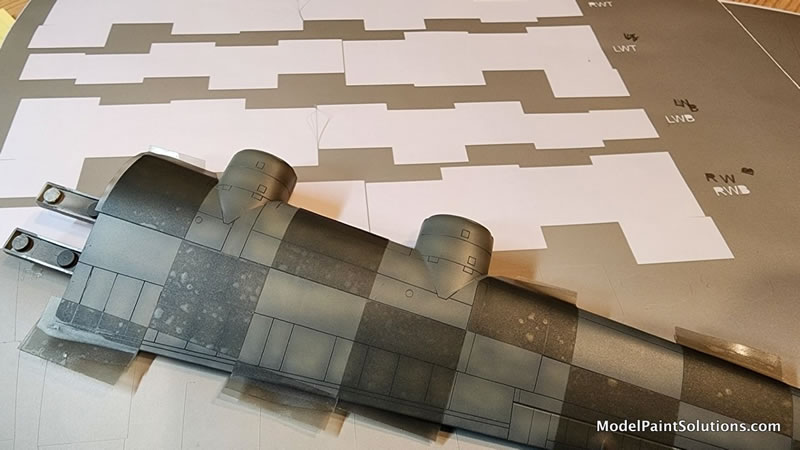
Also used the Cameo to create masks for most of the checkerboard pattern, scaling drawings from the Jackiewicz & Bock book to 1/72 as a reference
This brings me to a fairly recent modeling philosophy I’ve adopted, to actually complete models such as this (and the Academy B-17s). Rather than a maximum effort every time, I dial the intensity up or down depending on my motivation, inspiration, and the potential of the kit to achieve my intentions. Once you develop a basic modeling skillset, achievement is mainly a function of TIME: time devoted to careful prep and assembly, correcting kit deficiencies, fixing mistakes, masking & painting, recovering from calamity, etc. Time, precious time. My strategy is intended to maximize fun and minimize pain - after all, this is a hobby. It highlights the distinction between decent “museum quality” and superb “contest quality” - I quickly decided this project would be targeting the former rather than the latter!
Let’s now focus on the painting, which is the interesting and lurid part of this project. I always plot out a paint sequence early in the project, to try to identify problems and “gotchas” before any paint ever goes on the model. The more complex the scheme, the more important it is to clearly think through the steps. After converting “cold turkey” to acrylics in 2017, I learned (with the help of Dr. Strangebrush) the importance of thorough cleaning and degreasing of kit parts. My usual approach is to subject the parts to an initial warm soapy bath of Dawn at the beginning of a project, then (after all that handling during assembly) a systematic swab-down of the model with denatured alcohol and a Kim-Wipe just prior to applying primer.
One attractive aspect of the Academy kit is the snug fit of the wings into fuselage slots. After extensive test fitting, I decided that I could leave the wings off until final assembly – GREATLY facilitating the masking and painting to come. Here we will use both Mission Models and AK Interactive Real Color acrylics. The last couple of years, I’ve been experimenting with the “black basing” technique, where the model is primed black and then lighter mottling/marbling is applied freehand to various panels. This lays a foundation for the paints applied later, modulating the colors and breaking up the otherwise monochrome finish. I find this method easier, and yielding more natural looking results, than pre-shading panel lines in linear fashion.
I thin Mission paints with the Dr. Strangebrush elixir of 30% Mission Clear Primer / 70% Mission Thinner, dubbed “CP30”. (That elixir is further cut 5-10% each with Liquitex Flow Aid and Tamiya Retarder.) A Harder & Steenbeck Infinity airbrush with 0.2mm tip was used throughout, unless noted. Overall, weathering will be restrained, based on photos of the prototype.
Here is the “Wham Bam” paint sequence:
-
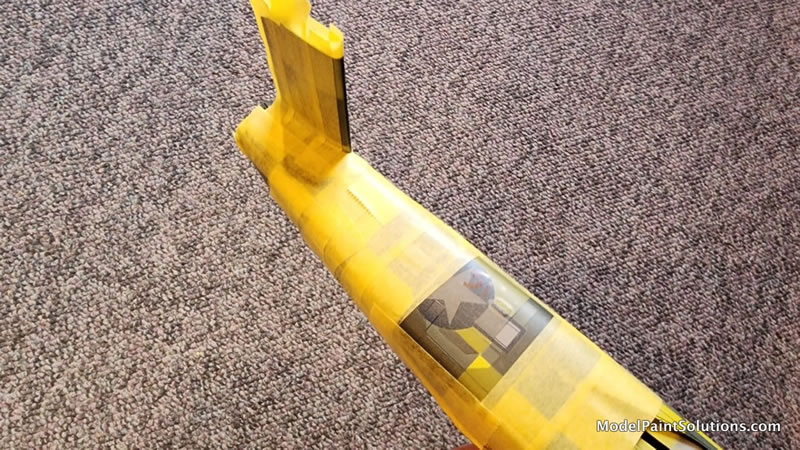
Masked clear parts with Eduard masking set where possible, and my own manual masking of the tail position.
-
Spot treatment of clear window framing with Mission Zinc Chromate (MMP-068), about thinned about 50/50 with CP30.
-
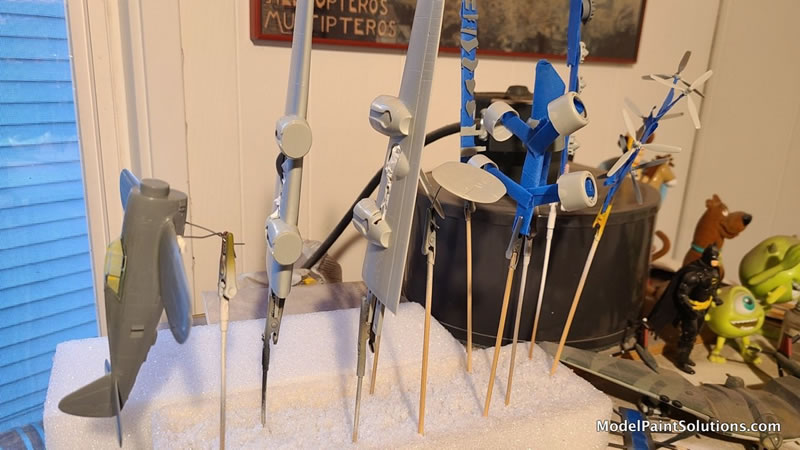
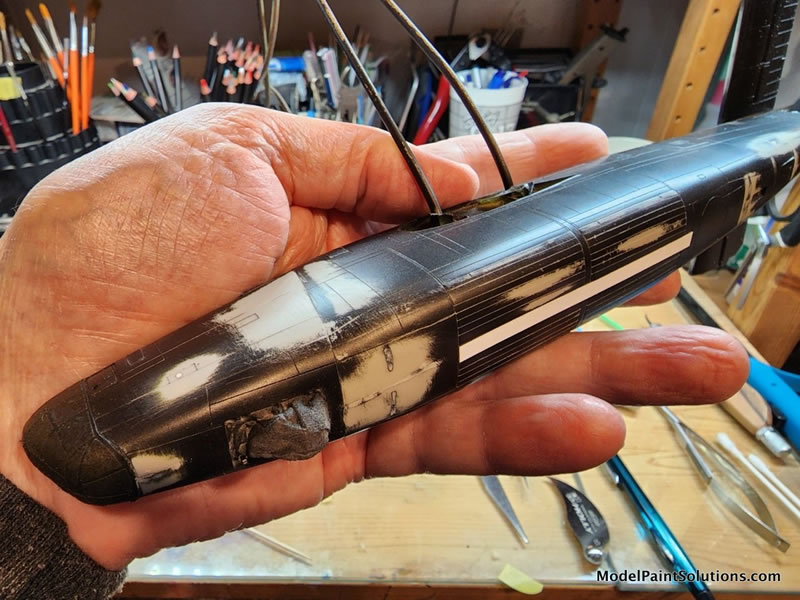
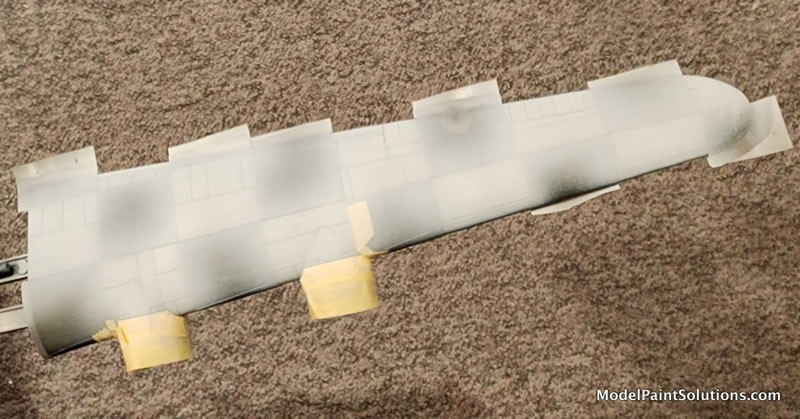
Entire model primed with the outstanding Mission MMS-001 Black Primer, thinned about 50/50 with straight Mission thinner and about 5% each Liquitex Flow Aid and Tamiya Retarder. (Then further work on seam lines and sink marks. I was simultaneously working on a Tamiya P-47 project, a complete pleasure in contrast to what we have here.)
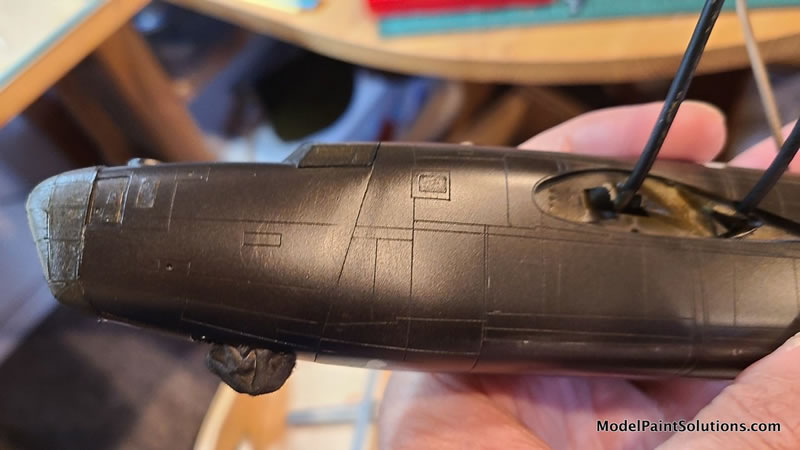
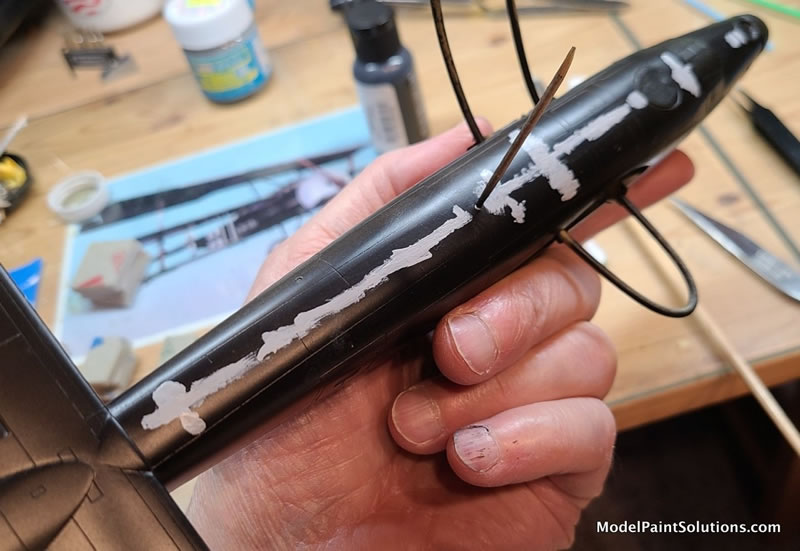
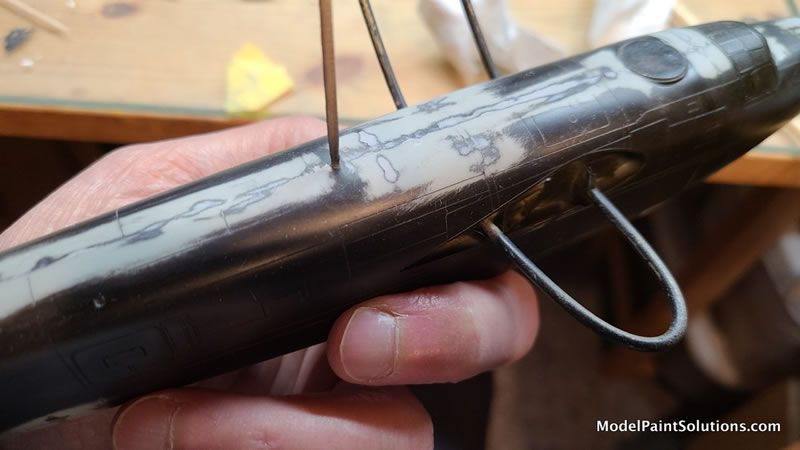
-
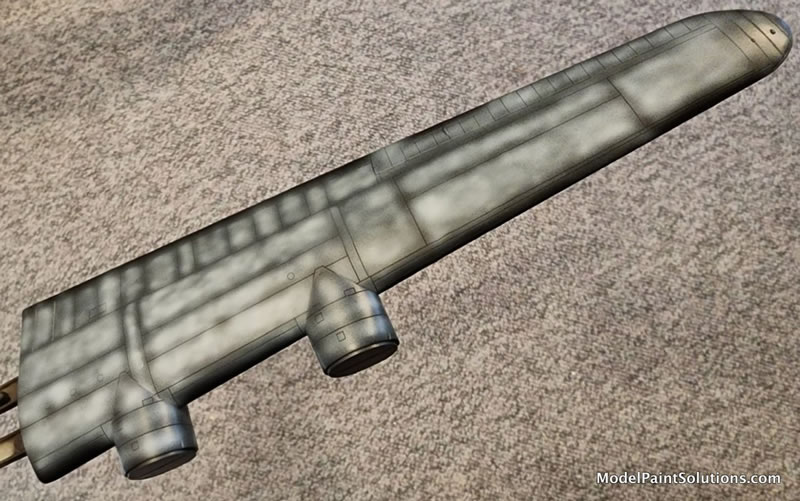
Light shaded mottling applied freehand in a swirling motion within each panel, using AK RC222 Insignia White, thinned about 20/80 with AK High Compatibility Thinner (HCT) and flow aid / retarder additives. This is a fine line setup, with the airbrush held fairly close to the model.
-
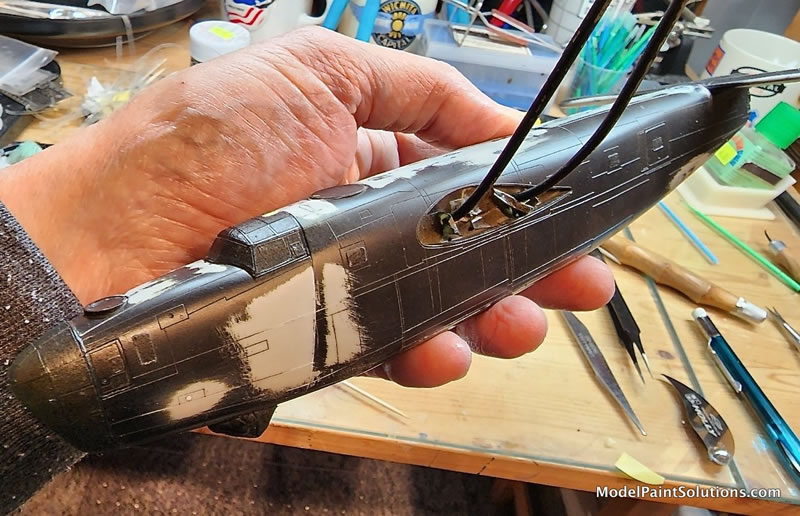
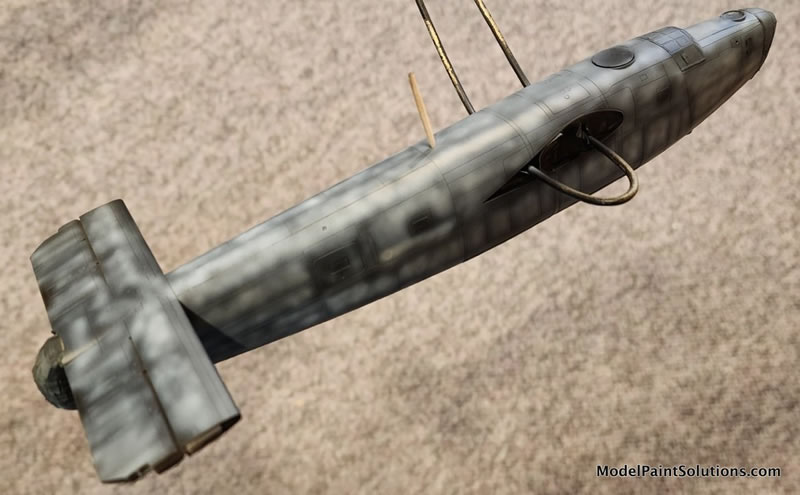
Undersides painted Mission MMP-118 Medium Grey (about 50/50 with CP30, but quitting while mottling was still visible), which I thought was a close approximation to USAAF Neutral Grey 43. It turned out a little too dark to my eye.
-
After masking the gray, upper surfaces and sides were shot with Mission MMP-091 USAAF Olive Drab 41, about 40/60 with CP30 to allow the mottling to show. I often add about 10-15% white for scale effect, but the Mission OD looks light enough such that I didn’t bother – I should have bothered with the gray.]
-
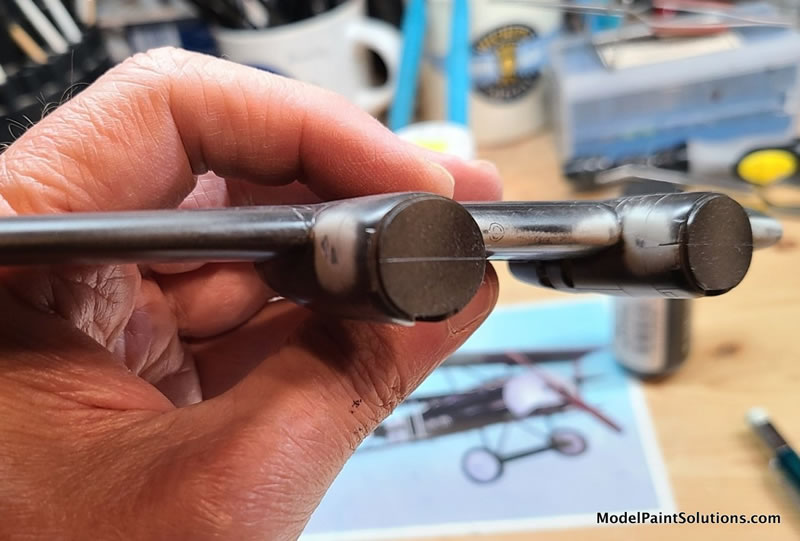
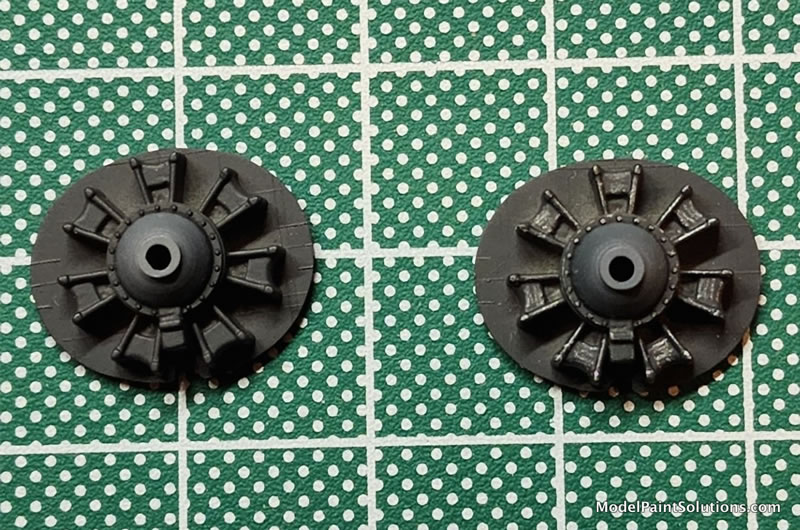
Meanwhile other items were painted such as landing gear, wheels & tires, and engines, with appropriate washes, drybrushing, and AK pencil treatments.
-
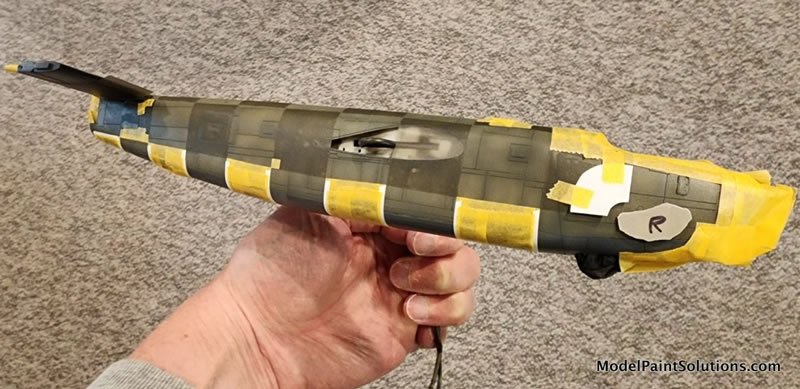
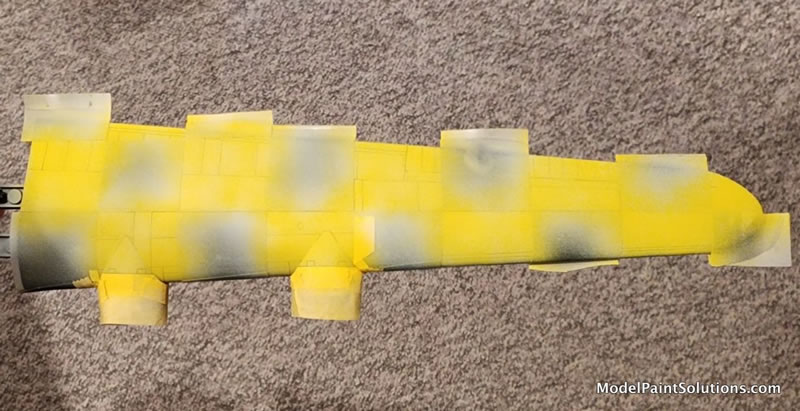
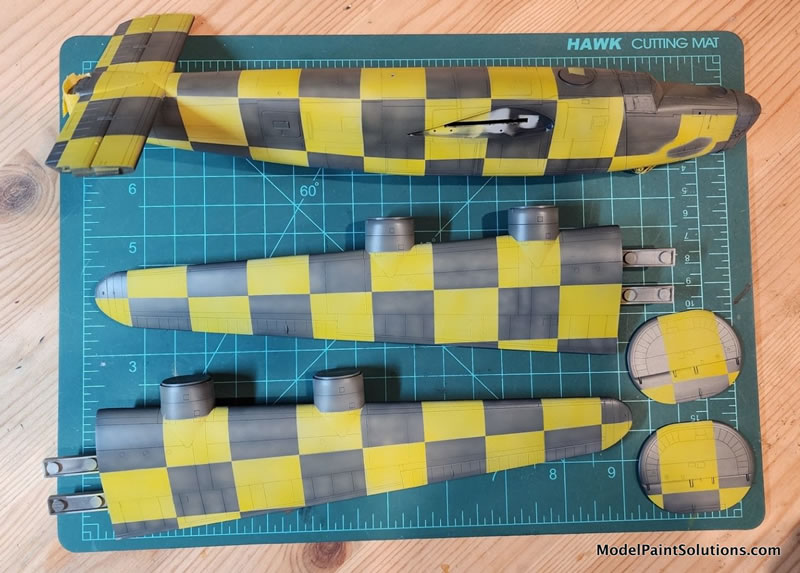
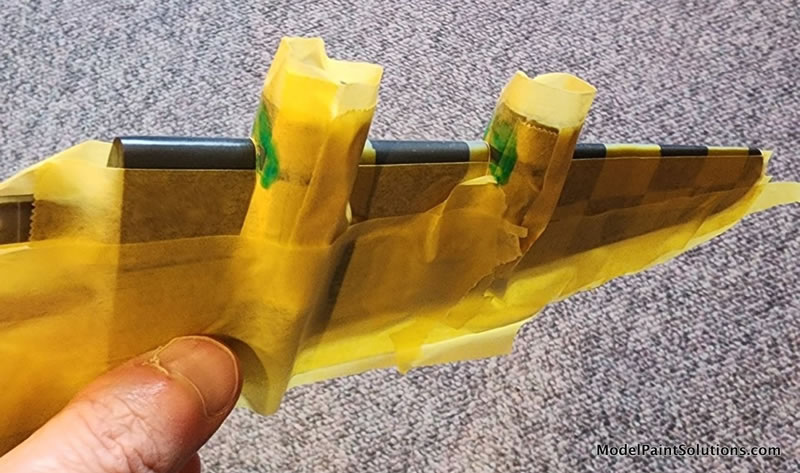
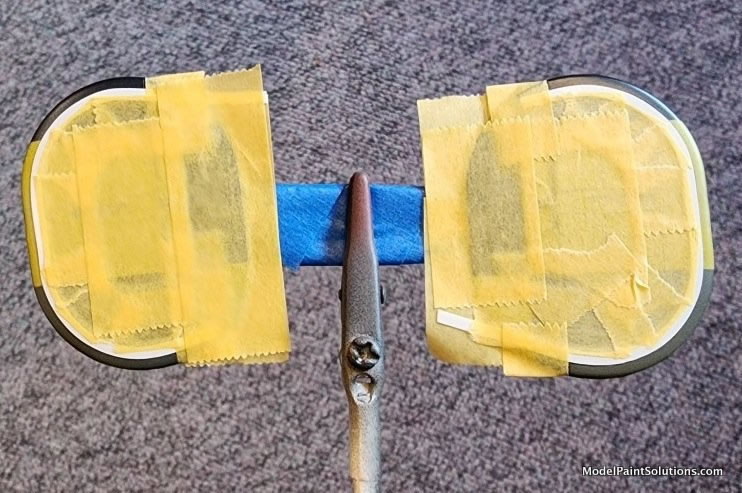
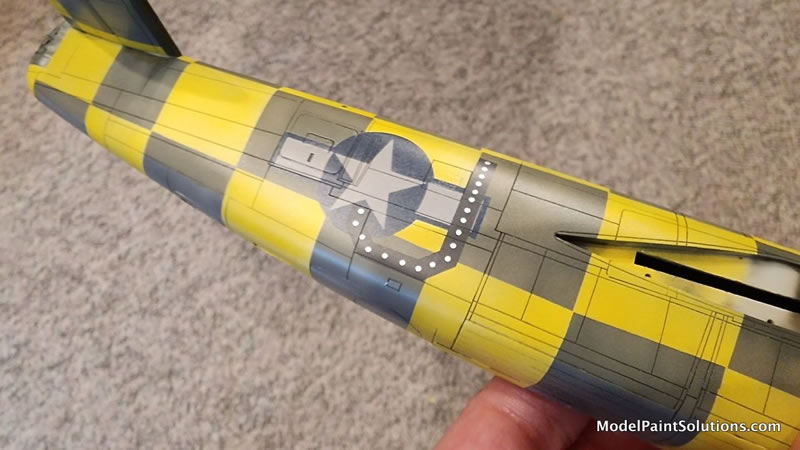
Now we move to the main event, the checkerboard pattern over the entire airframe. I used the Cameo masks to cover areas to remain OD and grey, including standoffs for soft demarcation lines around the nose art. I handled the compound curves with manual Tamiya and Aizu tape

-
To prepare for yellow, I first hit the applicable areas with the same AK RC222 Insignia White mix used above for mottling. I figured the newly applied yellow would be far less faded or weathered than the base OD and grey, so just went for basic coverage with some intentional unevenness.
-
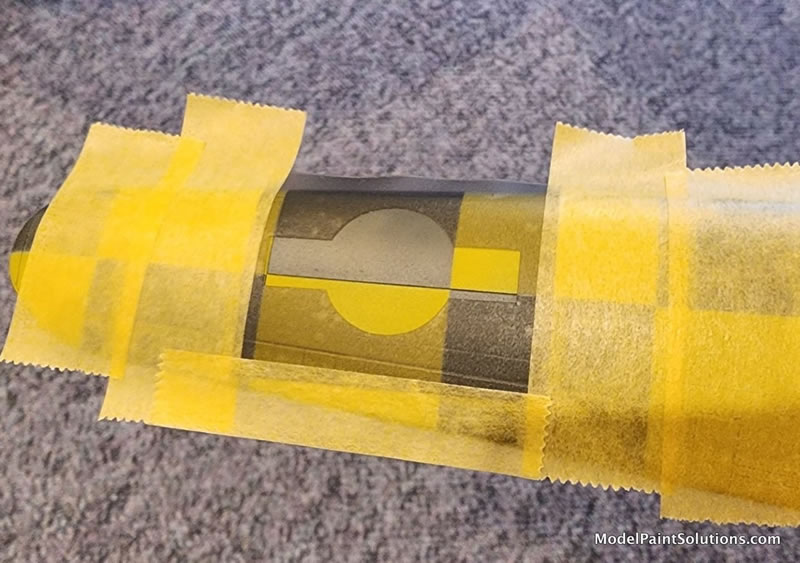
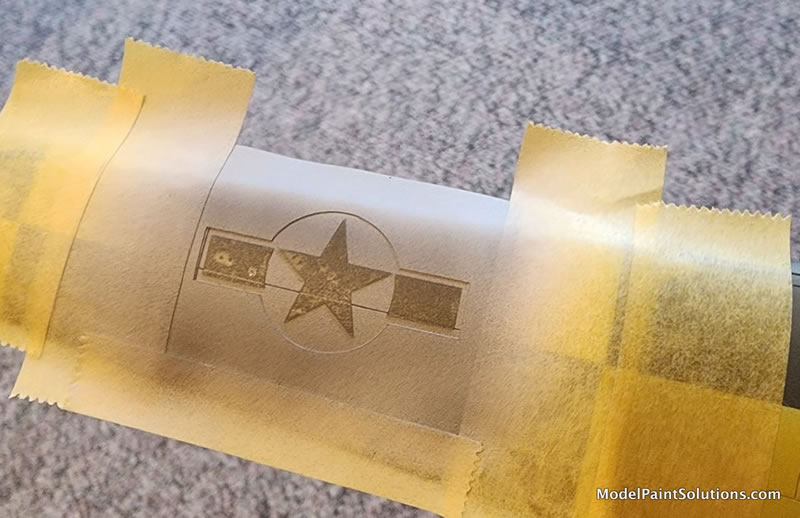
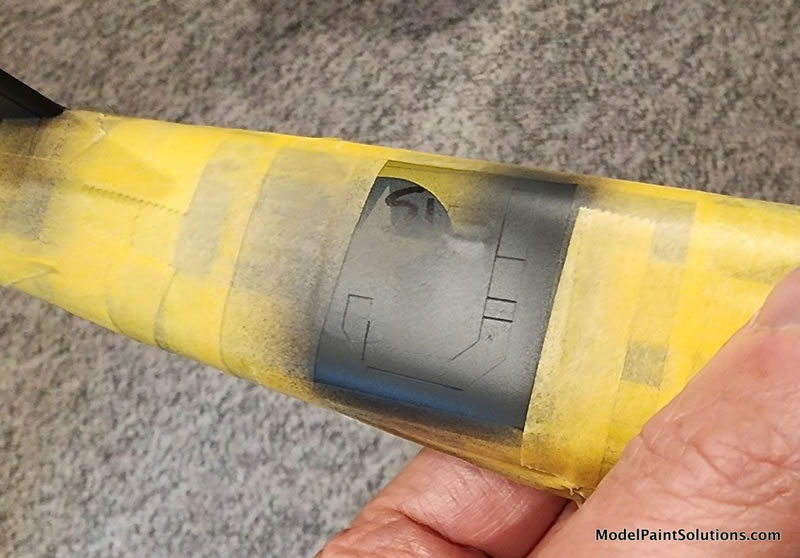
Unit and national insignia were applied using my own Oramask designs, first providing a lighter base with the same Insig White mix. Not content with the underside Mission Grey used above, I switched to AK RC261 Neutral Grey for the first layer of low visibility stars & bars (thinned about 40/60 with HCT and additives). The dark blue was later added using Mission MMP-048 Blue darkened with MMP-105 Worn Black, both thinned 50/50 with CP30.
-
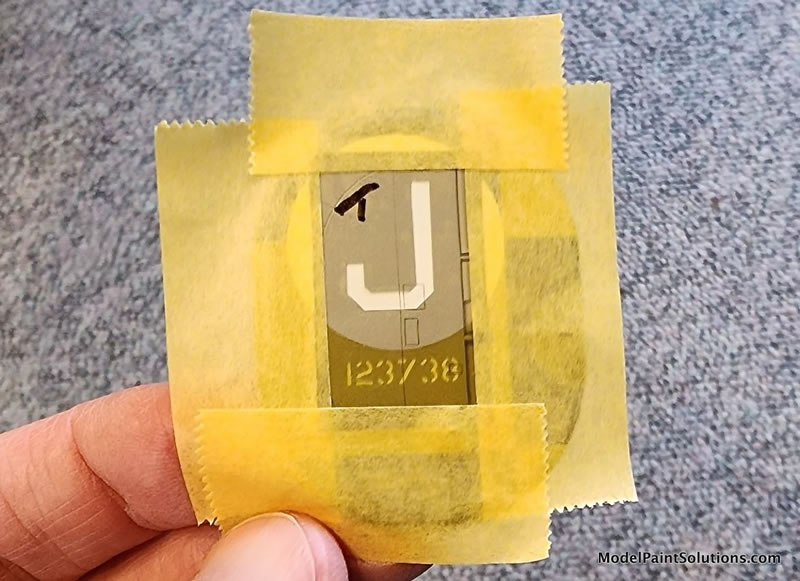
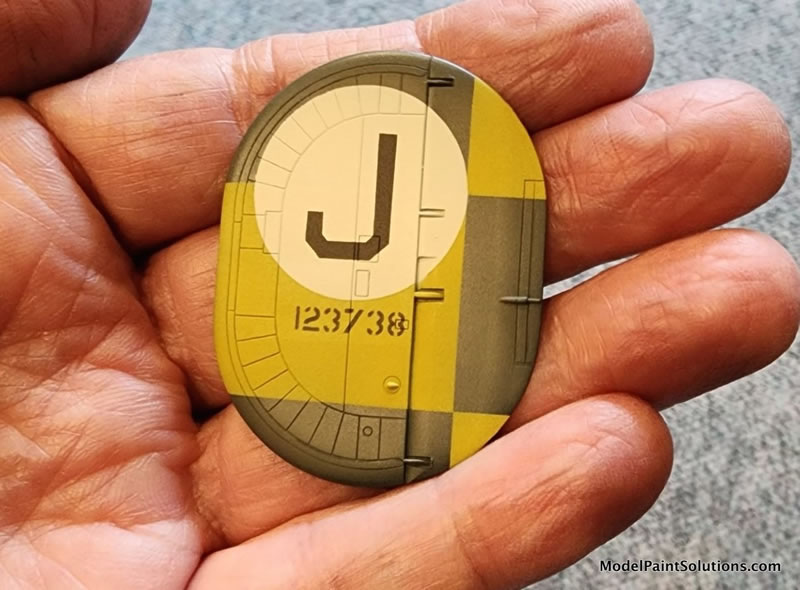
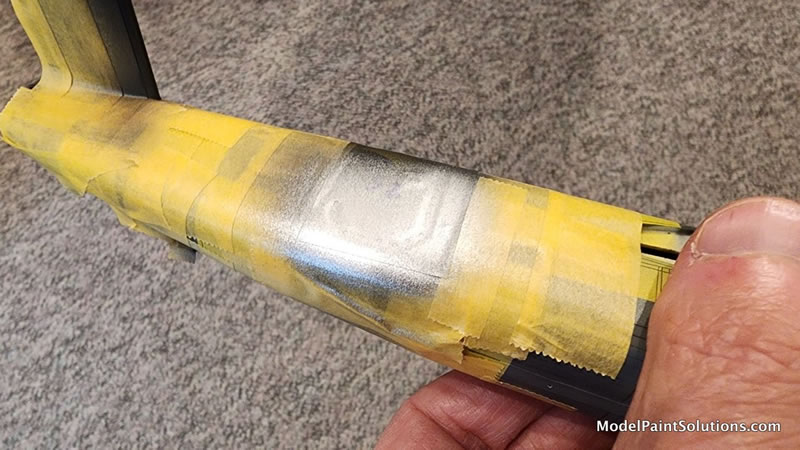
The Hussar decal sheet provides the large “J” markings that were applied in the summer of 1944. It depicts the light array but I didn’t find it convincing – motivating me to try an approach with paint: first laying down the “J” (Mission Worn Black as above), then spraying the “lights” over my Cameo mask with Tamiya X-11 Silver thinned 50/50 with Vallejo Thinner and usual flow aid/retarder).
-
Entire model sprayed with CP30 as a base for panel lining and nose decals.
-
All panel lines treated with Tamiya Black Panel Liner, swabbed off with a Kim-Wipe and Mona Lisa odorless thinner.
-
Final sheen was achieved using Vallejo Satin Varnish, mixed 50/50 with Vallejo Thinner and applied with an H-S Evolution fitted with a 0.20mm tip.
-
Exhaust stains (not photographed, all via the turbocharger exhausts on the wing underside) were applied with AK pigments
-
Some top wing oil streaking was applied with AK Streaking Grime and Fuel Stain

My workmanship on this B-24 rivals the craptacular effort I put into the earlier B-17s, but it is FINISHED -and a finished model is better than any hypothetical effort that is never completed. It ably fulfills the mission required of it, which is to tell the story of these colorful and unheralded birds at The Museum of Flight this summer. Check out the full display if you can, running from June 1 to October 5, 2023.
Cheers!
Tim
For more on this build, visit ModelPaintSolutions.com:
https://modelpaintsol.com/builds/square-deal-the-b-24d-assembly-ship-wham-bam
References:
Consolidated B-24 Liberator, Wikipedia
The Mighty Eighth, Roger A. Freeman, Doubleday (4th ed.), 1973
Assembly Ships of the Mighty Eighth, Jacek Jackiewicz and Robert Bock, Atelier Kecay 2007
Resources:
Mission Models Paint
AK Interactive Real Colors Paint
Silhouette Cameo 3 electronic cutting tool:
Available from the manufacturer, Micro-Mark, and other outlets.
Text and Images Copyright © 2023 by Tim Nelson
Page Created 16 March, 2023
Last updated
27 March, 2023
Back to HyperScale Main Page
Back to Reviews Page

|
 Home
| What's New |
Features |
Gallery |
Reviews |
Reference |
Forum |
Search
Home
| What's New |
Features |
Gallery |
Reviews |
Reference |
Forum |
Search