|
AJ-1 Savage
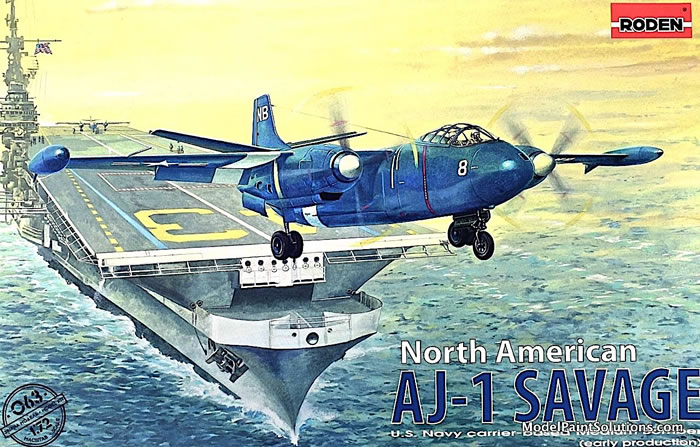
Roden, 1/72 scale
S u m m a r y : |
Catalogue Number: |
Roden Kit No.
063 - North American AJ-1 Savage |
Scale: |
1/72 |
Contents & Media |
170 parts in grey styrene (not all are used), 3 clear parts, and one decal sheet with markings for 3 aircraft. |
Price: |
£54.99 (£58.32 Export Price) plus shipping available online from Hannants
Click here for currency conversion |
Review Type: |
First Look. |
Advantages: |
This is a new mold kit of an under-served aircraft with nice recessed surface details, clear canopy parts, and a quality decal sheet. |
Disadvantages: |
There is a bit of flash on the smaller parts and some of the inscribed surface details will require refreshing. |
Conclusion: |
This is a nice kit of an aircraft that’s long deserved better treatment from the modeling industry. To get the most out this kit will require a bit of work but the result will be a beautiful model of a very attractive aircraft, but I’m biased. Highly Recommended! |
Reviewed by John Miller

When I heard these AJ1’s were inbound from Ukraine, I called the owner of my favorite local model shop, Skyway Models and requested that one be set aside with my name on it. I knew this kit would cause a local feeding frenzy and I didn’t want to miss out. That and I’m a long-time admirer of the North American Savage; a very svelte twin to this wing nut’s eyes. I’ve been eagerly anticipating this release and I’m not let down. It will take a little work but this kit will build into a beautiful model.
Background
The North American AJ Savage (later A-2 Savage) is an American carrier-based medium bomber built for the U.S. Navy by North American Aviation. The aircraft was designed shortly after WWII to carry atomic bombs and this meant that the bomber was the heaviest aircraft thus far designed to operate from an aircraft carrier. It was powered by two piston engines and a turbojet buried in the rear fuselage.
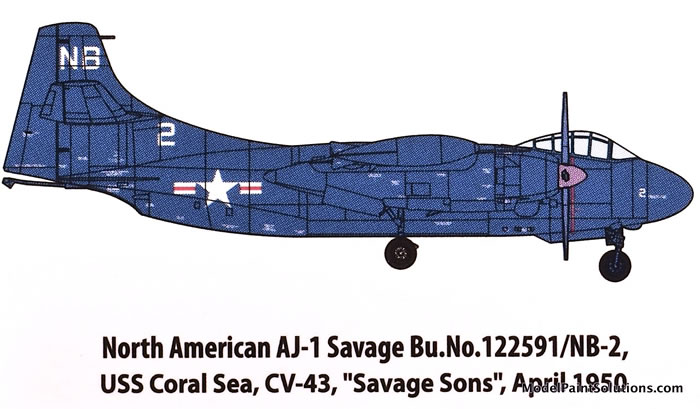
The AJ-1 first became operational in 1950 and several were based in South Korea during 1953 as a deterrent against North Korea. Of the 140 built, plus three prototypes, 30 were reconnaissance aircraft. In-flight re-fueling equipment was deployed on the Savage in the mid-1950s. The bomber was replaced by the Douglas A3D Skywarrior beginning in 1957.
(Edited from Wikipedia)
I like Roden kits for multiple reasons. Primarily, they’re one of multiple Ukrainian companies that specialize in producing quality kits of aircraft that weren’t perhaps in histories head lines. Such an aircraft is the North American AJ1 Savage; a pretty airplane to this reviewers eyes but one that’s been overlooked by the modeling industry. Fortunately, it appears that the folks at Roden did the ole girl justice. Thanks guys!
Coming in a lidded box adorned with the image of a Savage launching from a carrier deck are 9 sprues of light grey styrene and one in clear. The initial response is decidedly positive. The inscribed surface details are well done and scale-appropriate although a bit uneven in a few places. This is nothing that can’t be rectified with a couple of swipes of the scriber. This will be a large and impressive model when assembled.
A comment on the instructions: The suggested build sequence does not start with the cockpit or pilots seat etc. In fact, the assembly sequence as suggested in the kit instructions would be best described as novel. It starts with the main wings and tip tanks followed in sequence by the main wheels (from halves), main instrument panel, main gear assemblies, engines, propellers, nacelles, back to crew instrument panels, seats, cockpit (there it is!), bomb bay, and then we get to close up the fuselage…….………..novel. Perhaps there is an underlying justification for the sequencing that I’m missing. If so, I sincerely apologize to the folks at Roden. That said, there’s ~40 years of experience building models screaming at me to start with the cockpit and close up the fuselage so I can start working on the seams before I launch into x, y or z. That being the case, this review will present a more conventional build sequence mostly because I’m too old to change. Sorry, guys:)
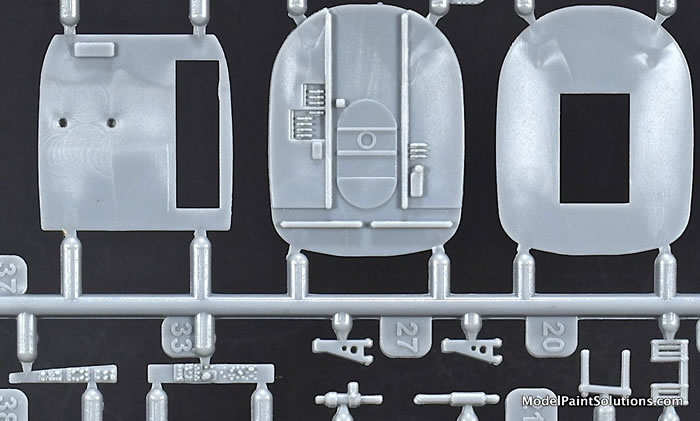
The cockpit (ah, much better) is well appointed with pilot and co-pilot seats comprised of multiple parts (3). The detail on the main instrument panel is molded in. Details for the side panels are provided in nicely detailed panel covers, also molded. Since the decal sheet lacks any decals for the main- or crew-instrument panels, you’ll have to be handy with a small trim brush to take advantage of what is some very impressive detail on such small injection-molded parts. Conversely, one could wait for the inevitable after-market color photo-etch or 3D-printed replacement parts, which is what this builder is going to do. Putting a little effort into the cockpit area is a good idea as the canopy is both large and crystal clear permitting all that detail to be seen.
Prior to closing up the fuselage the builder has to decide if the bomb bay doors will be posed open or closed. Should one want to pose the bomb bay open, 6 conventional bombs and their associated racks are provided. After the nicely detailed crew door is installed (open or closed), the assembled bomb bay, cockpit, tail cone, and upper fuselage air inlet cover (for the jet engine) are trapped between the fuselage halves; time to get to working on that seam ;).
The main gear, composed of 10 parts each, have separate oleos and retraction struts that will look very convincing under paint and a wash. The multi-part main gear doors are nice molded with separate retraction struts. Likewise, the R2800’s, comprised of 4 parts, are very nicely detailed. Once the engine and main gear bays are assembled they are captured between the nicely detailed nacelles (comprised of halves). The addition of a chin scoop completes the assembly. The surface details on the nacelles is as well executed as that on the fuselage and wing surfaces; very nice.
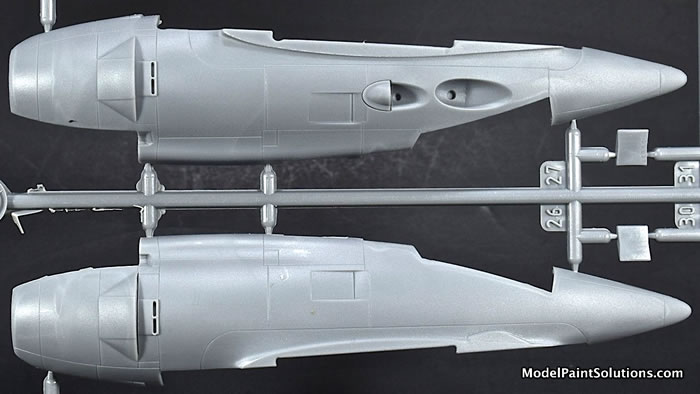
The main wings and the horizontal stabilizers are comprised of upper and lower halves. The nicely molded tip tanks are comprised of left and right halves with slits for installation onto the wing tips. Once the nacelles are joined to the wings, the wings and horizontal stabilizers attach to the fuselage via tab-in-slot joins.
The propellers, comprised of 4 separate blades and 2-piece hubs, will look very convincing when assembled. The addition of the single pice nose cone largely completes the airframe.
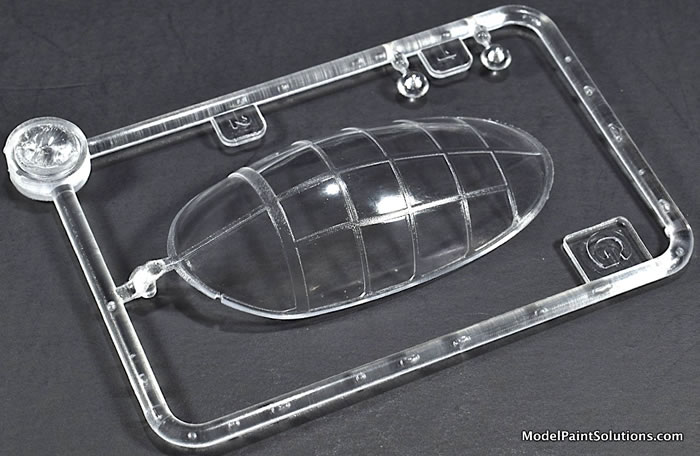
The single-piece canopy is nicely molded and crystal clear with scale-appropriate framing.
An interesting inclusion is a 1/72 Mk. 4 nuclear bomb and it’s trolley, which I suspect are intended for display alongside the completed model as shown at the end of the instructions.
Markings
The decals, by Roden, are crisply printed with good color density.
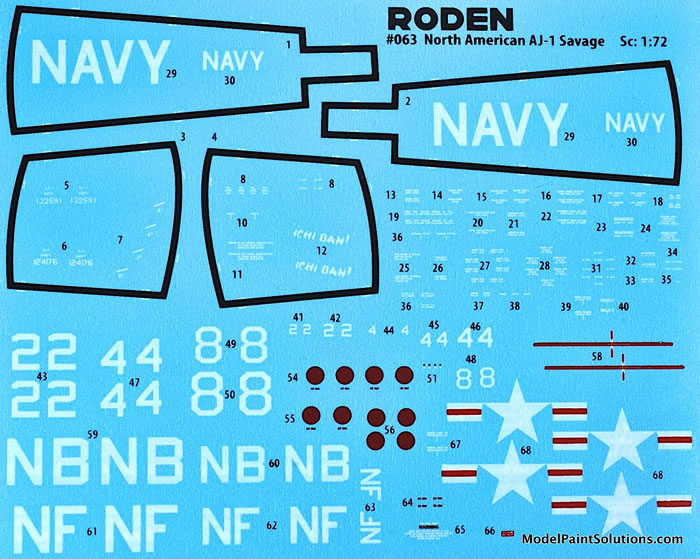
Markings and airframe stencils are provided for three aircraft as follows:
-
North American AJ-1 Savage, Bu.No. 174176/NB8, USS Coral Sea, VC-8, August, 1952.
-
North American AJ-1 Savage, Bu.No. 124176/NF4, USS Kearsarge, VC-6, July, 1952.
-
North American AJ-1 Savage, Bu.No. 122591/NB-2, USS Coral Sea, VC-5, April, 1950.
This is a very nice kit that will build into a convincing model seldom seen at shows and contests. The little bit of flash may require a little extra effort. Likewise, the fitting of major assemblies may require some adjustment and a little filling/blending but the result will be more than worth it. Highly Recommended to AJ-1 Savage fans everywhere!
Keep ‘em coming, Roden!
Thanks for reading along,
—John
Kit eagerly purchased by reviewer; yet again!
For more on this review visit Modelpaintsolutions.com.
https://modelpaintsol.com/reviews/roden-72-aj-1-savage-063
Review Text and Images Copyright © 2022 by John Miller
Page Created 24 November, 2022
Last updated
24 November, 2022
Back to HyperScale Main Page
Back to Reviews Page |
