|
Extra EA 300L/330LC
Brengun, 1/72 scale
S u m m a r y : |
Catalogue Number: |
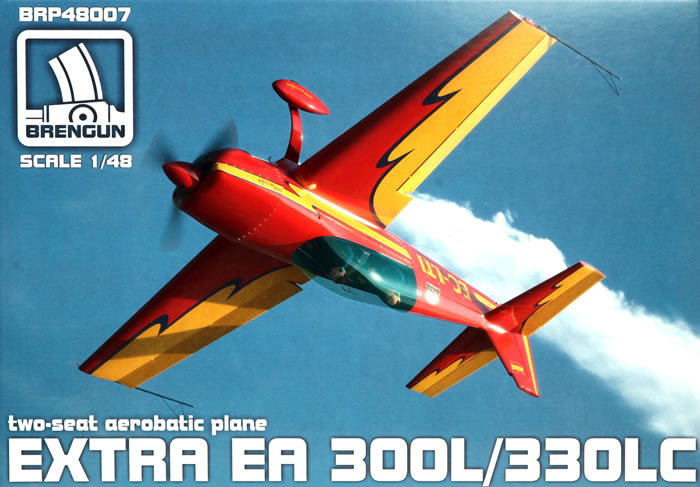
Brengun Kit No. BRP48007 - Extra EA 300L/330LC |
Scale: |
1/48 |
Contents & Media |
48 grey injection moulded parts, a clear canopy, decals and instructions. |
Price: |
Euro 28,44 plus shipping available online from Brengun
£28.20 EU Price (£23.50 outside Europe) plus shipping available online from Hannants
Click here for currency converter. |
Review Type: |
First Look. |
Advantages: |
Something really different and never released before in 1/48. Should be easy to build with small parts count. 3 bright colour schemes to liven up your collection. |
Disadvantages: |
A pebbly finish on the plastic which will need polishing for a high gloss finish as required. No seat belts in such an obvious cockpit. No wing tip aero frames which are obvious on the real aircraft. An after-market photo-etch set is needed for these which Brengun produce (review to come). |
Conclusions: |
A nice and very small model of an ultra-light aircraft never released in 1/48 before. Three very bright and interesting schemes are provided to brighten the model cabinet. |
Reviewed by David Couche

The Extra Flugzeugbau EA300 is a two-seat aerobatic monoplane capable of Unlimited category competition. It was designed in 1987 by Walter Extra, a German aerobatic pilot, and built by Extra Flugzeugbau.
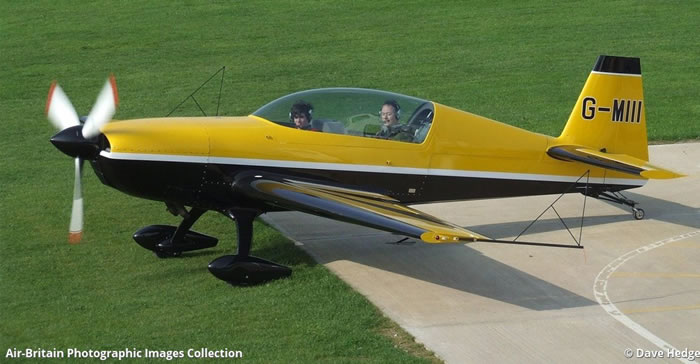
Design of the Extra 300 was based on the Extra 230, an early 1980s monoplane having a wing made of wood. The Extra 300 has a welded steel tube fuselage covered in aluminium and fabric. The midset wing has a carbon fibre composite spar and carbon composite skins. A symmetrical airfoil, mounted with a zero angle of incidence, provides equal performance in both upright and inverted flight. The landing gear is fixed taildragger style with composite main legs and fiberglass wheel pants. The powerplant is a fuel-injected Lycoming AEIO-540 which produces 300 horsepower (224 kW).
The first two-seat Extra 300 made its maiden flight on 6 May 1988, with German type certification following on 16 May 1990. The single-seat Extra 300S flew on 4 March 1992.
The Extra 300 is stressed for ±10 G with one person on board and ±8 G with two. Some Extra 300s are certified in the experimental category in the U.S., while others are certified in the aerobatic category.
* text adapted from Wikipedia
Brengun have released another nice little kit to continue their run of new esoteric releases over the last 12 months or so. This time it is a 1/48 Extra EA 300L, which is a two seat aerobatic aircraft from the late 80’s. I need to make comment that the labelling of this kit is somewhat erroneous. Whilst the parts for the uprated 330LC are in the box, there is no mention of it in the instruction and all schemes provided are for the 3 bladed 330L version.
The kit comes in an end opening folding cardboard box, with colour profiles on the back. All parts are sealed in a plastic bag, so no escaping parts.
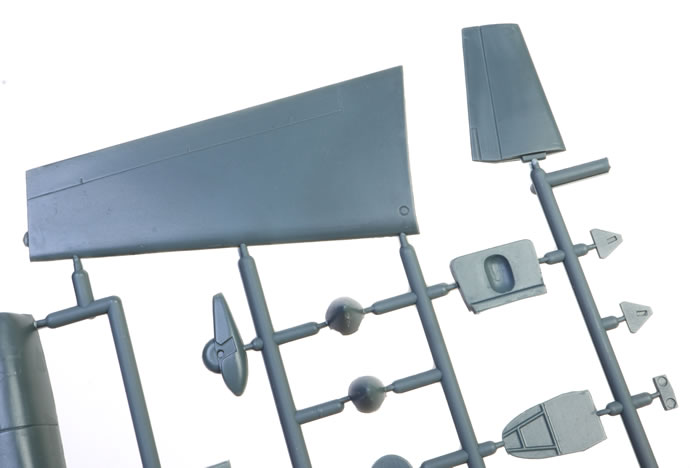
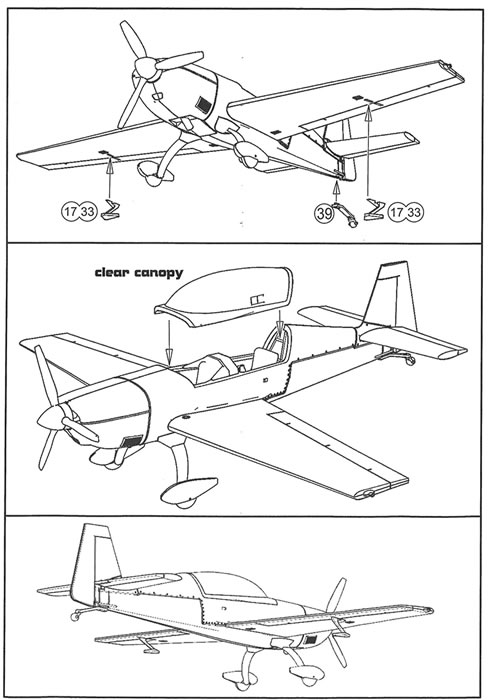
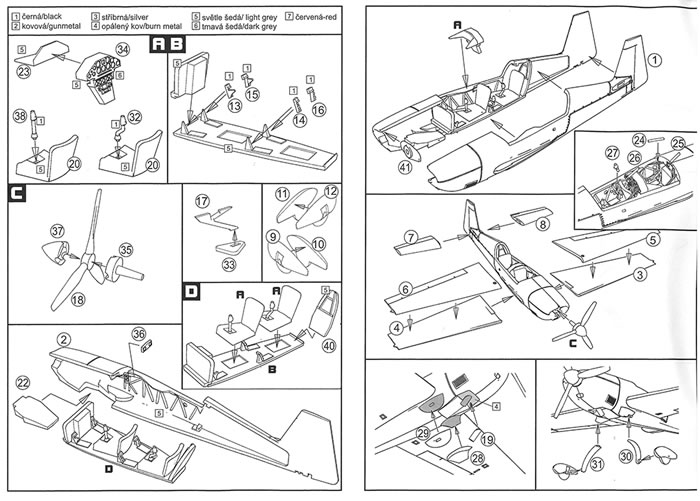
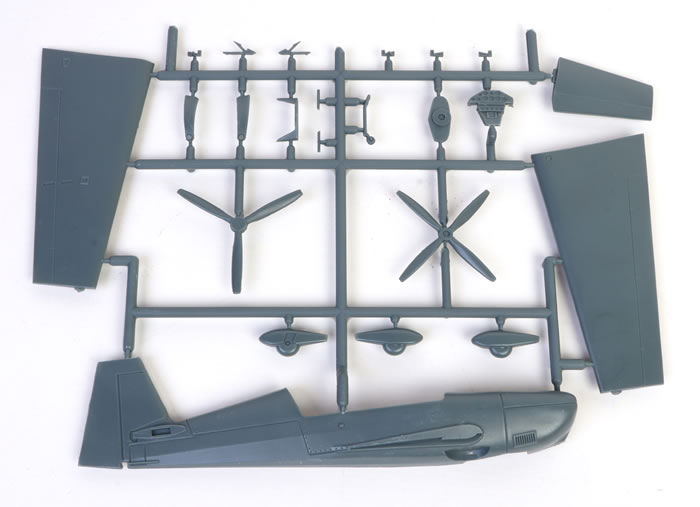
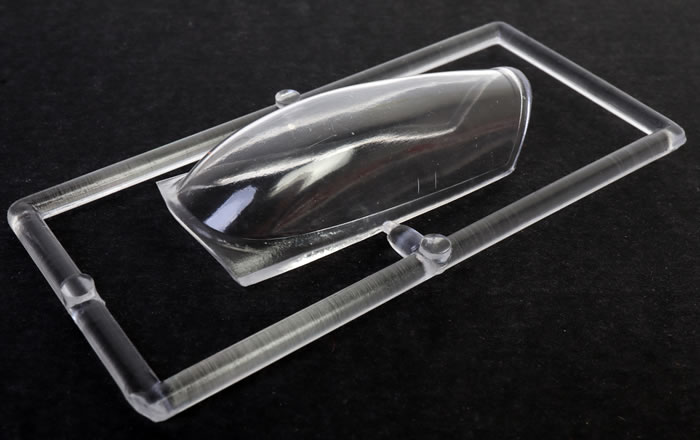
There are two grey injected sprue trees for this kit, having a parts count of 48, along with a single clean injected canopy. There is a roughly A5 sized decal sheets for the more complex markings of the aircraft pictured directly above here. A double-sided instruction sheet is included of 3 A5 sized section on each side.
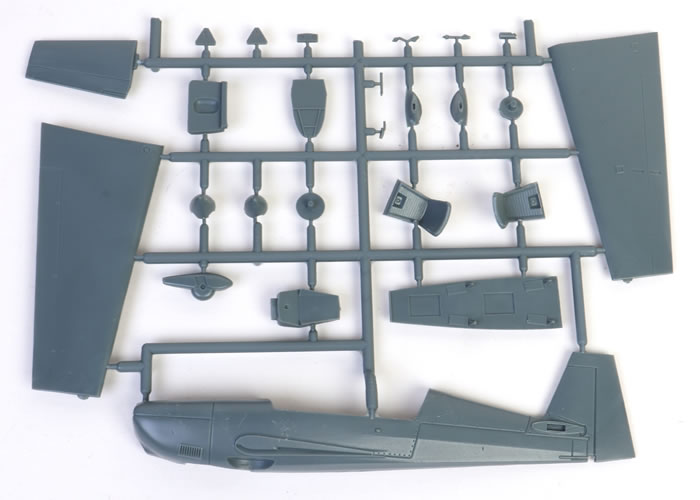
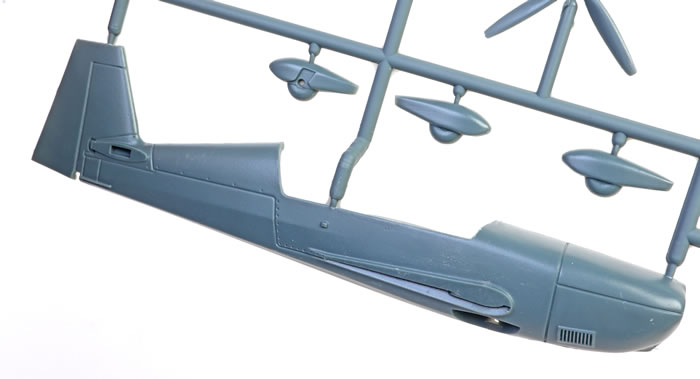
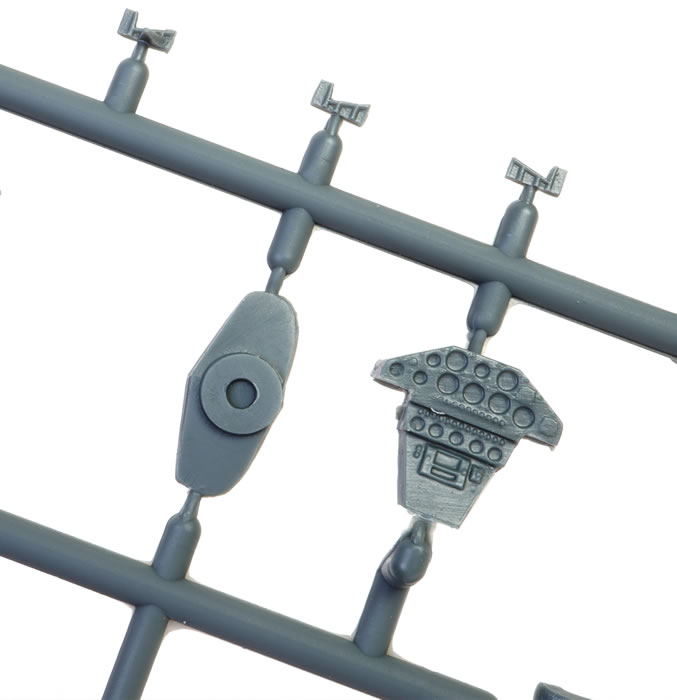
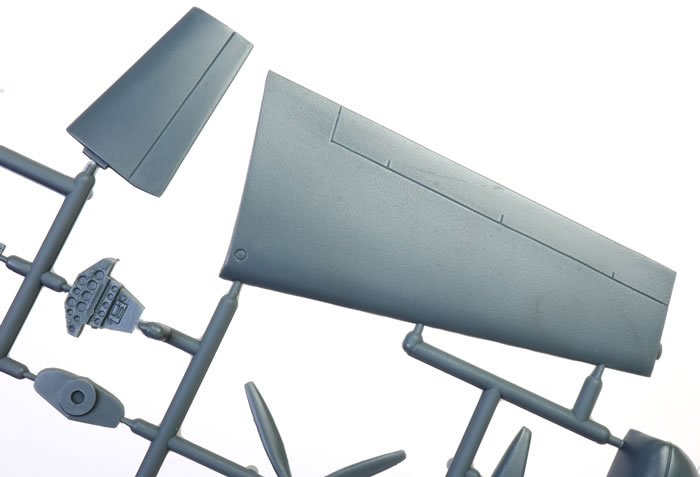
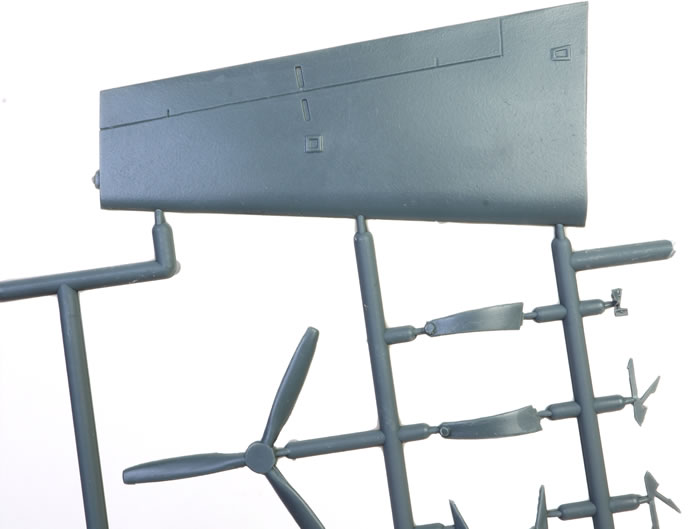
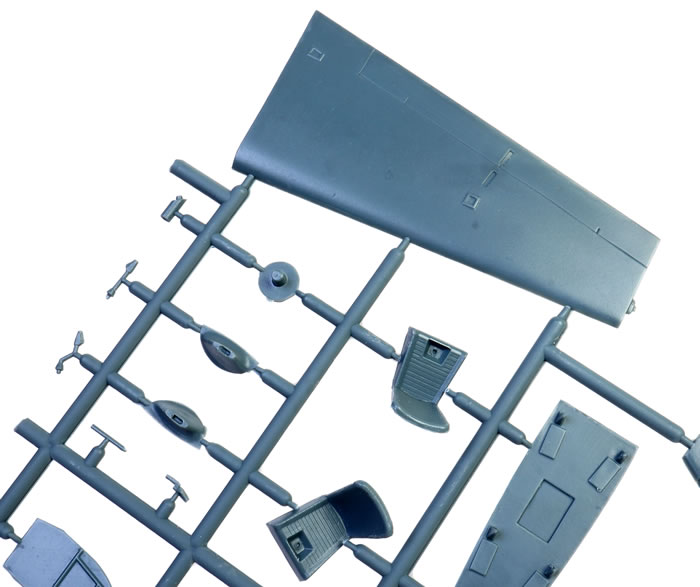
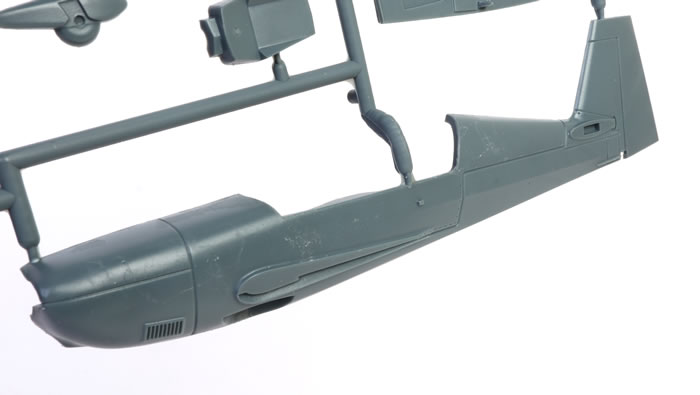
Each of the sprue trees has one of the fuselage halves, one wing and a tail plane on it, with a variety of other required parts. For one tree it’s the cockpit floor, seats, Cockpit bulkheads and firewall as well as a choice of spinners. The other sprue has the smaller parts being wheel spats and other undercarriage parts, a raised detail instrument panel and 2 propellers, a 3 blade and a 4 blade one. The schemes supplied here are for a 3 bladed 300L version only. There is some minor flash, but the main issue is that there is this fine pebbly finish on the exterior parts. With all these aircraft having highly polished paint schemes, you are going to have to finely sand and polish the exterior of the airframe to give you a good base for the following painting. All panel lines are recessed appropriately with raised details on the airframe parts as required and will look quite in scale with some paint applied.
This aircraft an undercarriage with the wheels being mounted in spats. The spats are 2 halves, but the wheel is moulded as part of this. To make it more lifelike, some clean-up and some scribing will be required as the moulded lines are quite soft in those locations. The instrument panel is positioned in the centre of the cockpit and in the real aircraft has the instrument bodies visible on the rear of it with very visible wiring. There are also no decals for the instruments on the sheet, so its either a dry brush finish or something like Airscale individual instrument decals to finish this very visually obvious feature. And while on the very exposed cockpit, not having seat belts in the kit is disappointing.
If I see a weak link, it is that the tail wheel consists of a long fragile piece which I see as wanting to sag or bend or break easily. This will be found out in the actual building of this model which will come soon.
The one piece clear canopy is quite clear but will need a bit of a polish up to improve the visibility into the highly visible style cockpit.
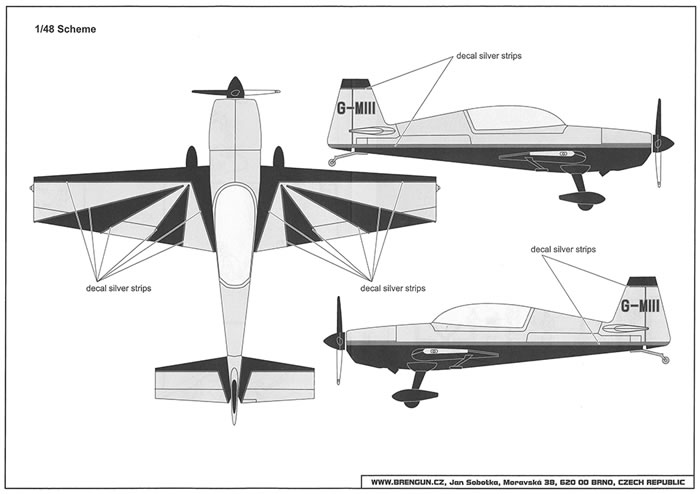
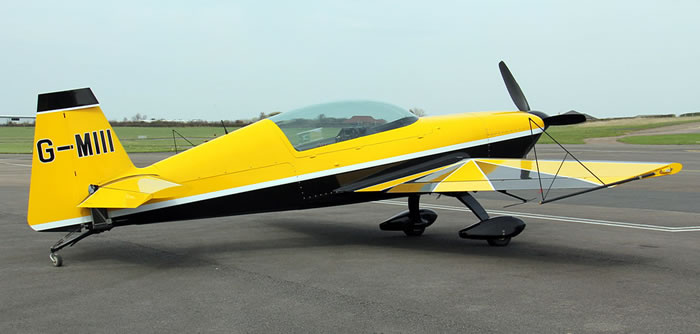
The instructions are a double sided A5 3 page per side sheet with 15 simple steps in the construction process. Colour callouts are generic colours with you needing to get reference photos of the cockpits etc to try and colour match. The instructions also include a set of 1/48 drawings for the black and yellow G-MIII aircraft so you can copy these and make masks the correct size. This is the more challenging scheme with its silver edging to the black sections.
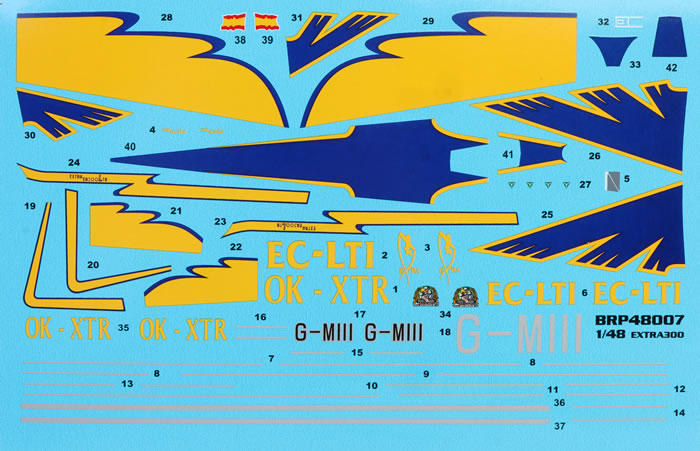
The decal sheet may challenge some with some quite large decals needed to be applied to the red schemes.
Brengun has intrigued me and inspired me to build a relatively unknown aircraft. I don’t normally build civil aircraft, but this kit continues leading me in that direction for the second time (the first being the Rutan Quickie). For a short run injection kit, whilst not flawless and needing a bit of clean-up, it is of a high quality and well thought out kit. Yes, it will need some caressing to create a great model but the foundation is there. This is an interesting subject will certainly interest the small civil aircraft modellers….and yes, I would recommend this kit and I am certainly going to build it.
Thanks to Brengun for the review sample.
Review Text Copyright © 2022 by David Couche
Images Copyright © 2022 by Brett Green
Page Created 24 February, 2022
Last updated
25 February, 2022
Back to HyperScale Main Page
Back to Reviews Page |
 Home
| What's New |
Features |
Gallery |
Reviews |
Reference |
Forum |
Home
| What's New |
Features |
Gallery |
Reviews |
Reference |
Forum |