Hasegawa 1/32 scale
KI-44-II Hei SHOKI “Tojo”
by Brian Tomasin
|
|
KI-44-II Hei SHOKI “Tojo” |

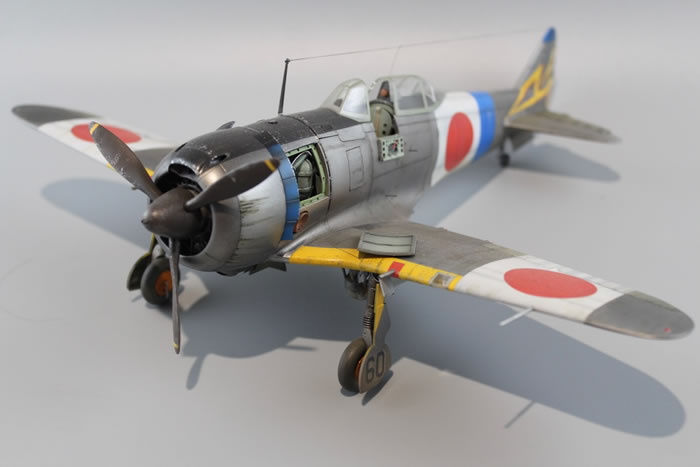
Hasegawa’s KI-44-II Hei SHOKI “Tojo” in 1/32 scale is a great platform to advance your modeling skills and finishing techniques. The kit is well designed for assembly with good details to start, adding a photoetch detailed cockpit, external details such as the butterfly flaps and scratch-built elements create a visually striking model with this venerable kit.
The KI-44-II Hei SHOKI or Demon, Allied code named “TOJO” ended up a high altitude interceptor used for home island defense of Japan late into the second world war. Tecnically, sharing many design characteristics with its Nakajima predecessor the KI-43 “ Oscar”, this powerful small stout fighter was the culmination of putting the largest radial engine on the smallest airframe possible. Because of this, the plane takes an almost cartoonish appearance with it large diameter Nakajima Ha-109 engine tapering down to a slim diminutive tail plane.
All my projects start with a goal. With the build of this model, mine was to create a natural metal finish aircraft featuring a hint of engine compartment details with a highly weathered finish. Thus the challenge, visually create insterest with added techincal features and paint finish to a war weary ship.
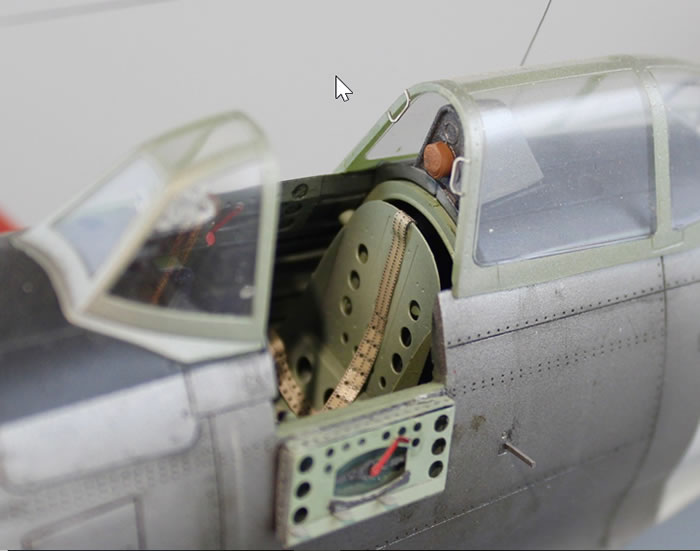
The cockpit was embelished with Eduards #32652 interior details set. With such a small interior cockpit space, I saw it appropriate to open the left side cockpit door and utilize all the photo etch details.
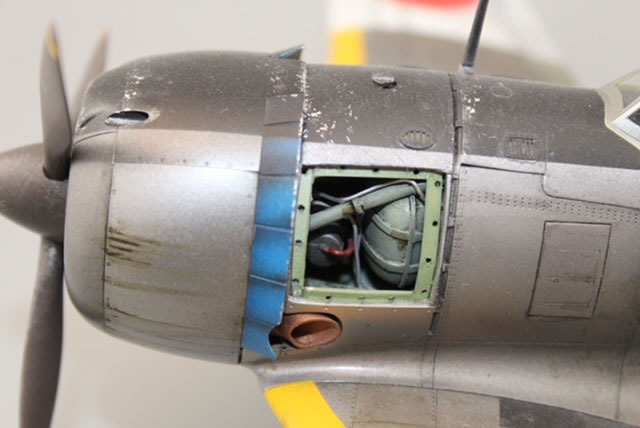
The engine compartment was a different story, all details were scratch built using best picture references available and some added “gizmology” . The tank in this compartement is the centerline tank from a 1/48 P-47 kit with details added. Various round stock styrene for the engine mounts and engine looking details were stolen from various kits, added and wired with different diameter solder. The exterior panel was scratch built also. I am a prescriber to Sheppard Paine’s methods of scratch building details like this. Use photographic reference material, cut away drawings and a little imagination to create compelling and interesting visual in these areas. Here you go!!
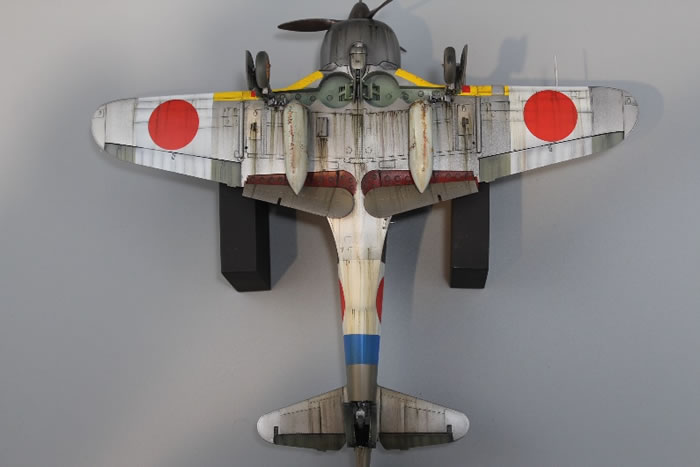
Exterior details, the butterfly flaps, flap rails and landing gear hinges were Eduard’s #32238 exterior detail set. A wonderfull little set that adds solid well crafted details to the model.
As I mentioned earlier, the goal of this model build was to create a heavily weathered natural metal finish aircraft. My “go to” material for this are the Alclad 2 Lacquers. They are simply awesome to paint with. They mix well together, dry quickly and provide a geat canvas to add weathering.
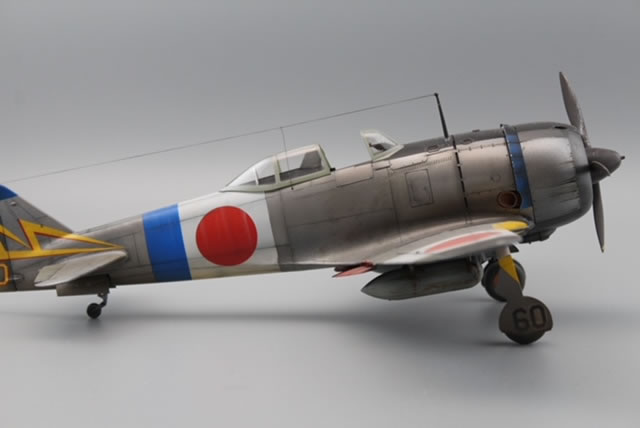
I use multiple layers when I weather my work. Decals, engine exhaust, streaking, multiple washes were all sealed with layers of acrylic gloss in between. Here, I perscribe to oil pianting methodology similar to Robert Taylor, renouned aviation artist. Mulitple transparent layers to protect work completed but also create a thickness to the work. The layers thickness are not really measurable, but the visual impact of the technique pays dividends. All in all, there are 8-10 different transparent layers to the weathering. Each element, panel lines, mottled washes, panel filters, green streaks, red/brown streaks, exhaust stains are different layers.
This was a good build for me and accomplished my intent creating an accurate and visually impactful piece. It was recently shown at IPMS Nationals 2021 in Las Vegas.
Listing of kit and materials:
-
Kit- Hasegawa ST-30 , 1:32 Scale
-
Cockpit Details- Eduard 32652 Photo etch set
-
Exterior Details- Eduard 32238 Photo etch set
-
Decals- Included with kit
-
Exterior- Alclad 2 Lacquer, Aluminum ALC-101, Magnesium ALC-111 in various mixed ratios
-
Blue stripe details- Testors Model Masters acrylic True Blue 4657
-
Antiglare panel- Tamiya Flat Black 80% + Testors True Blue 4657 20%
-
Wing Identification panels- Tamiya flat yellow
-
Home Island defense bands – Tamiya flat white
Model and Text Copyright ©
2022 by Brian Tomasin
Page Created 11 February, 2022
Last Updated
16 February, 2022
Back to
HyperScale Main Page

|
Home
| What's New |
Features |
Gallery |
Reviews |
Reference |
Forum |
Search