Revell 1/25 scale
1959 Chevrolet Impala Convertible
by Brad Huskinson

Brad Huskinson - 1959 Chevrolet Impala Convertible
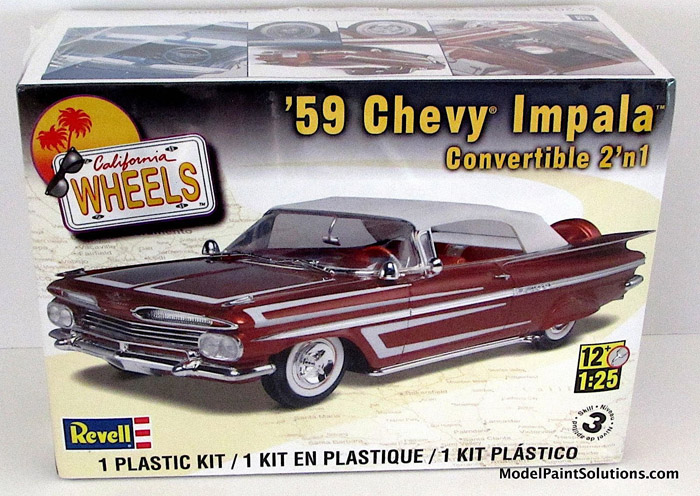
Revell Kit No. 85-4944
I built this kit for a very good friend from high school and college days. She had a friend who owned the 1:1 scale car, always loved it and wanted one.
All parts were removed from the sprue with cutters and cleaned up with sandpaper and sanding sticks. X-acto knives were also used extensively along with panel line cutters. Essentially, the kit was built stock, right out of the box, with just a few, minor enhancements which are covered below. Tamiya Thin was used throughout for unpainted parts and CA glues for parts that had been painted.
Noted Difficulties
The body and chassis were both warped a fair amount. I did the hot water (185 degrees) bath followed by a cold water bath while bending the pieces past the point of being correct. It took a couple of passes before they were straight after the cold water bath. I always lay these parts on a piece of glass before painting to make sure they are perfectly straight/square/level. It’s much easier than trying to correct after painting! And, it really sucks to have three tires on the ground and one floating in space...
The glass is also a great way to get a good visual to set ride height. Unfortunately, the windshield was quite warped. After several ineffective hot water dunks, I used a hairdryer with the windshield compressed into the proper shape.
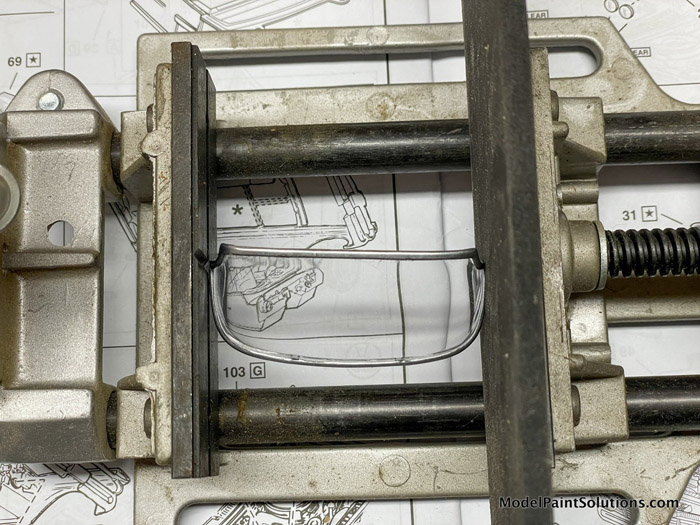
This straightened the windshield, but created stress fractures in the clear plastic; can’t win ‘em all!
The chassis was painted with Rustoleum flat black primer straight from the spray can. I shake the heck out of the can, put it in a bowl of very warm water for a few minutes, shake again, and spray multiple light coats from about 2 feet away.
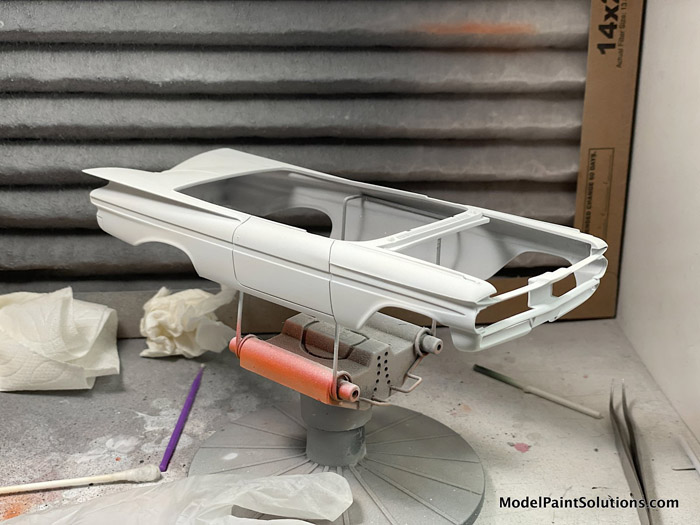
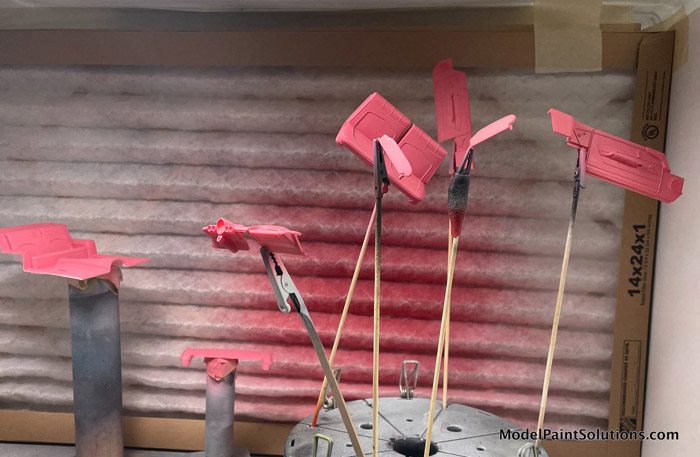
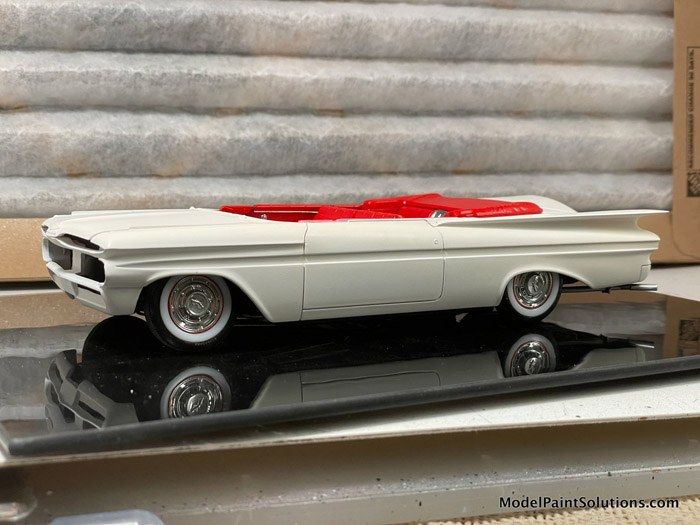
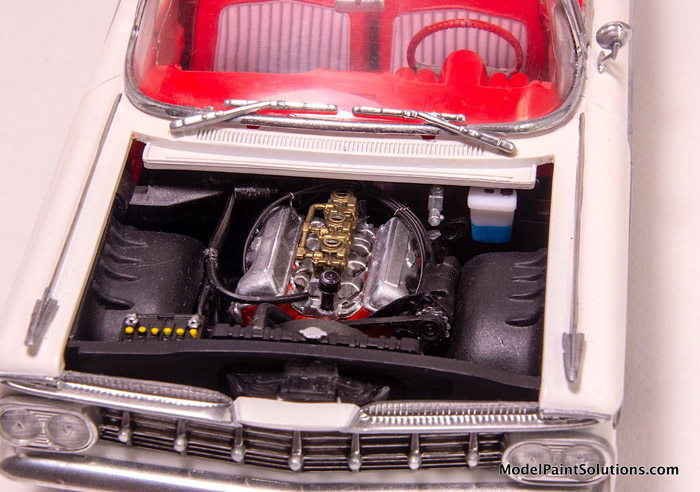
All parts were sprayed with various primers. The body was sprayed with Tamiya White Fine Surface Primer while the engine and transmission were primed with AK Extreme Metal Aluminum. The interior was primed with Splash Paints Pink Primer.
I used both a Harder & Steenbeck Infinity and Evolution for this build. Based on the surface area/size of the part being painted, I switched between using either 0.20 or 0.40mm tips. Virtually every part was airbrushed, as I really don’t like brush painting.
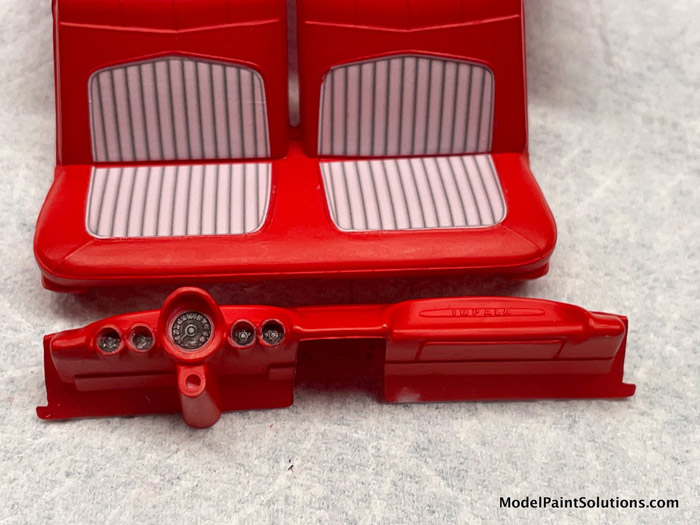
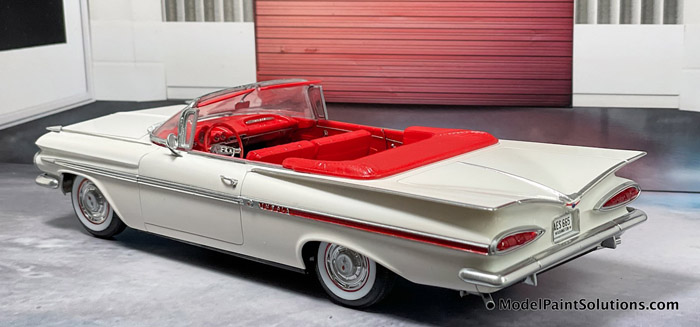
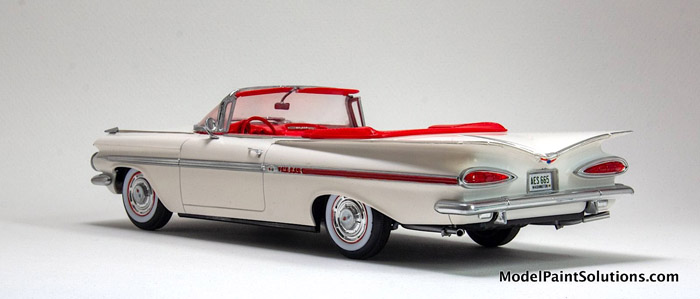
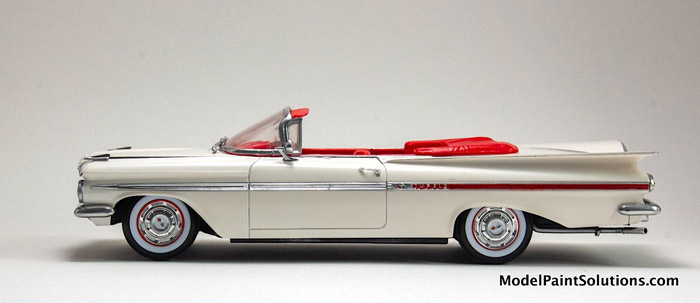
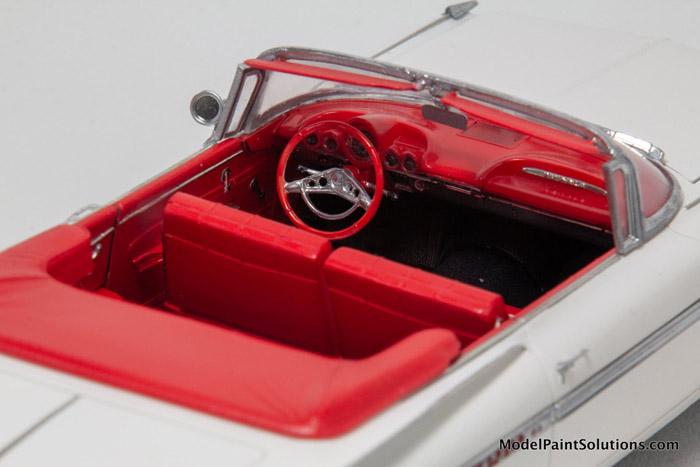
Most paints were diluted from 50/50 to 30/70 (paint/thinner) and sprayed at 15-18 psi. The body was painted with a mix of AK Flat White and AK Creamy White. The interior was painted Splash Upholstery Red and topped with a semi-gloss clear. All other parts, except the chassis, were painted with a combination of Mission, Tamiya, AK, or Model Master Metalizer paints.
The body was airbrushed with AK Clear Gloss (30%) cut with Mr. Color Leveling thinner (70%)
Decals and Final Finish:
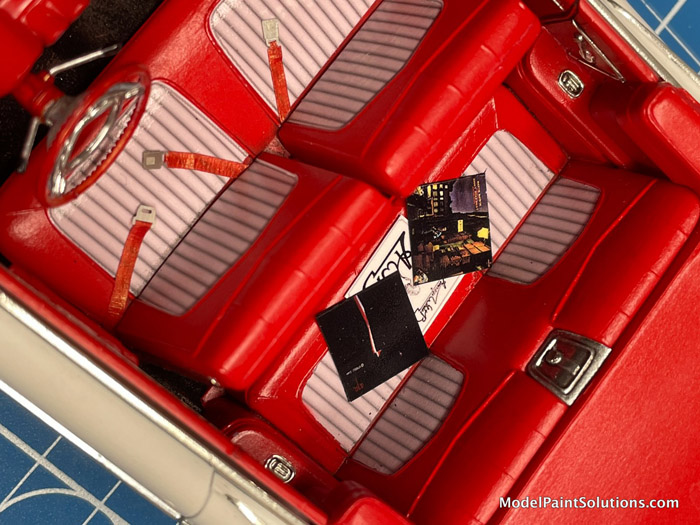
I used the supplied gauge decals for the dashboard and custom seat detail. Decals were applied using MicroSet and -Sol.
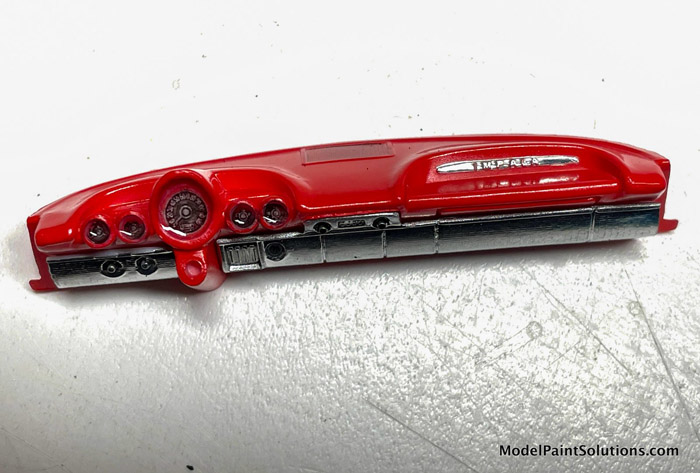
A drop of clear epoxy glue was put over the gauge decal. It dries to make a perfect glass/plastic gauge cover. I damaged the hood insignia decal and hand painted the raised details.
Final Touches
The interior carpet was enhanced by brush painting with Tamiya Flat Black and then pressing black embossing powder into the wet paint.
Seatbelts were made with masking tape cut into narrow strips, colored red with a Sharpie with photoetch buckles. I printed several favorite album covers to add visual interest and made my own license plates in Photoshop.
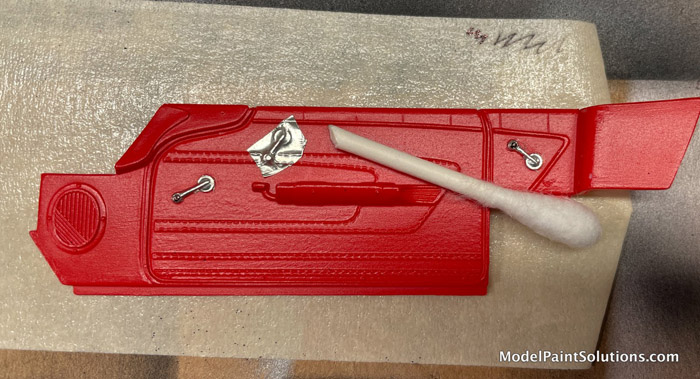
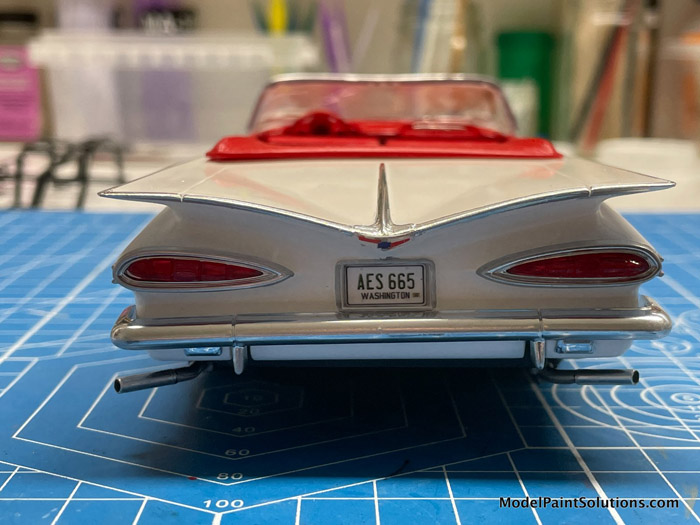
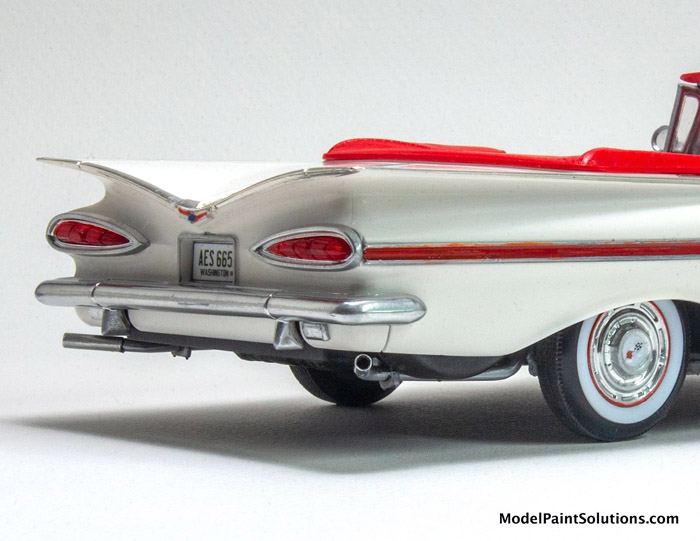
There is also quite a bit of Bare Metal Foil work on the interior as well as the body of the car. The chrome accents on the exterior are all Bare Metal Foil. Let’s face it, this was the era of chrome trim! For a handy burnishing tool, I cut the paper stick of Q-Tip ear swab at a 45º angle. I then use the pointed end to burnish BMF into place. It rarely, if ever tears, the foil. When it loses its point, just cut it a bit shorter and keep going. Tamiya Black Enamel Panel Liner was used to enhance all body panel lines.
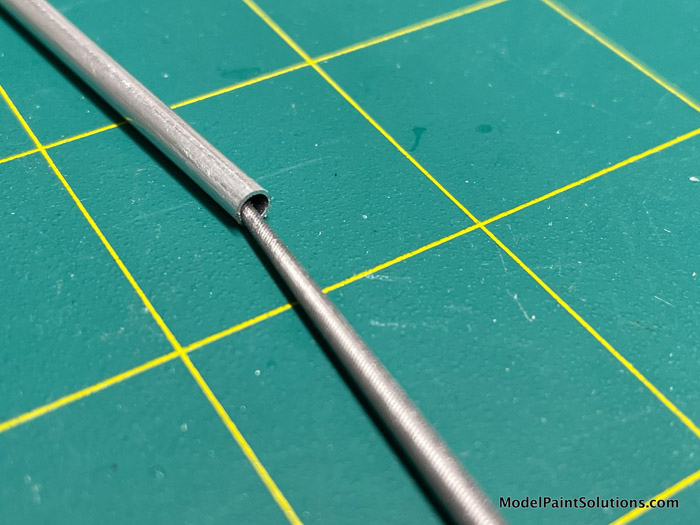
Plastic exhaust pipes don’t cut it. I always make exhaust tips from aluminum tubing. I use a tapered round file to thin the tubing from the inside to replicate the proper scale.
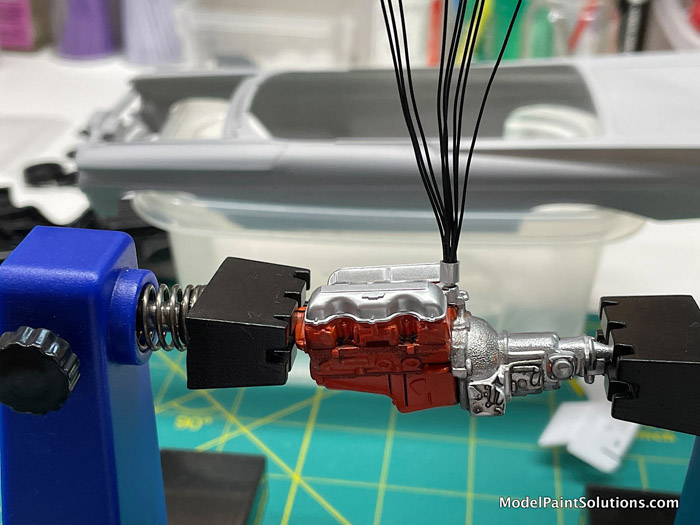
Wired engines look so much better, so I used a piece of aluminum tubing and small wires to create a distributor which unfortunately became impossible to see when the body was added (distributor is not finished in picture).
Many of the chrome parts were sprayed Vallejo Gloss Metal Varnish which knocked down the toy-like chrome kit finish. Conversely, some parts were stripped using Super Clean (which takes about 10 minutes maximum) and airbrushed with Molotow Chrome.

My friend loves her new/old Impala and I think it turned out quite well :)
For more on this review visit Modelpaintsolutions.com.
Text & Images Copyright © 2022 by Brad Huskinson
Page Created 7 October 2022
Last updated
7 October, 2022
Back to HyperScale Main Page
Back to Reviews Page

|
 Home
| What's New |
Features |
Gallery |
Reviews |
Reference |
Forum |
Search
Home
| What's New |
Features |
Gallery |
Reviews |
Reference |
Forum |
Search