Hobby Boss 1/48 scale
FJ-4B Fury
by Mat Mathis

Summary
Kit#: 80313
Scale: 1/48
Price:£21.99 Plus Shipping at Hannants
Review Type: Build
Background
At the beginning of this year, I decided to take a foray into “modern jets” with a couple of fast burners from the early Cold War era. First up, in early January was the North American F-86 Sabre (Academy 2162). This was a fun kit to build, and it was all coming together for me up until the decals, which gave me fits. From not sitting down into the details to breaking, it was not an enjoyable time.
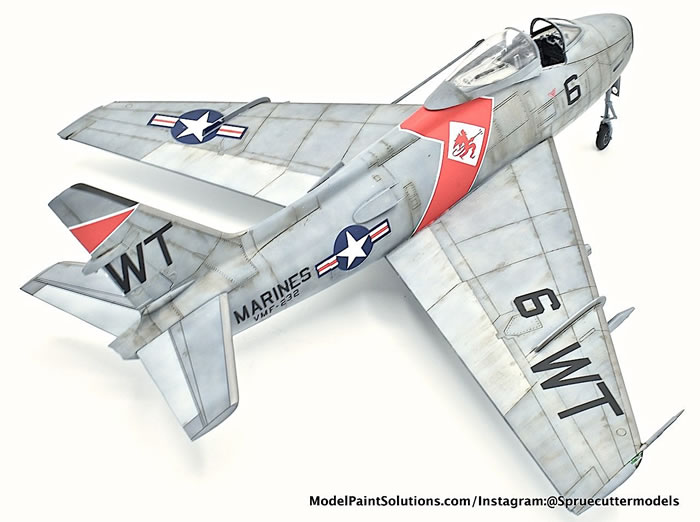
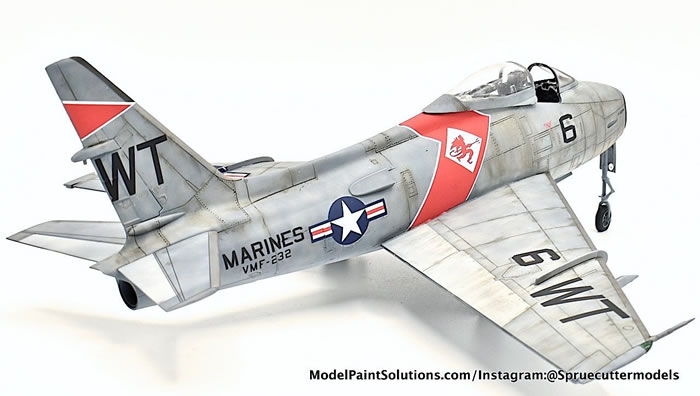
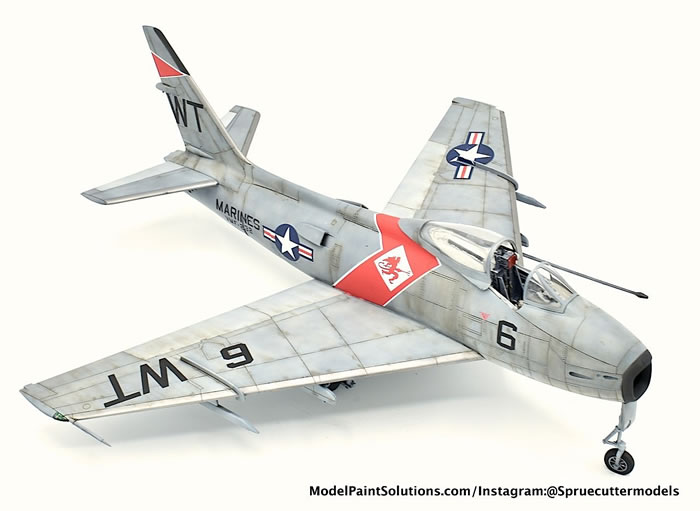
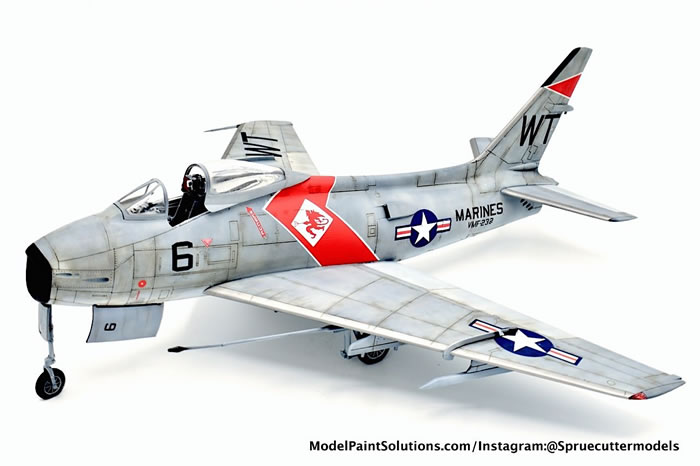
While the end was a mess, I thoroughly enjoyed building a jet and needed to redeem myself as soon as possible. Enter, Dr. Strangebrush! John sent me another member of the Sabre Family – namely the FJ-4B Fury (Hobby Boss 80313). In addition to the kit, all the aftermarket goodies a guy could ask for were included (resin cockpit, exhaust, tail fin, wheels, and metal landing gear struts). And just like that, the jet goodness continued!
As usual, the build commenced in the front office. This was a bit different than any of my previous builds because I’ve never used a full resin replacement before. Sure, I’ve used aftermarket this, aftermarket that, but there has always been polystyrene down in there someplace. For this project, we were entering new territory. First up was some dry fitting the tub and ejection seat. There were some modifications needed to make it fit, so out came the Dremel for some quick cleanup (first time using a rotary tool for scale modeling – a bit of learning curve for me to feel more comfortable with it). After I was satisfied with the fit it was time to start painting all the little details before final placement. Using my go to for brush painting – Tamiya Acrylics – I grabbed my new detailing brushes from Ammo by Mig and went after it.
Once the details were done the tub was put into place, the fuselage was closed and the few small gaps between the cockpit tub and fuselage were filled with Vallejo plastic putty. From there, the rest of the construction went forward with no issues. With the construction complete, I then filled any small gaps and went to work on some seams. After a bit of work, I sprayed the joins with Alclad Black Primer and Microfiller to check my work. I ended up seeing a couple spots on the top of the fuselage that needed some more sanding. With all of that out of the way, it was time for my favorite part – AIRBRUSH TIME!
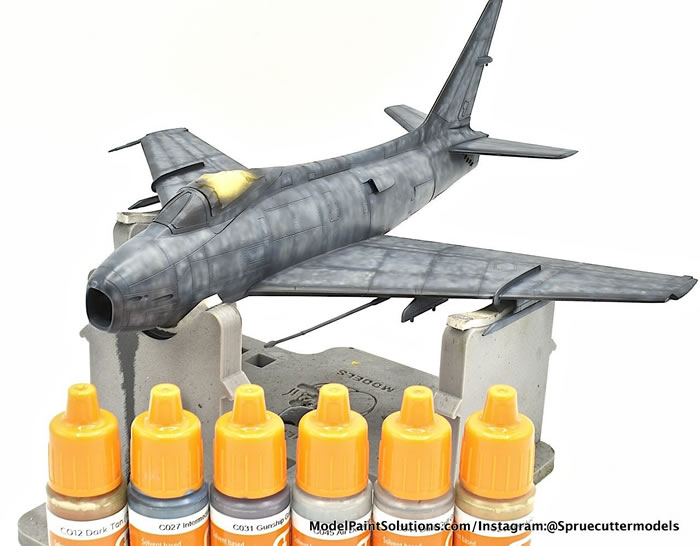
As always, I go with my trusty Alclad Black Primer and Microfiller sprayed at around 20-25 psi with my Harder and Steenbeck fitted with a 0.4mm tip/needle. I’ve found that this combination gives great coverage, and the finish comes out very smooth. After the primer is down, I like to give everything a quick polish to ensure the surface is as smooth as a baby’s bottom, as it were.
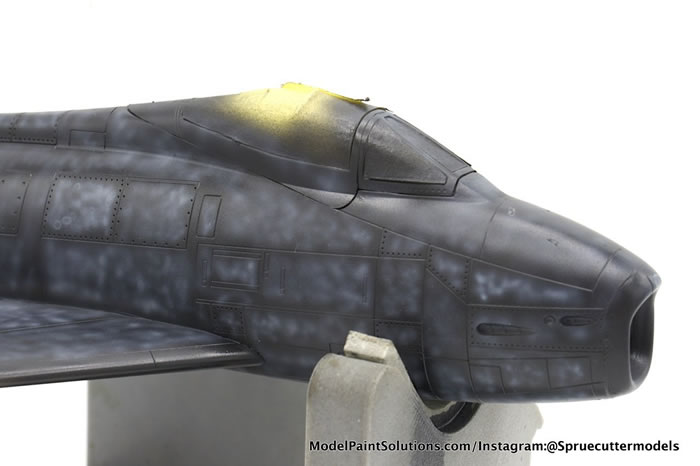
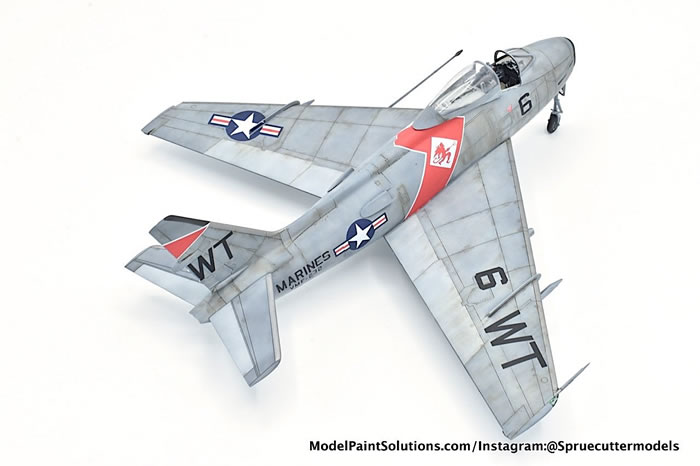
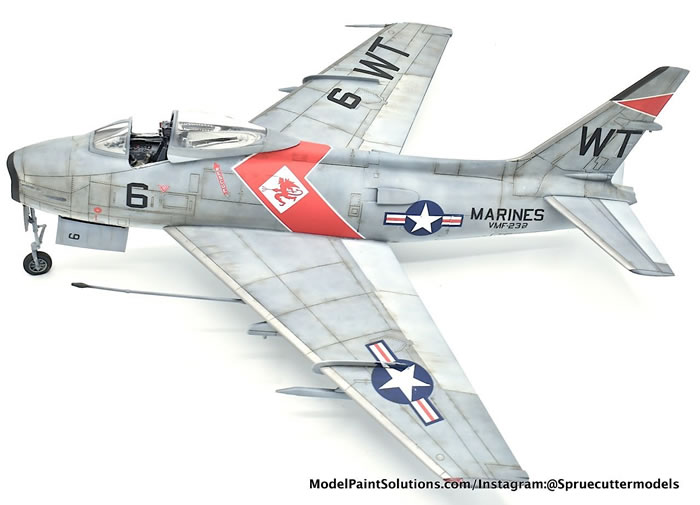
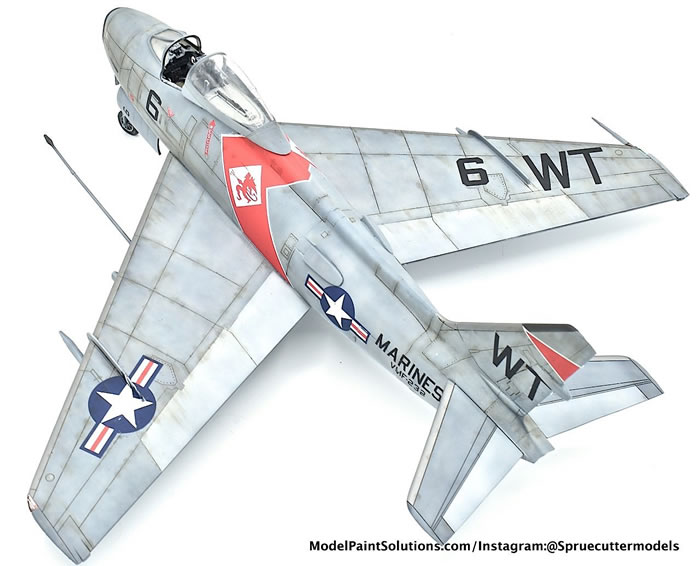
From there, I pulled out the handful of greys and a few other colors from my rack of Hataka paints. I started in with a light gull grey (which would end up being the final blend coat as well) thinned down to roughly 30% paint and 70% Hataka lacquer thinner and sprayed at about 10-12 psi with my H&S Infinity fitted with a 0.15mm tip/nozzle. Using irregular movements to create some marbling over the black primer, I covered the entire model, taking care to stay clear of the panel lines themselves. Once the light gull grey was done, I peppered in other shades of grey and some grime-type colors on both the top and bottom; thinned and sprayed in the same way as the light gull grey.
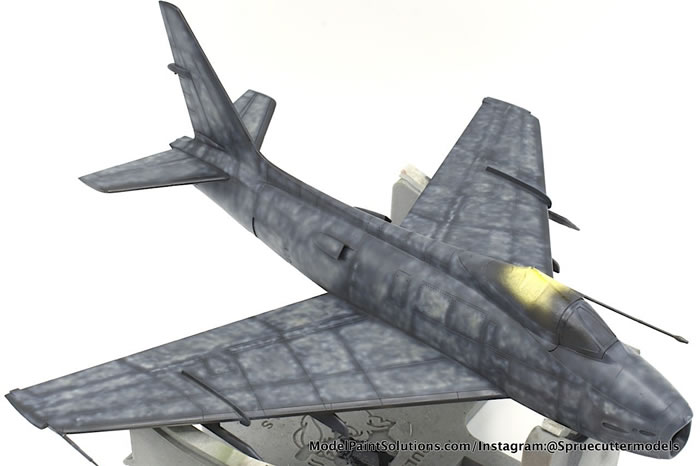
The final coats were then put on with the light gull grey over the top sides (except for the control surfaces) and insignia white on the underside and control surfaces.
These coats were put on at about 20% paint and built up slowly so as not to undo all the shading work that was done previously. After I was satisfied with the coverage it was time to seal everything in nice and tidy with VMS (Vantage Modeling Solutions) Gloss Varnish.

(John’s Note: Awesome work, Matt. Diluting a modulation coat to ~20% paint in order to lessen the chance of covering the underlying pre-shading is a great technique and one explained in detail in Airbrushing Tip’s ’n Tricks: Vol III on the MPS homepage.)
It was then time to redeem myself from the decaling travesty that occurred during the Academy Sabre build. This time around, things went well for the most part! Most of the decals went on with no issues however, there was one decal for the nose that did end up breaking. Rather than trying to piece it together or match the color with the rest of the decals (red is pretty tricky to match without it sticking out like a sore thumb) I decided to paint it the same black as the panel on the vertical stabilizer. While not historically accurate to the scheme, I think this was the best choice.
With the rest of the decals, I used Micro Set and Micro Sol initially and then switched over to Solvaset for a couple of rounds. With everything settled in nicely I gave a light gloss over just the decalled areas so the chemical barrier was the same throughout the entire model.
For weathering I kept it simple here and used an Ammo by Mig Panel Line Wash (Deep brown) to do a pin wash on the panel lines. After the wash had dried a bit, I removed/streaked the excess and blended it in with brush damp with odorless thinner. With all this complete, it was time to pull the masks and call it done!
All in all, I was very happy with the way this turned out – and I won’t even get to keep this one to look at. Ultimately, on Christmas Eve, it found its way to its new home (i.e. my brother’s house). This was the second time that I built this kit and it certainly won’t be the last. Sure, there are other P-51s out there that I will build too, but this kit can’t be beat in terms of simplicity and detail. It’s good for a slammer build and could easily be knocked out in a weekend if you set your mind to it – say there’s an idea… At any rate, it gave me great joy to push myself on this one. Now, it is time to refine those weathering techniques to make them a bit more subtle on the next one!
As a little bonus, I’ve included some extra photos of my first real build after starting the hobby; the same Tamiya 1/48 Mustang (this time the 8th Air Force boxing) in Detroit Miss markings. Surprise, another 361st Fighter Group build! Detroit Miss was built just about two years ago. It’s interesting the differences. I hope you enjoy seeing them side by side!
Cheers!
Mat
Instagram: @spruecuttermodels
For more on this build visit Modelpaintsolutions.com.
https://modelpaintsol.com/builds/hobby-boss-48-fj-4-fury
Text and images copyright ©2022 by Mat Mathis.
Text and Images Copyright © 2022 by Mat Mathis
Page Created 5 May, 2022
Last updated
6 May, 2022
Back to HyperScale Main Page
Back to Reviews Page

|
 Home
| What's New |
Features |
Gallery |
Reviews |
Reference |
Forum |
Search
Home
| What's New |
Features |
Gallery |
Reviews |
Reference |
Forum |
Search