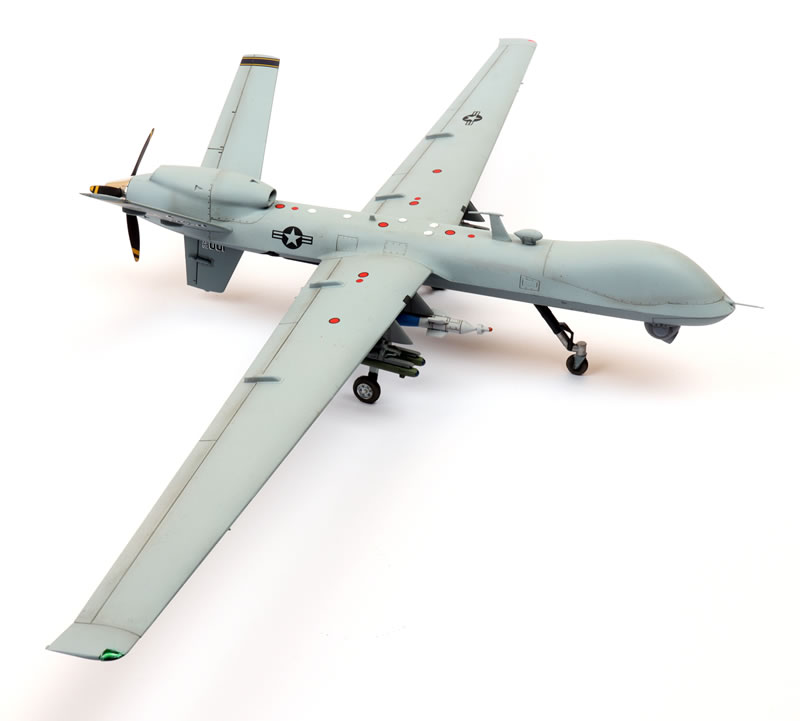
Kinetic's 1/48 scale
General Atomics MQ-9 Reaper
by Brett Green
|
General Atomics MQ-9 Reaper |

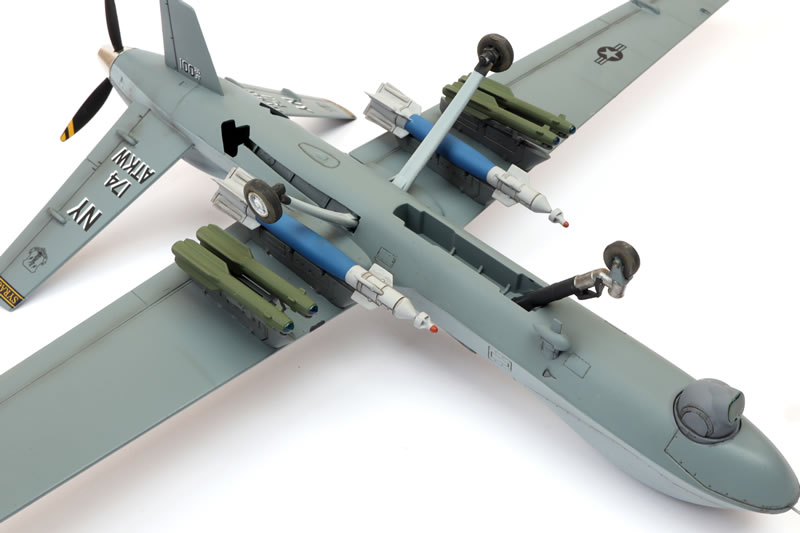
Here is my first completed aircraft for 2021 - Kinetic's 1/48 scale MQ-9 Reaper (USD$16.98 plus postage from Lucky Model).
Without a cockpit, this is a fast and easy build.
The model was built entirely from the box. The only modifications were:
-
sanding a flat spot onto the bottom of the main wheels
-
replacing the nose pitot with a light filament after I broke off the delicate plastic part, and
-
adding some small lead sinkers inside the nose to keep the front wheel on the ground.
Fit is good throughout, although you do need to make sure that the holes in the wing spar sections are opened up to allow the pieces to fit together properly.
The only real trouble I encountered was the labelling of parts in the instruction booklet. There were many errors.
Instruction Errata List
Here is a list of the corrected part numbers:
Step 1:
- The part labelled C19 should be labelled C22
Step 5:
-
The part labelled C15 should be labelled C12
-
The part labelled C10 should be labelled C21
-
The part labelled C16 should be labelled C19
Step 6:
-
The landing gear legs have no labels. The port side landing gear leg should be Part C2 and the starboard side leg should be C3
-
The part labelled C4 should be labelled C5
-
The part labelled C21 should be labelled C24
Step 7:
- The part labelled C7 should be labelled C9
Step 8:
- The part labelled C7 should be labelled C8
Step 10:
-
The eight parts labelled C13 should be labelled C16
-
The small part on the front of the Hellfire mounting rack, part E13, has no number on the sprue. It is located next to Part E10 on the sprue.
-
Take note that there are actually two different patterns of upper wing weapons mounts although they are all labelled parts E6 (for the starboard side) and E7 (for the port side). They look very similar, but the front notch on the bottom of GBU-12 bomb mount is slightly further forward than the front notch on the Hellfire missile mount.
Once you know what the actual part numbers are, assembly is a breeze! I finished basic construction in a single day.
I’ll be writing this one up in detail for Issue 188 of Model Airplane International magazine.
Thanks to Lucky Model for the sample.
Model, Images and Text
Copyright © 2021 by Brett Green
Page Created 12 January, 2021
Last Updated
13 January, 2021
Back to HyperScale Main Page
|
 Home
| What's New | Features | Gallery | Reviews | Reference | Resource Guides | Forum |
Home
| What's New | Features | Gallery | Reviews | Reference | Resource Guides | Forum |