Revell 1/25 scale
1969 Chevrolet Z28 Camaro
by Brad Huskinson

Revell 1969 Camaro, Kit No. 857457
All parts were removed from sprue with sprue cutters, and cleaned up with sandpaper, sanding sticks, and the David 300 sander.
I used both Tamiya Thin and CA glues depending on whether or not the parts have been painted. Occasionally I will use 5-minute epoxy if something really needs bonding.
Some after-market pieces, both resin and photo-etch, were used.
The most noted difficulties for this build turned out to be me. I had been trying for a couple of years, experimenting with a couple of kits before deciding exactly how I wanted to finish the car.
Also found that it was quite difficult to stay as focused as usual during the pandemic.
The one kit related issue were several sink marks on the body that needed filling, sanding and priming a couple of times before they disappeared.
All parts were sprayed with various primers. The body was sprayed with Splash Paints white surfacer lacquer primer and virtually all of the remaining parts were sprayed with either Mission primers or Mr. Hobby 1500.
Generally I diluted all acrylics about 50/50 or close using John’s charts which have really helped my airbrushing results. The Splash Paints lacquers were diluted to 80% paint/20% Mr. Color Leveling thinner. I am spraying at about 15-18 psi. (Not sure how trusty the gauge is on my CO2 tank.)

I used both a Harder & Steenbeck Infinity 2-in-1 and Evolution for this build. Small parts were shot using a .2 needle and larger parts like interior and body, I used a .4 needle. Virtually every part was airbrushed, as I really don’t like brush painting.
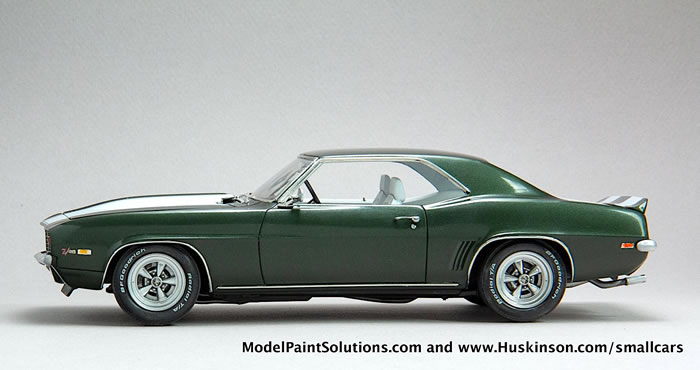
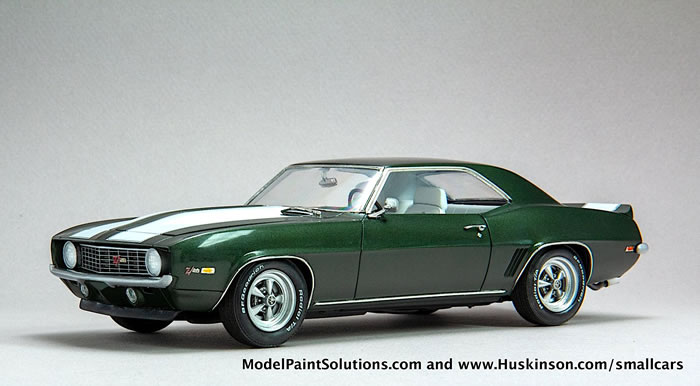
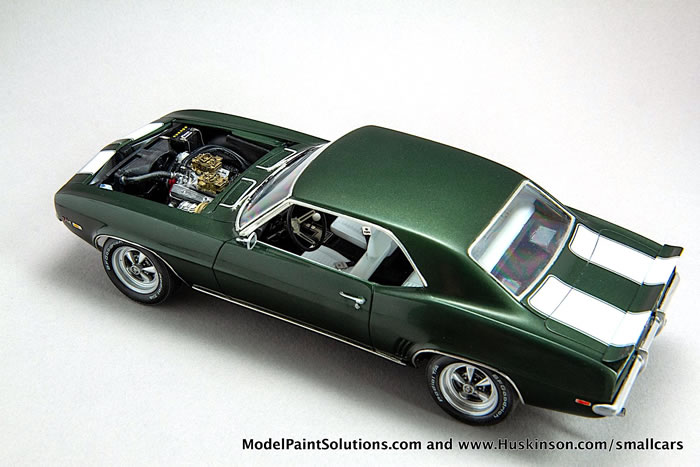
The body was painted with Splash Paints Fathom Green lacquer and several light coats of Splash 2k clear. All other parts were painted with a combo of Mission, Tamiya and Model Master Metalizer paints.
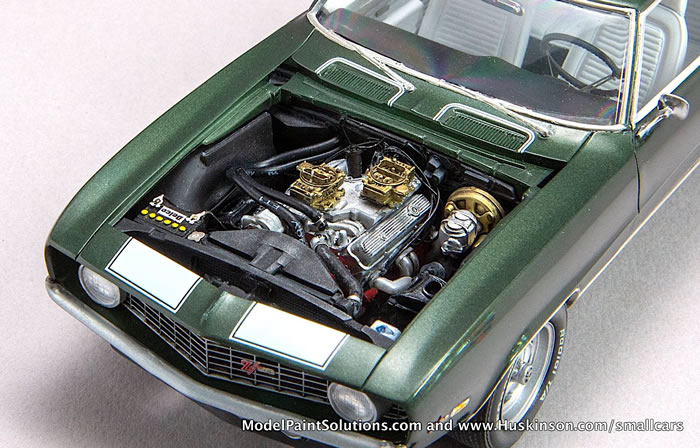
Under the Hood
The engine was painted Tamiya TS-49 Bright Red. The heads and manifolds were painted aluminum with Model Master Metalizer.
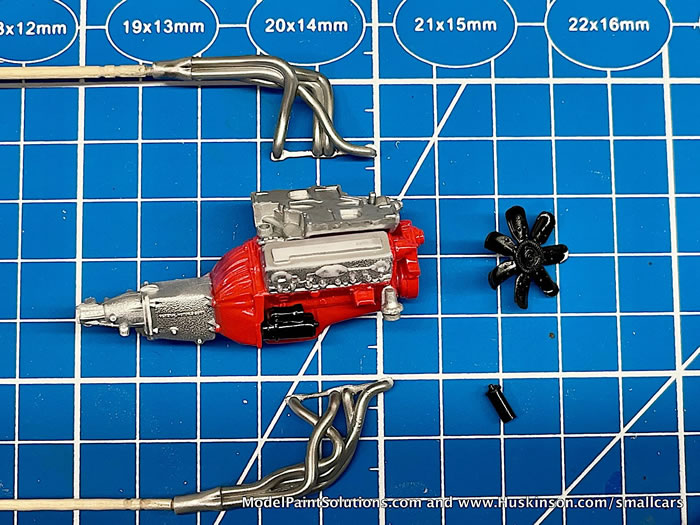
The distributer was drilled out and nine overly long wires (30 AWG Wrapping wire) were pushed through from the bottom and epoxy glued in place. The virtually detail-free carburetors were replaced with highly detailed Fireball Modelworks carbs.
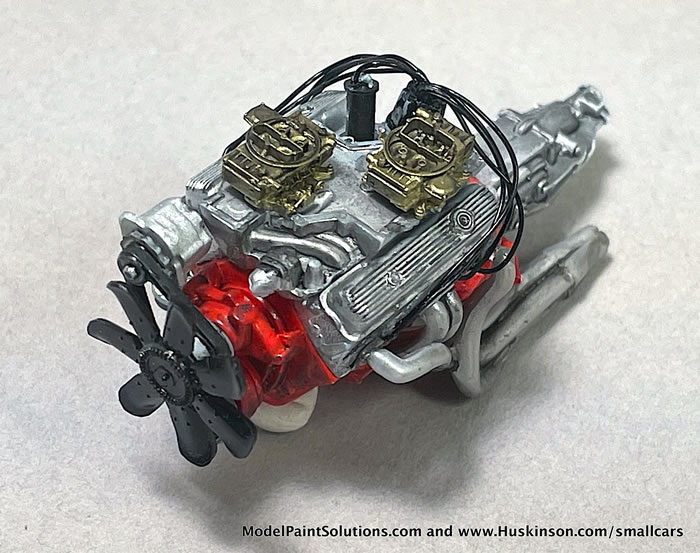
The engine bay was totally plumbed and enhanced with PE battery hardware, hose clamps, and radiator cap from Model Car Garage.
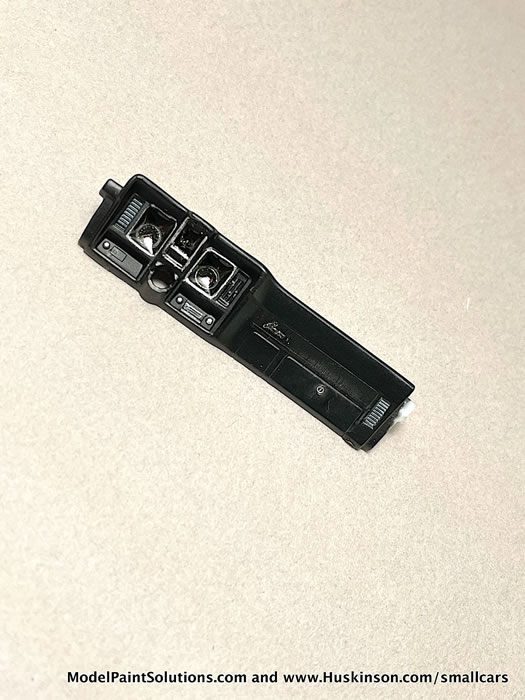
The Body
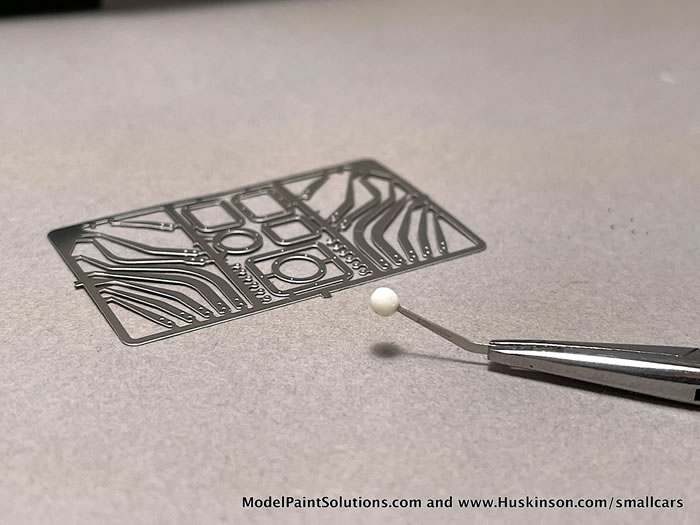
All body badging was photo-etch from Model Car Garage.
For the exterior mirror, I drilled a hole in the base and a corresponding hole in the driver’s door. A straight pin was cut about 3/16” long and glued. This is a great way to keep mirrors from getting knocked off the car. Fireball Modelworks door handles replaced the molded ones that were sanded off. I used the same mounting method as the mirror.
All chrome parts were stripped using oven cleaner and re-chromed by airbrushing Molotow Chrome or Krylon Premium Metallic chrome. Molotow is an excellent chrome which looks more scale than the kit supplied chrome parts. The downside is that it is very sensitive to handling. You have to let it cure for several days before touching, should really have a protective clear coat applied.
The wheels I chose were Fireball Modelworks Cragar SS and Fireball BF Goodrich T/A decals which fit the kit tires perfectly. After chrome finishing, Tamiya Black panel liner was use to pop the details.
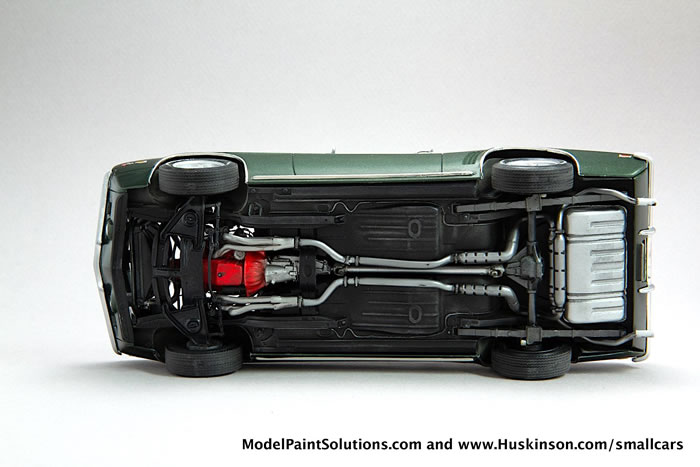
Aluminum tubing was used as the exhaust tips, which definitely adds realism.
Interior:
The interior was airbrushed with Mission Models semi-gloss over the Mission Models White. Black embossing powder was sprinkled over Tamiya flat black paint to represent the carpeting and rear deck detail.
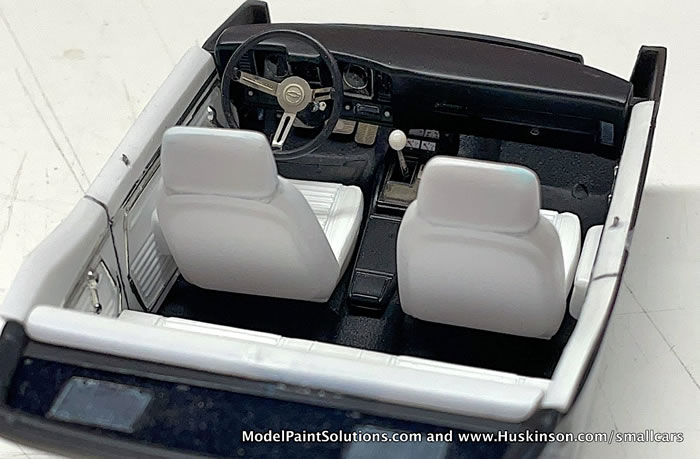
The gauge details were achieved by gently scraping the black paint off of the raised markings in each to reveal the white plastic. The speedometer needle was highlighted with red Sharpie. A drop or two of clear epoxy glue was put over each gauge. It dries to make a perfect glass/plastic gauge cover.
The steering wheel spokes, console detail and Hurst shifter are all Model Car Garage photo-etch pieces.
Seat belts were added using strips of masking tape painted black and photo-etch buckles.
The Chassis:
I really like mildly weathering the underside. Real cars get dirty! A little grease or oil stain here. Some wear and tear there.
Since I had several of the same kit, I cherry picked the best decal sheet! The opacity of the white body stripes varied dramatically, so I used the most opaque of the bunch. I had also purchased a set of decals from Keith Marks. It took a fair amount of finessing to make sure the hood/body and trunk lid/spoiler stripes lined up perfectly. To aid with this, I used thin tape strips. Micro Sol and Micro Set were both used as well.
The body chrome trim and interior chrome was done with Bare Metal Foil. I had some issues with it not adhering as it had in the past and needed to redo several items.
I’m very happy with this build and constantly wish I had the 1:1 in the driveway!
For more on this review visit Modelpaintsolutions.com.
https://modelpaintsol.com/builds/revell-1969-camaro-z-28-rs
Text & Images Copyright © 2021 by Brad Huskinson
Page Created 23 September, 2021
Last updated
23 September, 2021
Back to HyperScale Main Page
Back to Reviews Page

|
 Home
| What's New |
Features |
Gallery |
Reviews |
Reference |
Forum |
Search
Home
| What's New |
Features |
Gallery |
Reviews |
Reference |
Forum |
Search