Academy/HTC Modelismo 1/48 scale
P-47D Bubble Top
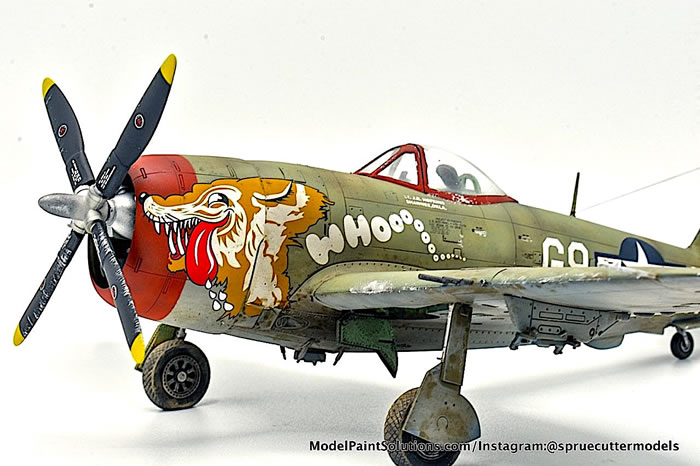
by Mat Mathis

Description: 1/48 Academy/HTC Modelismo P-47D Bubble Top
Kit# 48003
Scale: 1/48
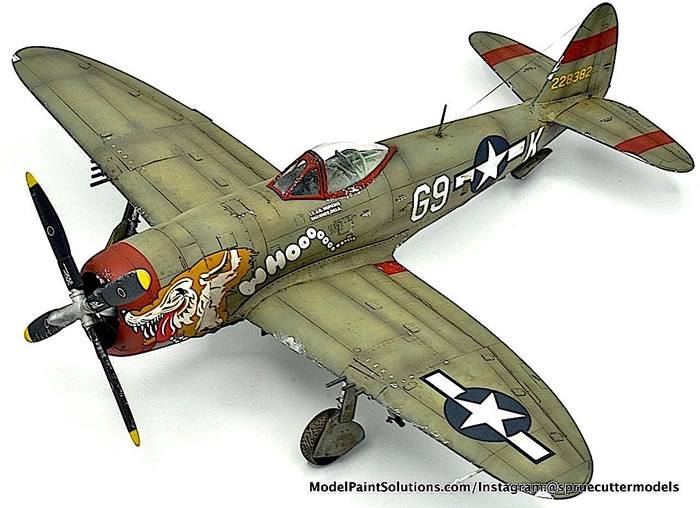
Review Type: Build
Model, pictures, and text by Mat Mathis
Another month down, another build complete! The main topic of August was the Academy/HTC Modelismo P-47D Bubble Top–an odd enough boxing. This build ended up taking my mind away from a Revell Bf-110G that has been giving me fits from the very beginning. I acquired the -47 kit from my local IPMS club raffle (Stateline Area Modelers, Ohio, USA).
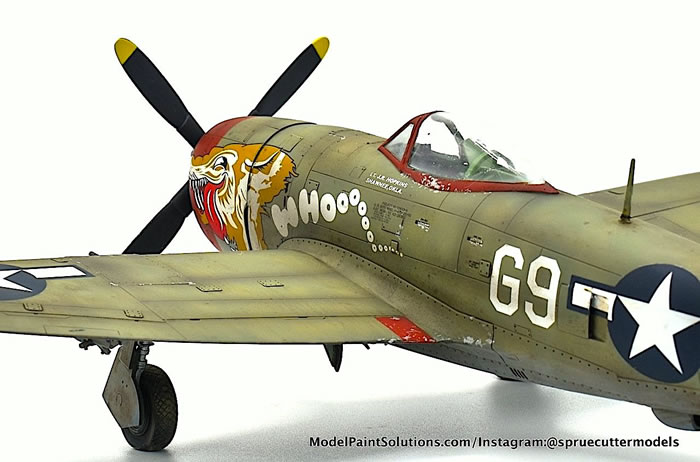
It moved up in the build order after I found out it was my godfather’s favorite plane. He has had health issues lately so I wanted to cheer him up and surprise him with this.
Overall, there were no real issues to speak of during the building phase.
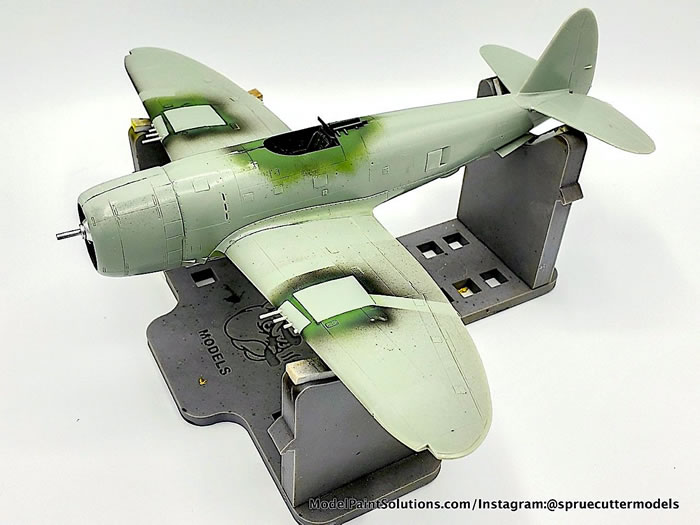
A couple small gaps to fill around the wing joins but that was it. I was quite pleased with the quality of the fit.
After taking special care for seam removal and re-scribing, we were quickly ready for some paint.
I started my painting with Alclad Black Primer and Microfiller. Then, knowing what look I wanted to go for, I started building up various colors on the top and bottom, keeping in mind that I was ending up with a faded Olive Drab (OD; as usual). I’m more of a fan of a faded yellow/green hue OD rather than a newer deep olive color. Everyone has their own preferences though!
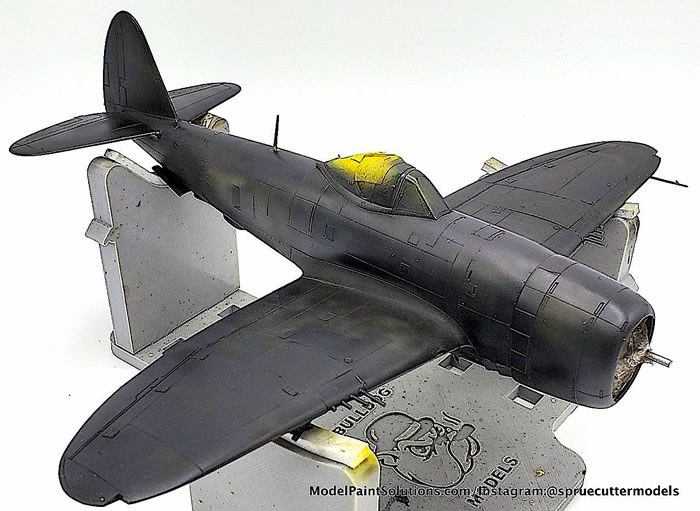
For the undershades I use Tamiya acrylics thinned with Mr. Leveling Thinner (aka “unicorn tears”). This is a lethal combo and it’s what dreams are made of. Once the various undershades were complete, I went over the top with Mission Models Faded Olive Drab on top and their Light Gull Grey on the bottom. The red markings were courtesy of the Tamiya Red and “unicorn tears.”
As the decals in the box were Brazilian markings (which I didn’t really have an interest in building); yellow and cracking, I knew that I would have to get an aftermarket set. Wanting some memorable nose art, I started scouring the internet for something that I liked.
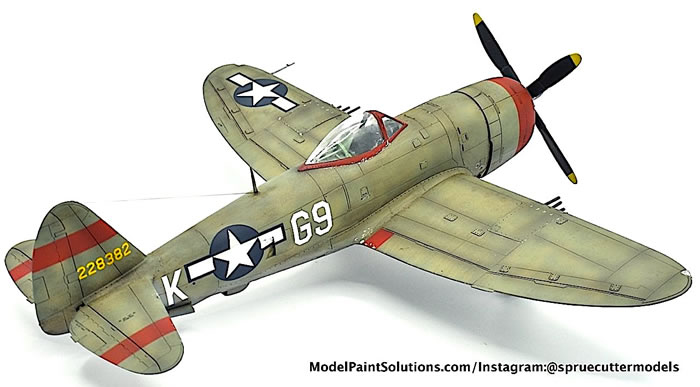
I settled on an EagleCals set that had one OD and one NMF version to choose from, knowing I could stash the NMF one away for a rainy day. I’ve built with EagleCals before and have had some great successes! This build was no different. They are very easy to work with and settle into details nicely with a round or two of Micro Set and Sol.
Still not very comfortable with going all out into weathering, I kept it within the comfort zone once again. For weathering on this build I did a Flory Models Wash (Grime) to bring out the panel lines and detail and did some light chipping with a sponge and Tamiya Flat Aluminum. I did a little bit of post shading along the panel lines as well.
The initial go was a bit too pronounced for my liking, so I went back over with the OD to blend it until it was where I liked it. With that, I attached the last few bits and bobs, removed the canopy masks, and placed the rigging wire. All that was left was to get some photos!
I was very happy with how this kit turned out! Before sending it off to my godfather, I entered it in an IPMS Regional show and took a Silver with it. I was quite pleased with that result and know where I need to improve a bit more, as well. I carefully packed it up and sent it to its new home. A few days later I received a call that it had arrived (unscathed) and it really cheered him up! The kit itself was pretty painless and very enjoyable to build. It’s making me hopeful for the handful of other Academy kits I’ve got stashed away. I bet we’ll get at least one more on the bench before the year is through. Stay tuned!
Thanks for following along!
If you have any questions, feel free to reach out on Instagram,
Mat
Instagram:@spruecuttermodels, www.instagram.com/spruecuttermodels
For more on this review visit Modelpaintsolutions.com.
Text and Images Copyright © 2020 by Mat Mathis
Page Created 22 October, 2021
Last updated
22 October, 2021
Back to HyperScale Main Page
Back to Reviews Page

|
Home
| What's New |
Features |
Gallery |
Reviews |
Reference |
Forum |
Search