Tamiya's 1/48 scale
P-38H "Becky"
by Mat Mathis

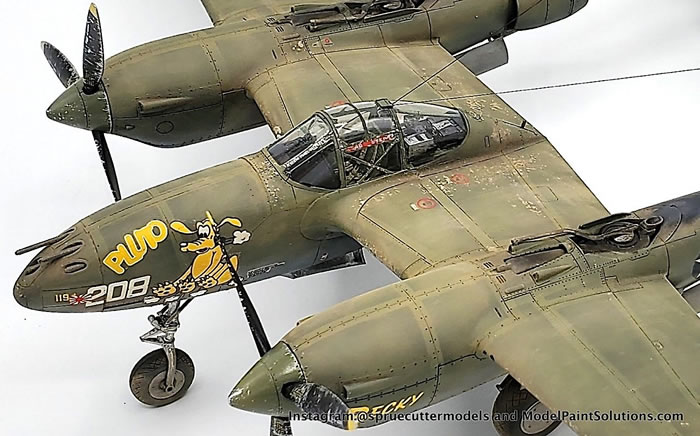
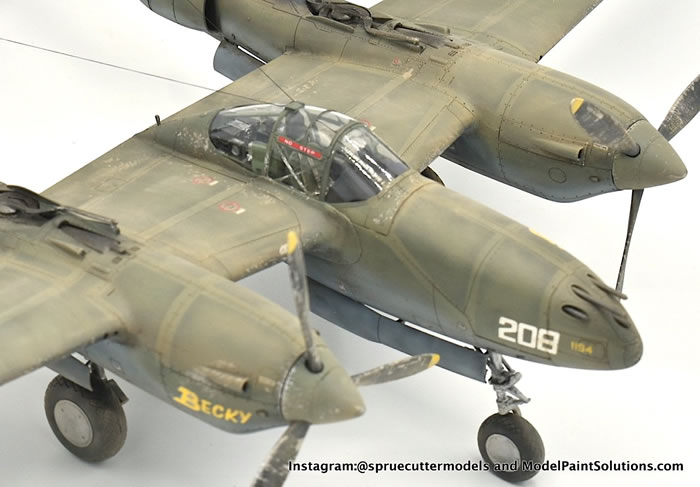
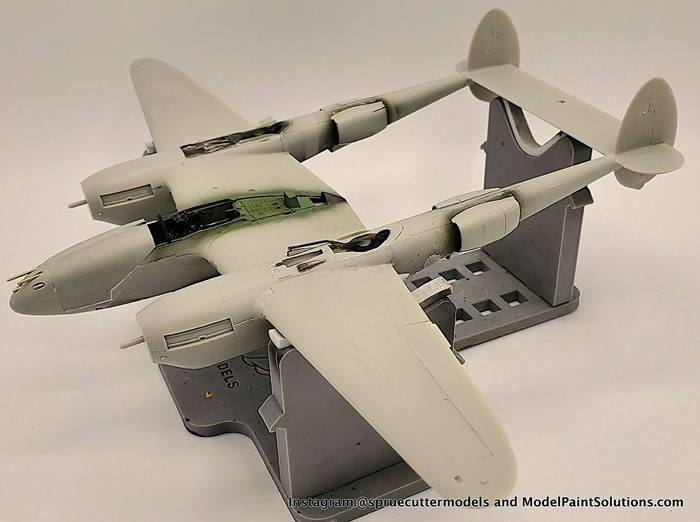
Without sounding like a Tamiya fan boy (of which I am one) this kit is an absolute engineering masterpiece. Every part was thoughtfully designed with the modeler in mind to minimize visible ejector pin marks, seams, etc. The parts slot in perfectly – almost to the point where glue is not needed in some spots. At one point, I had to search for the seam where I was applying the Tamiya Extra Thin Cement. The detail is adequate to where you could build it directly out of the box. With that said, I ended up adding the Eduard “Look” control panel and PE seatbelt as well as gun barrels by MASTER.
Because of the excellent engineering the kit went together with no issues.
As those old adages go for Tamiya kits – “it puts itself together.”
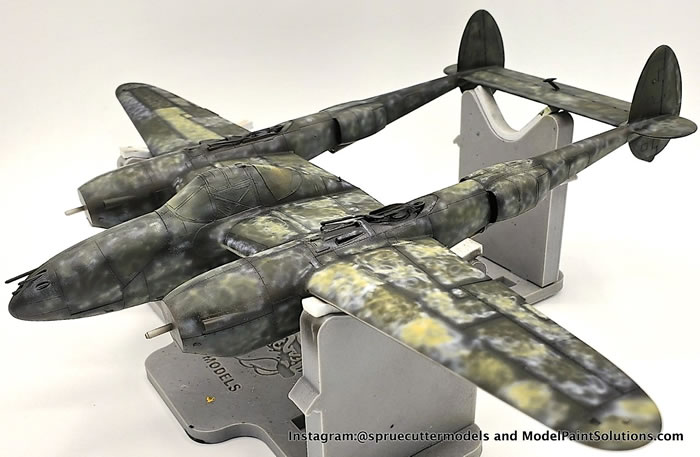
I am a proponent of the black basing technique and use it on every build.

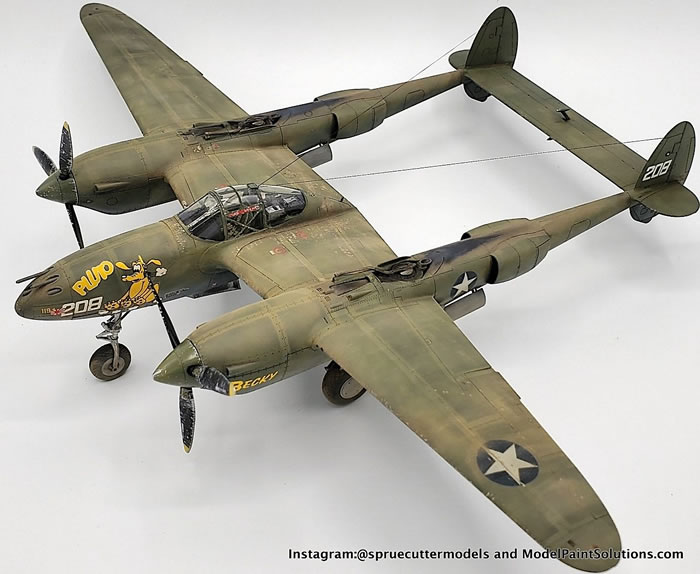
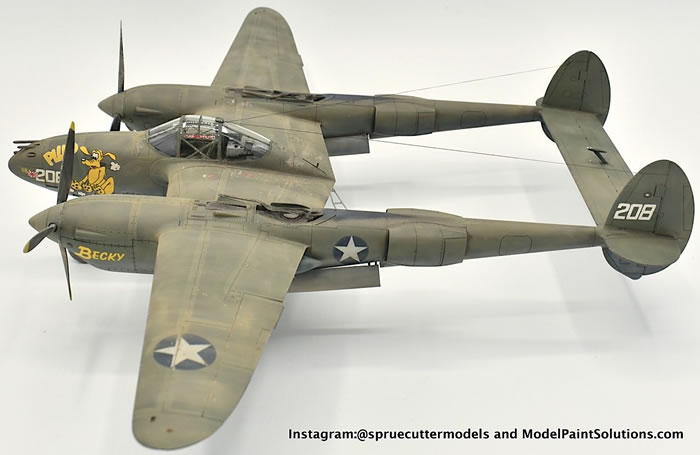
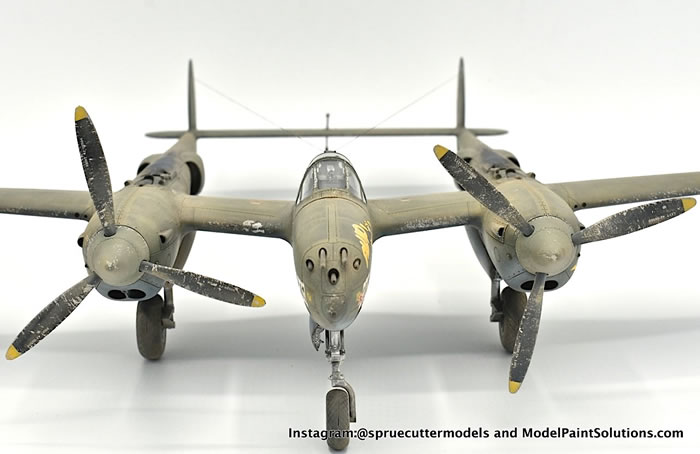
After priming with Alclad Black Primer and Microfiller, I started building up layers of “marbling” to act as shading and help to add a more dirty/weathered look to the final paint job. I always start with white and then add additional colors that would complement the final color. In this case, I used Tamiya’s Khaki, Buff, and Olive Drab on top the sides and Buff, Khaki and Field Blue on the underside.
After this, I painted the OD and Grey color scheme using Mission Models Faded Olive Drab #2 and Hataka Orange Line Light Gull Grey in light layers, so as not to obliterate the shading work.
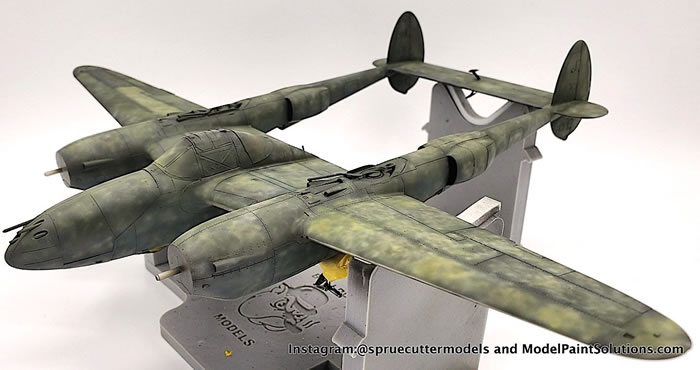
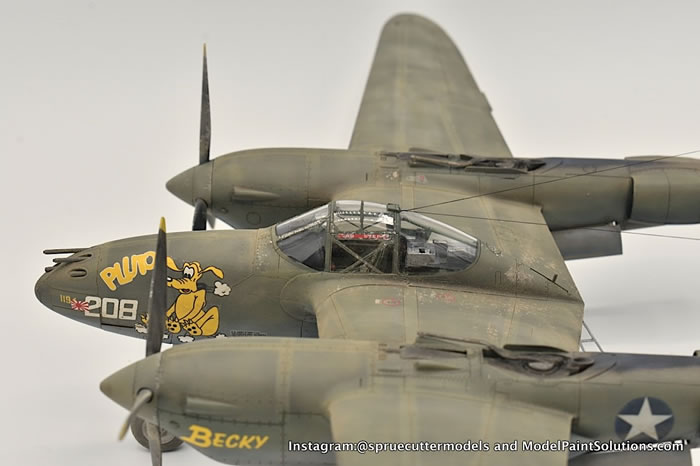
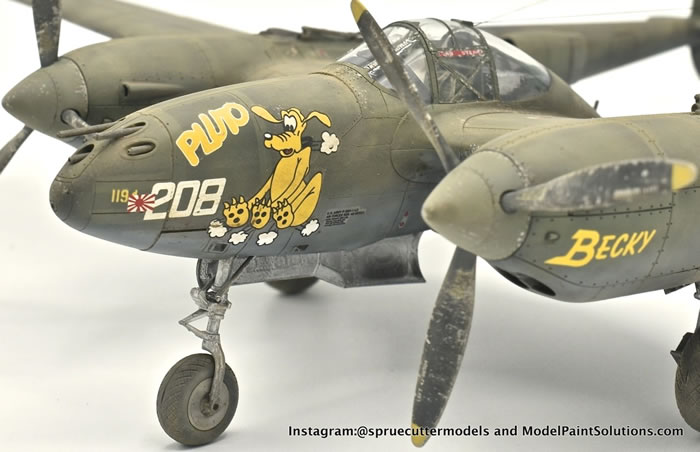
Once the main colors were down, I started work on the “transport tape lines.” When these planes were shipped overseas, the panel lines and access panels were commonly taped over to protect them from the elements. This resulted in a very distinct discoloration on and around where the tape was placed. To replicate this, I masked the areas and painted over them with a light mist of very dilute black paint. Next, I removed the mask and blended the starker areas with the OD.
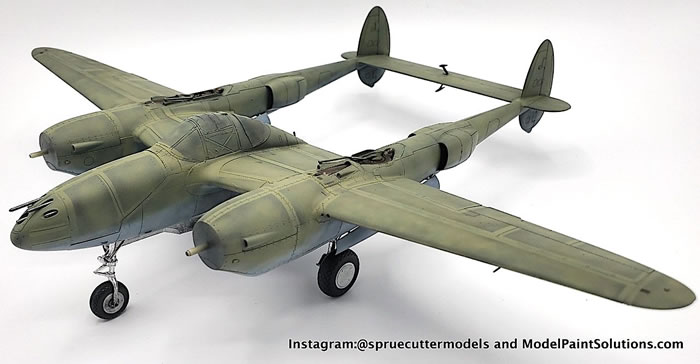
I then used my Montex mask set to mask off and paint the insignia. I used a self-mixed blue, matched to the color of the decals that came with the kit. While I am a fan of Tamiya as a whole, if it is possible, I will use aftermarket decals. In this instance, however, I decided I wanted to paint the markings on.
After the insignia was painted, the model was sealed with Alclad Klear Kote Gloss prior to decaling. The Montex mask set also came with decals for two planes. Only the stencils were taken from the Tamiya kit.
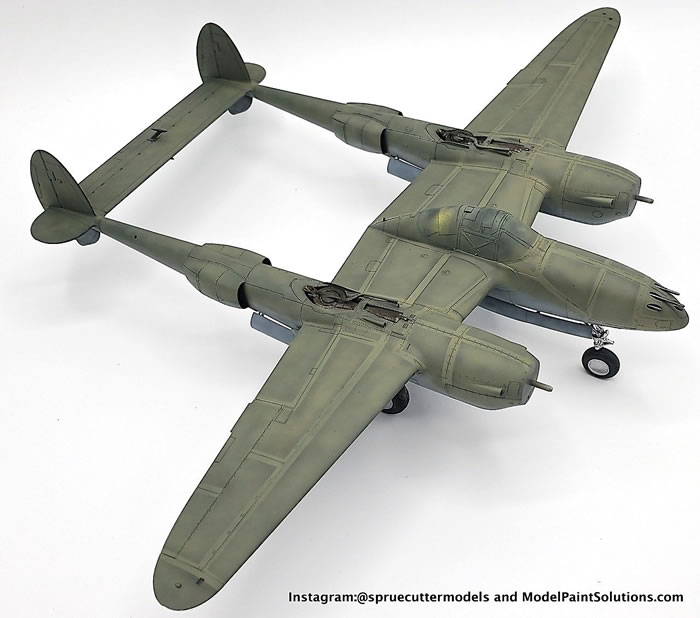
First, I started off with some sponge chipping with aluminum paint. Also, for weathering I tried to use some techniques that I have not used very much in the past – pigments and oils. Being that this plane was in the South Pacific, I wanted to give it a very sun faded, sandy/dusty look. I mixed some Vantage Modeling Supplies (VMS) pigments together – European Earth and Sand – to create the perfect tone. I applied this liberally as a wash and then started to remove it until I liked how it looked (high science going on here). I also used oils to create the discoloring on the booms, behind the exhaust. Once these were dry, I used more VMS pigments to create the staining directly behind the exhausts.
After all of this was completed, I sealed everything again in Alclad Klear Kote Flat. This caused the pigments to fade a bit, so I did one final, light dusting prior to calling it done.
All-in-all, I think it is safe to say that this has been my best build to date. Is it perfect? Absolutely not. That said, it does not have to be perfect for me to be happy with it. After all, that is what this hobby is all about – having fun and being happy with your own work.
Thanks!
Mat
For more on this review visit Modelpaintsolutions.com.
Text and Images Copyright © 2020 by Mat Mathis
Page Created 15 July, 2021
Last updated
15 July, 2021
Back to HyperScale Main Page
Back to Reviews Page

|
 Home
| What's New |
Features |
Gallery |
Reviews |
Reference |
Forum |
Search
Home
| What's New |
Features |
Gallery |
Reviews |
Reference |
Forum |
Search