ICM's 1/48 scale
BQM-34A (Q2-C)
Firebee Drone
by John Miller
S
u m m a r y : |
Description and Item No.: |
ICM Kit No. 48403 - BQM-34A (Q2-C) Firebee Drone |
Price and Availability: |
£15.80 EU Price (£13.17 Export Price) plus shipping available online from Hannants
and hobby retailers online and worldwide |
Scale: |
1/48 |
Review Type: |
Full Build |
Advantages: |
The kit scores high on the novelty scale and has few parts; most of which fit quite nicely. A nice selection of colorful schemes are covered by the decals. |
Disadvantages: |
The part for the main intake lip is a bit thick and required filling, blending, and recontouring to achieve an appropriate fit. |
Conclusion: |
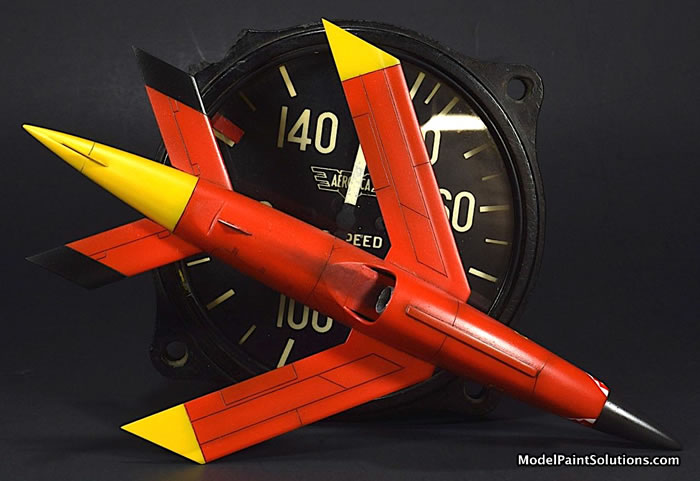
This is a quick, relatively painless build that results in an eye catching and novel model when assembled. Recommended! |

In the late 1950s, the USAF awarded Ryan a contract for a substantially improved “second generation” Firebee, the Model 124, originally with the designation Q-2C. The initial prototype performed its first flight in late 1958 and went into production in 1960. In 1963, it was re-designated the BQM-34A. The old first-generation KDA-1 and KDA-4 targets then still flying with the Navy were (somewhat confusingly) given the respective re-designations AQM-34B and AQM-34C.
The BQM-34A/Q-2C emerged as the Firebee as it is recognized today, with a bigger airframe, longer wings, and a particular “chin”-type inlet under a pointed nose (in contrast to the circular intake of the first-generation Firebees). It was powered by a Continental J69-T-29A turbojet, a copy of the improved Turbomeca Gourdon derivative of the Marbore, with 1,700 lb (7.6 kN) thrust. The U.S. Navy also adopted the BQM-34A, while the Army obtained a ground-launched version designated MQM-34D with longer wings and a heavier JATO booster.
(Edited from Wikipedia)
As is my norm, the sprues were soaked for 2 hours in a 1:1 solution of Denatured Alcohol (labeled for Cleaning Glass) and old style Windex (with ammonia) then rinsed in warm/hot water. I do this to remove mold release from the styrene prior to starting the build.
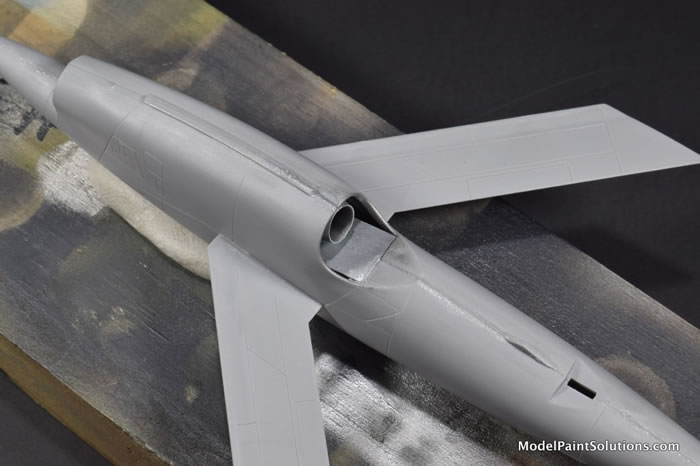
The kit is of conventional layout and design with the exception of having interlocking wings and horizontal stabilizers. The parts count is low and the building sequence is straightforward. The only major issue I had is the opening in the belly just aft of the engine. This is visible only when viewed from underneath but I opted to add an additional panel above the engine (see below).
All parts were cut from the sprues with GodHand nippers and prepped with a sharp X-Acto blade and Alpha Abrasives synthetic sand papers (400 and 600 grit). Tamiya Liquid Cement was used for major assemblies.
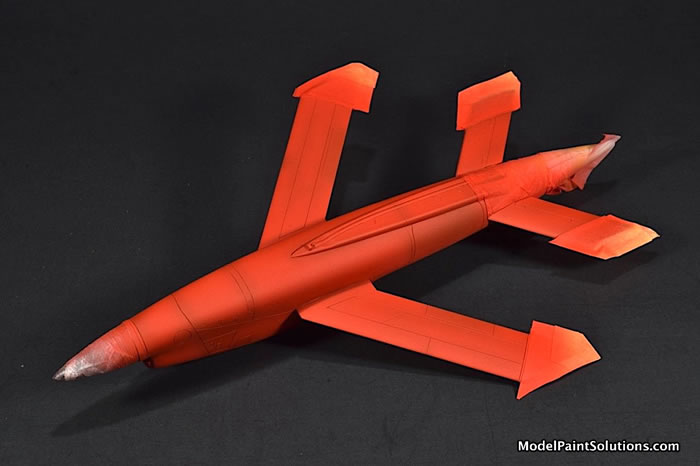
The build starts with the engine which is then trapped in between the fuselage halves. The wings insert into the fuselage and lock together with an over-lapping join. This makes for a stable bond but care must be taken to ensure the wings don’t set with a negative cant or anhedral.
Once assembled there is a noticeable gap just behind the engine that exposes the empty fuselage. This is only visible from underneath but since I often display my builds on mirrors, I made a small square cover from thin sheet styrene thereby closing off the open fuselage.
Part number A16…
All was progressing quickly with the build and then I added part A16; the lip for the main intake. Pictures of 1/1 scale Q2-C’s show this lip to be quite thin; not so with part A16, which is rather thick and required filling and recontouring with micro-files and sandpaper to get an acceptable fit and appearance.
At this point in the build seems and surface imperfections were filled with Mr. Surfacer 1200 followed by blending with Alpha Abrasives 400, 600, and 1,000 grit sand papers (used with soapy water).
Prior to priming, the model was buffed with Micromesh 4,000, and 6,000 (pads and sheets) used with soapy water. This was followed by a wipe down with a lint-free Kimwipe tissue saturated with a 1:1 solution of Denatured Alcohol (labeled for Cleaning Glass) and old style Windex (with ammonia). The model was then dried and buffed one final time with a dry Kimwipe to remove static electricity prior to priming.
The Primer Coat:
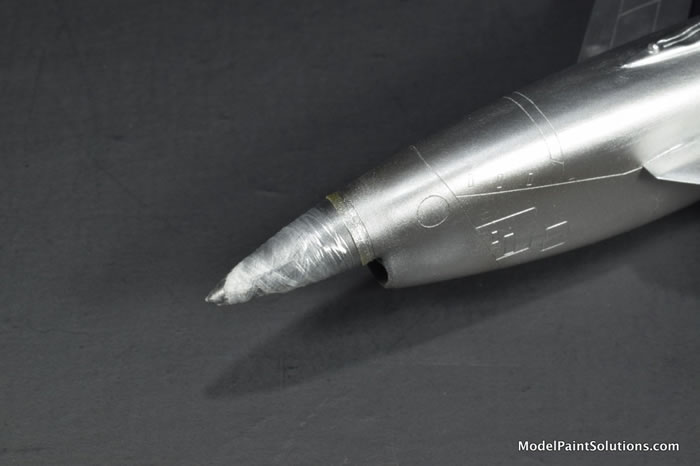
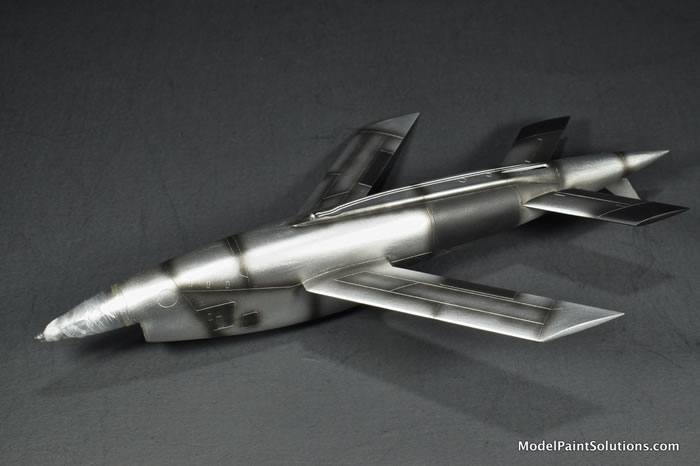
Something I started with my build of the Eduard 1/48 Me-109G-6, is priming my aircraft builds with AK Xtreme Aluminum diluted 30% with AK Xtreme lacquer thinner (that’s a ratio of 70:30 Xtreme Paint to Thinner). I applied this at ~15psi with an H-S Evolution fitted with a 0.40mm tip. Used as a primer, AK Aluminum adds an intensity and hue to the overlying coat of paint that, to this builders eye, is different than that obtained with a more conventional color of primer like white or grey.

When this was dry, the model was lightly buffed with a dry Kimwipe resulting in a smoother, shinier finish. The nose cone was then shot AK Black 6RP diluted to ~30% paint with AK High Compatibility Thinner (HCT). That’s a ratio of paint to thinner of 30:70. The HCT had both Liquitex Flow-Aid and Liquitex Slow-Dry each added to 5% by volume ahead of time. This is my standard mix for most/all acrylic thinners.
After the nose cone was masked with ParaFilm and Tamiya tape, selected panels and panel lines were pre-shaded with AK Black 6RP diluted to ~30% paint with AK High Compatibility Thinner (HCT).
The pre-shading was shot at 8-10psi at a working distance of 4-5mm with an H-S Infinity fitted with a 0.15mm tip and an In-Line Air Valve.
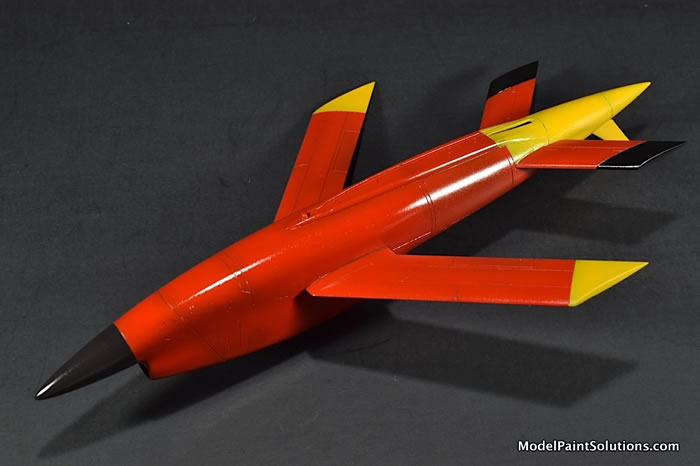
When this was dry, the wing tips and tail cone-ventral fin were shot with AK Maize Yellow diluted to 40% paint with HCT. This was applied at ~12psi using H-S Evolution fitted with a 0.20mm tip.
When dry, the tail cone-fin and wing tips were masked with Tamiya tape and ParaFilmM and the tips of the horizontal stabilizers were shot AK Black diluted to 30% paint with HCT. When dry, the stabilizer tips were covered with Tamiya tape preparatory to the final coat of red.
The Primary Color:
After some experimentation, I decided on a 1:1 mix of AK Red and AK Signal Red. Unlike my normal approach, no white (usually ~5%) was added for scale effect. The red was diluted to 30% with HCT and applied as a dry-coat followed quickly by a wet, fill-coat. The coats were applied at ~12psi with an H-S Evolution fitted with a 0.40mm tip.
After allowing the red to dry overnight, it was overshot with AK Gloss diluted to ~30% with AK Nitro Thinner. Nitro thinner has a nitrocellulose-based leveling agent that allows the paint to stay “open” or wet for a longer period of time.
This adds to the drying time but provides a significantly smoother, more glossy finish, which is time well spent.
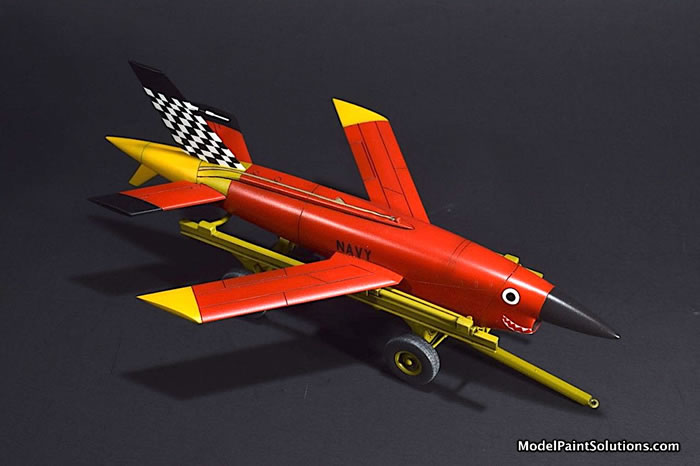
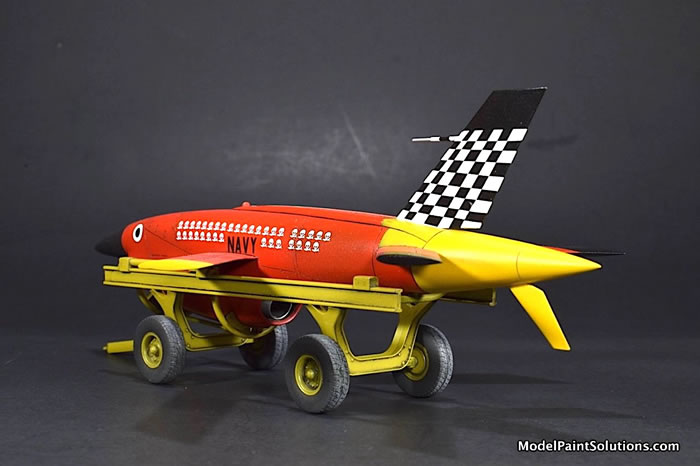
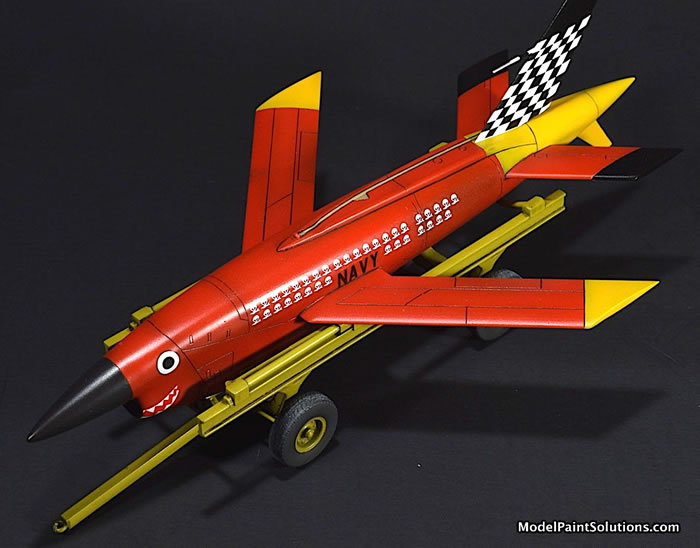
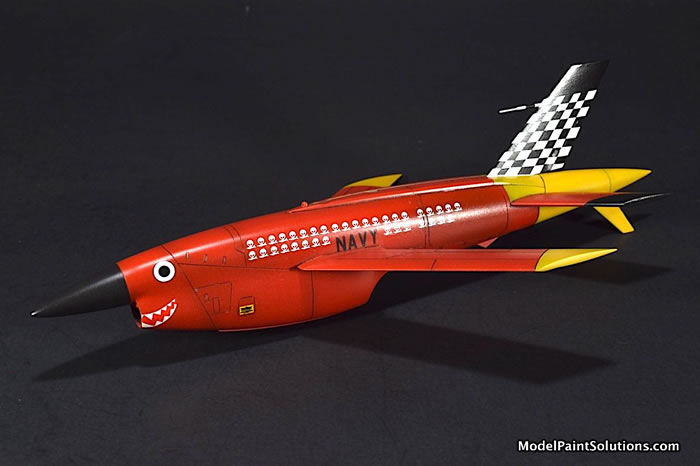
Decals:
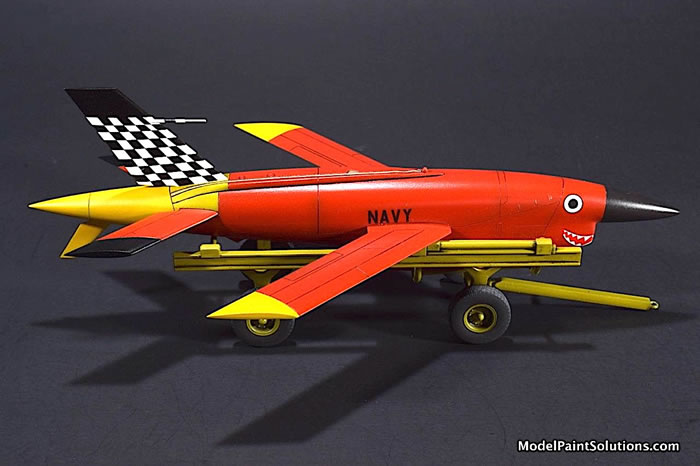
After allowing the gloss to dry for 24hrs, the kit decals were applied using conventional techniques and the Micro-Set/-Sol system. I opted to do a Q-2C that completed 36 flights and was adorned with appropriately happy nose art. The decals were surprisingly sticky, requiring soapy water to be used during placement versus my usual Micro-Set. Once in place, I switched to Micro-Set followed by -Sol and the decals behaved beautifully.
Once the decals had dried for 24hrs, the model was given second coat of AK Gloss diluted to ~30% with AK Nitro Thinner. This both sealed and blended the decals with the underlying gloss coat.
Finishing Up:
A full 24 hours after the second gloss coat, the parachute rigging, visible on the dorsal fuselage, was hand-painted using a small brush and a custom mix of Mission Models White and Brown. The inscribed panel lines were then picked out using a pin-wash of Tamiya Black Panel Liner.
The gloss finish was dulled and and evened out with a coat of AK Satin Varnish diluted to ~30% with HCT (no Liquitex Flow-Aid or Slow-Dry added). This was applied at ~15psi as misty, over-lapping, dry coats using an H-S Evolution fitted with a 0.40mm tip. A very minor amount of chipping was done around some panels and fasteners with an AK Silver Pencil and some small exhaust stains on the belly, just aft of the engine, were added with black and brown weathering powders.
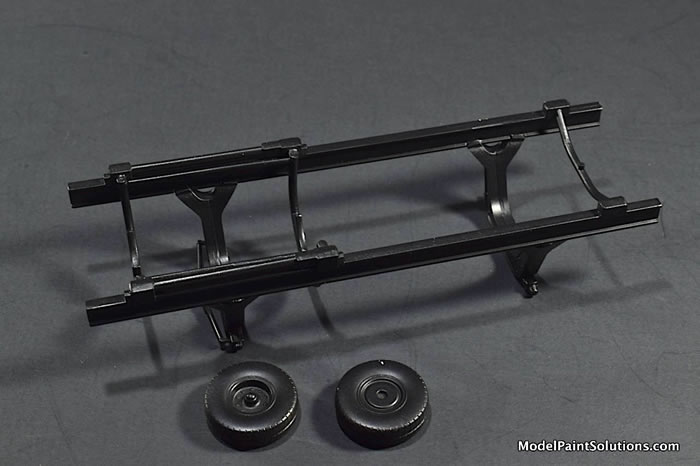
The Trolly:
The rather intricate trolly adds a lot to the final presentation of the model. Outside of a few fiddly steps, the trolly came together quickly with minimum of fuss. I used a combination of Tamiya liquid cement and thick CA Glue (Bob Smith) for the assembly.
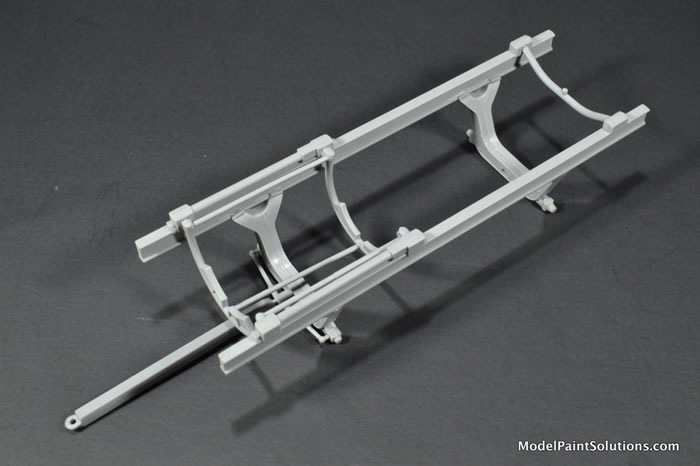
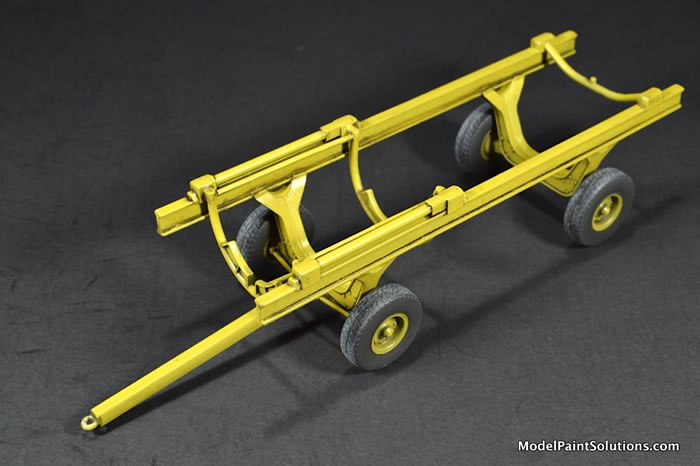
Once built, the trolly and wheels were shot with Mission Black Primer diluted 1:1 with Mission Thinner. Liquitex Flow Aid was added to 5% by volume. This was applied at 15psi with an H-S Evolution fitted with a 0.20mm tip.
When dry, the trolly was shot with a custom mix of Mission Green Chromate and Yellow Chromate. The wheels were paint with the same mix and after masking, the tires were sprayed Mission Tire. As a final step, the trolly details were accentuated with a wash of Tamiya Dark Brown Panel Liner and the finish blended with a light coat of AK Satin varnish diluted to ~30% with HCT (no Liquitex Flow-Aid or Slow-Dry added).
Done!
This was a very enjoyable build and the result is a model seldom (ever?) seen on the modeling show tables. It’s not without its nit-picks and the fit of the main intake lip will make you work for it.
But, if you’re looking for a break from more high-stress builds and you want something different on your built shelf, consider this Q-2C drone from ICM.
Now go paint something!
—John
For more information on the build visit ModelPaintSolutions.com
Kit eagerly purchased by the builder.
Text and Images Copyright © 2020 by Model Paint Solutions
Page Created 16 December, 2021
Last updated
16 December, 2021
Back to HyperScale Main Page
Back to Reviews Page

|
 Home
| What's New |
Features |
Gallery |
Reviews |
Reference |
Forum |
Search
Home
| What's New |
Features |
Gallery |
Reviews |
Reference |
Forum |
Search