A Ship Modeling Novice and the Amazing Technicolor Rubik’s Cubes of Nautical Delight:
The Revell 1/700
Colombo Express
by Tim Nelson

Let me state upfront I’m not a ship modeler nor an able seaman, and this is my first nautical model in 30+ years. I’m mostly an airplane guy, both by trade (retired) and as a modeler. However, I’m fascinated by ships and like to linger in the ship section of model shows.
I foolishly signed up to build a 1/700 model of USS Tennessee (BB-43) for an upcoming NorthWest Scale Modelers display on Pearl Harbor at the Museum of Flight in Seattle, WA. Knowing I needed a “warmup,” a colorful vessel caught my eye in the local hobby candy store known as Skyway Model Shop in the fall of 2020. It would give me a chance to get my feet wet in some ship modeling matters, and also try dreaded photo-etched (PE) railing. Equally important, it is simply an appealing subject far removed from anything else I’ve done, and shaking things up is generally good in both hobbies and life.
History
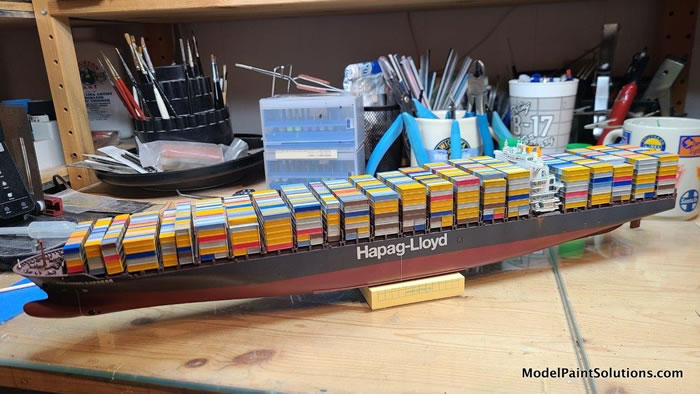
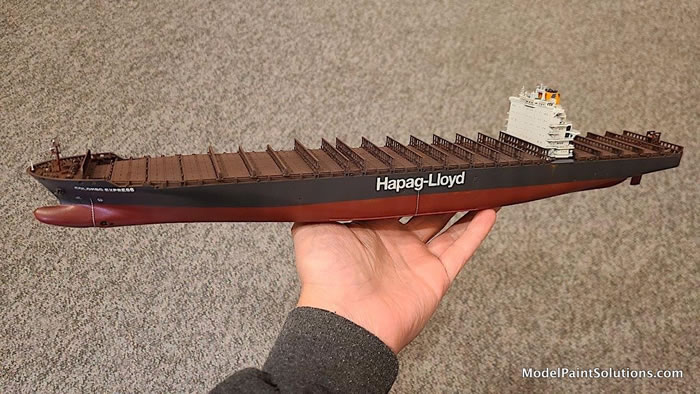
The world’s international commerce is heavily dependent on shipping via intermodal containers. The experience of the 2020 pandemic has highlighted how reliant the global supply chain is to the ships which ply the oceans carrying these colorful boxes between far-flung ports. The Colombo Express is the first of a class of eight vessels commissioned by the German Hapag-Lloyd shipping line in the early 2000’s. At the time of launch in 2005, at over 1000 feet long and about 94,000 gross tons displacement, these ships were the largest container ships in the world.
.jpg)
credit:
By Wmeinhart - Foto wurde mit einem Panoramaprogramm aus drei Fotos zusammengesetzt, CC BY-SA 3.0.
Construction and Painting |
The Revell 1/700 kit is a modern mold, first offered circa 2010. I was intrigued by the kit then, but passed on acquiring it. When the reissue came in 2020, I was in the mood and excited about the outrageous color palette in the offing. Opening the vibrantly hued box and looking at the sprues of 226 parts, it was clear that even in 1/700 scale, this kit is large – about 15” long. It quickly seemed apparent to me that the build could be broken into three acts: the hull, the superstructure, and the (MANY) containers. I mulled the build and painting strategy for each phase, and got to work with a fair amount of enthusiasm.
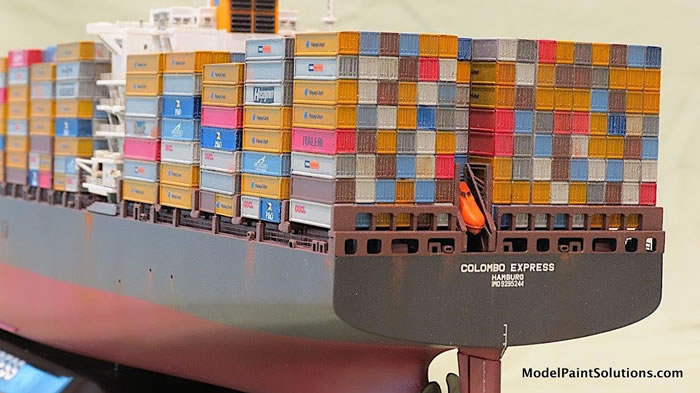
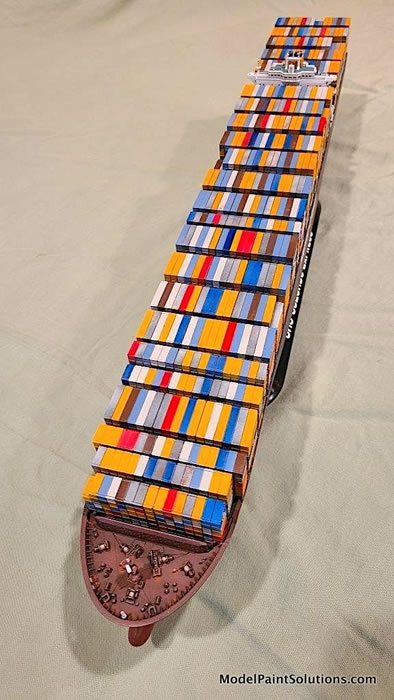
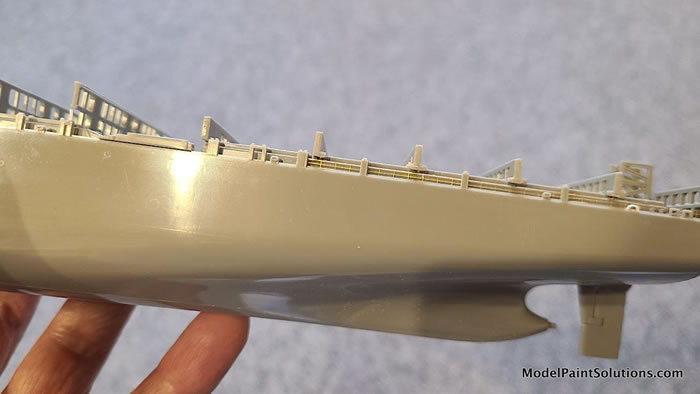
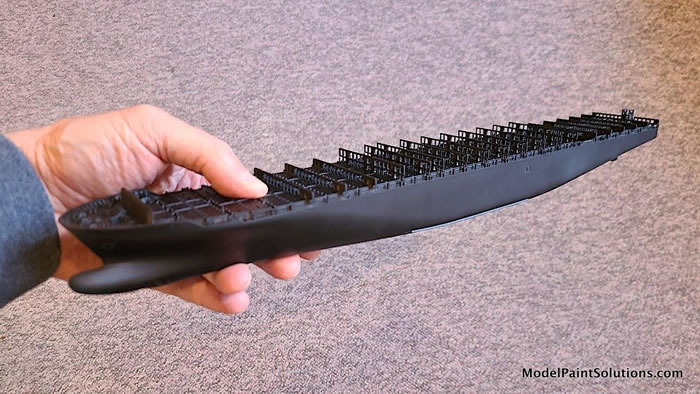
The hull has relatively few parts, with two halves supported by a couple of bulkheads amidships. The decking is installed in fore and aft sections, followed by structures which divide the rows of containers. There should be openings in the bow for mooring lines which are molded solid - these need to be drilled and filed for better realism. Using photos, I also drilled a few bilge pump outlet holes on the hull sides. Except for a couple of details like the bow radar (?) mast, I assembled the hull in total before painting.
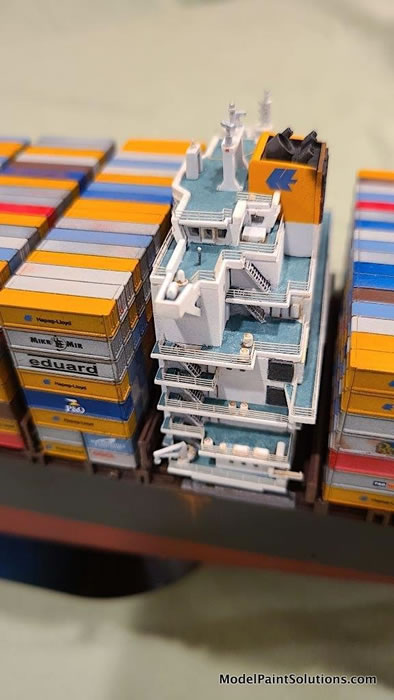
The superstructure is where most of the detail and parts count reside. The kit does not come with PE parts but ship models really need railing to pop. I acquired some Tom’s Modelworks and White Ensign generic 1/700 railings for this and future projects. (The hull and bow mast also benefit from added railing.) Then I started to ponder how to paint and assemble everything.
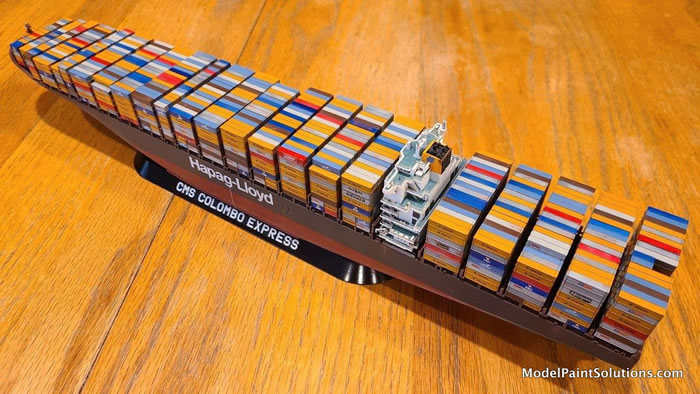
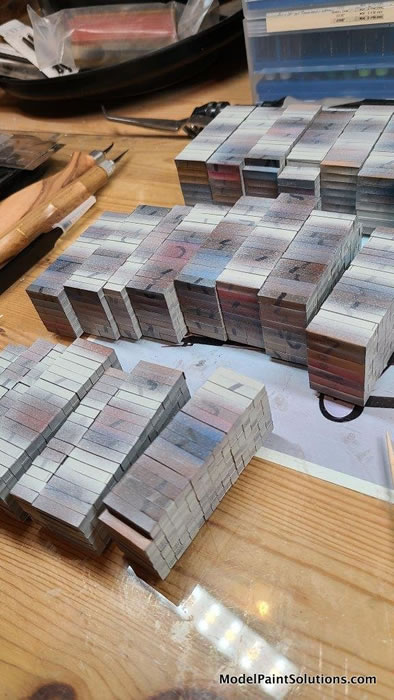
The containers are represented in 23 blocks, most of which are unique. (It’s important to label each block on the bottom during assembly, since they are installed in specific locations at the end.) Although simple parts, these blocks would be the dominant visual impression of the model, so it would be important to render the individual containers in a variety of colors, markings, and degrees of weathering. The kit containers depict an absolute, 100%, filled to the gunwales (pronounced “gunnels”), load – which I’ve never seen in person nor in photos. I decided to cut out a few corners to render a slightly less full and more random-looking load. This required some minor surgery but wasn’t too difficult. The kit containers are rendered with smooth sides, without the vertical corrugations seen on many of the real thing – this was a simplification I could easily live with.
A simple base is included, which I decided to use in a gloss black. At some later date, I might consider something fancier but it’s certainly serviceable.
Overall, my approach would be to mimic the impression of these ships and their cargo seen in many photos online: well-maintained with some light staining and rust.
I began with the usual parts separation and prep. In this case only minor sprue nub cleanup was needed. The most significant area of need was the seam at the end of each set of container block tops, which was straightforward to address.
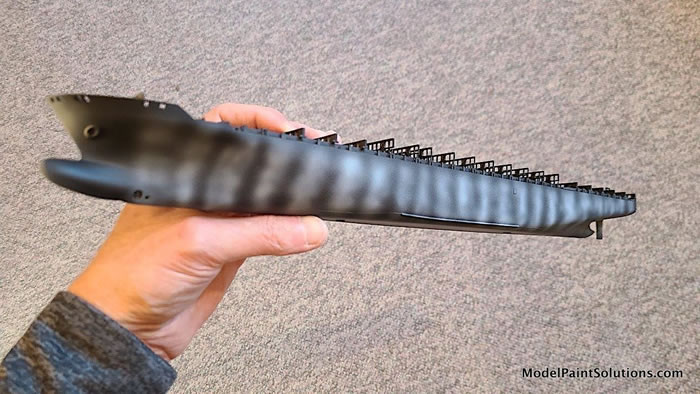
After a good precautionary swab-down with denatured alcohol, it was time to begin hull painting:
-
Rattle can Krylon ColorMaxx Paint+Primer Semi-Gloss Black (This stuff is really useful when you want a quick, effective primer, especially for large subjects. It goes on fast but levels well, fills tiny scratches, and cures quickly to a rock-hard finish. And no clean up!)
-
Pre-shade of the hull with Mission Models MMP-001 White. It looks and is heavy-handed, but most of this would be obscured in subsequent painting to get to the subtle effect I was looking for.
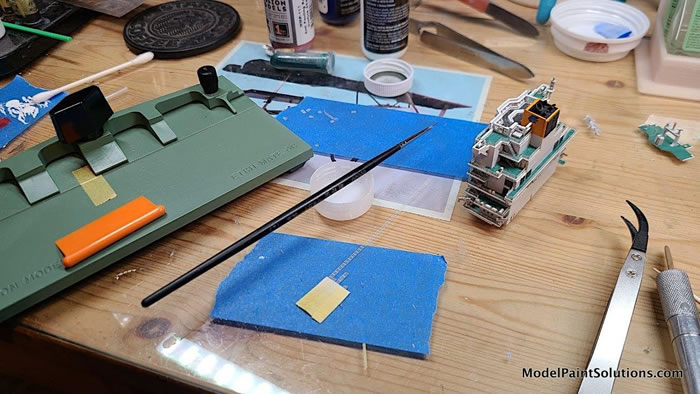
While the hull was curing, I moved to the superstructure. I decided I would need to spray the predominantly white surfaces first, then hand paint the greenish (presumably linoleum) decking before assembly:
-
Rattle can Krylon ColorMaxx Paint+Primer Satin White overall.
-
Primed PE railing still on the fret with Mission MMS-002 White Primer, airbrushed 50/50 with Mission Thinner.
-
Masked and airbrushed the orange stack section with Mission MMP-005 Orange
-
Masked and airbrushed miscellaneous louvers and vents with Mission MMP-105 Worn Black.
-
Decking hand painted 50% Mission MMP-004 Green and 50% Mission MMP-069 Light Gull Gray, with a tiny touch of Mission MMP-048 Blue. Since I wanted slow drying and leveling, this was then cut 30% with my standard thinning elixir of Mission Thinner mixed 70:30 with Mission clear primer (dubbed “CP30” by John Miller). I was nervous about how this would turn out but after some testing on scrap plastic, I liked both the color tone and mottled appearance of this approach.
-
After some touchups, assembled the various decks and bulkheads. I cut off the radar antennae on the superstructure (and also the bow mast) and repositioned at random angles for a more natural look.
-
I installed the deck railings one level at a time, working from bottom up on each side. After measuring each section with dividers, I cut the lengths and did my best to gently clean up any nubs on the PE. Most of the sections have 90 degree bends in them, which helps the PE stand in place on its own. When in the desired position, I used a fine tip brush to apply small amounts of Gator’s Grip glue thinned with water. A little white touchup was needed here and there on the rails.
-
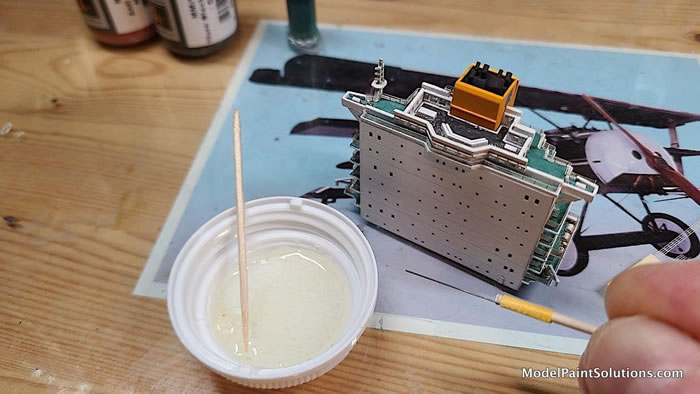
The finished superstructure was then given a sheen of Vallejo Satin varnish to blend everything and hide the eye-catching glint of extraneous glue.
-
Finally, the superstructure windows were filled with 5 min epoxy in three rounds.
- (The bow mast was also primed and railed during this process.)
It was then time to return to painting the hull, all airbrushed with a 50% solution of the “CP30” thinning mix noted above:
-
A 50/50 mix of Mission MMP-111 Anti-Fouling Red and MMP-003 Red was applied.
-
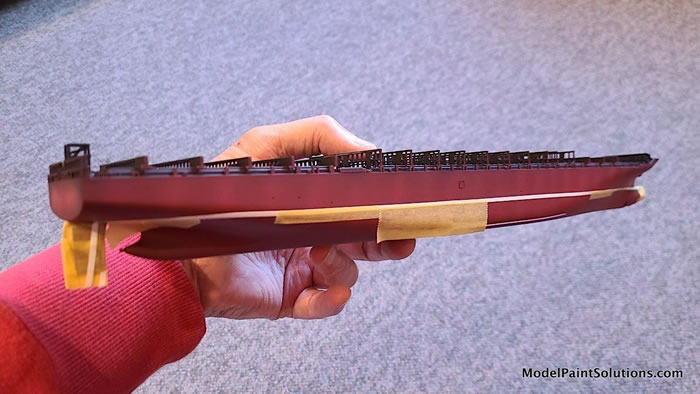
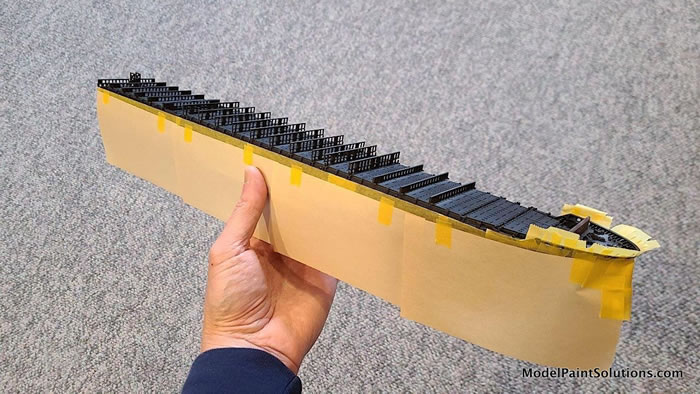
Although there is a faint raised line marking the waterline, it became hard to find after priming and paint. Using kit drawings and vestiges of the raised line that I could find, I used a mechanical pencil on a stack of Post-It Notes as a surface gauge to make reference marks, then masked off the red part of the hull. The upper hull was then treated to Mission MMP-105 Worn Black.
-
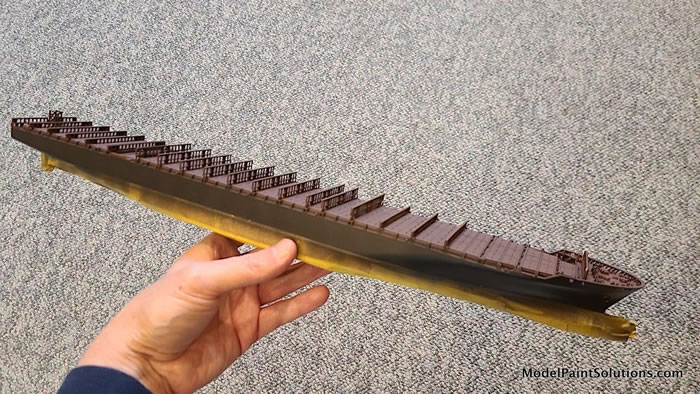
Major hull painting was completed by masking off the outer hull and painting the deck with a 50/50 mix of Mission MMP-012 Rotbraun and Mission MMP-111 Anti-Fouling Red.
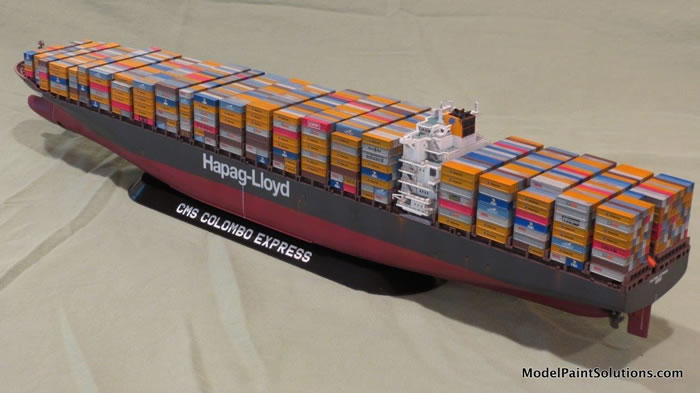
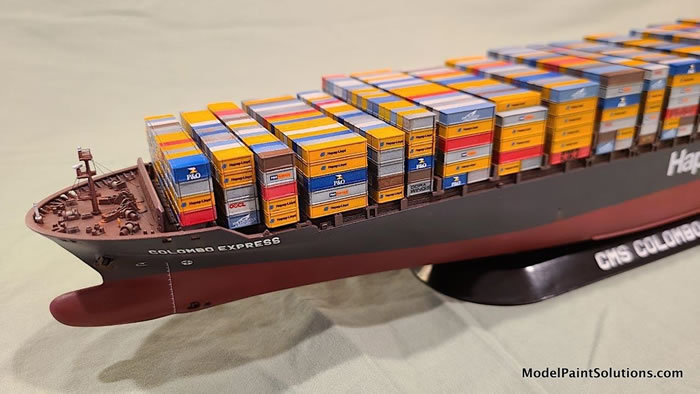
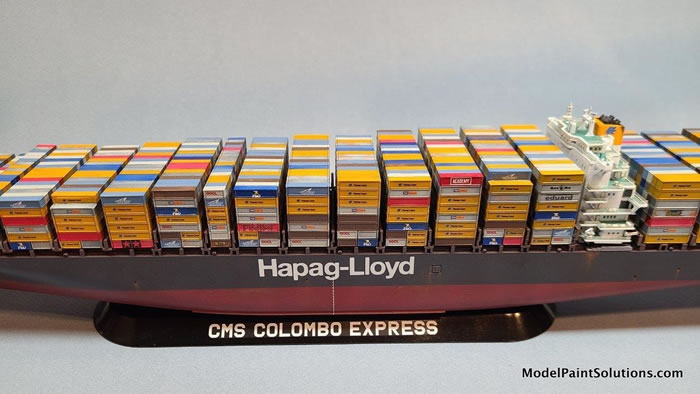
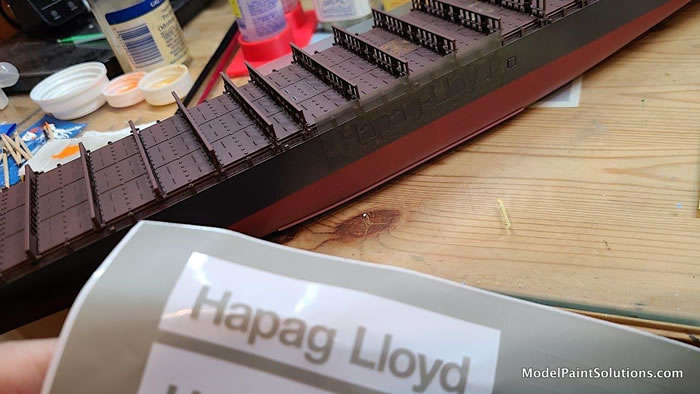
A prominent feature of the hull on these ships is the large Hapag-Lloyd lettering on each side. Although fine, thin decals are provided in the kit, I prefer to paint large markings rather than fight silvering on a large scale. I found the appropriate markings on the web (a little cleaner than trying to scan the kit decal) and created masks with the Silhouette Cameo. After carefully applying and burnishing my resulting Oramask 810 stencils, I painted the letters with Mission MMS-002 White Primer over the dark hull for a slightly weathered, scale-appropriate look.


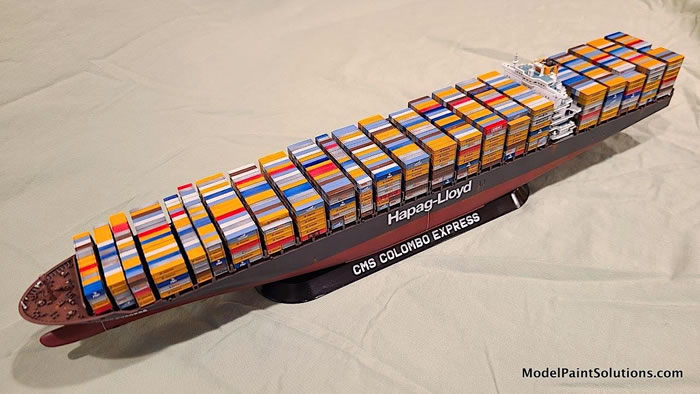
Final hull weathering was accomplished with artist oil dot filters and AK Interactive rust pigments. Again, the intent was subtle weathering in harmony with photos of the prototype. I attached the superstructure at this point using 5-minute epoxy. The ship is now done – but looks a little bare…
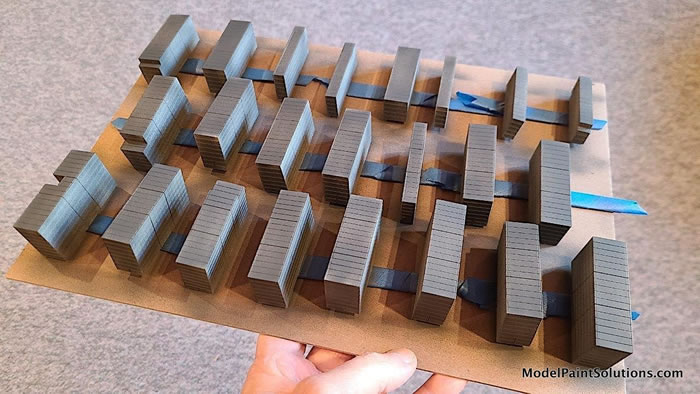
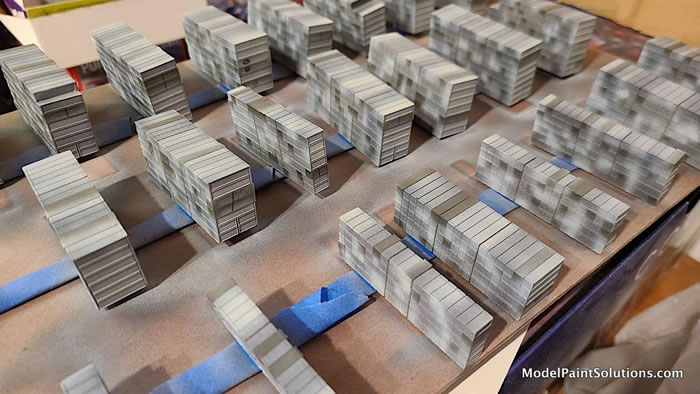
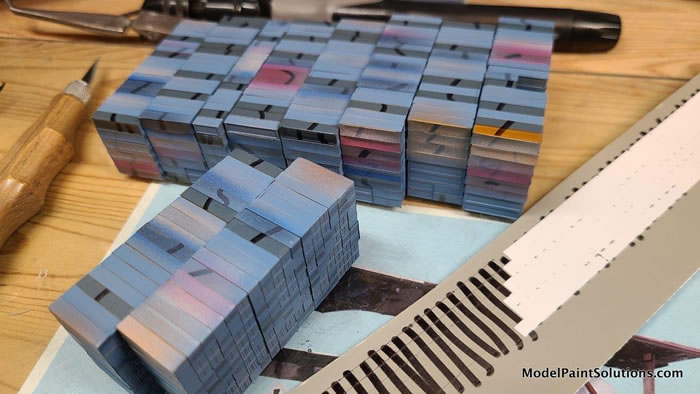
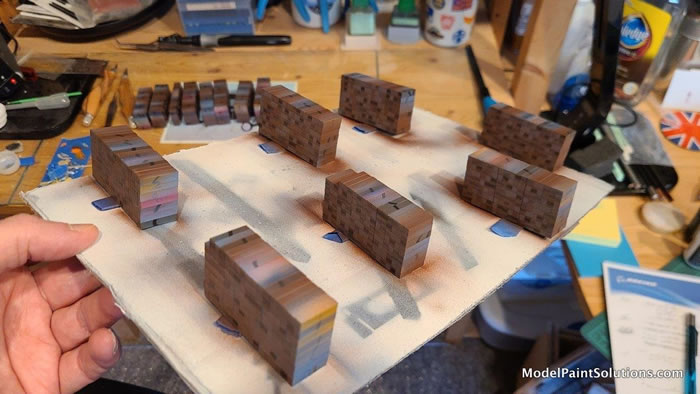
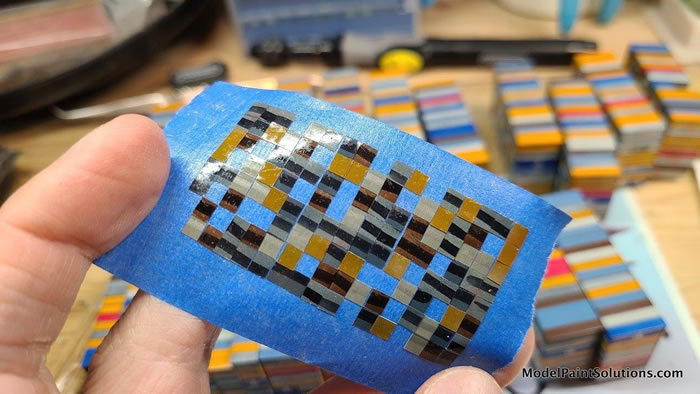
Now we come to the main event, which would ultimately consume half of the time of the build – the load of containers. The variety of colors and levels of weathering posed some challenges I haven’t faced in previous projects. It seems that some who have tackled this model painted the containers by hand, or laboriously manually masked between rounds of airbrushing. As I pondered how to attack this problem, my gaze fell upon the good ol’ Silhouette Cameo. I thought, why not scan the container parts (tops, sides, bottoms) and let the machine do the dirty work of cutting shapes for masking? This is the way.
My general approach would be to 1) paint, and 2) save containers of that color with my precut masks (which would remain in place until the end), 3) repeat for each color (over and over). In some cases, an intermediate light gray would need to be applied to make lighter colors pop. There would be some interesting and random pre-shading effects generated along the way. I would have to consider how many container sides of each color to paint and preserve to align with shipping company decals that would eventually be applied. Laborious, but in my estimation the maximum result for the least work.
This was the sequence of painting the containers, all airbrushed with a 50% solution of the “CP30” thinning mix noted above:
-
Overall Mission MMP-105 Worn Black, which also served as a primer
-
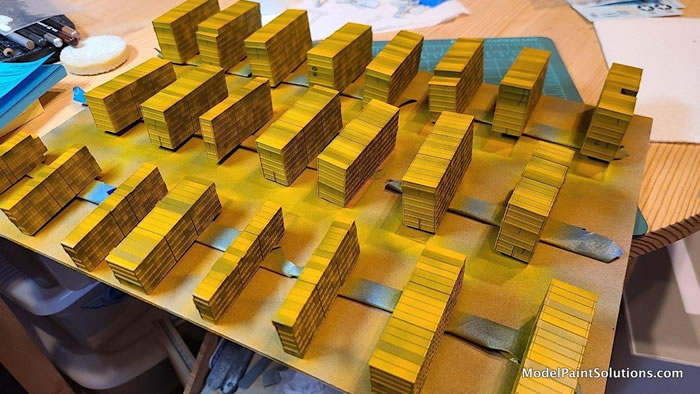
Overall Mission MMP-073 Medium Grey, then about 70 sides masked
-
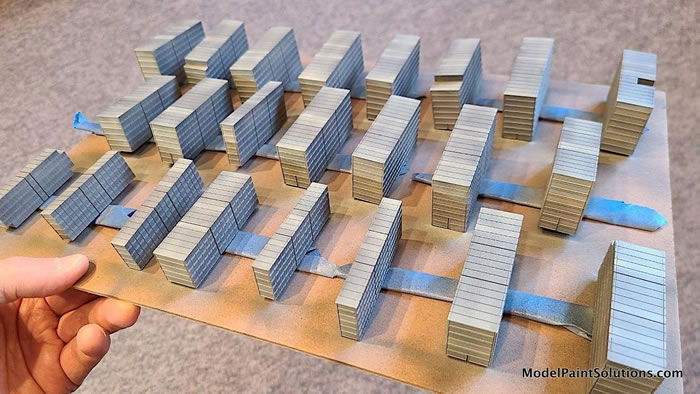
Targeted Mission MMP-104 Insignia White, then Mission MMP-005 Orange, then about 130 sides masked
-
Targeted Mission MMP-003 Red, then about 15 sides masked
-
(Painting to this point revealed a couple of areas needing touchups and/or seam work)
-
Overall Mission MMP-116 Light Grey, as a pre-shade for follow-on colors
-
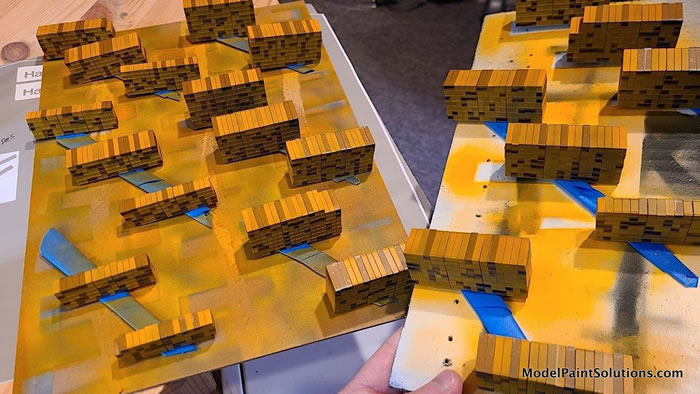
Targeted Mission MMP-048 Blue, then about 30 sides masked
-
Targeted blue/gray shade (70/30 mix of Mission MMP-116 Light Grey and MMP-048 Blue), then about 30 sides masked
-
Targeted red/brown shade (50/50 mix of Mission MMP-012 Rotbraun and MMP-003 Red), then about 40 sides masked
-
Overall Mission MMP-116 Light Grey applied to remaining containers
In addition to the masked sides noted, tops and ends were masked for a semi-random mix. Of course, the color of one end should be the same as the opposite end, so each round of masking was time-consuming – but the precut masks were still a great help with the mechanics of actually applying masks in a precise way.
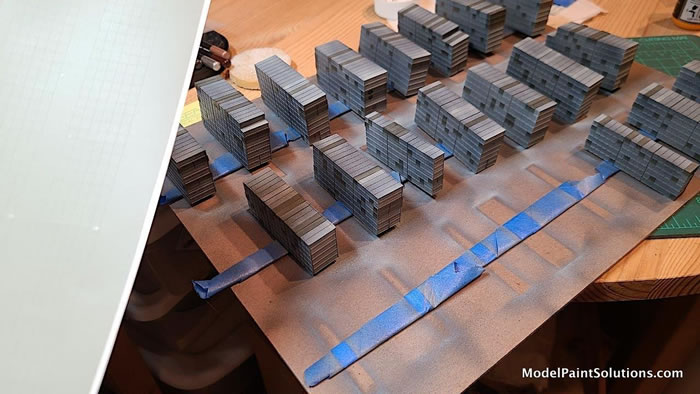
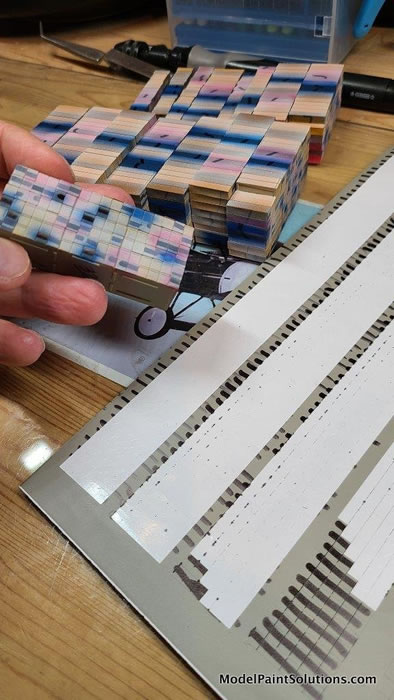
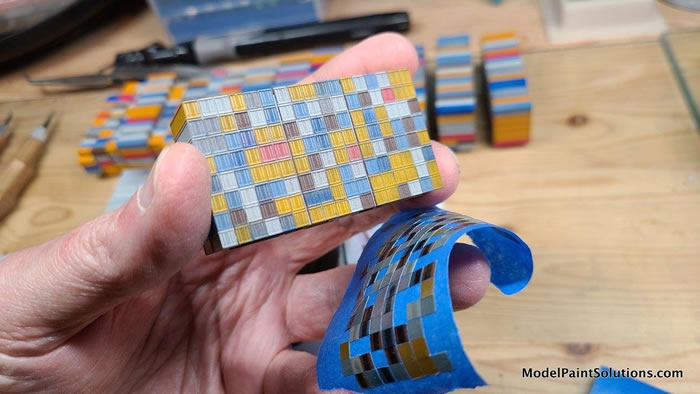
After this herculean exercise was complete, I moved on to touchup and an overall gloss of Pledge Floor Gloss (PFG, or Future). On the recommendation of local modeler and friend Tracy White, I obtained the nifty White Ensign “Container Decals” set (D702) targeted for this kit. This set really expanded the spectrum of shipping lines represented beyond the Hapag-Lloyd markings supplied with the kit. The decal instructions provided insightful guidance on colors and orientation, and became an integral part of the paint strategy discussed above. To add a little levity, I applied about 20 modeling related logos and planted at least one inside joke.
After decal application and more PFG, I applied selective washes and pencil effects. After an overall application of Testors Metallizer Sealer, which affords a nice semi-gloss sheen, I applied rust pigments to a small number of the containers. Overall, the containers seen on these ships just do not show significant weathering at anything like a 1/700 view, so I tried not to take this step too far. I affixed each container block in the appropriate spot using 5-minute epoxy, in two rounds.
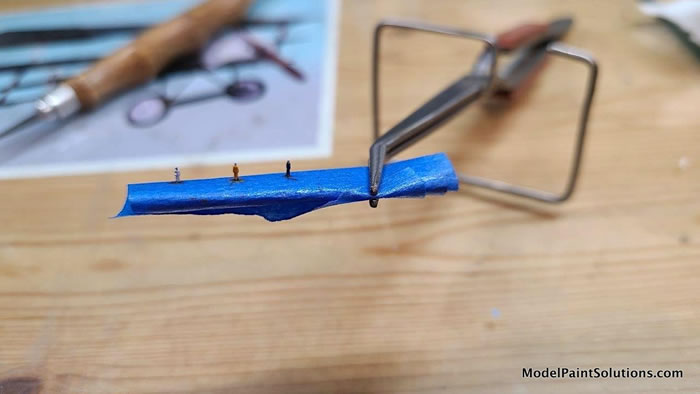
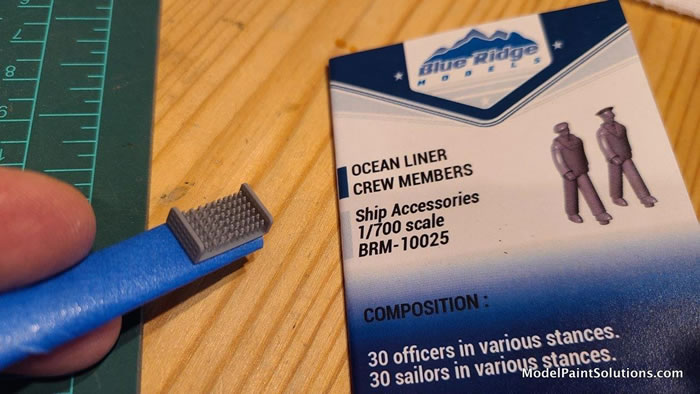
One final touch was to add a few crew to lend a sense of scale to this immense vessel – assuming you see them at all. I obtained a set of nifty Blue Ridge Models 1/700 3D printed “ocean liner” crew from the nautical pro’s at Free Time Hobbies, and donned my magnification to paint three of them per Hapag-Lloyd uniform colors I found on the web. I attached each figure with a dot of Vallejo Satin varnish: the lonely skipper mans the port bridge wing, another crew member in orange coveralls stands on the bow, and a third in white coveralls contemplates life at sea on the starboard superstructure.
The vessel and its many containers of goodies was complete.
I confess to some phobias about ship modeling, however, my first ship model since the 1980s was a lot of fun. It certainly made me think about and solve unusual problems. I look forward to my upcoming USS Tennessee, and other nautical projects in the future.
References
Colombo Express, Hapag-Lloyd data
https://www.hapag-lloyd.com/en/products/fleet/vessel/colombo-express.html
Colombo Express, Wikipedia
https://en.wikipedia.org/wiki/MV_Colombo_Express
Build Review, Aaron Skinner, FineScale Modeler, February 2010
https://finescale.com/product-info/kit-reviews/2009/11/revell-germany-1-700-scale-container-ship-colombo-express
Resources
White Ensign Models
https://www.whiteensignmodels.com/
Free Time Hobbies
https://freetimehobbies.com/
Silhouette Cameo 3 electronic cutting tool:
https://www.silhouetteamerica.com/featured-product/cameo
Available from the manufacturer, Micro-Mark, and other outlets.
Model, Images and Text Copyright ©
2021 by Tim Nelson
Page Created 24 February, 2021
Last Updated
24 February, 2021
Back to HyperScale Main Page

|
 Home
| What's New | Features | Gallery | Reviews | Reference | Resource Guides | Forum |
Home
| What's New | Features | Gallery | Reviews | Reference | Resource Guides | Forum |