Cavalier Turbo Mustang III
1/48 conversion for Eduard P-51D/K kits
Part Two - Conversion & Construction
by Brett Green
|
Cavalier Turbo Mustang III |

There have been a few other 1:48 scale Cavalier Turbo Mustang III conversions released over the years, but Halberd Models' offering is the only one that has immediately called out for me to build it NOW!
I reviewed Halberd Models' conversion here on HyperScale a couple of weeks ago and wasted little time before starting. I thought it might be worthwhile to document my progress on the project to date.
The only thing you will need to add to the Halberd Models' resin conversion is an Eduard 1:48 scale P-51D/K/ Mustang Mk.IV kit. If you don't have an Eduard Mustang already, the best value for money will be to buy an Overtrees boxing from Eduard's website. These are white-box basic sprue sets with only the plastic parts. They are available for the bargain price of USD$22.95.
I already had a couple of Eduard 1:48 scale Mustang kits here. These were both ProfiPACK editions with colour photo-etched parts and masks. I chose Kit No. 82105 - P-51K Mustang, although any of Eduard’s Mustang family would have done the job.
Eduard's Mustang kits barely need an introduction. Surface textures are class-leading while cockpit and wheel well detail are quite clearly the best of any 1:48 scale Mustang kit currently available.
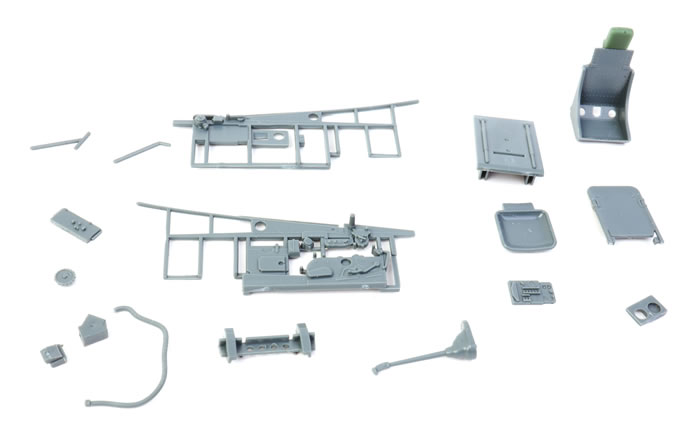
I kicked off the project by removing all of Halberd Models’ resin conversion parts from their casting blocks and strips.
A number of these parts require some care when removing them to avoid damaging the mating surfaces. In particular, these are the front cowl ring, the front cones and the front of the wing tip tanks, and the propeller spinner.
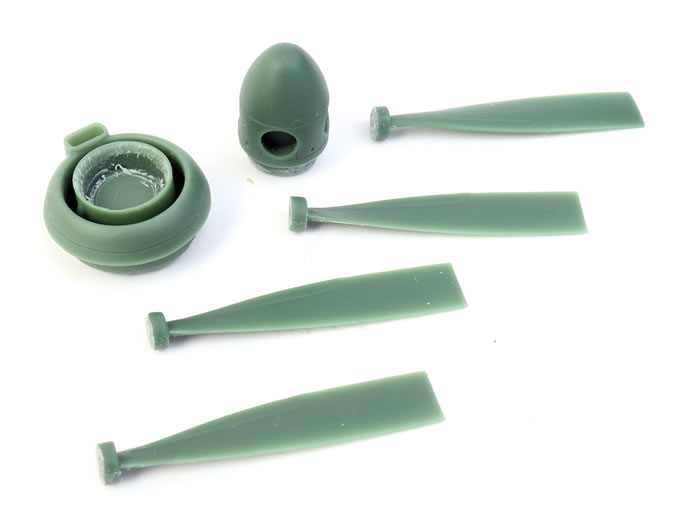
For most of these parts I used a razor saw, turning the angle frequently and never cutting too deep in one direction. Once the parts were removed they were cleaned up with a hobby knife and progressively finer sanding sticks.
The spinner base attachment with the cowl ring was very tight so I sanded it for a more comfortable fit.

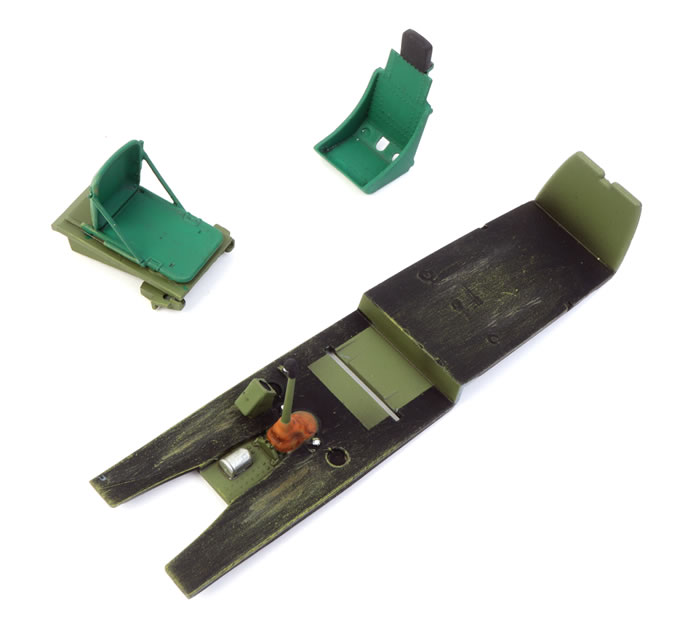
Some minor work is required to the kit cockpit. The Cavalier Mustang has a rear seat fitted where the fuel tank and radios are located on the P-51D Mustang so I decided to plug the holes on Eduard’s rear floor section with plastic rod. Once the glue had set, the excess plastic rod was cut off and the rear floor was sanded flat.
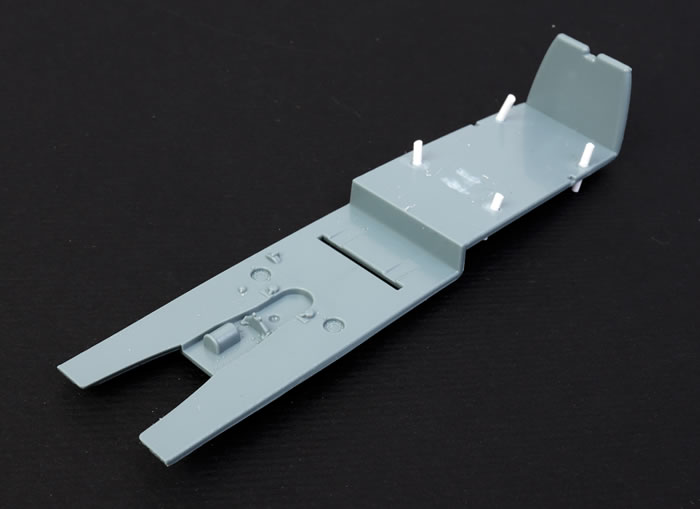
The kit cockpit parts were now prepared for assembly. Apart from the rear seat, the cockpit may be assembled according to Eduard’s instructions.
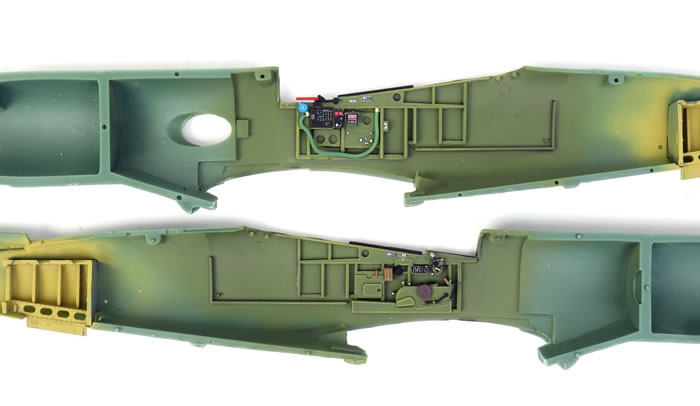
The sidewalls and tail wheel wells were fixed to the fuselage interior using super glue.
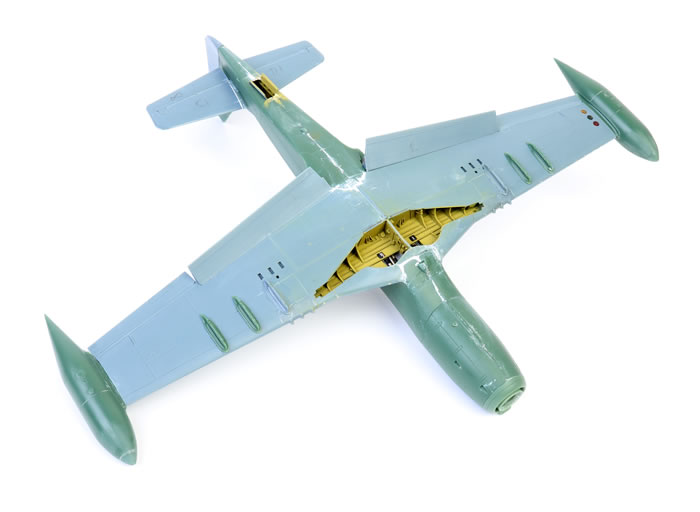
I delayed painting until I had finished building the main wheel wells. First though, I modified the lower wing by cutting off the front lower fuselage section and removing more plastic according to Halberd Models’ instructions.

The wings were test fitted against the fuselage at every step of the way but I still managed to cut away a bit too much plastic from the kit wings.
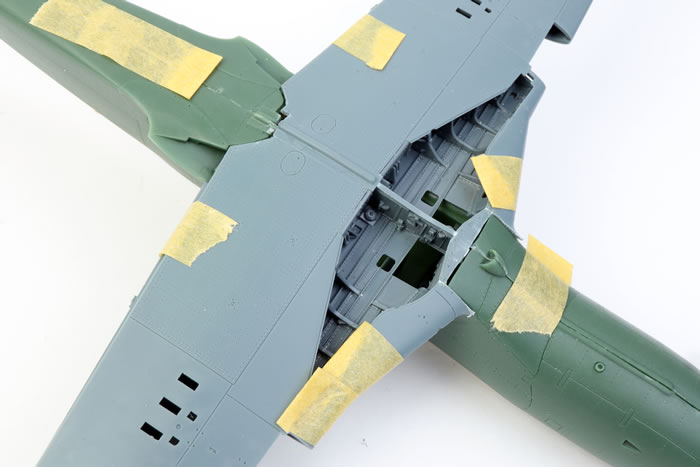
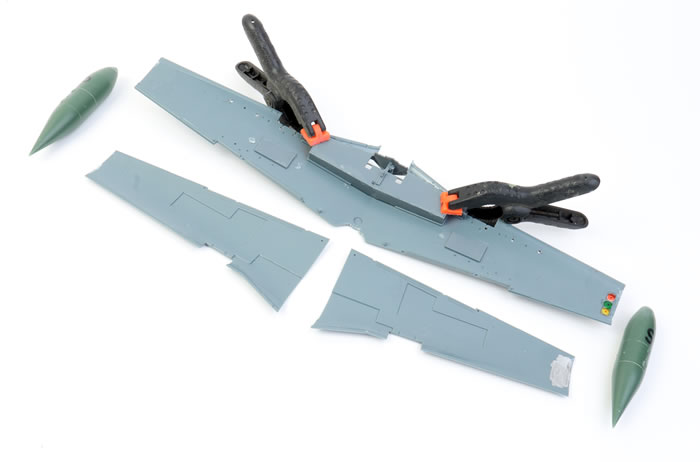
The wing tips were also cut off after repeated scribing with a sharp blade. Once the wing was suitably modified, the wheel wells were assembled.
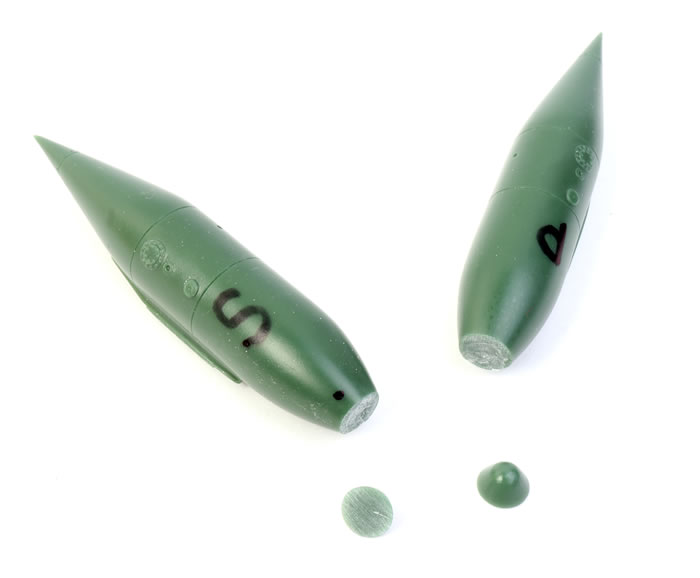
Additional holes were drilled into the lower wing for the extra four ordnance mounts. Halberd supplies these four mounts and they were fitted using super glue. The lower wing formation lights were also painted from behind and glued in place at this stage.
The wing parts were glued together and test fitted against the fuselage. There were a few minor gaps, which mainly seemed to result from my slightly over enthusiastic cutting of the wings. Oh well…
There also seemed to be a bit of a gap at the wing roots, but the floor had not been fitted at this stage.
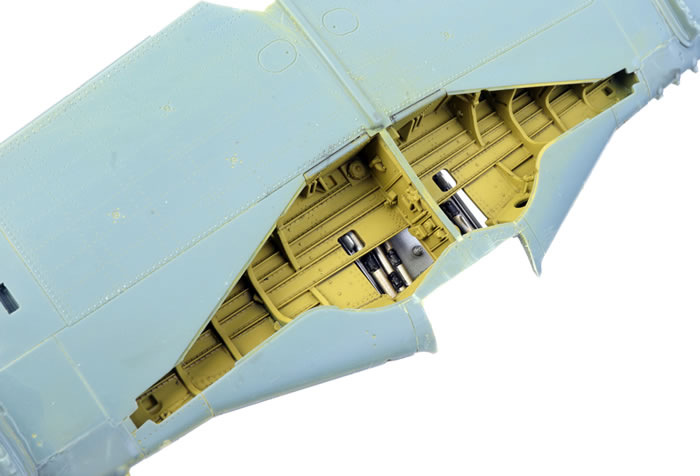
Now the cockpit and wheel well parts were painted with Tamiya and Vallejo acrylics.
I painted the front and rear cockpit floors in anti-skid black and carefully dry-brushed this finish with Interior Green and Tamiya Deck Tan to suggest wear from constant footfall.
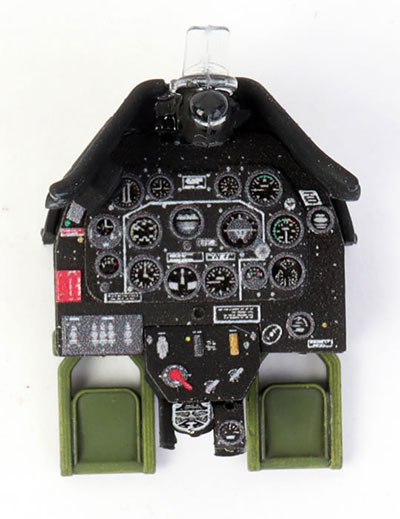
I also fitted Eduard’s colour photo-etched parts as supplied in the kit to the cockpit including the excellent instrument panel and various placards.
I needed an extra set of harness straps for the rear seat so I used Eduard’s Item No. 49087 – Seat Belts USN WWII Beige SUPER.
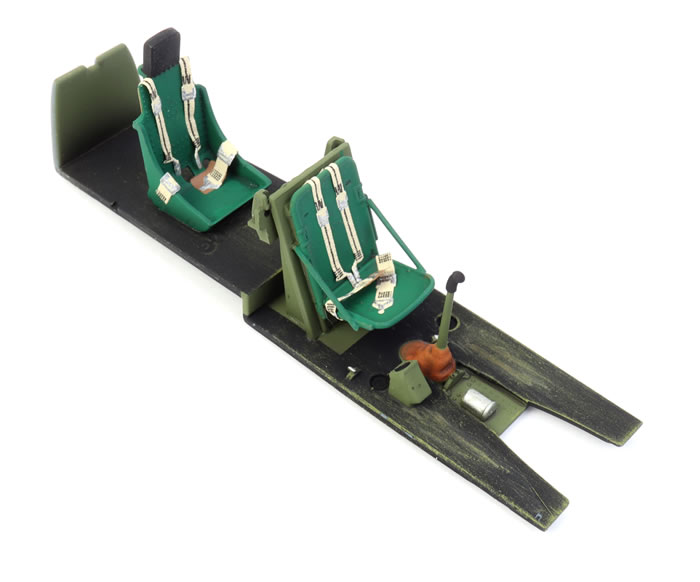
These are super flexible material and may easily be draped on the seat pan and back rest.
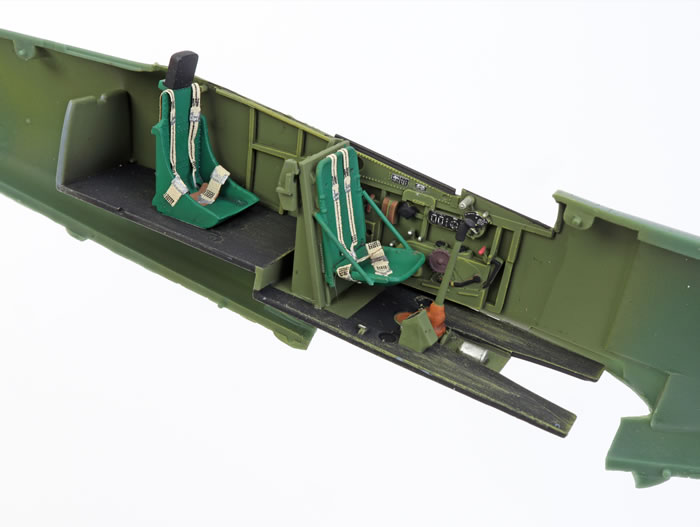
I used both belts in this set so the front and back seats would match.
I test fitted the fuselage halves again, this time trying to fit the instrument panel assembly (which includes the coaming and the rudder pedals) into the cockpit from the top. However, it did not seem to be possible to fit in this way, so I glued the instrument panel to one side of the fuselage interior.
I also glued the cockpit floor to the inside of the starboard fuselage half.

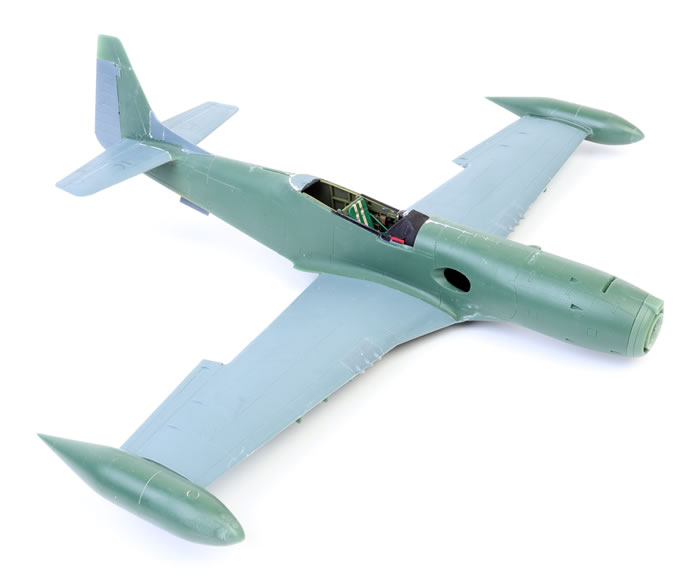
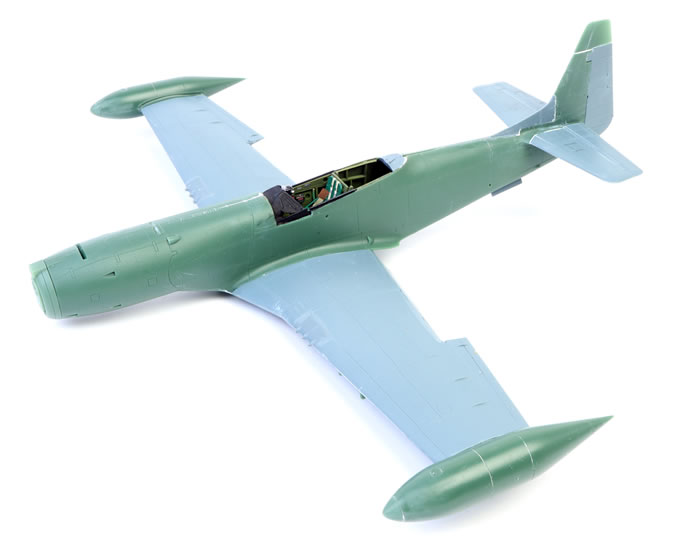
The fuselage halves were now brought together after a line of Rocket Hot super glue had been applied to the mating surfaces. The cowl ring was fitted at this time too.
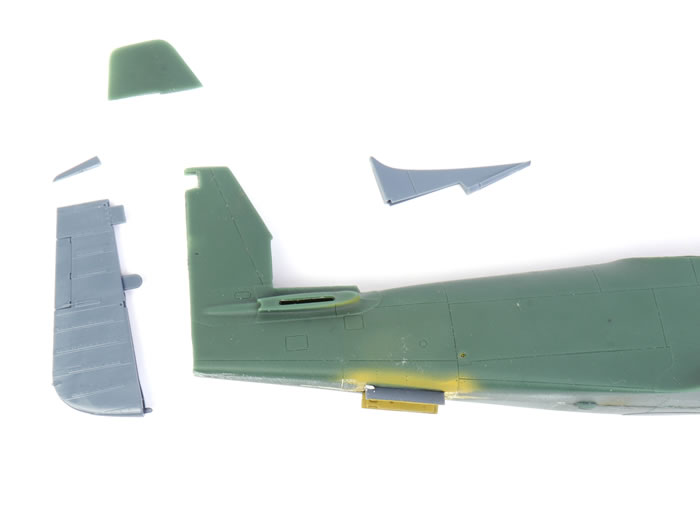
A little more surgery was required now. The top of the rudder was carefully sliced off. The rudder was now super glued onto the fin. The new tall fin cap was glued in place, as was the Eduard plastic fin fillet.
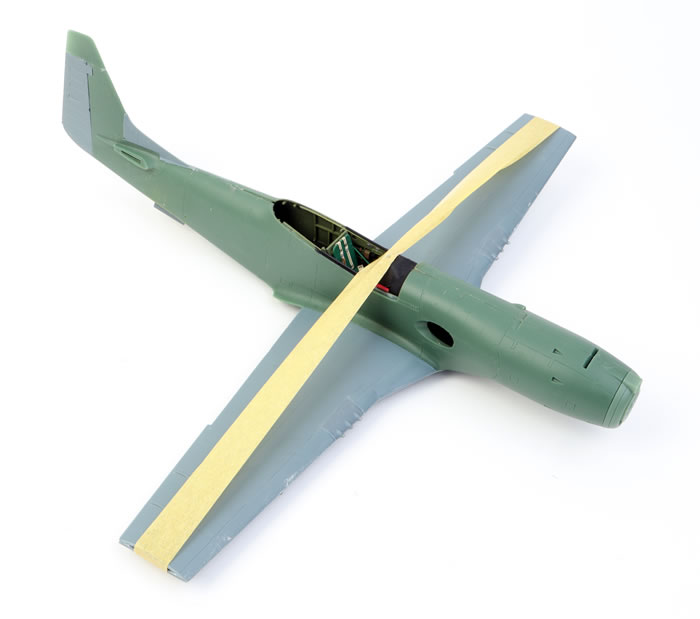
Rocket Hot super glue was applied to the upper wing mating surfaces and the lower fuselage join. This pressed into place nicely but the expected gaps at the wing root had closed up completely. The cockpit floor must have acted as a spreader. I stretched a length of Tamiya 10mm masking tape from wing tip to wing tip. This helped set up the correct dihedral as the Rocket Hot glue set.
Now it was just a matter of adding the plastic horizontal tail surfaces, ailerons and flaps. The big wing tip tanks were also super glued in place.
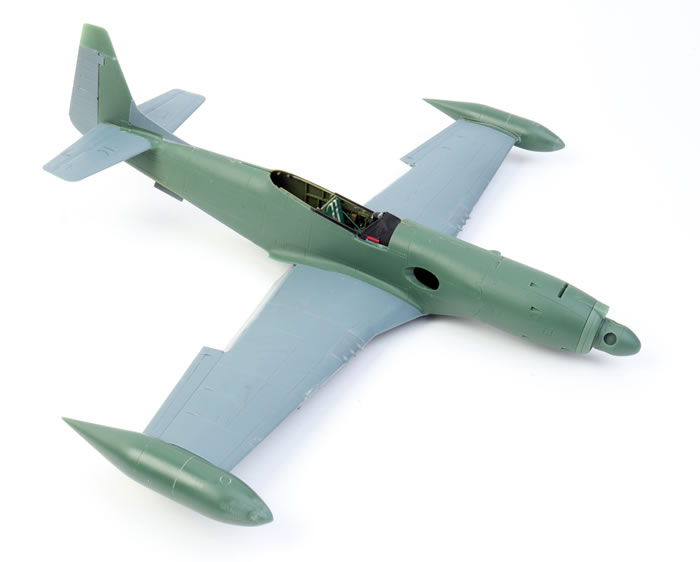
Fit was really pretty good. All I needed were a few smears of Deluxe Materials’ Perfect Plastic Putty – wiped on and wiped off in most cases – to fill some minor gaps.
The biggest of these were at the lower wing and fuselage front and rear joins.
Halberd Models has delivered a comprehensive and really well executed conversion for what must surely be the coolest of all the Mustang variants.
I was very impressed with the quality of the surface textures and casting.
You should have some experience working with resin parts and conversions, but if you have a few projects under your belt and make sure you test fit multiple times before you cut or glue, you should be fine with this one.
Thanks to Eduard and Halberd Models for the samples.
Model, Images and Text
Copyright © 2021 by Brett Green
Page Created 8 November, 2021
Last Updated
9 November, 2021
Back to HyperScale Main Page
|
 Home
| What's New | Features | Gallery | Reviews | Reference | Resource Guides | Forum |
Home
| What's New | Features | Gallery | Reviews | Reference | Resource Guides | Forum |