Special Hobby 1/72 scale
Messerschmitt Bf 109 E-4
With PeilG IV
by Andrea Brenco
|
Messerschmitt Bf 109 E-4 PeilG IV
I.JG 1 Black 11, Belgium Vlissingen, June 1941 |

Like most of us devoted to the One True Scale, I was looking forward for building this new kit from Special Hobby/Eduard: in the meanwhile much has been written about accuracy and the few issues in it and it has to be said that after the first batch, some of them were mended with the second E-4 edition and the new E-3 boxing, so now we have corrected fuselage panel lines and a better fitting canopy.
I build mine "first edition" from the box without any correction, but if you want a more accurate representation you should shorten the undercarriage legs about 1 mm. / 0,40" and if you dare, resize the slats that are too wide for nearly the same amount of the undercarriage legs...
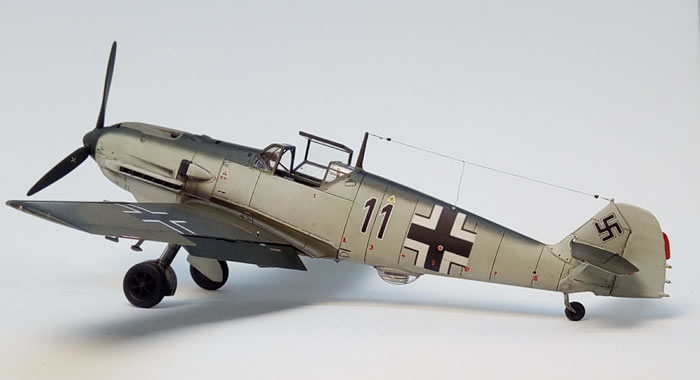
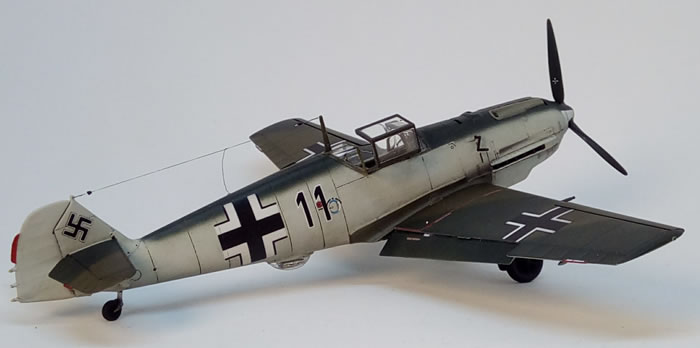
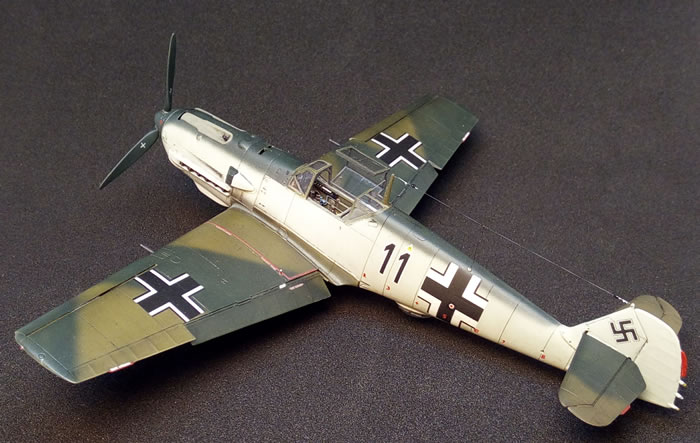
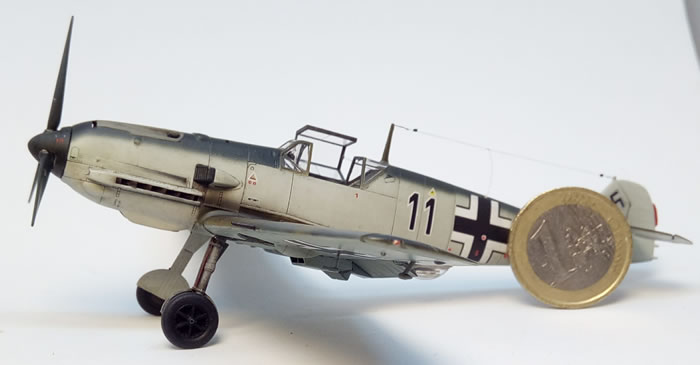
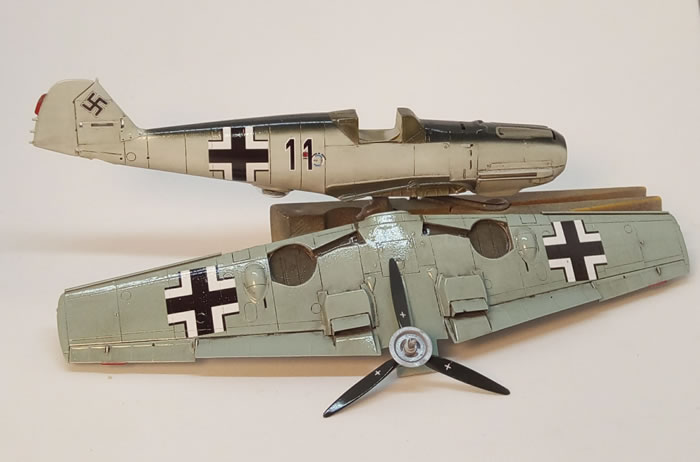
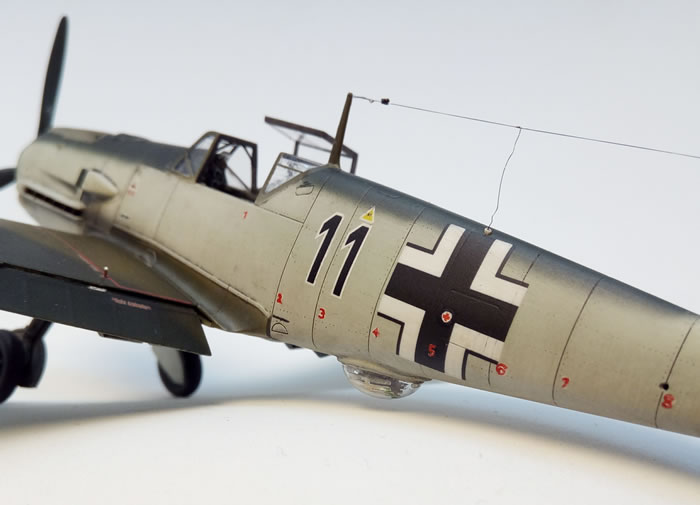
About my build and the chosen subject: since I have seen them the first time, I was fascinated by the picture in the D'Amico-Valentini collection, a Bf 109E-4 with a PeilG IV Gerät direction finder underbelly antenna dome and a not-standard camouflage.
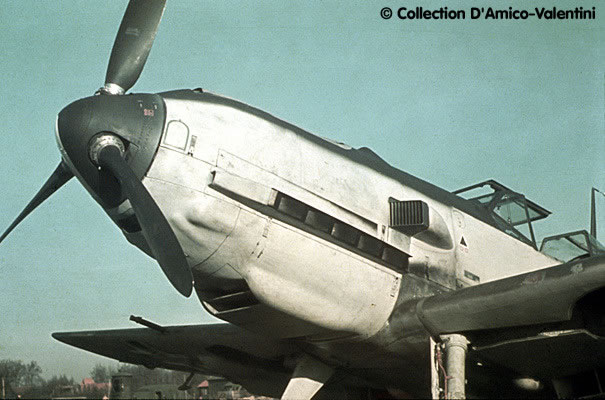
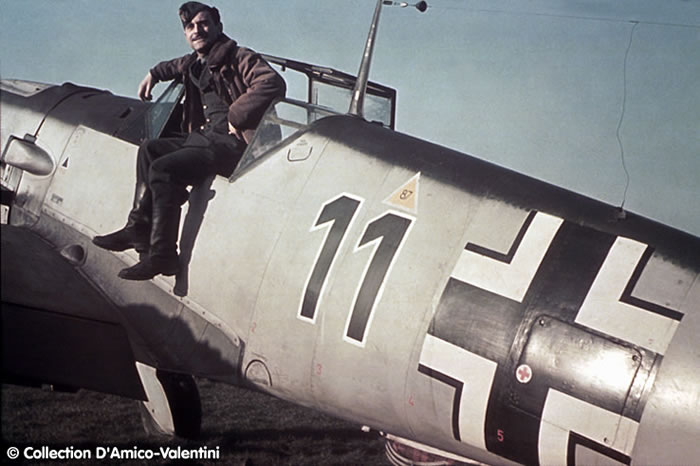
I studied the pictures in details, and came to my conclusion that, at some time, the fuselage was refurbished and painted a new color, nearest to the RLM 76, who knows...the fuselage spine was RLM70, wings undersides in RLM65 but wheel well covers in the same shade of the fuselage, some overspray on the gear legs, reddish brake lines, red stencils numbers on the fuselage, canopy frames RLM71 and wings upper surfaces splinter RLM70-RLM71: all shades are mixed from Tamiya range to match the color pictures, regardless what common knowledge says...
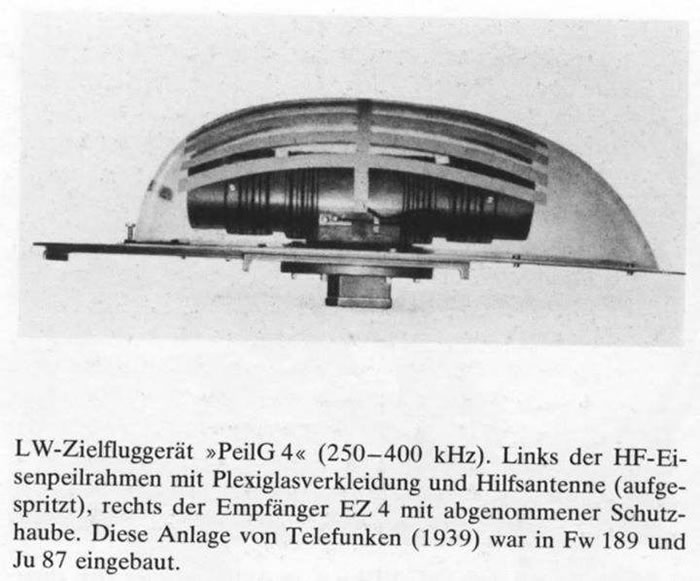
The PeilG IV conversion is a detail set from AML (ex-OWL) that include a PE fret, a vacuum dome, a resin modified rudder and decals for two version; there are few airframes documented with the PeilG IV and it is not sure that this one carried the modified rudder, but I like its different look and decided to use it anyway.
Building started, as usual, from the cockpit and here we are gifted with some of the best injected plastic details I have seen: my only addition were the FineMolds Nano Aviation seatbelts, they have to be painted but I found them very convincing.

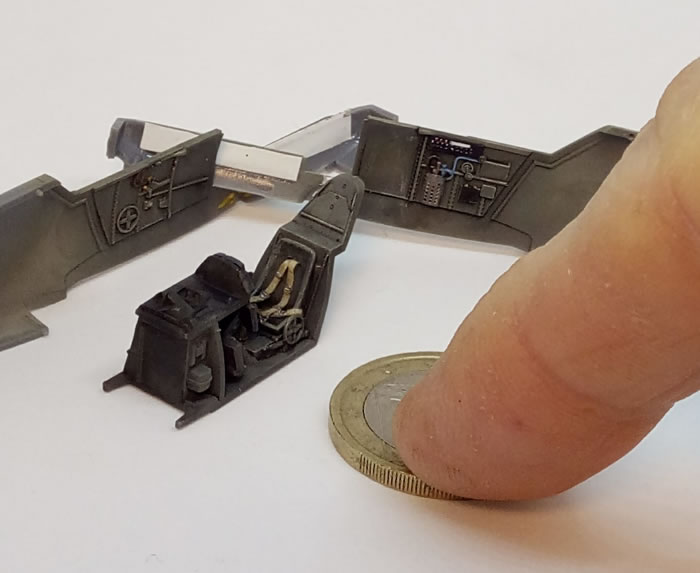
I blanked off the exhaust slot because I will not fit the supplied engine (in hindsight it wasn't a good choice, because this will lead to trouble fixing the propeller and to replicate some parts of the engine that can be seen through the cover slots) and will use the Quickboost replacement (for Airfix kit, but can be used with some minor tweaking)
Fit of every pieces of the kit is very accurate and tight and needs careful cleaning and test fittings.
Extra care has to be taken with the tail wheel, SH molded it in a way that it has to be glued at a too earlier stage of the build; I cut two of the four locating pins on the tail wheel, reduced the other and placed a plastic ring inside the fuselage tail: in this way I was able to glue it in a more traditional way, when building and painting were finished.
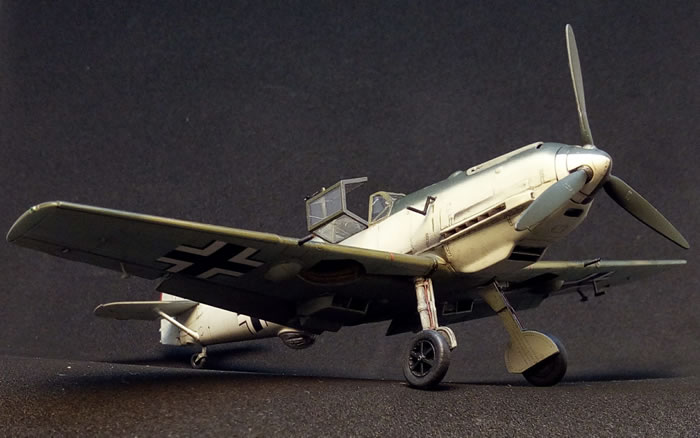
I replaced the oversized brake lines in the main landing gears with some thin soldering wire; wheels are really nicely molded and I don't feel the need for aftermarket here.
However, there should be a better solution for the gear legs locating points because the square holes in the kit are shallow and the whole assembly is weak...
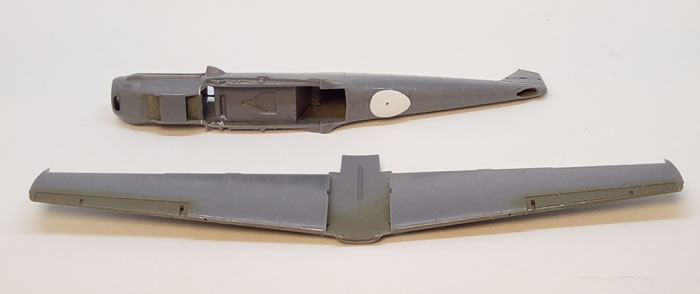
The only problem I really had to solve was for the too wide and slightly longer canopy, sanding the front and rear canopy edges and adjusting the central part length according to them. Hopefully this issue should be solved or reduced with the newer boxing.
I also added the two small "bumps" on the side of the engine cover, with some circular slices of heat stretched sprue.
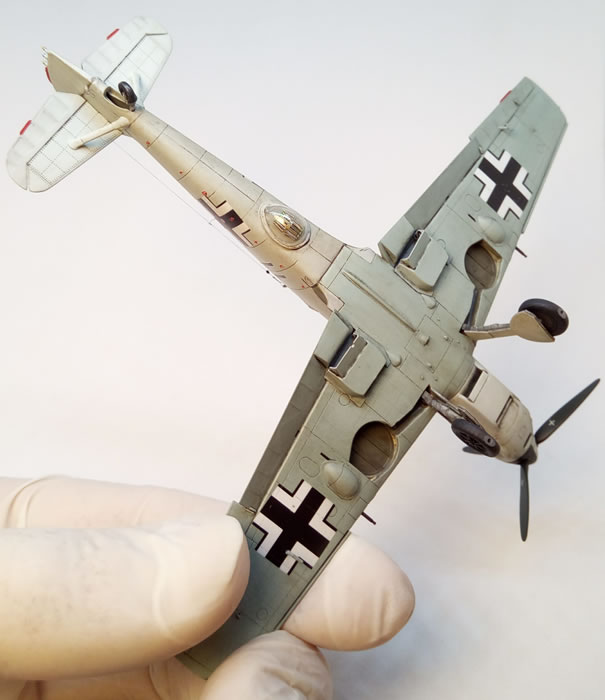
I will paint the wing and fuselage as separate units, so I modified the odd solution that SH realized for the nose radiator and saw it off from the bottom wing.
I cut a small plasticard base for the PeilG IV dome, it can clearly be seen in the pictures of the original fighter
Antenna wire was made with Uschi van der Rosten Superfine elastic wire with some micro plastic cones done thanks to Mr. Barry Numerick's technique and a piece of very fine copper wire leading to the fuselage through a piece of white sprue.
If you look closely, you will notice that the two numbers "one" are not level: the same was on the real airplane.
Fuselage sections red numbers were hand painted over the white kit's decals numbers.
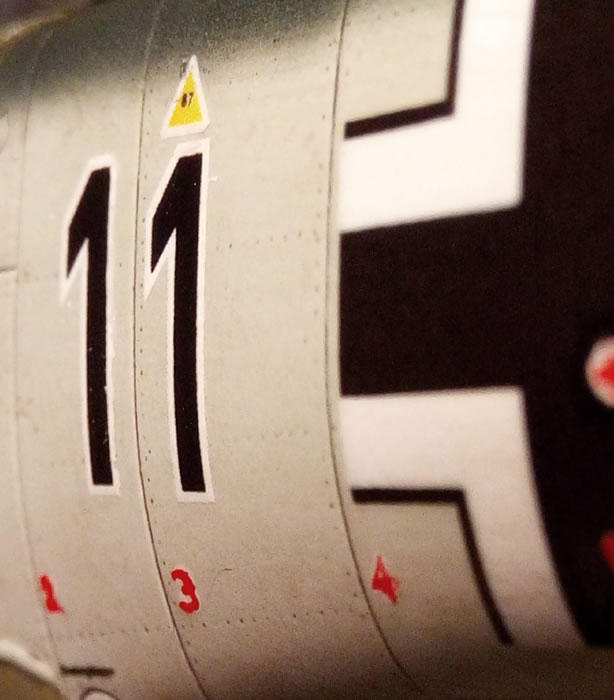
Kit's decals are great, but need careful handling, they easily curl under themselves, especially the smallest ones.
I used Micro Set and Sol and conformed to all the small recesses.
Two copper wire pieces were placed inside drilled holes on top of the wings, I think they are flap indicator rods.
Very few other stencils can be seen on the fuselage, giving more credit to my opinion about a frontline workshop repainting...
I really enjoyed this kit, but it is demanding: the amount of details in it are astonishing, some of them I discovered only under magnification doing details painting!
Otherwise, I think this kit is a turning point for us 1:72nd modeler, and it raises the bar really high for other manufacturers...
I have more in the stash and will absolutely build them!
Model, Images and Text Copyright ©
2021 by Andrea Brenco
Page Created 24 May, 2021
Last Updated
25 May, 2021
Back to HyperScale Main Page

|
 Home
| What's New | Features | Gallery | Reviews | Reference | Resource Guides | Forum |
Home
| What's New | Features | Gallery | Reviews | Reference | Resource Guides | Forum |