|
Making and Using
Drill Bit Extenders
S
u m m a r y |
| Description: |
Simple and Handy: Drill Bit Extenders |
| Advantages: |
Can be used to drill small holes in difficult or hard-to-reach situations. . |
| Disadvantages: |
Unless rigid self-control is maintained, these bit extenders can lead to spurious hole drilling |
| Conclusion: |
A simple staple for modellers, these sanding blocks feel durable and quite luxurious. |
by John Miller

HyperScale is proudly supported by Squadron.com
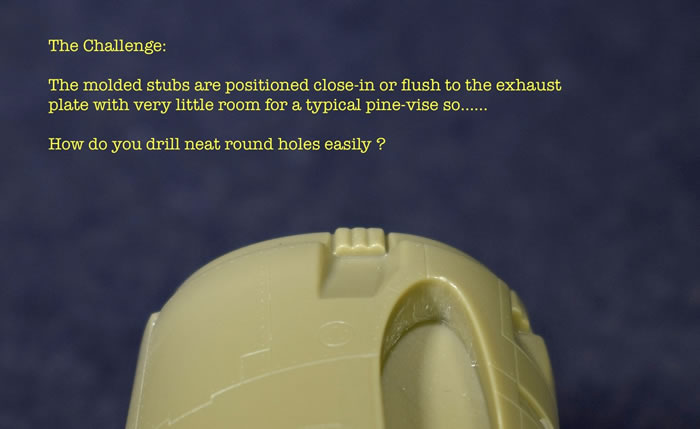
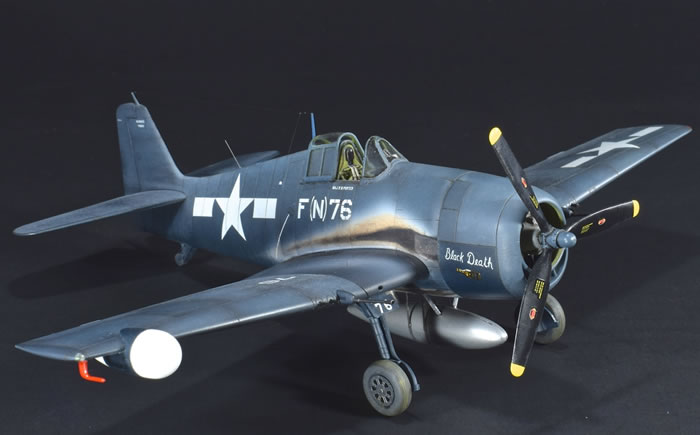
I suspect that most aficionados of the one true scale would agree: the Eduard F6F is the nicest Hellcat available in 72nd. It’s detailed, the fit is excellent, the canopy can be posed open, and if you add the color PE, the final result is just beautiful. That said there are a few small issues that need addressing including the solid exhaust stacks that are molded, in relief, on the side of the fuselage.
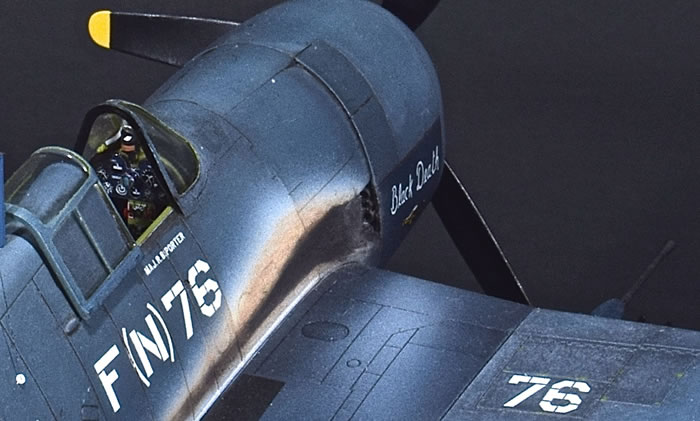
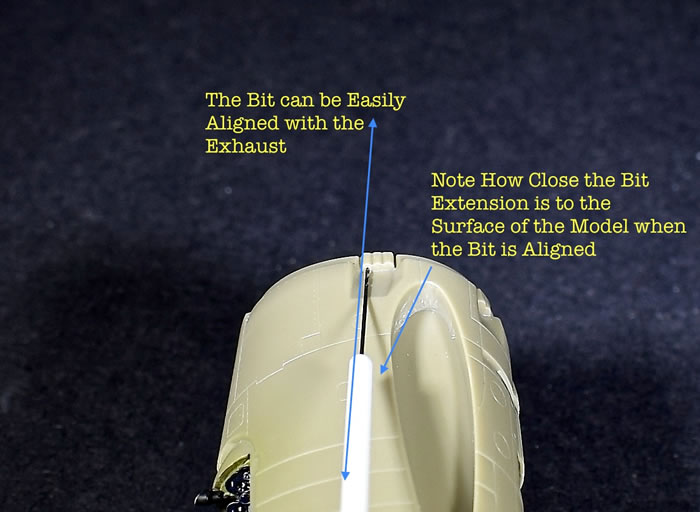
The angle of the stacks combined with how they’re recessed into the fuselage makes it difficult to drill them out by simply aligning the drill bit with the stack. The main problem is the collar of the pin vise (holding the drill bit), which is too large to clear the model. Having built airplane models for many (many) years, I’ve been here before. My usual approach is to align the drill bit (or a small dental bur) with the stack as parallel as possible and accept that just a round depression in the end of the exhaust is the best that can be done. A little strategically placed black panel wash (or paint) in the depression completes the illusion: not ideal but usually good enough.
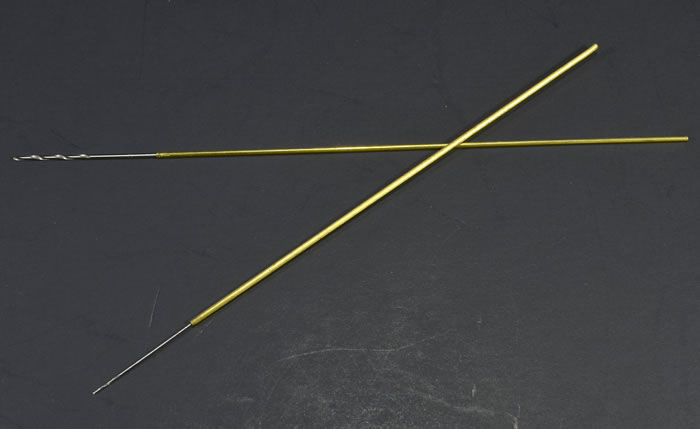
A neat solution for ‘drilling out the Hellcat’s exhausts’ was suggested by a friend of mine, Mr. John Cate: member of both Seattle IPMS and the NorthWest Scale Modelers group. John and is an excellent modeler with a bent toward biplanes. As he explained; affixing drill bits to small diameter brass or aluminum rod is a trick used by some biplane builders faced with the challenge of drilling holes in hard-to-reach areas during assembly or worse, repairing broken rigging on a completed model.
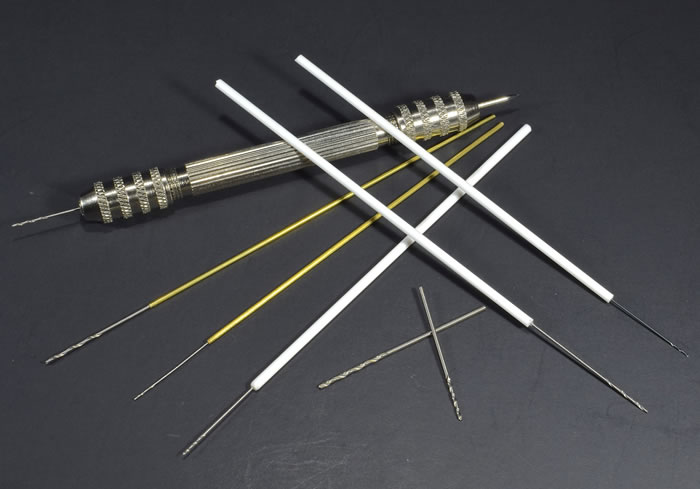
Call me naïve or maybe I don’t get out much but this sounded like a pretty cool idea to me. A quick look in my stock drawer revealed a couple of pieces of brass rod and a full assortment of extruded plastic rod: perfect for making a couple of drill bit extenders.
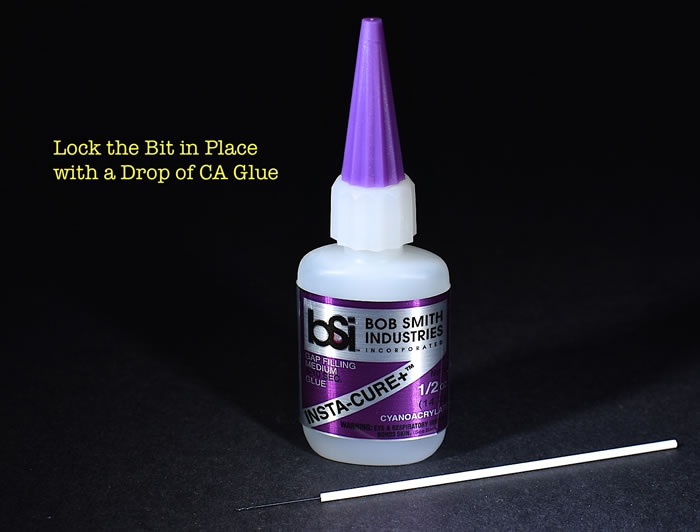
Making a drill bit extender out of brass rod is quite easy especially if the inner diameter of the brass rod is just a tad larger than the drill bit. Simply insert the bit into the rod and crimp the end with a pair of needle-nose pliers. A drop of CA glue or epoxy inside the rod will also help secure the bit against the torsional stress of drilling.
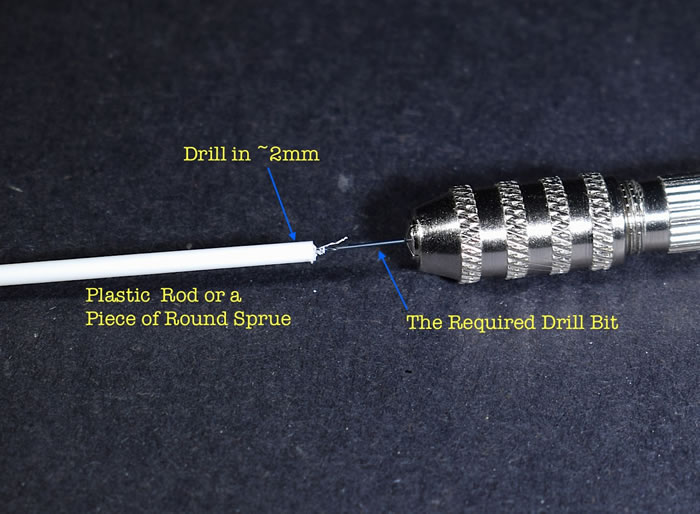
To make an extender from plastic rod, chuck the drill bit of interest in a pin vise and drill a hole ~2mm deep into the end of the rod. Try to drill the hole as parallel to the rod as possible or the bit will have a wobble when turned. The bit is then pushed into the hole after a dip in super glue or epoxy. Should you wish to remove the drill bit from the rod, a solid tug on the bit with a pair of pliers breaks the CA bond allowing the bit to be removed.
Drilling Out Exhaust Stacks:
Armed with my newly made drill bit extenders, I set about drilling out the Hellcats’ exhaust stacks using the following three-step process:
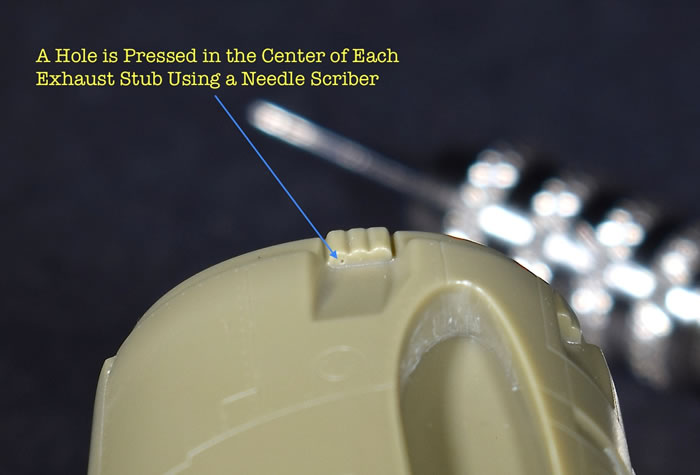
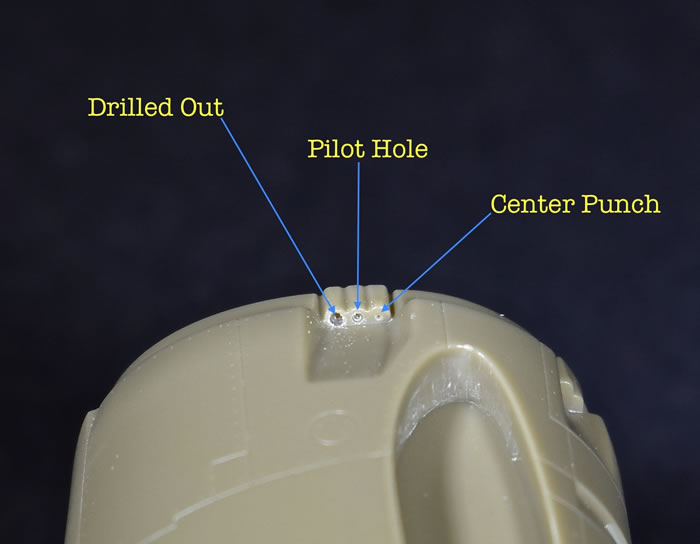
Step 1) Press a hole in the center of the exhaust stack using a fine, needle, point scriber or similar tool. Avoid pressing too hard and deforming the end of the stack.
Step 2) Using the pressed hole as the starting point, drill a “pilot hole” with a small drill bit. It’s important that the pilot hole be as centered and parallel with the exhaust stack as possible. For the Hellcat exhausts, a #79 bit was used and worked like a champ.
Step 3) Enlarge the pilot hole with progressively larger drill bits to achieve a hollowed-out exhaust stack. Starting with drill bits just slightly larger than the pilot hole lessens the chance of stressing or deforming the exhaust stack. For the Hellcat I first used a #75 bit followed with a #70 to do the final hollowing out.
In my hands, exhausts in 1/72 scale usually require one, maybe two larger bits after the pilot hole. For larger exhaust stacks multiple (3+) bits of increasing diameter may be required to achieve a scaled hollowed out effect.
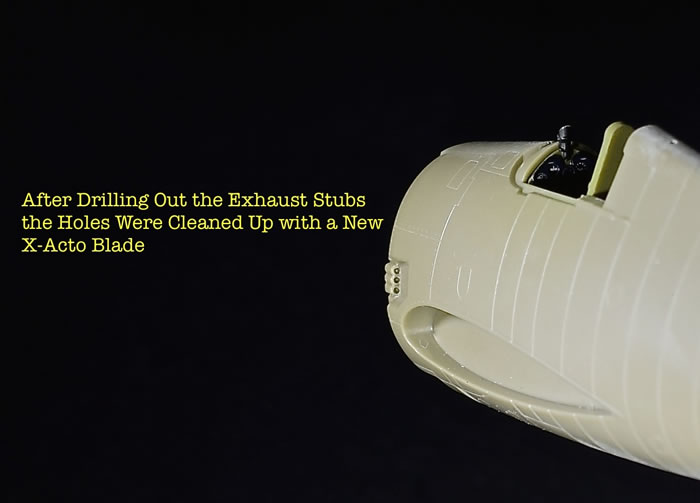
Once the exhaust stacks are drilled out, a quick deburring with a new X-acto blade is usually required as a final clean up.
In addition to drilling out exhausts, I find drill bits mounted on extenders to be handy for a bunch of other jobs on the workbench.
It’s nice to have an assortment of bits mounted on extenders and ready to go without having to futz with a pin vice. Drill bit extenders; a very simple and handy tool.
Now I gotta go drill something!
--John
For more on this and other ‘how to” articles visit Modelpaintsolutions.com.
Text and Images Copyright 2020 by John Miller
Page Created 22 April, 2020
Last updated
22 April, 2020
Back to HyperScale Main Page
Back to Reviews Page

|
 Home
| What's New |
Features |
Gallery |
Reviews |
Reference |
Forum |
Home
| What's New |
Features |
Gallery |
Reviews |
Reference |
Forum |