Arma Hobby's 1/72 scale
Yakovlev Yak-1b
Expert Set
by John Miller

Hobby Boss' 1/72 P-61A Black Widow is available online from Squadron.com
S
u m m a r y : |
Description and Item No.: |
Arma Hobby Kit No. 70027 - Yakovlev Yak-1b Expert Set |
Contents and Media: |
44 parts in grey plastic, two parts in clear plastic; 17 photo-etched parts; markings for six aircraft; die-cut self adhesive masks. |
Scale: |
1/72 |
Review Type: |
First Look |
Advantages: |
The kit has simple, conventional engineering with crisp, inscribed, surface details and a nice selection of PE parts and quality decals. |
Disadvantages: |
One-piece canopy. |
Declaration: the Author declares his interest in MPS, which carries this model on its website.
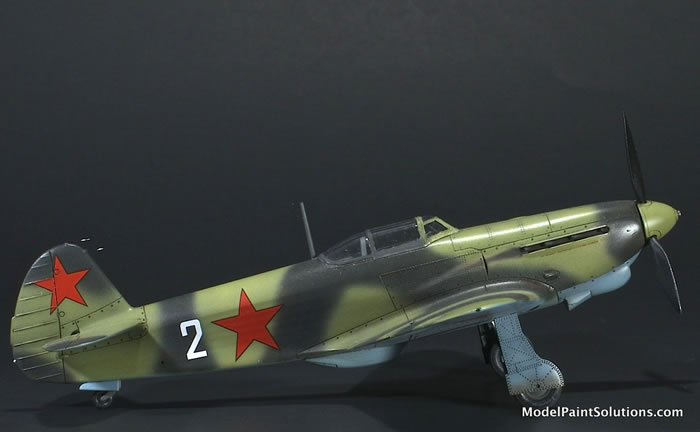
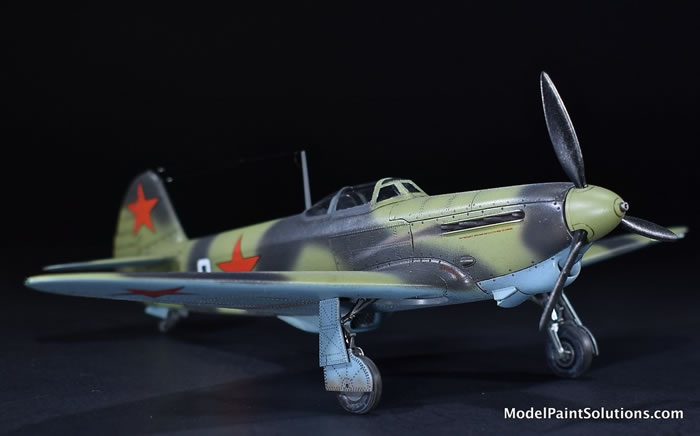
Having built the Arma Hobby Hawker Hurricane, I was excited to get my hands on their new Yak-1b. This is a beautiful model that’s simply engineered and comes together quickly. The cockpit detail is some of the best I’ve seen in this scale and rivals many 1/48 scale kits. Although the canopy plastic is crystal clear, there is no poseable option. That’s a bummer, as an open canopy would allow some of that awesome cockpit detail to be better seen. I suspect we’ll see an aftermarket canopy sometime in the near future.
The fit of all the major components is spot-on and the clever engineering of the nose cowl obviates the usual seam filling/blending. The crisp, inscribed surface details really pop under paint and wash and the ample detail in the wheel wells combined with the detailed landing gear make for a very convincing final result.
This kit was a blast to assemble and quicker than most of my builds. The final result is quite convincing and fills a gap that’s long needed filling in my display cabinet. Highly Recommended!
As I do with all my builds, the sprues were soaked in a 1:1 solution of Denatured Alcohol (For Cleaning Glass, not Fuel) and Windex (with ammonia) for 2 hours. The sprues were then rinsed and allowed to dry before assembly commenced.
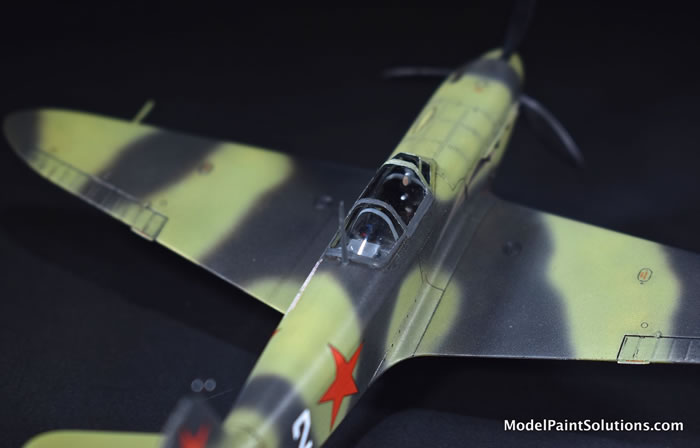
As usual, the build begins with the pilot’s office and this is one area where the kit really shines. The detail is ample, accurate, and on par with what’s usually seen in larger scales. This is a very detailed cockpit right out of the box.
The required parts were affixed to a piece of wood for ease of handling while painting. Parts such as the instrument panels and cockpit side consoles were shot with Mission Black Primer. After priming in black the PE intake grills were shot with Mission Aluminum.
The instrument panel consisting of a decal sandwiched between the main and smaller center panel comes together beautifully.
With the “Expert Set” some of the molded-in cockpit side panel details are replaced with more detailed PE versions. With this done, a custom mix of Mission A-14 Interior Steel-Grey was prepared by matching to VVS A-14 from the Akan Lacquer range. This was combined with Mission Clear Primer and used to spray the fuselage side panels and various cockpit interior parts.
Note: Scroll down for suggestions on diluting and spraying Mission Primers, Paints, and Clear Coats.
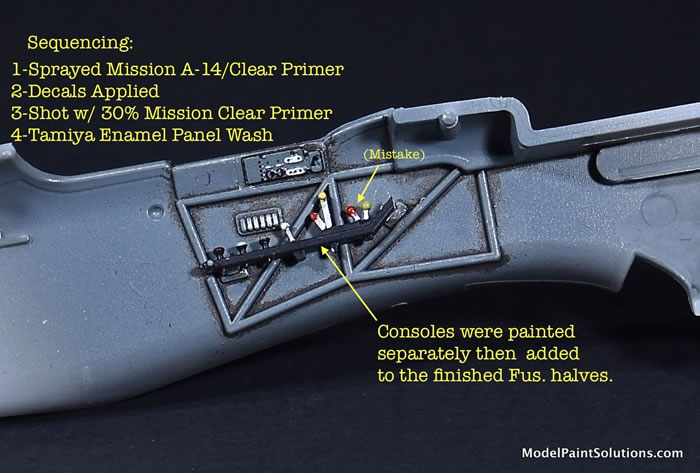
Decals are provided that fit the PE side panel additions and add a lot of nice detail with little effort. The decals responded well to Micro-Set and –Sol. Once the decals were protected with a quick coat of 30% Mission Clear Primer (see below), details were highlighted with an enamel panel wash. The addition of the nicely detailed side consoles, after some detail painting with Mission and LifeColor, completed the fuselage halves.
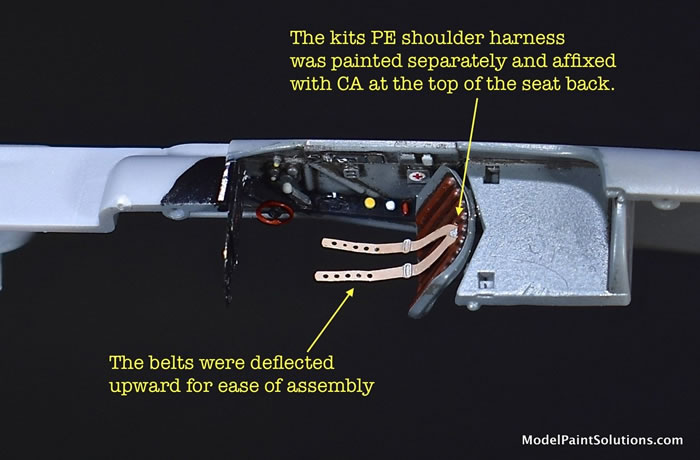
The assembled instrument panel, seat back, and back deck (behind the pilot’s head) were added to the starboard fuselage half and at this point, the wealth of detail in the cockpit area is abundantly clear. The shoulder harness was affixed at the top of the seat back and deflected so as to make room for the seat bottom, which is an integral part of the wing center section (added later).
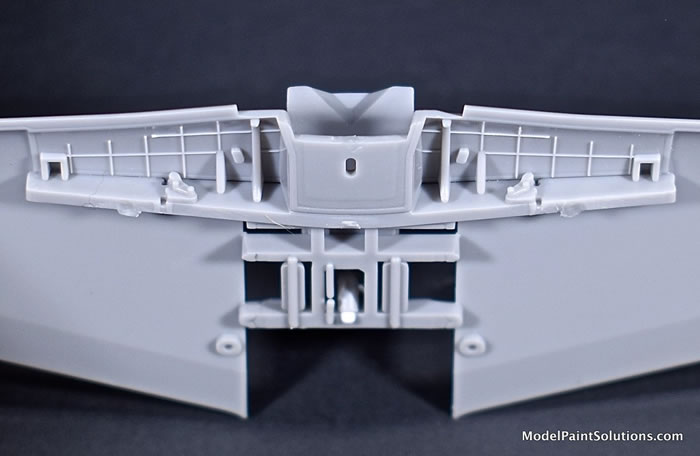
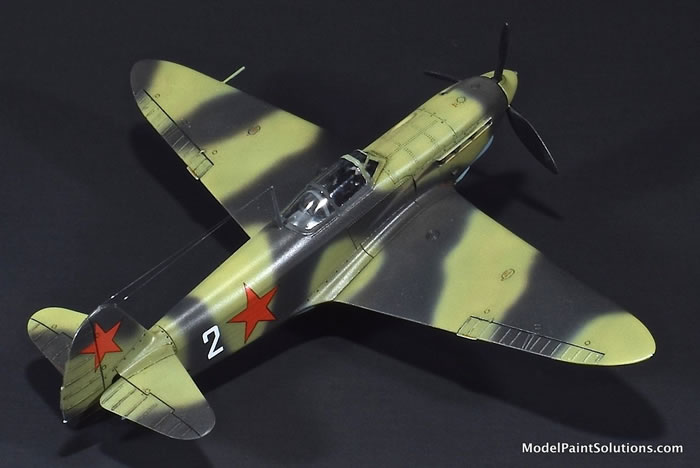
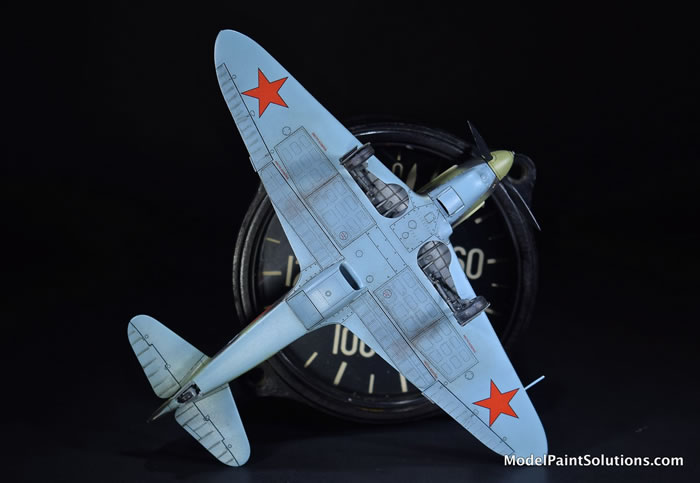
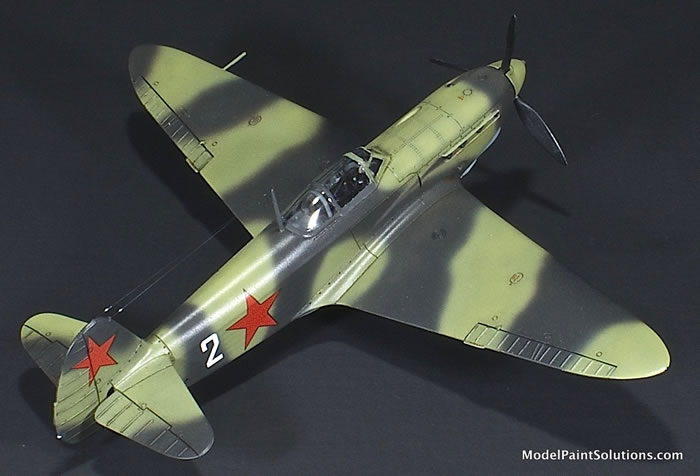
The full-span upper and lower wing halves come together very nicely with little-to-no seam. The details provided in the main wheel wells are awesome for this scale and look great under paint and wash (below).
The cockpit floor, footboards, rudder pedals, stick, and seat bottom are glued to the upper wing half during assembly and, again, the detail is abundant and all the little fiddly bits fit quite nicely.
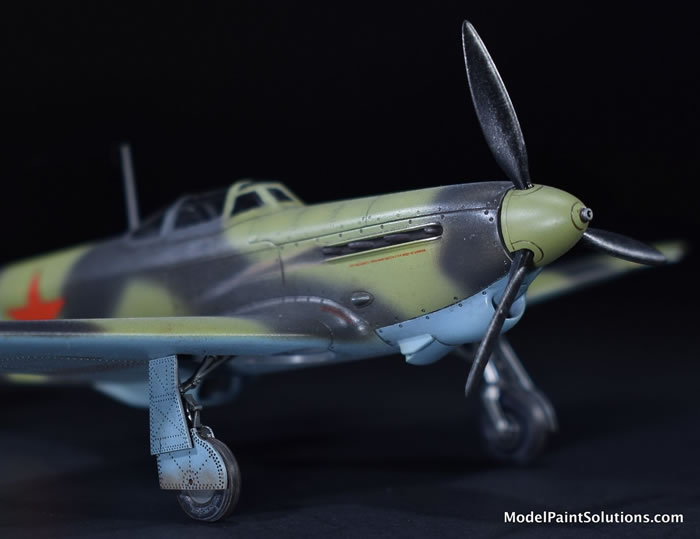
The wing-to-fuselage join is beautiful requiring no filler; ditto that for the join between the horizontal stabilizer-elevator assemblies and the empennage. The clever engineering of the single-piece upper nose cowl obviates any filling/blending here and makes for a pretty rapid and easy assembly. It wasn’t all beer and skittles however. Small sink marks or depressions on the wing leading edges and horizontal stabilizers were filled and blended in preparation for primer.
The fit of the clear, single-piece canopy is spot on. As I do with most of my builds, the canopy was buffed out with a dry Kimwipe and dipped in Future or Pledge with Future Shine as it’s now called. The canopy was affixed with Gold CA Glue (Bob Smith).
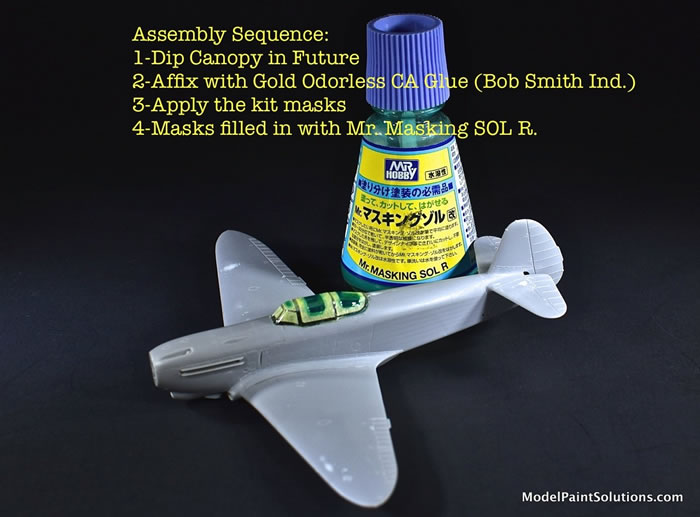
The kits die-cut masks fit well and were filled in with Mr. Masking SOL R preparatory to priming.
I usually paint and detail the wheel wells during assembly then mask them off for priming and painting. For masking, a strip of 0.70mm Aizu Masking Tape was used for the periphery of the well, which was then filled in with white putty. The wheel well details are very well done and look pretty convincing under paint (Mission A14) and wash (Tamiya Panel Liner).
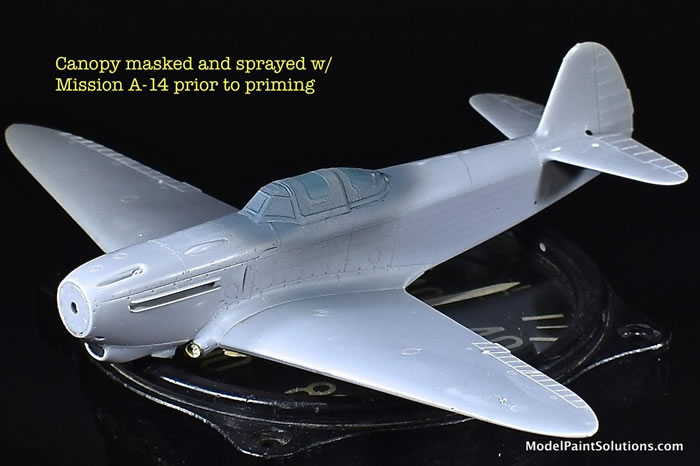
The masked canopy was sprayed with Mission A-14 to ensure the inner framing would appear the correct color when viewed from the outside when finished. This was applied first as a dry-coat followed by a light wet coat to lessen the chance of wet paint wicking under the canopy masks.
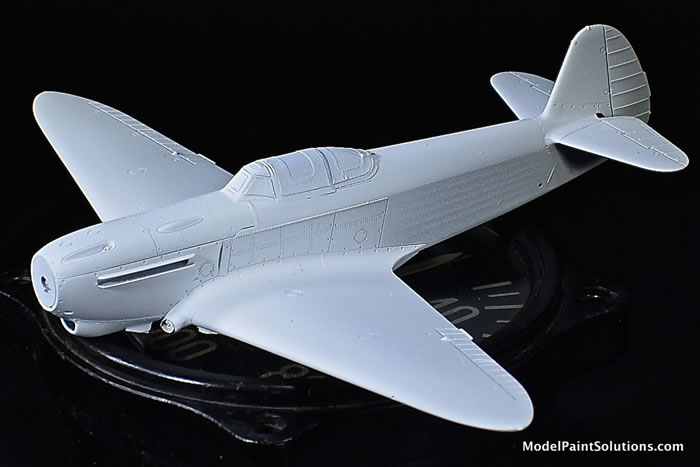
Prior to priming the model was wiped down with a Kimwipe moistened with Denatured Alcohol (DA). Care was taken to keep the DA away from the painted canopy area. DA dries very quickly so after just a few minutes the model was shot with Mission White Primer diluted 1:1 with Mission Thinner. This was applied at ~15psi with an H-S Evolution fitted with a 0.20mm tip. After drying overnight the model was buffed out with 8,000 Micromesh used with soapy water.
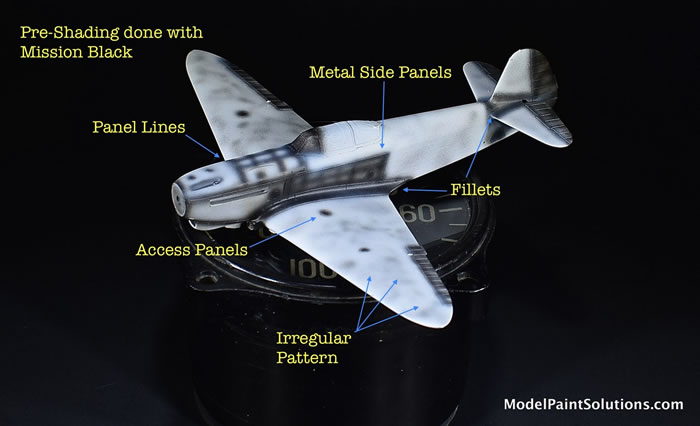
Panel lines and other surface details were pre-shaded with Mission Black. The black was diluted for fine-line spraying (see below) and applied at 8-10psi with an H-S Infinity fitted with a 0.15mm tip.
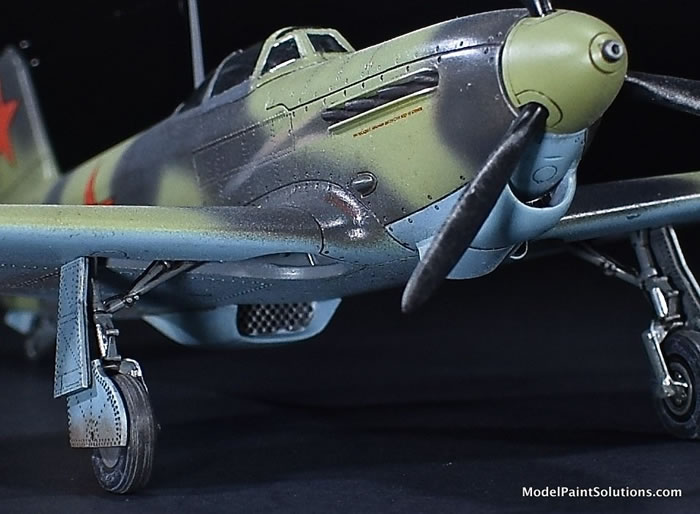
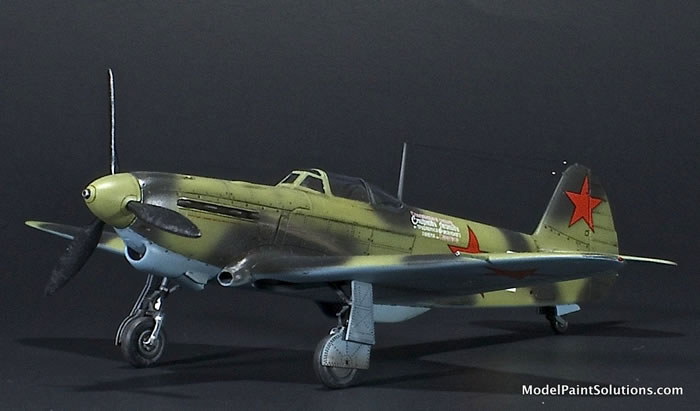
The belly and undersides were shot with a custom mix of Mission paint formulated to match VVS AMT-7 “Blue-Grey” from the Akan range. This was diluted to ~30% paint and shot at ~12psi with an H-S Evolution fitted with a 0.20mm tip (see below).
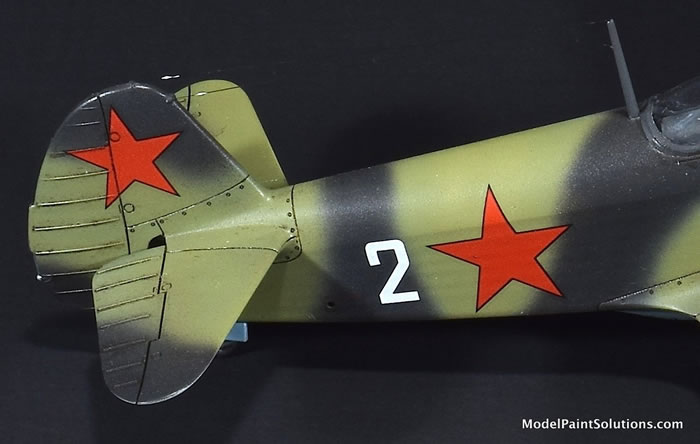
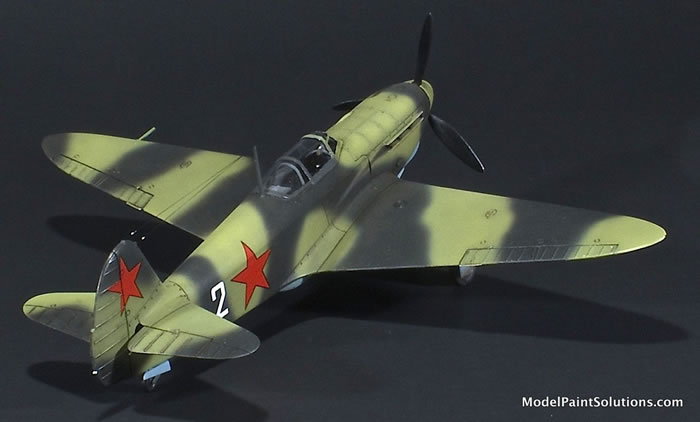
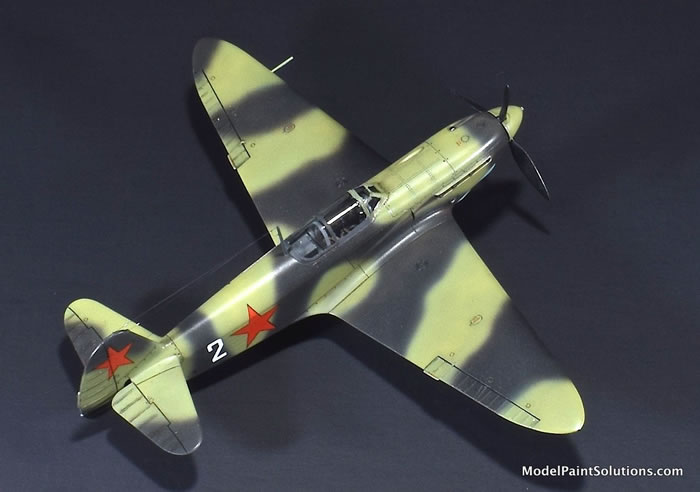
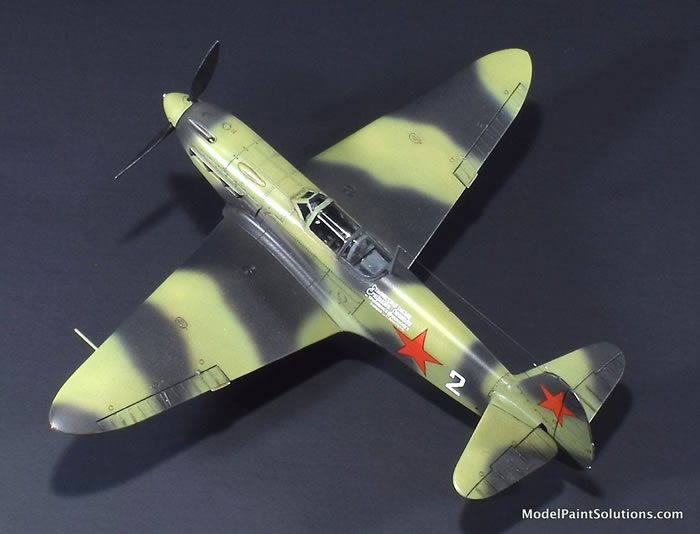
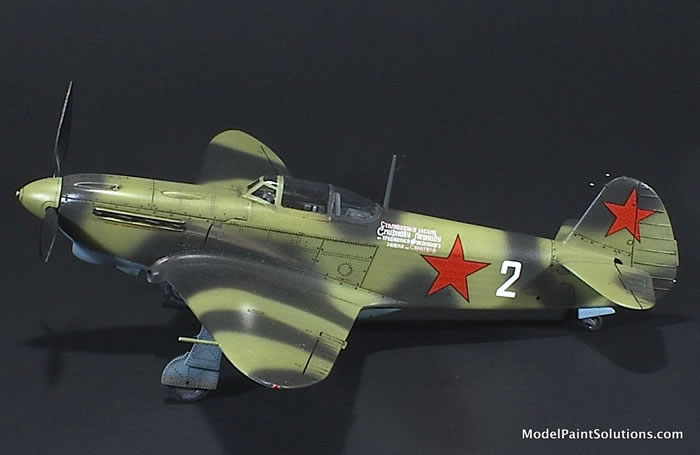
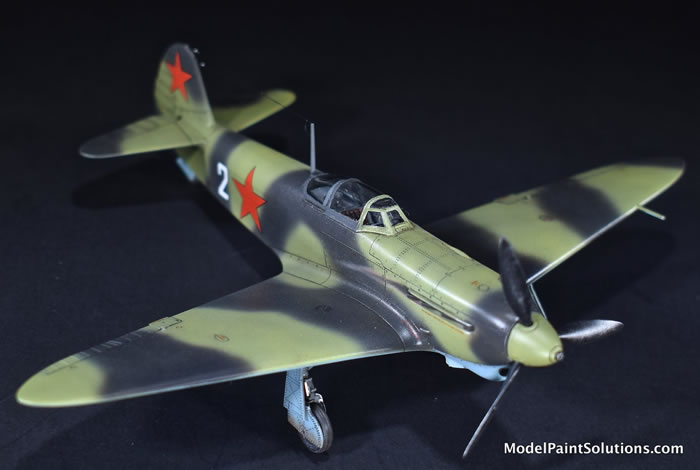
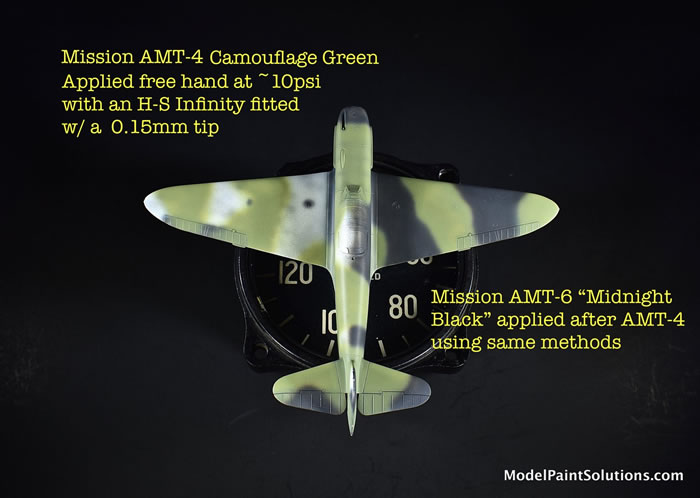
Custom mixes of Mission paints were matched to AMT-4 (Camouflage Green) and AMT-6 (Night Black) from the Akan lacquer range. Starting with the lightest color (AMT-4), the basic scheme was shot free hand with an H-S Infinity fitted with a 0.15mm tip. This was followed with AMT-6 “Night Black” mixed from Mission paints and shot free hand with a 0.15mm tip. Both paints were diluted to ~30% paint and sprayed at 10-12psi (see below).
Clear Coats and Decals
Preparatory to decaling, the model was sprayed with a 25% mix of Mission Clear primer in Mission Thinner. This was applied as a dry coat followed by a light wet coat for full coverage at ~15psi with an H-S Evolution fitted with a 0.20mm tip. Mission Clear Primer serves as a very hardy clear coat with a semi-gloss finish and pronounced chemical resistance to Micro-Set and –Sol; my go-to decal solvents.
Decals were applied using conventional techniques and Micro-Set and –Sol. Once dry, the decals were shot with Mission Clear Primer (see below) in preparation for weathering.
Exhaust stains and various airframe weathering was done with rendered oils and odorless White Spirits (Mona Lisa Odorless Thinner). Once dry, the oil weathering was sealed in with a coat of Mission Clear Primer.
The nicely detailed main gear legs assembled easily and were installed with CA glue. As with the gear legs, the wheels were first painted with Mission A-14 and then masked using Die-Cut Masking Circles saving time and ensuring a crisp paint line between wheel and tire. When dry additional weathering was applied to both wheels and tires with rendered oils and pastels.
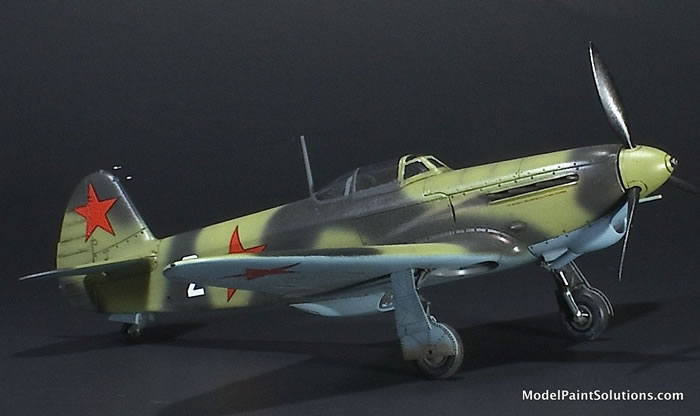
The twin aerials were replicated with Uschi “Super-Fine” rigging material (great stuff) and the white insulators were added with white glue applied with a sharpened toothpick. The blobs were allowed to dry and then carefully painted white.
Done!
What a blast! This kit comes together quickly with very little effort and packs a huge amount of scale-appropriate detail in a pretty small package. The quality decals went on without a hitch and the whole model was off my bench in about half the time I normally spend on a 1/72 single-seat fighter. What’s not to like? Highly Recommended!
--John
For more painting details from this build visit Modelpaintsolutions.com.
Text and images copyright © 2019 by Model Paint Solutions.
Text and Images Copyright © 2019 by Model Paint Solutions
Page Created 14 February, 2020
Last updated
14 February, 2020
Back to HyperScale Main Page
Back to Reviews Page

|
 Home
| What's New |
Features |
Gallery |
Reviews |
Reference |
Forum |
Search
Home
| What's New |
Features |
Gallery |
Reviews |
Reference |
Forum |
Search