Revell 1/72 scale
Supermarine Stranraer
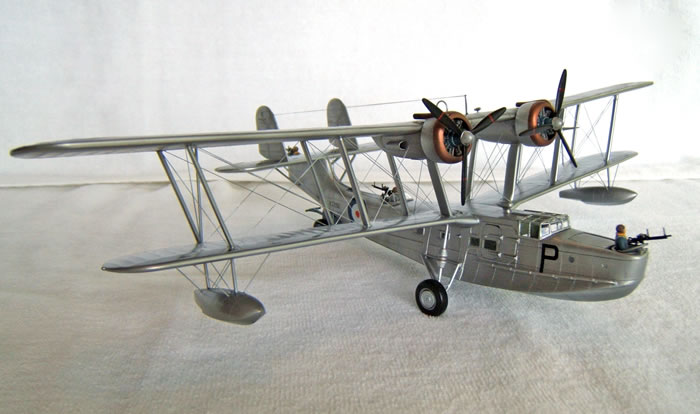
|
Supermarine Stranraer |
by Michael Rohde

Hobby Boss's 1/48 F4U-7 Corsair is available online from Squadron.com
Air Ministry Specification R 24/31 called for a twin-engined general purpose coastal reconnaissance flying boat and Supermarine's submission was a bi plane known originally as the Southampton V, although it clearly owed more to its immediate predecessor, the Scapa, than to the 1925 -vintage Southampton.
Of all metal construction , with fabric covered wings, the Stranraer was larger than the Scapa, with an extra bay in the wings and a lengthened fuselage with an open gun position in the tail.
The prototype Southampton V, renamed Stranraer in August 1935, was powered by two Bristol Pegasus III M radial engines, each driving two bladed wooden propellers, but these were replaced by Pegasus X's with three bladed Fairey- Reed metal propellers for production aircraft.
In August 1935 17 were ordered to specification R 17/35, and a further 6 in May of the following year.
In 1936 No 228 Squadron at Pembroke Dock was the first Royal Air Force Squadron to receive the Stranraer, and the type was still in service at the outbreak of WW 2 in September 1939. No's 201 and 209 Squadrons at Invergordon used the aircraft until the Summer of 1940, when they were re-equipped with Short Sunderlands and Saro Lerwicks.
The Stranraer was also built under license by Canadian Vickers, the initial Royal Canadian Air Force order was for seven aircraft , being later increased to forty.
Production began in 1938, and eight were in the RCAF inventory when the war started. The last Canadian Stranraer was delivered in 1941.
The RCAF's No 5 ( General Reconnaissance) Squadron received its first Stranraers in November 1939 and , after re designation as a bomber -reconnaissance squadron in October 1939, operated Canadian east coast anti submarine patrols from bases in Nova Scotia. No 4 Squadron, in British Columbia, performed a similar role of the west coast, later joined by No's 6,7, and 9 Squadrons, the last being the ultimate squadron to retire its Stranraers, which were withdrawn from active service in April 1944 on replacement by Consolidated Cansos. The Stranraer was used briefly by No 117 ( Auxilliary) Squadron in the autumn of 1941, and from October 1941 to November 1942 by No 13 Operational Training Squadron to train flying boat crews.
This kit set is Revell's reboxing of the venerable Matchbox kit dating back to the early 1970s.
The kit consists of four frames with 106 pieces in cream coloured plastic plus one frame with 13 clear parts. As to Matchbox's standard of the time it is a bare bones kit lacking interior and almost no exterior detail. The up side is that it does provide a good canvas to add detail by engraving and scratch building.
The instructions are comprehensive and easy to follow, mind you , it is not a very complicated kit either.
The decal sheet does provide 2 options:
-
No 228 Sq. RAF Pembroke Dock , Wales 1938
-
No 240 Sq. RAF Stranraer , Scotland January 1941
Before I started I decided to man this model with a set of four Italeri figures , which I salvaged from old models built quite some time ago.
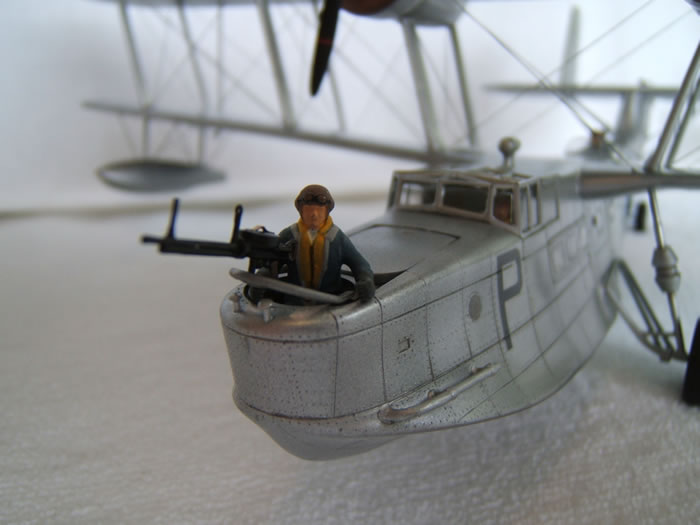
The good thing about these is that they originally come segmented and one is able to set them up in different postures.
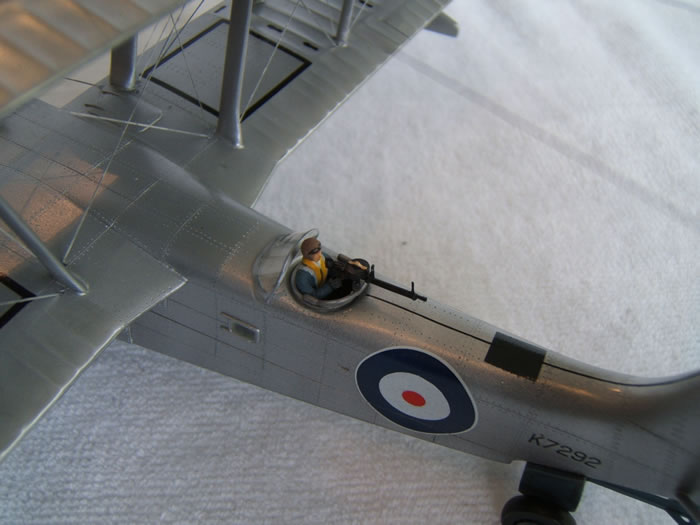
In this case I carefully disected these figures and later reset their postures according to their station (pilot, bow , dorsal and tail gunner).
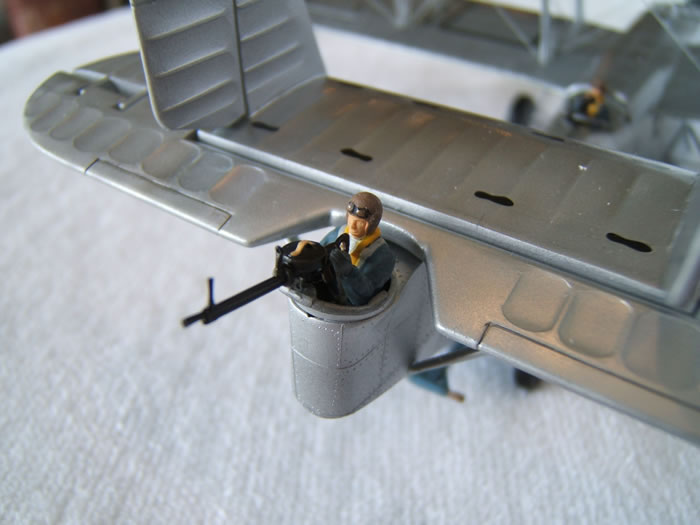
I also made floor sections for the entire fuselage except the cockpit area . These were fashioned from .4 mm Evergreen sheet. The radio shack components are made up of left overs from old kits. Ribs and stringers were added for good measure using Evergreen strips of various sizes)
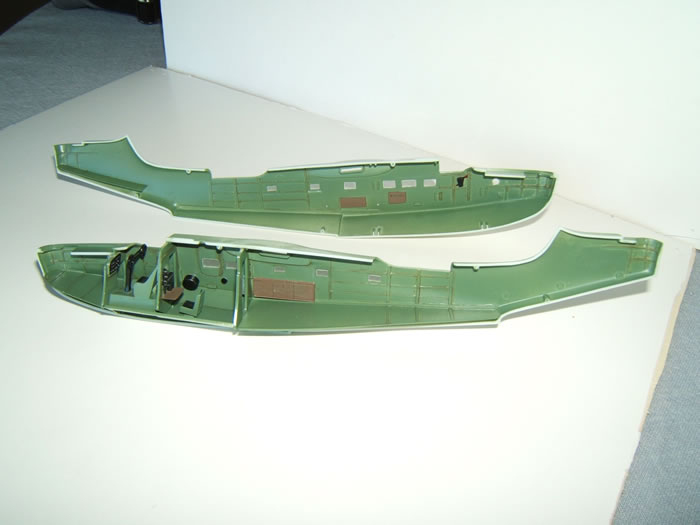
The windows supplied in the kit were no good ( sink marks) and I made new ones using .4 mm clear Evergreen sheet and glued these into place instead.
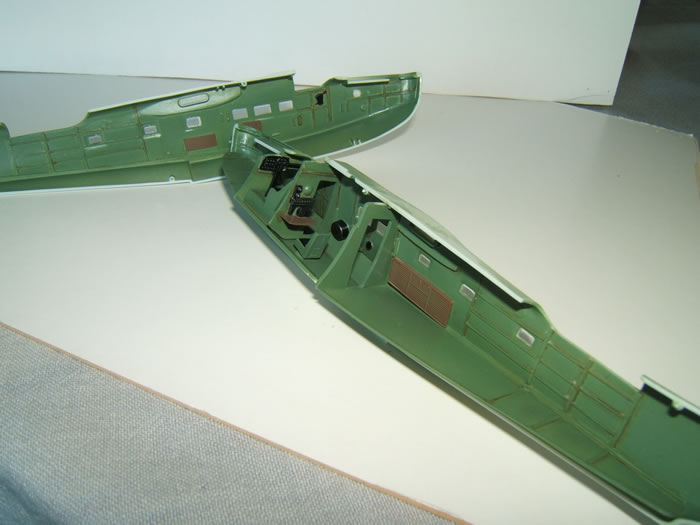
Next I inserted the floor sections incl. Pilots seat, control column, the bulkheads with the various radio equipment .The windows were masked off and the whole lot was ready to be airbrushed using Tamiya XF 71 cockpit green. Painting various equipment (instrument panel, control column. Radio set etc) was done afterwards due to easy access. The pilot figure was set up so the hands can rest on the controls and then painted ( the pilot was the first figure to be glued into place before I attached the canopy).
To finalise the interior dry brushing and the application of Tamiya Panel accent liner brown and black was used to highlight fine details.
That done the fuselage shells were glued together and left to set.
In the meantime all other components were made ready for assembly: Lower wings, tail plane with movable elevator, upper wins and centre section ., engine pods and the beaching gear .These went together well and little effort was required to fill and sand seamlines. More work was needed to clean up the struts though-- I had to deal with a bit of mould shift in this department.
The mating of the lower wings and complete tail plane followed.To get the dihedral correct , I had a very good reference book at hand ( James Kightly/ Roger Wallsgrove Supermarine Walrus and Stranraer) With this book comes a centrefold with accurate 1/72 scale drawings which helped me with the alignment.
After the glue has set and small gaps were remedied with a bit of filler I drilled all the holes for the rigging wires. The same applied to the upper wing with the engine pods in place. ( to rig the wings – and the stabilizer floats-- the instructions give us a good diagram of where the wires are attached , steps 47 a to 48 b).
Since the old Matchbox kit does not give us much surface detail at all , I – again with the help of these technical drawings- went ahead and engraved all the panel lines and stiched all the rivets. That makes all the difference to an otherwise very bland model.
A lot of patience is required to do that – there must be an excess of hundreds of tiny holes. I did not bother to keep track of time or count them!
To get the panel lines straight I used masking tape as a ruler and guide for the engraving tool. The same trick was used to get the rivet lines straight.
With this major job aut of the way , I moved on to the next step . This was to glue all the supporting struts onto the lower wing and making sure that the angles are all correct. While the glue set I drilled all the holes for the rigging into the upper wing.By the way -- the grand total was to drill 88 holes ( that includes the rigging for the stabilizer floats).
When the glue had set sufficiently I test fitted the upper wing and found that I had to open up the oval holes in the engine pods a little to get the centre struts slide easily into place .Having assured a good fit there I moved on to securing the upper wing with masking tape to see if the other eight struts plus the connecting rods for the upper and lower ailerons were seated properly. Small adjustments hade to be made in several steps to get that right.
In the end I got the struts to adapt alight, checked the alignment of the wing once more and proceeded to glue the struts into place with CA glue. Small gaps were filled by and by with small droplets of CA glue.
Now it was time to assemble the (painted )radials and cowl rings plus the exhaust pipes. These were painted separately and attached after the entire model was painted and rigged.
The main beaching gear was glued into place on the fuselage (minus the wheels). And so were the stabilizer floats. The outer rigging was made of guitar string.
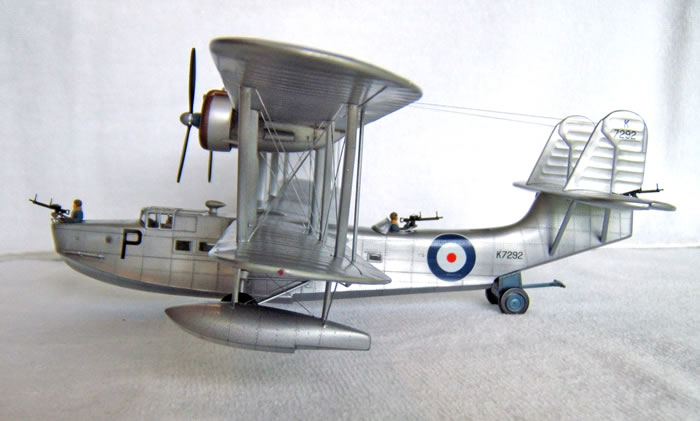
Choosing a bare metal scheme I started with pre shading the wings and tail plane with Tamiya flat white( to achieve a weathered silver dope effect).
The wings and tail plane were painted with Tamiya flat aluminium and coated with Tamiya gloss clear.
Before I moved on to the fuselage( and the center section of the upper wing plus engine pods) the ( pre painted) canopy and all the windows were masked off as were the demarkation lines between bare metal finish and the silver dope of the wings and tail plane.
To paint the fuselage I used AK aluminium and Ak polished aluminium . To kind of weather the overall fuselage I applied AK dark aluminium in a light coat along the panel lines.
Afterwards the fuselage and the wing center section received a thin coat of Tamiya gloss clear as well.
The rigging was done using EZ flexi line and given a coat of diluted Tamiya silver chrome.
The decal option I have chosen are for a machine of 228 Sq., RAF, Pembroke Dock Wales , November 1938.
These decals are a bit tricky. Apart from being a bit brittle they needed a good amount of Microsol to settle. During that process the decals started to wrinkle quite badly and on had to stand by and literally massage the decals with a Microsol saturated brush to get rid of the wrinkles. But in the end I got there and the decals were sealed with a coat of Tamiya gloss clear.
The final job was to put the Vickers machine guns and their mounts into place together with the gunners. By the way --the mounts are scratch built using Evergreen rod, The machine guns had the gunsights added made from stretched sprue --rear sight drilled hollow) and the straps for the magazines were made of masking tape.
Finally some weathering (mainly around the engines and upper wing centre) was applied and the antenna wires put into place.
I'd say well worth it. It is the only game in town at this stage anyway and with a bit of extra work the result is very satisfactory indeed.
I hope that maybe Special Hobby or even Airfix will consider to do a Stranraer in the near future.
Text and Images Copyright ©
2019 by Michale Rohde
Page Created 14 January, 2020
Last Updated
15 January, 2020
Back to
HyperScale Main Page

|
Home
| What's New |
Features |
Gallery |
Reviews |
Reference |
Forum |
Search