Zoukei-Mura 1/48 scale
Super Wing Series No. 5
F-4S Phantom II
by Steve Pritchard
|
F-4S Phantom II
|

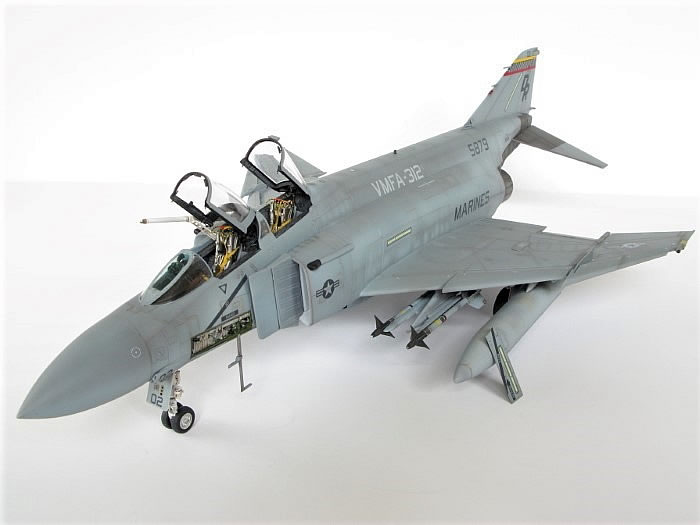
Zoukei-Mura 1/48 F-4S Phantom II (Super Wing Series No.5) in the markings of VMFA-312 F-4S 155879 MCAS Beaufort, in 1987
Aftermarket Accessories:
-
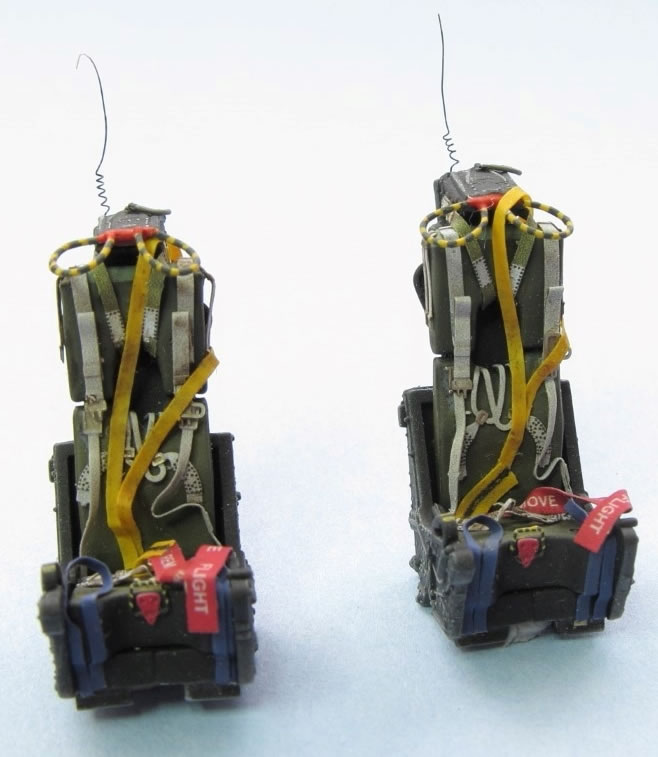
Eduard EDU49015 F-4 ejection seat grey for Hasegawa Kit (coloured photo etched seatbelts)
-
Aires 4763 F-4S Electronic Bay
-
Hypersonic models HMR 48016-3 F-4 Phantom Canopy Details
-
DN Models Canopy and Wheels Paint Masks for ZM F-4J/S/C/D Phantom II
-
Furball Aero-Design 48-063 Lo-Viz Devil Dog Rhinos decals for ZM F-4J/S (12 options)
Paints Used:
Mr Color 307, 308 and 337 for the three-tone blue grey camouflage. Various Alclad shades, steel, jet exhaust, exhaust manifold for the aft fuselage metalled areas and Humbrol enamels for the cockpit and other detail painting. Humbrol Gloss 35 polyurethane prior to decaling with a finish coat of Wattyl Estapol Matt Polyurethane
Construction was generally straightforward – I did find the instruction sheet a bit cluttered with extra information (though quite useful) about what the parts represent on the real aircraft. Joining up the fuselage was the biggest issue I had – I struggled to get the cockpit sills sitting correctly, probably due to some slight misalignment at an earlier step. A small amount of filler was necessary at the wing root – I tried Mr Surfacer 500 and was impressed with its gap filling properties and quick dry time. I only installed one of the Aires electronic bays, it went in easily without having to trim too much plastic. It would have been helpful for Aires to include some information on what colours to use for this.
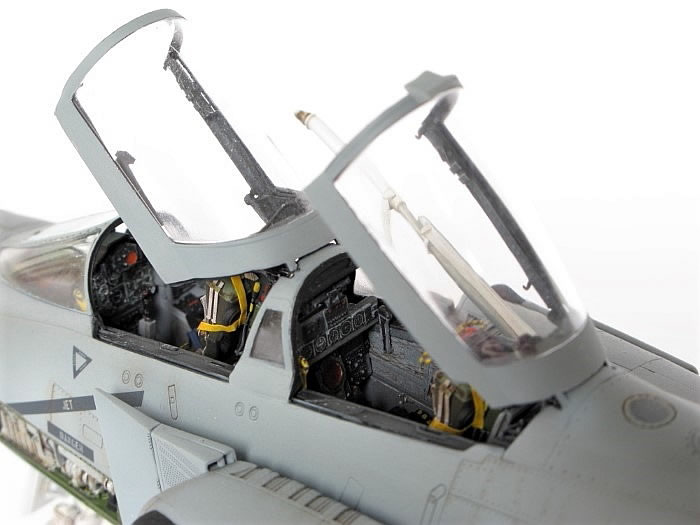
I was disappointed in the clarity of the clear canopy parts – while usable, they did not seem to be as clear as those from other manufacturers.
Another area I had a slight problem with was fixing the main undercarriage legs – these should have a slight forward lean with the main door bottom edge parallel to the ground – the attachment is not precise and one of the legs assumed a more vertical position – of course, the glue had set before I realised this. Consequently, the gear door was also at the wrong angle – I removed it from the leg and modified its attachment slightly, so the angle of the leg is not too obvious now.
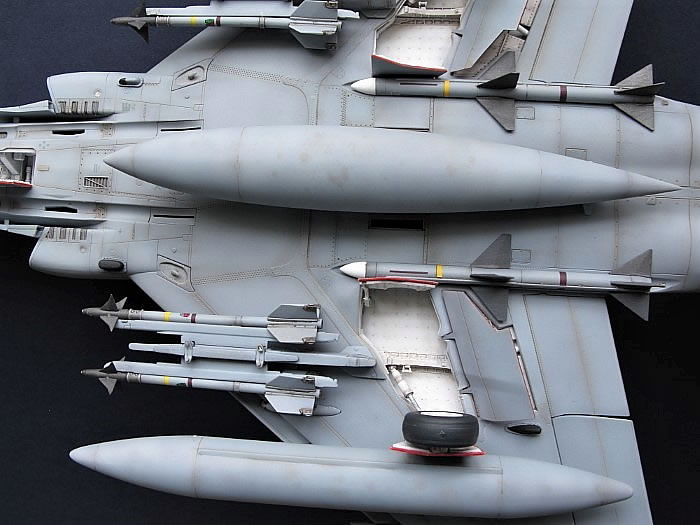
I chose to add all three fuel tanks and inner wing pylons to my model – you don’t see many images where all three tanks are fitted plus all those missiles, but the moulding is so good I had to include them. Also, I don’t think the leading-edge slats would be deployed without the flaps, but there didn’t seem to be an option to show them retracted. I think it adds interest to the model, even if not strictly accurate.
I preshaded with dark grey Mr Color 331 – I also tried some marbling effects to break up the finish of the top coat colours. I was quite pleased with the result.
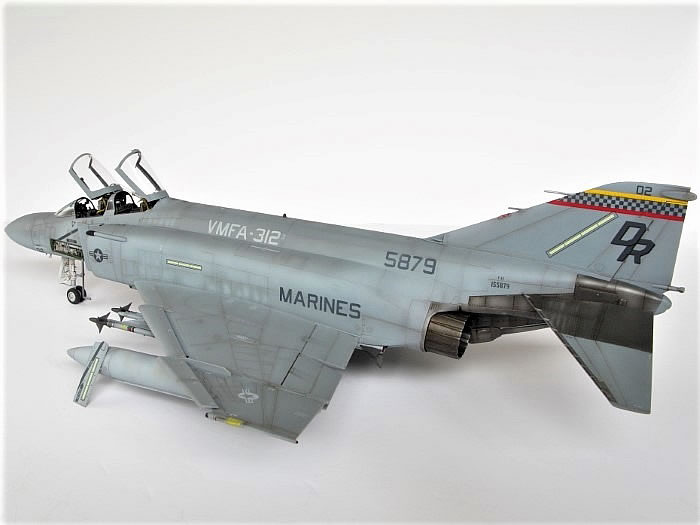
The Mr Color paints spray beautifully at a ratio of approx. 3 parts levelling thinner to one of paint. I was surprised at how similar the three shades of grey are from the bottle – the Furball decal instructions show colour profiles of each aircraft and the contrast in shades is very noticeable. However, there are plenty of photos of low viz Marine machines on the internet which show some with very little difference and others with greater contrast.
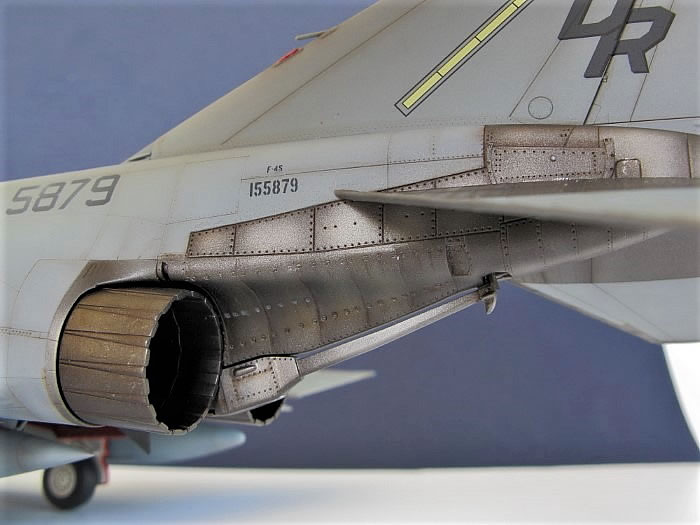
Not sure how 155879 really looked in 1987 – my model shows it ‘faded’. I added a bit of post shading to various panels, with shades of the main colours.
This was an extremely enjoyable build of an excellent model kit. Out of the box detail is very good, perhaps only really needs some aftermarket seatbelts.
I would certainly build another in the series - looking forward to an F-4EJ in those incredible Japanese colour schemes.
Text and Images Copyright ©
2020 by Steve Pritchard
Page Created 3 March, 2020
Last Updated
3 March, 2020
Back to
HyperScale Main Page

|
Home
| What's New |
Features |
Gallery |
Reviews |
Reference |
Forum |
Search