Piaggio-Pegna P.C.7 Schneider Trophy Series
AMP, 1/48 scale
S
u m m a r y |
| Catalogue Number and Price: |
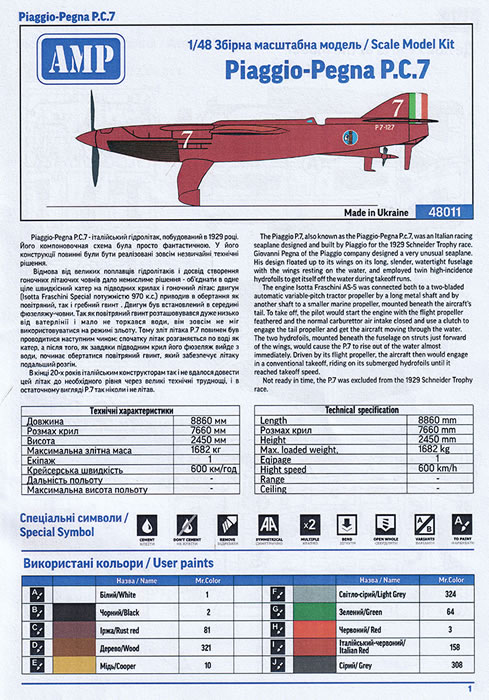
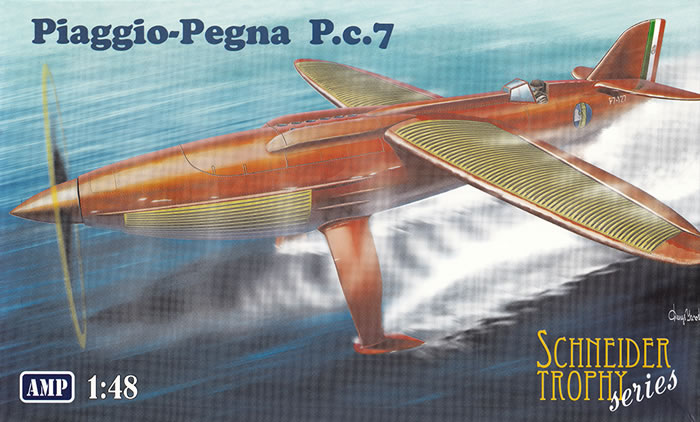
AMP Kit No. AMP48011 - Piaggio-Pegna P.C.7 Schneider Trophy Series
GBP£32.99 EU Price (GBP£27.49 Export Price) plus shipping available online from Hannants
and hobby retailers worldwide
|
| Scale: |
1/48 |
| Contents and Media: |
66 grey injected moulded parts, 1 clear part, 3 photoetched parts, decals and comprehensive instructions. |
| Review Type: |
FirstLook |
| Advantages: |
An injected moulded kit of a rare aircraft. Thanks AMP for producing it! |
| Disadvantages: |
A reasonable amount of flash to clean up as well as blemishes in the surface of the plastic (see details below). |
| Conclusion: |
Great of AMP Models to produce this rare aircraft in kit form for us. It will take a good deal of work to create a great model but at least we have a base to work with. |
Reviewed by David Couche

The Piaggio P.7, also known as the Piaggio-Pegna P.c.7, was an Italian racing seaplane designed and built by Piaggio for the 1929 Schneider Trophy race.
Seeking to avoid the aerodynamic drag induced by floats in seaplanes of floatplane design, Ing Giovanni Pegna of the Piaggio company designed a very unusual seaplane to represent Italy in the 1929 Schneider Trophy race. A cantilever shoulder-wing monoplane, known both as the Piaggio P.7 and the Piaggio-Pegna P.c.7, his design floated up to its wings on its long, slender, watertight fuselage with the wings resting on the water, and employed twin high-incidence hydrofoils to get itself off the water during takeoff runs.
Sources differ on the P.7's engine; it is described both as an Isotta Fraschini Special V6 rated at 723 kW (983 PS; 970 hp) and as an Isotta Fraschini AS-5 of 745 kW (1,013 PS; 999 hp). The engine was connected both to a two-bladed automatic variable-pitch tractor propeller by a long metal shaft and by another shaft to a smaller marine propeller, similar to those used on motorboats, mounted beneath the aircraft's tail. To take off, the pilot would start the engine with the flight propeller feathered and the normal carburettor air intake closed and use a clutch to engage the tail propeller and get the aircraft moving through the water. The two hydrofoils, mounted beneath the fuselage on struts just forward of the wings similar to the way in which floats were mounted on floatplanes, would cause the P.7 to rise out of the water almost immediately. After the aircraft had risen on its hydrofoils and the flight propeller had cleared the water, the pilot would open the carburettor air intake, again employing the clutch to disengage the marine propeller, and use another clutch to engage the flight propeller, which automatically would switch from feathered to flight pitch. Driven by its flight propeller, the aircraft then would engage in a conventional takeoff, riding on its submerged hydrofoils until it reached takeoff speed.
Without the aerodynamic drag induced by floats or the weight they added to the aircraft, Pegna projected that the P.7 would reach high speeds. Sources differ on the speeds he predicted, claiming both 580 km/h (360 mph) and 700 km/h (434.7 mph).
Piaggio manufactured one P.7 and turned it over to the Italian Schneider Trophy racing team. Although some pilots refused to fly the aircraft, the Italian Schneider team's Tommaso dal Molin conducted some water tests on Lake Garda in northern Italy. The spray the hydroplanes generated made it difficult to see during takeoff, and persistent problems with both clutches ensued. The aircraft never became airborne.
Not ready in time, the P.7 was excluded from the 1929 Schneider Trophy race, in which a Macchi M.52R and two Macchi M.67 seaplanes represented Italy. Piaggio and Pegna abandoned plans to build a second P.7.
Firstly, I will declare my bias towards this aircraft. The Piaggio P.C.7 must be one of the sexiest shaped aircraft to have ever been designed, even if it was a failure in the flying stakes. The Piaggio-Pegna P.C.7 has been one of 5 unicorn kits I have wanted. Previously, the only available kit(s) in 1/48 have been some rare resin kits which have been out of production for many years. They come up on rare occasions of the likes of EBay at absolutely massive prices. Imagine the great rejoicing then, that came with the release of the AMP kit of the Piaggio-Pegna P.C.7 Schneider Trophy aircraft. Of course, I immediately ordered one from across the ocean in the UK and awaited its arrival keenly.
The kit comes in a top opening box, which was surprisingly not full by any means. I have several of the AMP helicopter kits in the stash which have plenty of plastic within them, much more than this kit. The contents include, 4 grey injected moulded sprues with some 66 parts on them. There is one clear piece, very small and not overly clear, 1 small sheet of photoetch containing 3 parts, a small sheet of decals and the fairly comprehensive instruction sheets. As for most limited run kits, there are no part alignment pins so careful alignment will need to occur.
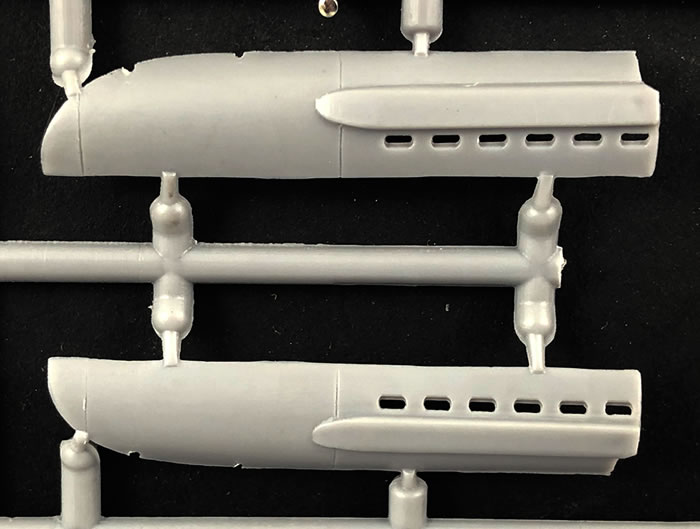
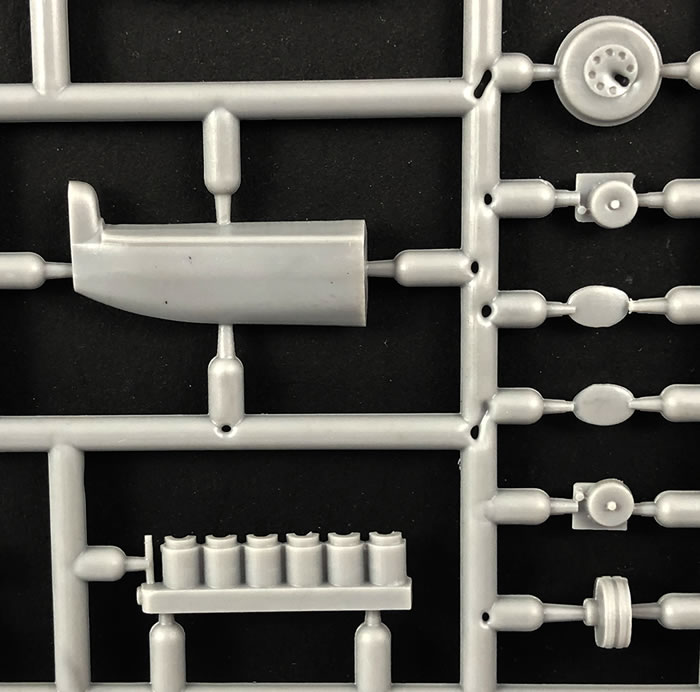
Sprue A
This sprue has 7 grey injected plastic parts on it. The main parts here are the right and left fuselage halves. Detail is a mix of recessed panels and hatch details. This sprue also has the 2 engine/exhaust covers and the nose radiator panels. There is a good deal of flash on these parts. Beware in cleaning the fuselage halves as there is a thin section towards the nose which can be snapped easily.
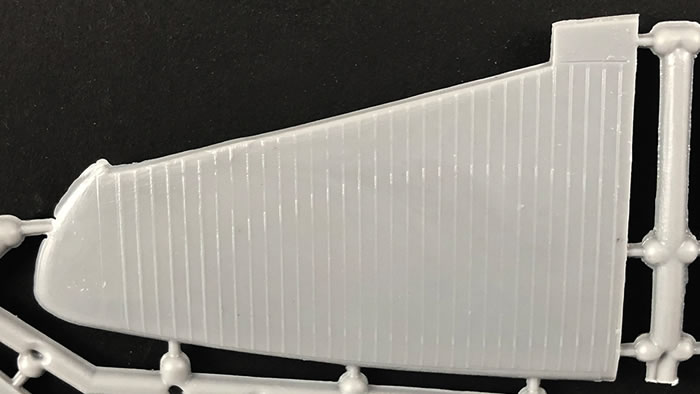
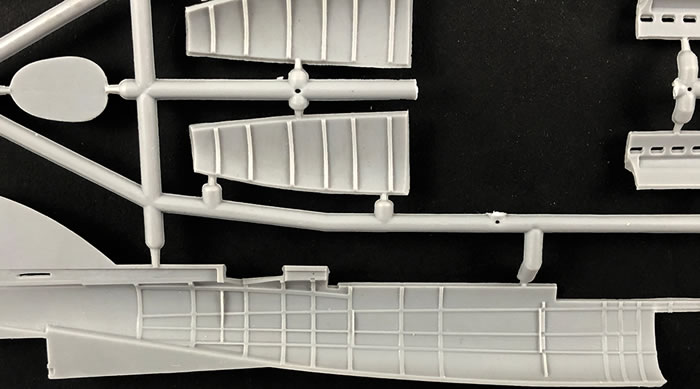
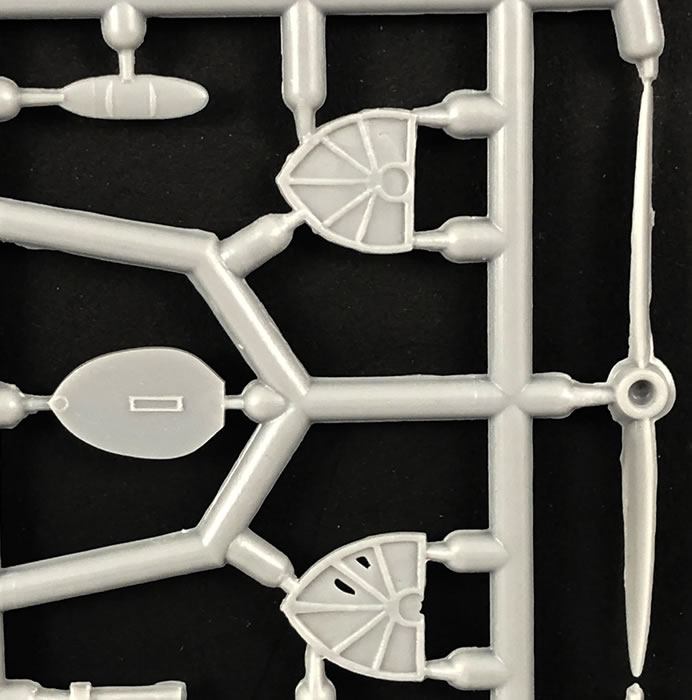
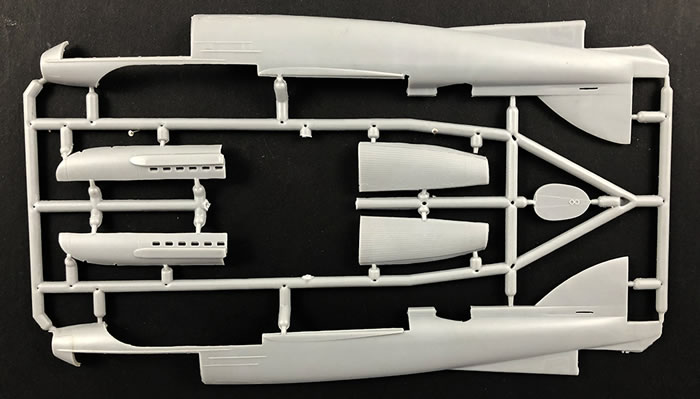
Sprue B
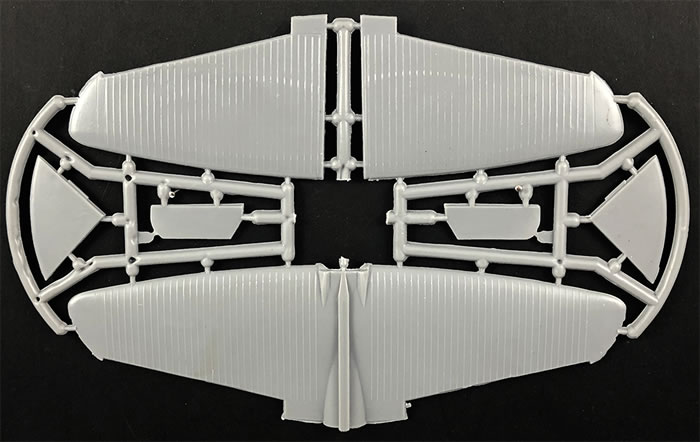
Sprue B has the lower wing sections and the one piece upper wing. The skin mounted radiator panels are moulded in. Unfortunately, there is a good deal of flash on these parts that will need cleaning up. Luckily, the radiator panels don’t go right to the edge of the wing some clean-up is reasonable with care. A more worrying thing is that there are moulding surface imperfections within the rib detail on the wing surfaces. This will ultimately have a metallic copper paint added so will need very careful removal to ensure a good surface. A bit disappointing AMP! With this in mind, I checked my other AMP helicopter kits, and they certainly are much better and show very little of these imperfections.
Sprue C
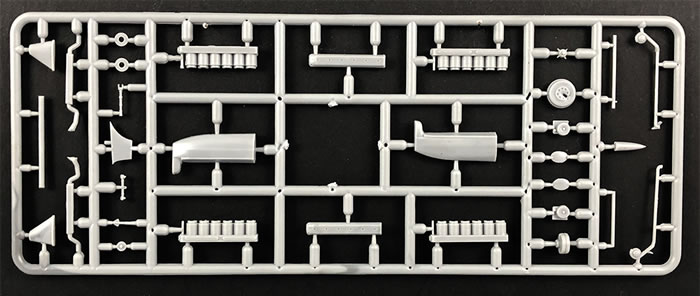
A sprue with 29 parts on it and has the parts to construct the engine, some of the parts to go in the cockpit and a few other small parts. Again, plenty of flash/mould marks to clean up.
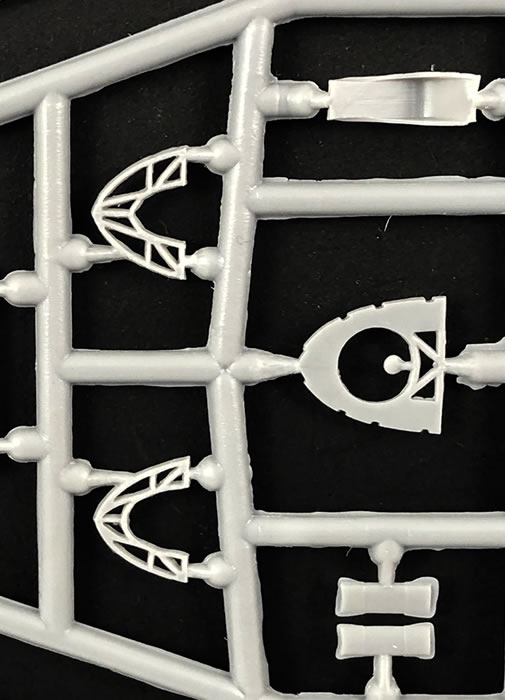
Sprues D
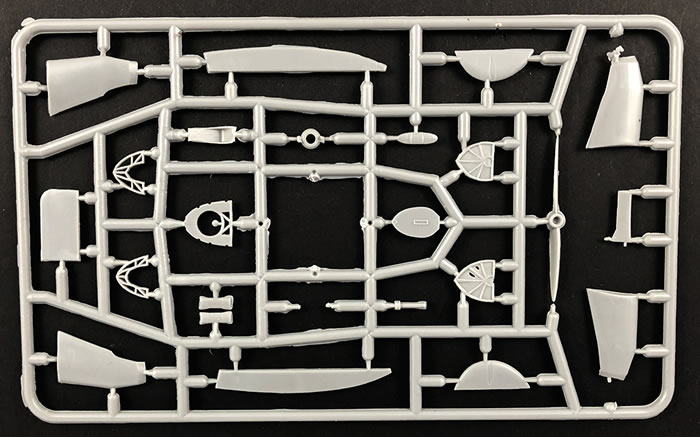
This sprue has 23 parts on it, and delivers us the hydroplane parts, ailerons, internal frames and engine supports and a few more cockpit parts.
Clear Part
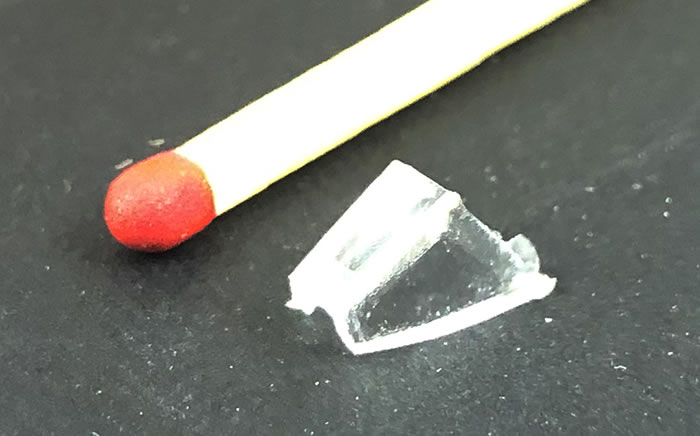
There is only one clear parts for this aircraft. The canopy front is tiny (see it compared with a match-head) and this is in 1/48! It is not overly clear and is quite thick compared with its size. (I’m thinking if a simple replacement from clear sheeting of much thinner material.)
Photoetch
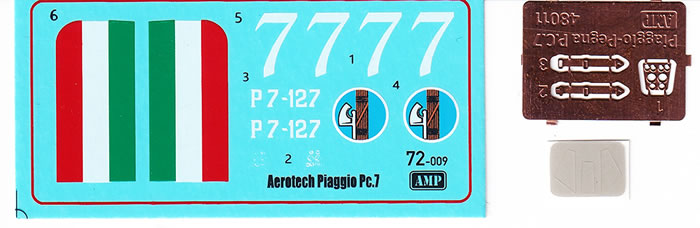
There is a small photoetch sheets of 3 parts included. The parts are a set of seat belts and the instrument panel.
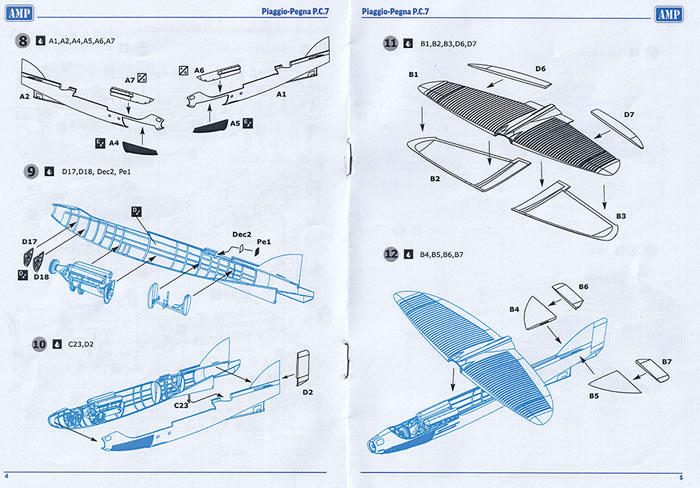
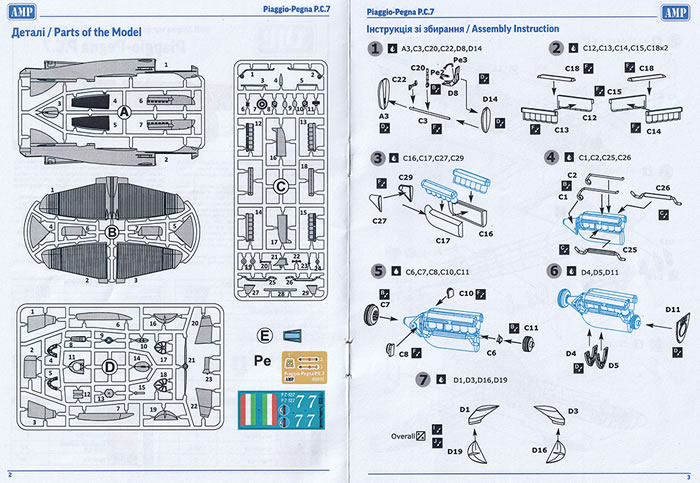
Instructions and Decals
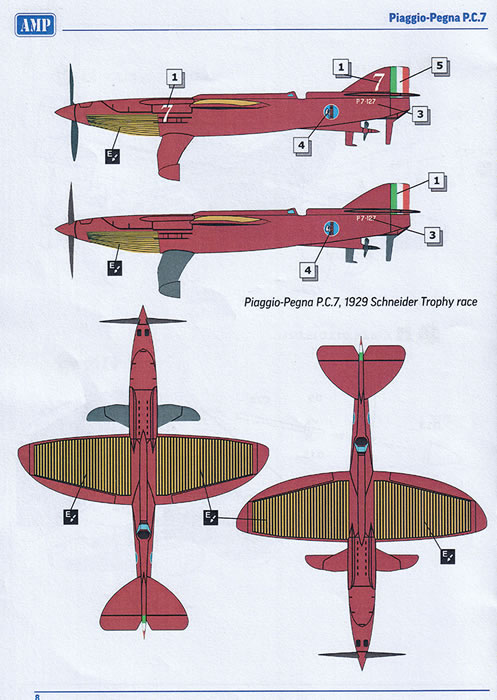
The instructions for the kit are pretty detailed instructions, with basic colour call outs throughout, using only the Mr Color range. The decals appear to be in good register giving the options for 2 version of the same aircraft.
Firstly, how good is it a company like AMP Models produce such a rare aircraft kit? Now the first rush of overjoyed enthusiasm has died off with careful examination of a somewhat flawed offering to us. The flash can be overcome with a bit of careful cleaning up but the flaws in the surface finish gives us a lot of work to be able to have a high quality metallic copper finish as well as a high gloss beautiful Italian Red paint job. OK, disappointment rant over, at least we have something to work up where previously we had nothing. I will recommended it those with the Schneider Trophy racer bug or the flying boat bug or those that just love the esoteric aircraft the Italian’s designed and built.
P.S. ……. I have already started this kit and so far construction has been pretty good but a lot of time spent cleaning up the wing surfaces…..stay tuned for the final results.
Review Text Copyright © 2019 by David Couche
Page Created 12 November, 2019
Last updated
5 December, 2019
Back to HyperScale Main Page
Back to Reviews Page Woo! |
 Home
| What's New |
Features |
Gallery |
Reviews |
Reference |
Forum |
Home
| What's New |
Features |
Gallery |
Reviews |
Reference |
Forum |