Wingnut Wings' 1/32 scale
Sopwith Snipe
by Garfield Ingram

Hobby Boss' 1/32 Spitfire Mk.Vb Trop is available online from Squadron
I think we can all agree at this point, that Wingnut Wings kits are among the finest ever produced. 1/32 scale invites the builder to really get into the nuances of the subject and in the end, they have the ability to become museum quality models. When I build a model, I generally have a number of objectives to achieve, objectives that go beyond basic modelling skills such as alignment and seams. In this case, I wanted to represent realistic clear, doped linen on the bottom and PC-12 on the top. As a Canadian, the only Snipe on my to-do list is Barkers as he has been a hero of mine since childhood. His epic Victoria Cross winning fight amazed me since I first read about it in the book ‘Knights of the Air’ and so this model is my homage to him.
For this article, I won’t get into the assembly and finish of the interior work as it has been well-covered in other articles and I don’t have anything new to add. I will say that the cockpit took over half the time that I spent on the model. Wingnut wings have loaded the interior with detail which is highly visible in the wide cockpit. There is also it seems, as much rigging inside the cockpit as there is outside so be prepared to spend some time here. To make the interior even more visible, it was necessary to cut away some of the decking in front of the cockpit. Barker evidently preferred to have easy access to the guns and found this necessary. As for the engine, I used Alclad products starting with a coat of the gloss black primer. Following this, light coats of their steel made the engine sparkle, giving it a look of oily metal.
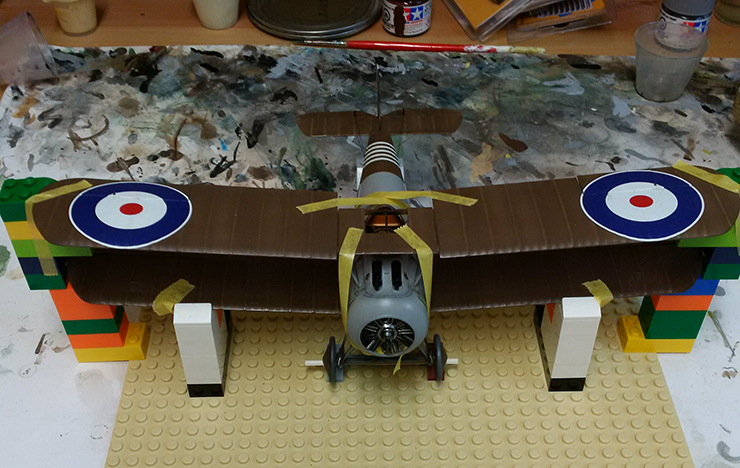
Wingnut Wings have made this model with the latest computer technology and so the fit is outstanding. This makes alignment of the model much simpler but regardless, I used a jig made from Lego blocks. They are sturdy and are inherently symmetrical, needing only small shims here and there.
Now, on to the finish which is the mysterious PC-12 on the top and clear doped linen on the bottom. I am a professional designer/illustrator and have taught colour theory among other things. Even though I’ve gone entirely digital in my work, I’ve done plenty of paint mixing in my day and prefer to mix my own colors. I always work from the bottom up so first, the clear doped linen (CDL). As a base for this, I mixed up a linen colour which is essentially a pale beige. In this case, white was darkened with a touch of the PC-12 that I had mixed up. I make a light, medium and dark version of the CDL and used the lightest one across the entire lower wings. Following this, narrow strips of masking tape masked off the location of the rib tapes. Next I sprayed random stipes between the ribs with the darker values. This will modulate the values from left to right thus giving the wing a bit of interest. This is very subtle so don’t over-do it. Have a good look at photos of the actual aircraft that you are doing and note the values. Are the ribs darker or lighter? Are the wings backlit or not. Is there dark paint on the upper surface or is it CDL?
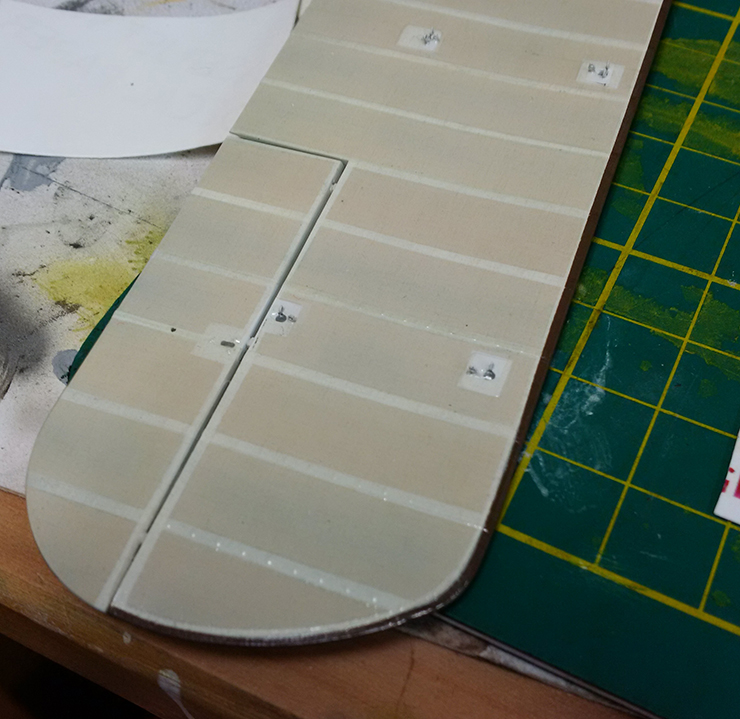
As a final layer to the bottom, I applied CDL decal that is made by Pheon. There are two version of this- one printed on clear, the other on white. I used the one printed on clear as it allows the pre-painted colours to show through. A couple of cautionary notes here- first, the material is decal film and works just like any other decal. You should therefore apply it on a glossy surface, free from dust. It can trap small bubbles underneath which appear as tiny spots of silvering once dry. To avoid this, it is best not to try to cover the entire wing in one shot. It is better to work in sections of about four bays and push trapped air out to the edges. The other thing and this is important- the clear decal film is rubbery. If you cover up pre-drilled holes and try to re-open them with a #80, the film twists around the drill and pulls away from the surface. You will have to try different ways to re-poke the holes, perhaps with a hot needle. I also thought I would cut the film slightly over-size and trim it with a #11 blade. Nope, it is very hard to trim being rubbery so cut the film to size. One other thing and this is important- liquid glue will wick under the film so keep this in mind when you are rigging and adding control horns. The effect of the decals is very subtle but it is worth it in my opinion.
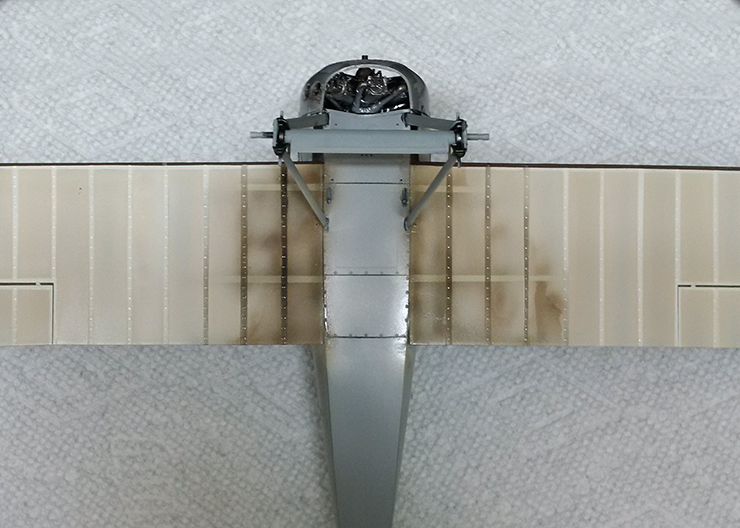
In the Wingnut instructions, there is a great shot of a Snipe sitting on its nose. It is a wonderful study in what is going on with the dirty oil that gets blown back from the rotary engine. You will see that there is a bias to one side due to the spinning effect of the engine. Also, when soaked with oil, the linen becomes transparent, showing the spars. The stained look was created with about four layers of paint, done in sequence with regards to masking. I used a dark, grey-brown and applied it in very thin coats. When all of the paint and decals were applied, final coats of oil paints were used for streaking. Don’t forget to do the same to the tailplanes as there is a lot of goop that gets sprayed back there.
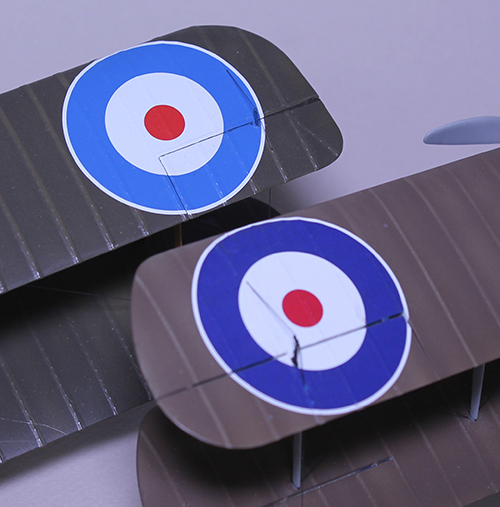
Now the PC-12. As you probably know, there were basically two upper colours used by The RFC/RAF during the Great War- Pigmented Cellulose #10 and #12. There has been a LOT of discussion on-line about the nature of these colours. Here’s my take on the subject but I suggest that you listen to those more knowledgeable than I. PC-10 was made of two basic pigments- yellow and black. Smaller amounts of red and blue may have been added as modifiers. From these two basic pigments, you can make Interior green for instance or keep adding black and end up close to PC-10. The more black you add, the darker a green you get. Adding a bit of red will brown it up a bit. My Snipe was painted to represent PC-12. Here there is a lot of controversy. There was apparently, a wide variation of this colour but it is a basic mix of red ochre and black. Again, the two other primaries were added in smaller amounts as modifiers. If you mix these two basic pigments together, you get a red-brown, suitable they say, to the mud of the Western front. The problem is, I don’t like that colour! I therefore, swayed to a version of the colour which is less ‘choclatey’ and more drab brown. The mix is made of red-brown, black and a fair bit of yellow. White was added to reduce the value and create a ‘scale-effect’.
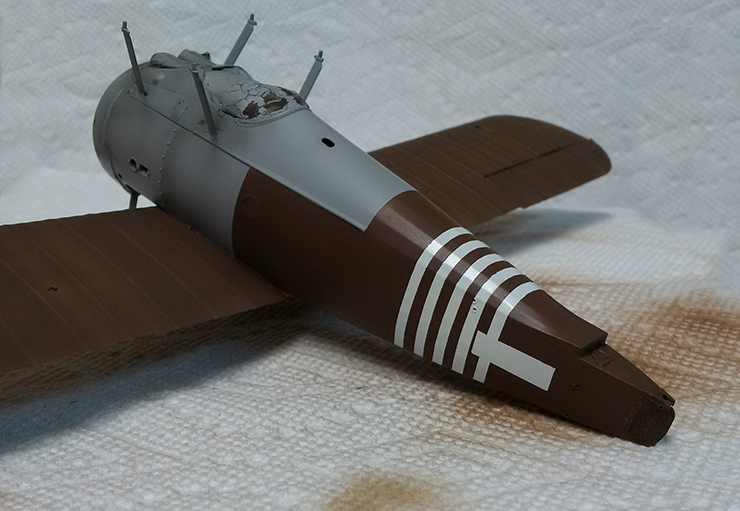
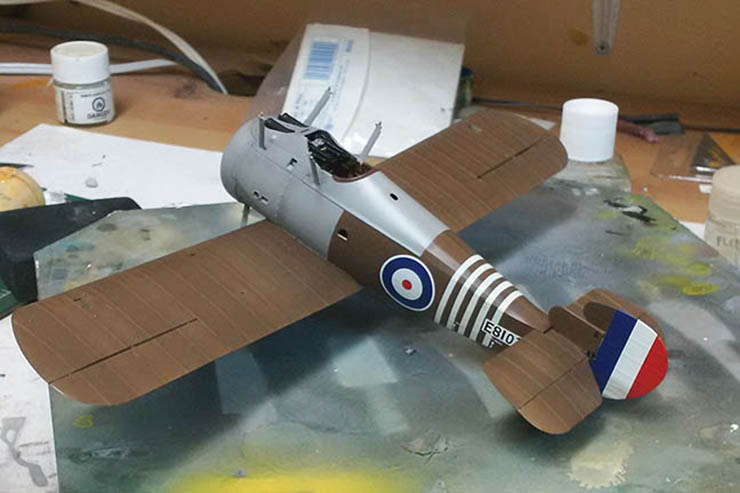
As I was doing Barker’s machine, I pre-painted the area for the tail stripes and serial block with white. Following this, the grey areas were painted using Tamiya XF-80 Royal Grey. It looks like the right value to my eye. You can see in the photo that I did a very soft edge spray with a darker value to define the separate panels on the nose. The grey was masked off and a very light coat of PC-12 was applied and the ribs were masked off. The top colour was sprayed as with the CDL, in stripes from front to back using a very thin mixture. This created a variety of subtle values, giving the wing a slightly faded, hand-painted look. Close to the end, all rib masks were removed, exposing the original light pass. More thin layers of the drab paint were applied to blend in the colours. The PC-12 was wrapped around the leading edge a couple of inches so that had to be carefully masked. I put a narrow piece of masking tape as a guide whsere the dark colour will be. I then mask up to it and removed the guide tape. This will minimize the wobble that may occur when masking as it gives you an opportunity to correct the line before you commit to paint.
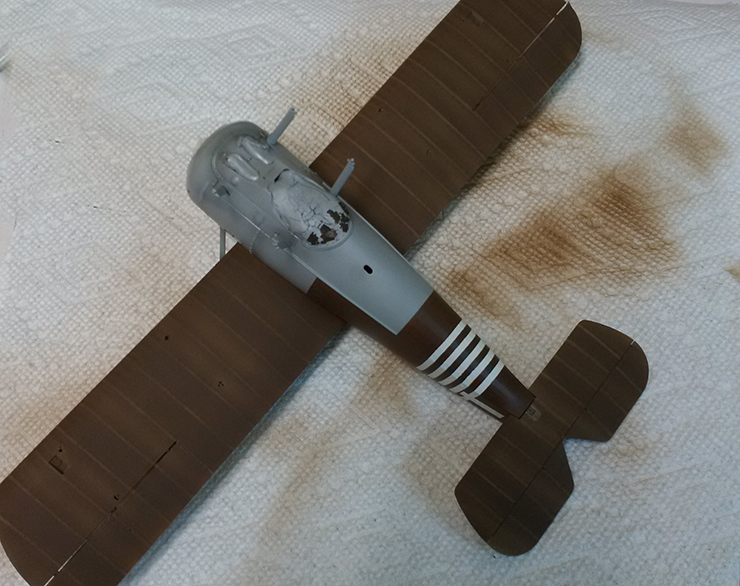
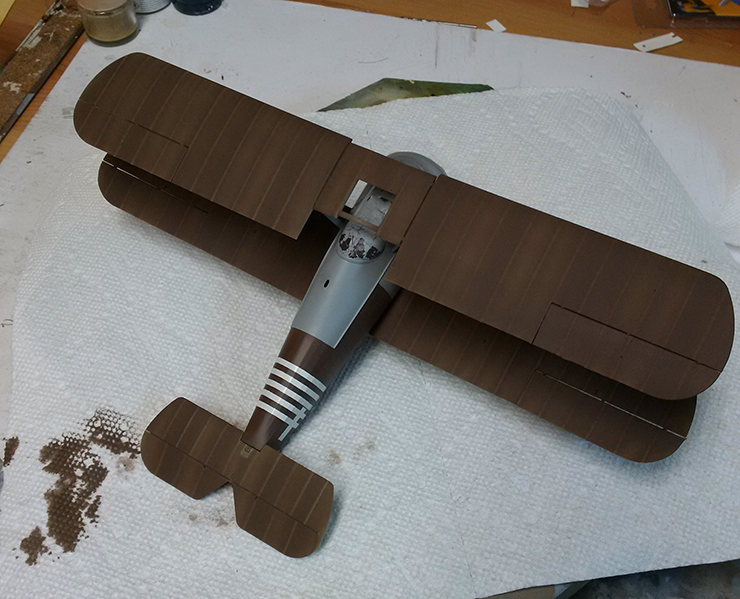
There are a number of painting details I did and will briefly mention them. The rudder colours were masked and sprayed; the lower cowl was pre-painted with aluminum, masked and painted grey. It was then chipped; the main wheels were painted using a light spray in the middle and denser one around the perimeter; a dark blow-back from the engine was applied to the lower surfaces using a very thin mixture of dark grey.
Once all of the components were painted, it was final assembly time. I used a simple Lego jig to lock all of the parts together and ensure alignment. What is especially important is the alignment of the alighting gear. If this is crooked, there is no way the model will ever look square. I stabilized the model in the jig and ensured that the tips were even in height. I attached the gear legs and wheels, let them dry in the jig and then rigged it. Now I know the gear is as strong and square as it can be. One complaint that I have heard about Wingnut kits is that the gear are wobbly. I guess they are right so all you can do is make the rigging as strong and tight as possible.
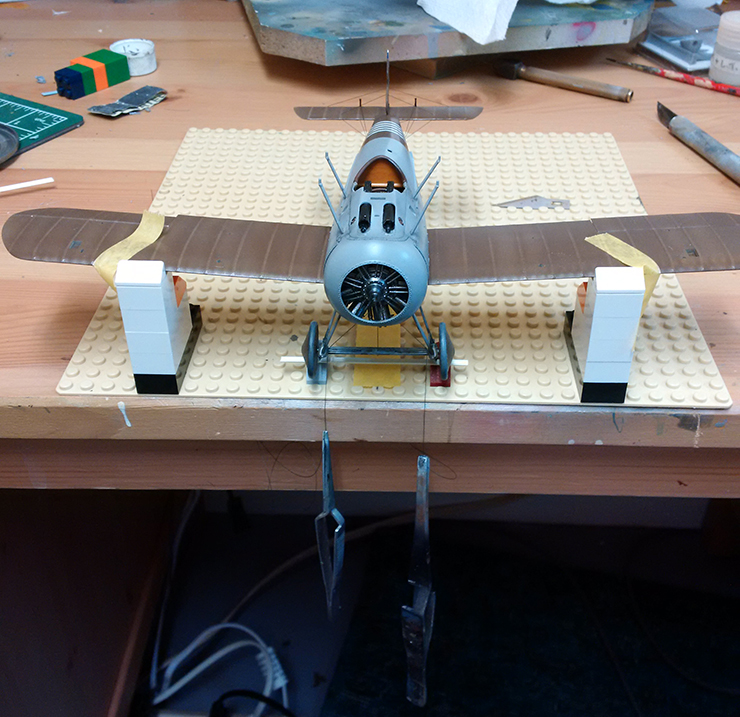
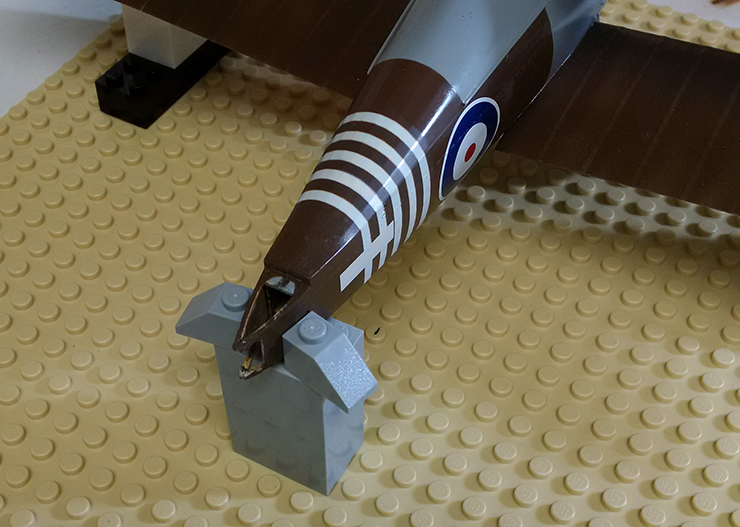
There are many excellent articles about rigging but it remains a difficult thing to master and an intimidating one for many. Thankfully, the Snipe does not use many turnbuckles externally so if you do a clean job, it will look convincing. I used Gaspatch eyelet anchors on the upper wing and drilled out the lower holes with a #80. Using nylon (not polypropylene), mono-filament, I pick up a small ball of thick CA on the end of the thread and put it into the lower hole. It is then threaded through the eyelet and pulled tight with a pair of self-closing tweezers. I then put a tiny bit of thin CA on the tip of a #11 blade and touch the eyelet. Once it is cured, I carefully cut the mono close to the eyelet and let the tweezers drop away. I don’t have the greatest technique but hey, it works! Again, the nice thing about this scale is that you have some elbow room to work with when doing the rigging.
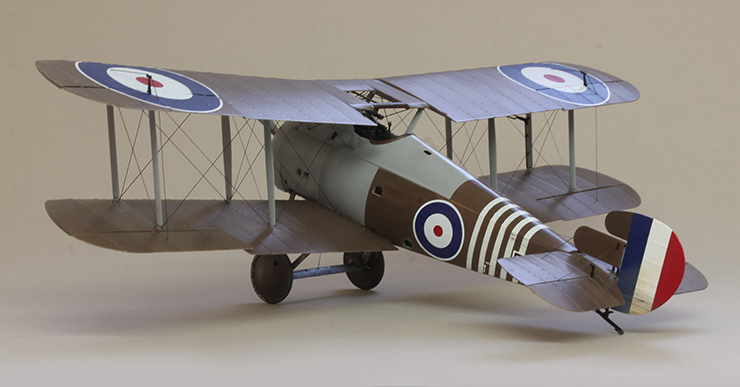
So there you have it. Those are the major points that I want to make about this build. If you haven’t done a Wingnut Wings kit before but have it on your to-do list, start with an easier subject like a Pup or Camel. Be patient- it’s better to be neat than to do all sorts of fancy detail.
Happy modelling!
Garfield
Model, Images and Text Copyright ©
2019 by Garfield Ingram
Page Created 21 March, 2019
Last Updated
21 March, 2019
Back to HyperScale Main Page

|
Home
| What's New | Features | Gallery | Reviews | Reference | Resource Guides | Forum |