Revell 1/25 scale
1968 Mustang GT
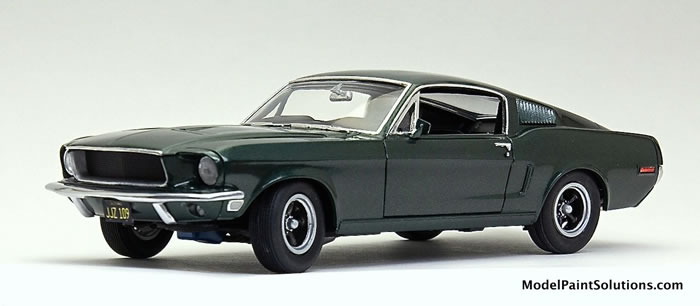
by Brad Huskinson

Hobby Boss' 1/72 P-61A Black Widow is available online from Squadron.com
Having seen “Bullitt” in the theater as a first run film, I have always been a fan of Steve McQueen and his incredible Mustang. I was spurred on to finally build my 1:25 scale version by a recent Bullitt Mustang article in Scale Auto magazine by Marcos Cruz.
Kit #: 85-4215
All parts were removed from sprue with cutters and cleaned up with sandpaper and sanding sticks. Both Tamiya-Thin and Thick CA glue were used depending on whether or not the parts had been painted.
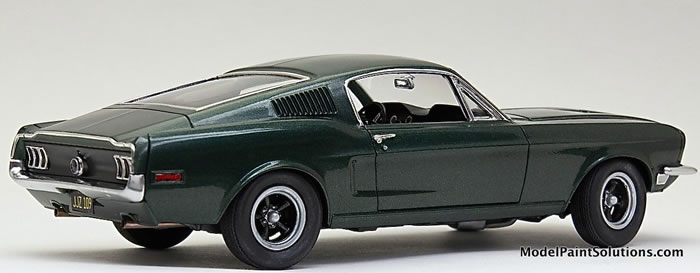
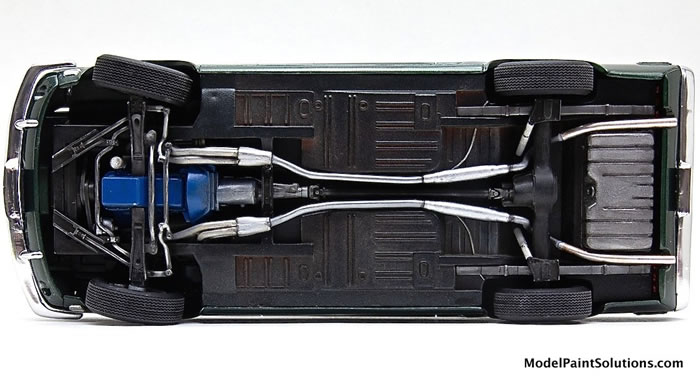
I removed all badging and identification markings from the body and the vertical chrome bars from the rear bumper to match the 1:1 car. The exhaust system was also modified to resemble the Bullitt exhaust (also modified) and the exhaust tips were replaced with aluminum tubing.
The molded-to-the-manifold carburetor was removed and replaced with a highly detailed Holley 750 cfm carb from Fireball Modelworks. I also made my own coil over front shocks.
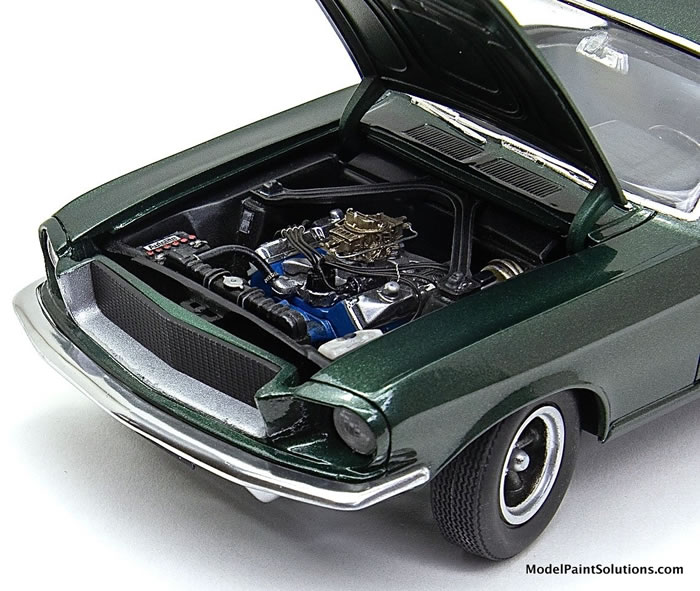
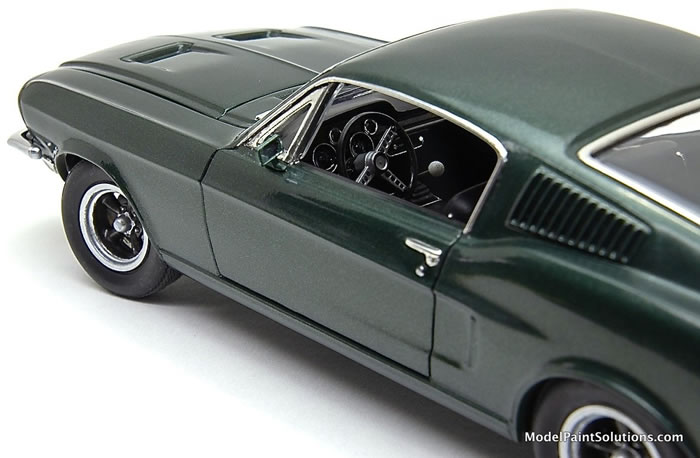
I drilled out the kit distributor and wired the engine. I used photo-etch wire looms to keep things looking organized. I cut off the kit shifter and replaced it with a slightly bent white ball shirt pin to replicate the original car and added photo-etch seat belt hardware with black painted masking tape doubling for the belts. Ken’s Fuzzy Fur was used for carpeted areas.
The front wheels were posed to the left to resemble the iconic picture of the Bullitt Mustang sitting still.
Painting
All parts were sprayed with various primers. The body was sprayed with Splash 2K light grey primer and virtually all of the remaining parts were sprayed with either Mission primer or Mr. Hobby 1500.
Generally I diluted everything about 50/50 or close using John Miller’s dilution charts, which have helped my airbrushing immensely. I am spraying at about 15-18 psi.
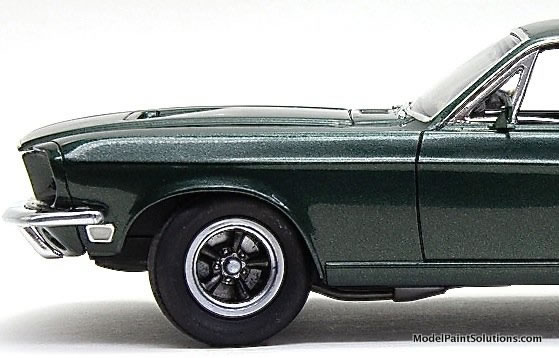
The body was painted with Splash Highland Green lacquer and 3 very light coats of Splash clear. All other parts were painted with a combo of Mission, Tamiya and Testors Metalizer paints. Again it seems that I was close to a 50/50 dilution for all paints. I used a Harder & Steenbeck Infinity exclusively for this build. Virtually every part was airbrushed, as I really don’t like brush painting.
Decals and Final Finish
No aftermarket decals were used. I used the supplied gauge decals for the dashboard and a couple of decals in the engine bay. A drop of clear epoxy glue was put over each gauge decal. It dries to make a perfect glass/plastic gauge cover. Micro Set and Micro Sol were used to apply the decals.
I had to be very careful not to get a deep clear finish as the original Bullitt Mustang had a very non-shiny finish which I’m sure was done to reduce reflections in the filming of the movie.
All in all it turned out quite well. No complaints, no regrets!
For more on this review visit Modelpaintsolutions.com.
Text Copyright © 2019 by Brad Huskinson
Images Copyright © 2019 by John Miller
Page Created 16 May, 2019
Last updated
16 May, 2019
Back to HyperScale Main Page
Back to Reviews Page

|
 Home
| What's New |
Features |
Gallery |
Reviews |
Reference |
Forum |
Search
Home
| What's New |
Features |
Gallery |
Reviews |
Reference |
Forum |
Search