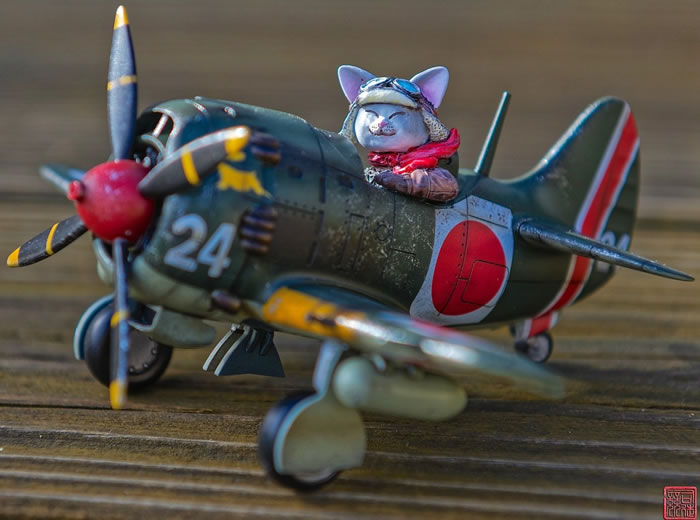
Nakajima Ki-84 Hayate
with Cat Pilot
Tiger Model, no scale
S
u m m a r y : |
Description and Item No.: |
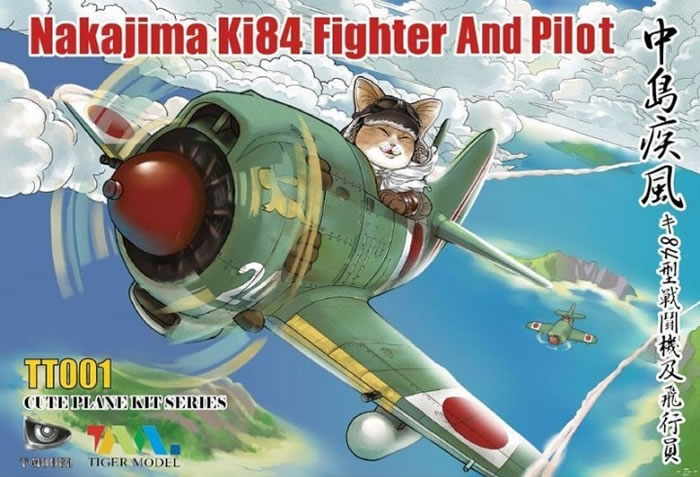
Tiger Model Kit No. TT001 - Nakajima Ki-84 Hayate with Cat Pilot |
Scale: |
No Scale |
Price: |
$28.12 Plus Shipping at Hobby Link Japan |
Review Type: |
Build |
Advantages: |
The kit is simply engineered with good fit of the major components. The cat pilot is nicely molded and full of detail. The kit definitely scores high on both the novelty and cute scales. |
Disadvantages: |
Your dog may not like it! |
Conclusion: |
I enjoyed building and photographing this kit. |
By Ken Szeto

Hobby Boss' 1/72 P-61A Black Widow is available online from Squadron.com
Tiger Model is a Chinese company and it seems that they have launched their own line of “cute” models based on military machines from airplanes to tanks. They are definitely not the same as the egg planes by Hasegawa but they still have their own unique “SD” looks.
Although I am typically a Sci-Fi and Gundam modeler, I’m not afraid to try different things when the subject catches my interest. This model kit was brought to my attention from a co-worker who ordered his from Hobby Link Japan.
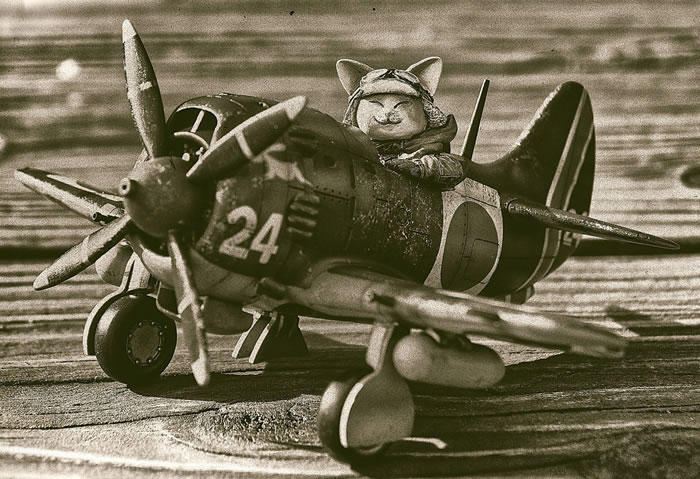
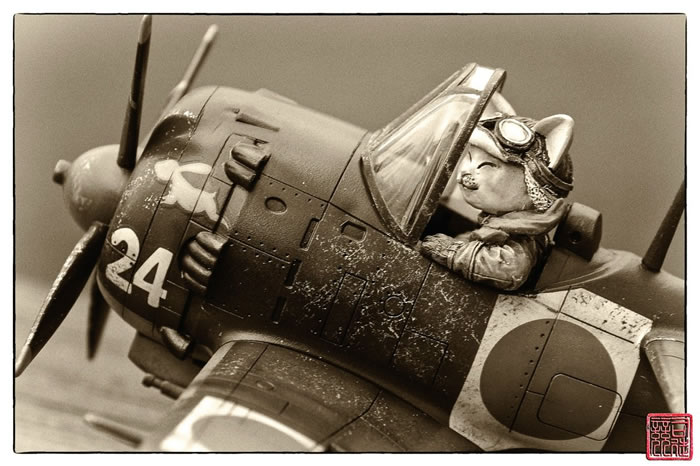
The moment I saw the Cat pilot; I wanted the same kit. The cat pilot exudes so much personality and I love it!
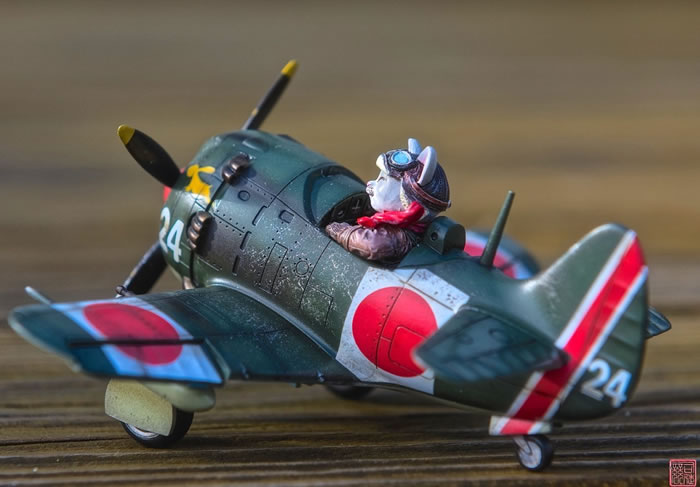
This is my second model kit from Chinese manufacturers, and I found the plastics on the softer side. This may not be a big deal but when you need to fill seams with putty, it is very possible to wear out the plastic before the fillers if one is not careful. The model doesn’t contain a lot of parts but most of the snap fit components like: the tail wings, landing gears and cockpit fit perfectly.

Since the Cat pilot sits inside the cockpit and its right-hand grabs onto the control stick, I had to do some test fitting to see if the cat could be put into the cockpit after the fuselage is put together. Great news! Tiger sculpted the cat in a way that you could put the pilot into the plane once it is finished.
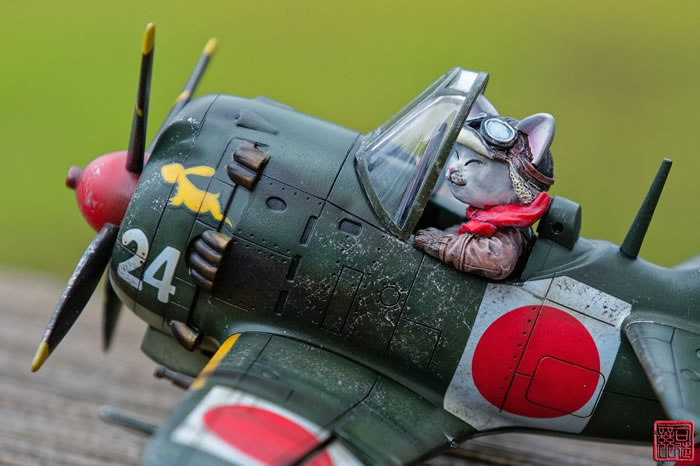
The next decision was if I wanted to use the canopy and how much of it on the plane since the cat has its left elbow sticking out of the airplane. In the end, I decided I will only install the front portion of the canopy and will not use the back half at all. Because of this, I filled the slots on the fuselage where the back-half of the canopy would be inserted.
Like all other plane modelers, I constructed, painted and weathered the cockpit first before I put the fuselage together. The fuselage and the main airfoil were fused together using methylene chloride and I purposely applied more than necessary so some of the melted plastic would squeeze out so they could be sanded away without using any putty.
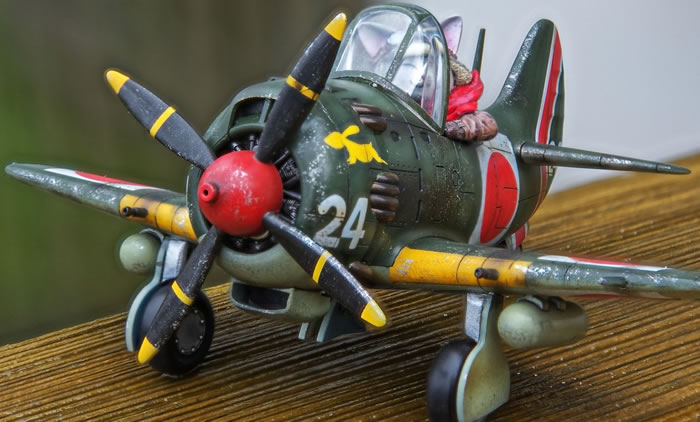
One mistake I made and later discovered is the peg for the prop could be installed with the engine piece during the fuselage construction. I thought the peg would fall out so I purposely left it out and thought I would install it before I glued the main airfoil to the fuselage. Well, there are two supports in the nose area and one of them would have held the peg in place. By the time I discovered this, I couldn’t install the peg anymore. Luckily, the plastic is on the soft side and I was able to take my hobby nipper and cut away the support that was blocking the peg. Since the fuselage was “fused” together, I could get away without the second support in the nose area. Other than that assumption, the rest of the model fit very well.
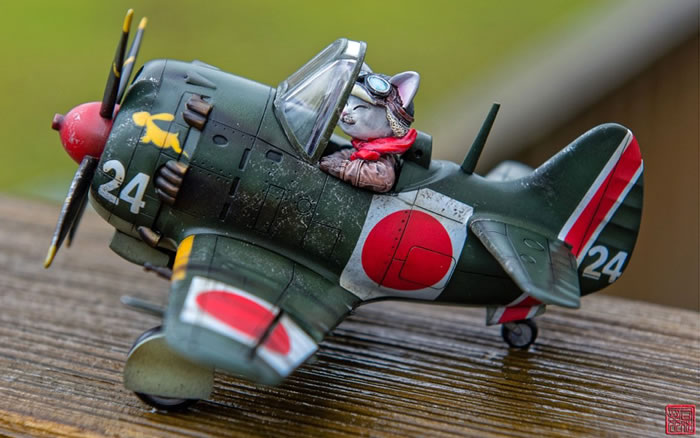
Painting, Markings and Weathering |
The entire model was primed grey followed by Tamiya XF-13 for the green and XF-14 for the grey. Other details were painted with Mr. Color’s gun metal, Gundam red, silver and orange yellow.
For the green colour, I found the XF-13 too dark so I left it as a panel line shade. On the panels themselves, I added some light grey to the XF-13 and then used pre-shading technique to lighten up the overall green.
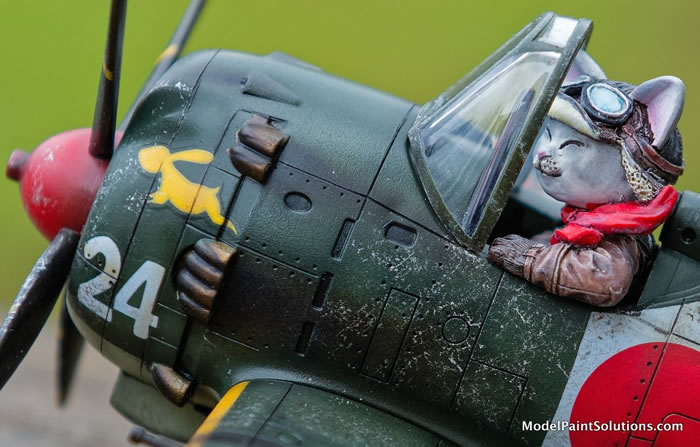
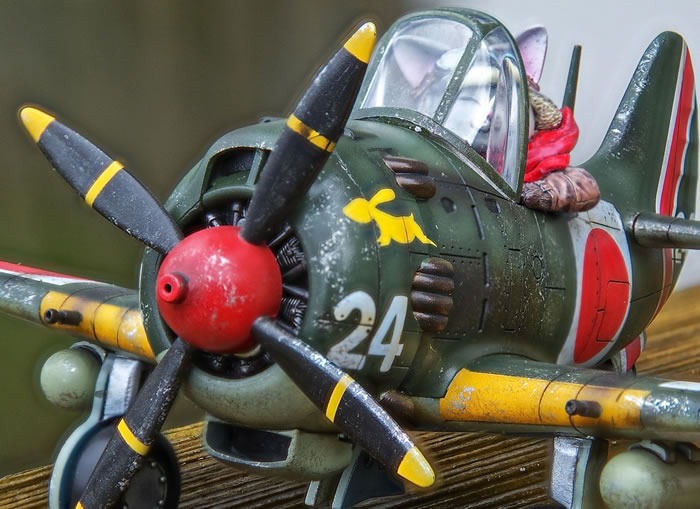
To create the paint chipping effect, I used a tiny piece of sponge and applied enamel-based chrome on it then dry dab the paints onto areas where chipping should occur such as any leading edges of the airplane.
Tamiya’s weathering wash was used to darken all the panel lines. Mr. Color’s clear black and clear brown were sprayed on the leading edges and panel lines to add depth to the model. Modo MK-41 smoke effect was used to create carbon build-up from the exhaust and machine guns.
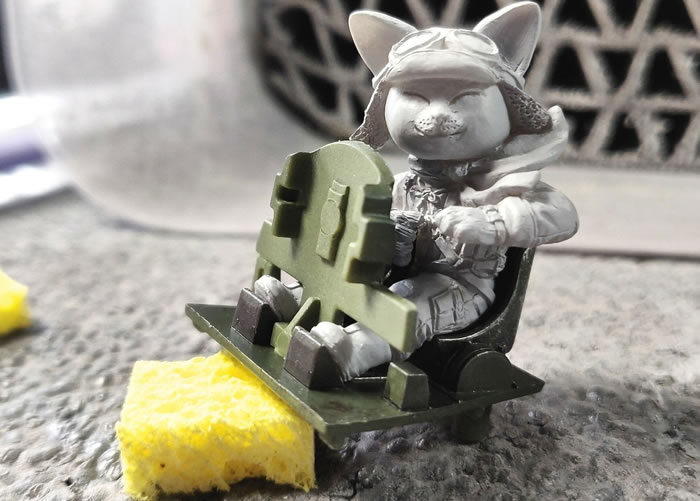
Originally, I wanted a “tiger” looking cat with orange and brown then I realized that WWII Japanese pilots worn a brown uniform, so I dropped that idea. Grey and white cat it is!
I sprayed the entire cat with lacquer-based white first. A light grey was sprayed onto the face followed by pink on the ears. The rest of the uniform was hand painted with Tamiya brown XF-10 neat and mixed with different amounts of black and neutral grey for the uniform, gloves, and boots.
Once all the main colors were painted, I applied a coat of lacquer-based clear gloss over the entire cat. I then washed different parts of the uniform with different shades of washes followed by a light dry-brushing with white oil-paint to enhance the highlights on the uniform.
Finally, a lacquer-based flat clear was applied to seal and protect all the different layers of paint.
Thank you for reading along and I hope you enjoyed the process as much as I enjoyed building and photographing the kit.
Ken Szeto
For more on this review visit Modelpaintsolutions.com.
Text and Images Copyright © 2019 by Model Paint Solutions
Page Created 27 June, 2019
Last updated
28 June, 2019
Back to HyperScale Main Page
Back to Reviews Page

|
 Home
| What's New |
Features |
Gallery |
Reviews |
Reference |
Forum |
Search
Home
| What's New |
Features |
Gallery |
Reviews |
Reference |
Forum |
Search