Ferrari 250 GTO
Fujimi, 1/24 scale
S
u m m a r y : |
Description and Item No.: |
Fujimi Kit No. 12377 - Ferrari 250 GTO |
Contents and Media: |
Plastic parts and decals. |
Scale: |
1/24 |
Review Type: |
Build |
By Evan Smith

Hobby Boss' 1/72 P-61A Black Widow is available online from Squadron.com
The Ferrari 250 GTO is a GT car produced by Ferrari from 1962 to 1964 for homologation into the FIA's Group 3 Grand Touring Car category. It was powered by Ferrari's Tipo 168/62 Colombo V12 engine.
The "250" in its name denotes the displacement in cubic centimeters of each of its cylinders; "GTO" stands for "Gran Turismo Omologata", Italian for "Grand Touring Homologated."
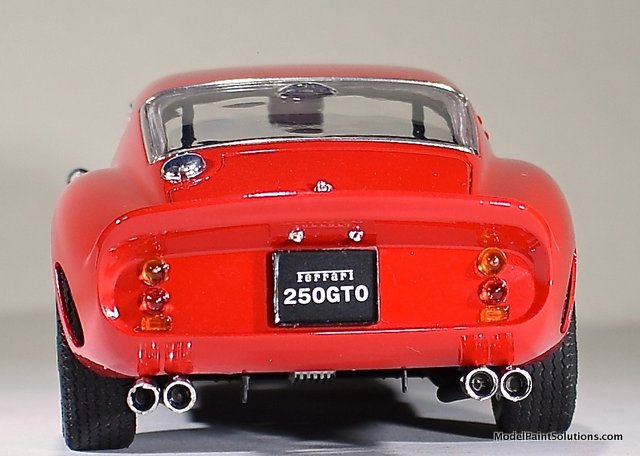
Just 36 250 GTOs were manufactured between 1962 and 1964. This includes 33 cars with 1962-63 bodywork (Series I) and three with 1964 (Series II) bodywork similar to the Ferrari 250 LM. Four of the older 1962-1963 (Series I) cars were updated in 1964 with Series II bodies.
When new, the GTO cost $18,000 in the United States, with buyers personally approved by Enzo Ferrari and his dealer for North America, Luigi Chinetti. In October 2013, Connecticut-based collector Paul Pappalardo sold chassis number 5111GT to an unnamed buyer for a new record of around $52 million. In June 2018 the 1964 250 GTO set an all-time record selling price of $70 million.
In 2004, Sports Car International placed the 250 GTO eighth on a list of Top Sports Cars of the 1960s, and nominated it the top sports car of all time. Similarly, Motor Trend Classic placed the 250 GTO first on a list of the "Greatest Ferraris of All Time while Popular Mechanics named it the "Hottest Car of All Time."
(Edited from Wikipedia)
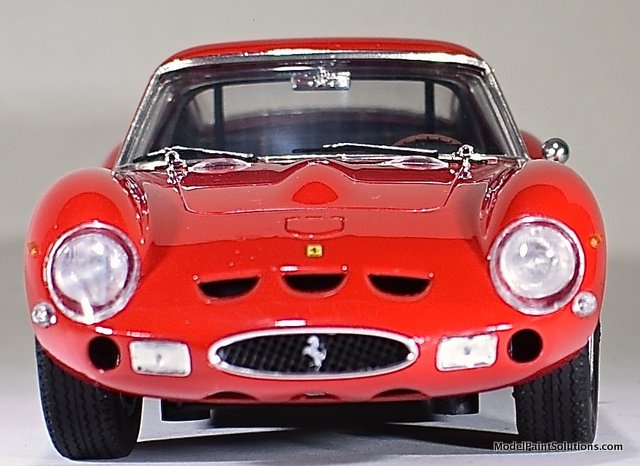
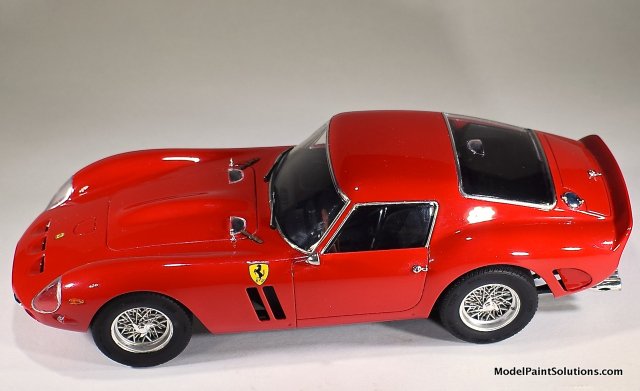
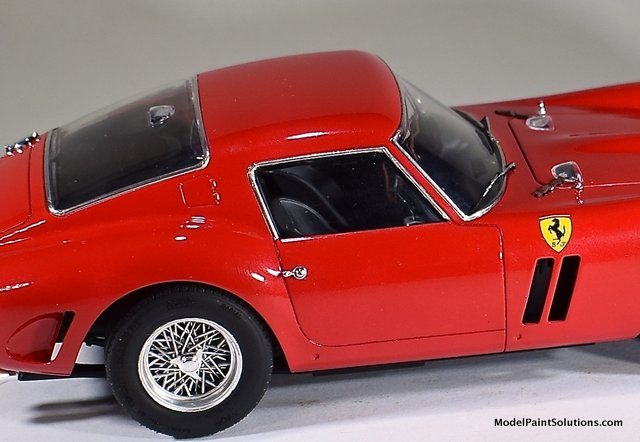
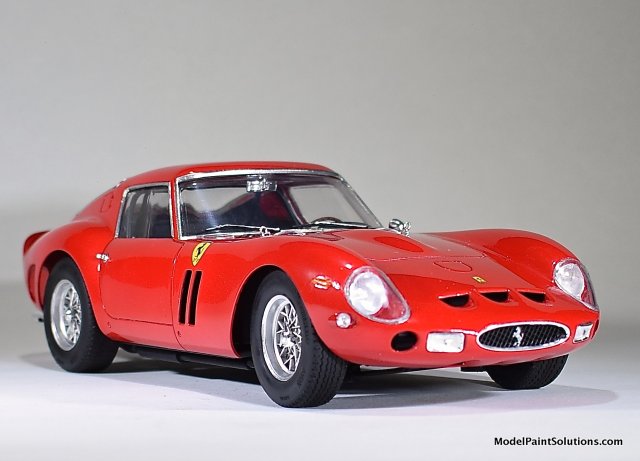
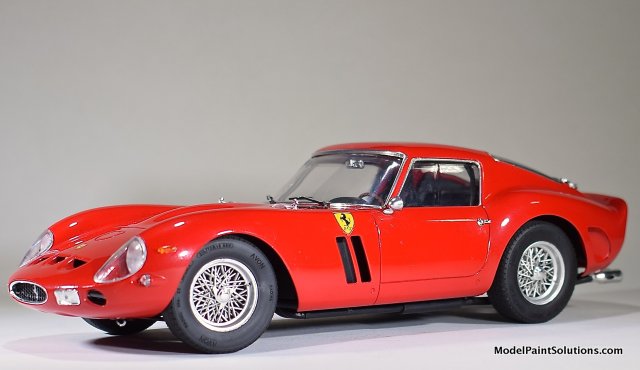
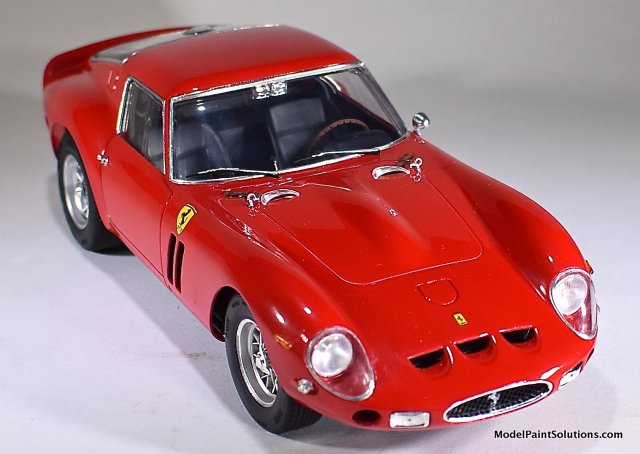
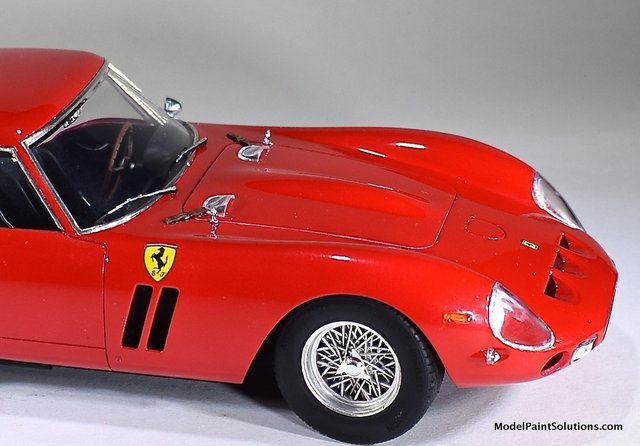
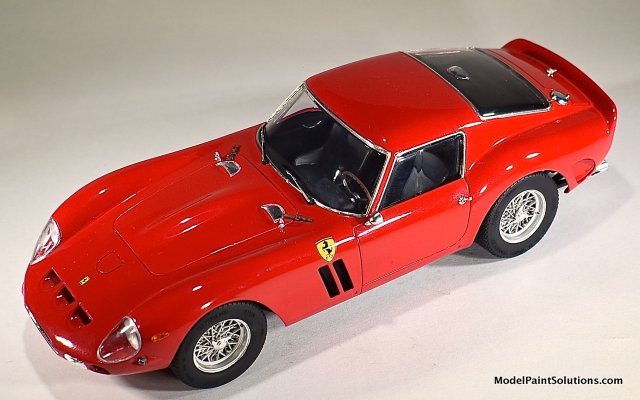
This kit was a bit of a mixed bag. The exterior and passenger compartments are both excellent: fitting together nicely with no struggles or drama. The body itself is an excellent representation of the car in one of its many variants. Worth noting is that being racecars, these bodies were often crashed and rebuilt by Ferrari. One result of this was that no two were exactly alike as engineers improved and modified the design over time.
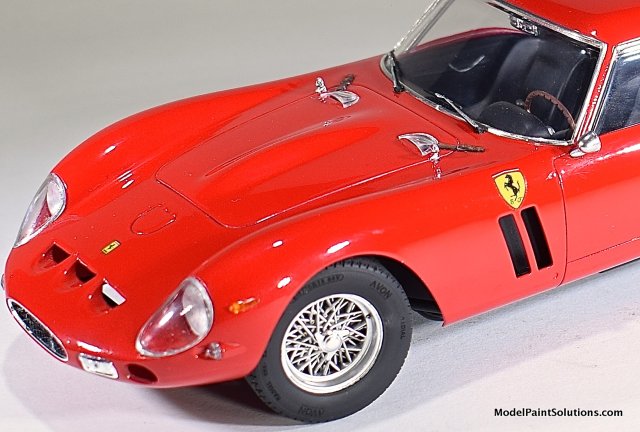
The kit was built out of the box, with no aftermarket parts added. The tricky part of the build was the suspension and running gear. Either through some small gap or piece not fully seating, the hood would not close with the carburetor downdraft tubes installed. I decided to glue the hood shut to preserve the lines of the car.
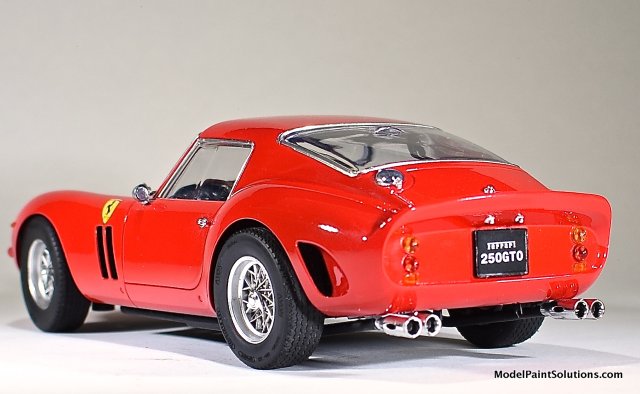
More concerning was the kit’s method of attaching the wheels, which required them to be jammed onto poly caps fitted within the wheel hubs. As the mounting points were actually too small for the poly caps to fit, I quickly abandoned this and cut out the caps and mounting stems in favor of gluing the wheel directly to the brake hub. Not an ideal method, but it worked in the end. The fragile and at points poorly engineered front suspension also caused issues.
The model was sprayed with Stynylrez White acrylic primer, shot at 30-35 psi straight from the bottle through my Harder&Steenbeck Evolution AL+ with a .4 needle/nozzle. This was sanded when dry. Rosso Corsa red by Gravity was used for the base coat. This was sprayed straight from the bottle, at ~15 psi with an Evolution for a total ~4 layers of Red.
I also chose to spray the door mirror in chrome in order to get more of a 60’s American road car vibe, starting out with Gunze GX2 onto bare plastic. This was thinned 50/50 with Mr. Leveling Thinner, with a final mist coat of thinner to help it settle into a smooth surface all at around 15 psi. After that I sprayed it with AK Extreme Metal Chrome straight from the bottle and sealed it with Alclad Aqua Gloss as oils in skin will cause the paint to come off.
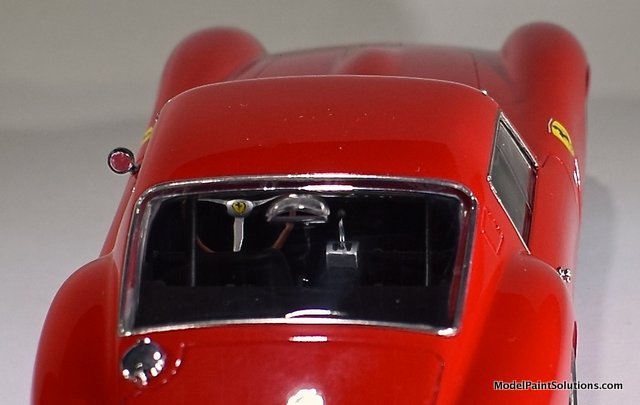
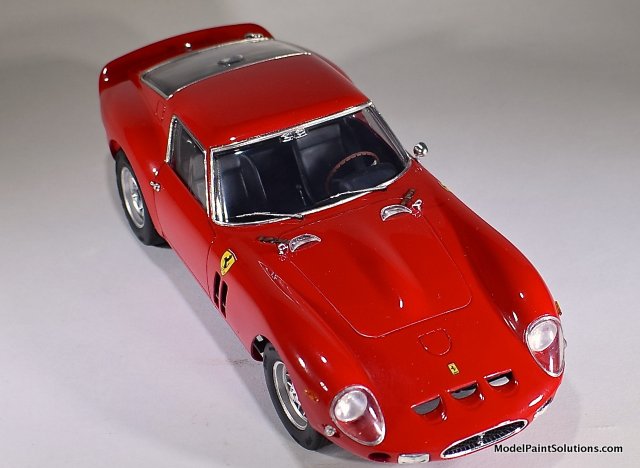
To give a bit of variety to an otherwise spartan interior various panels etc were painted in various shades of MRP Black and Grey. Little of that is visible through the glass. I also sprayed the fire extinguisher in chrome using the same method as the mirror.
Decals and Clear Coat
Decals were applied before clear coating with Micro Sol and Micro Set. I never bother with a clear coat before applying decals as lacquer paints are smooth enough and resilient enough to not need it.
The main body was cleared in Splash 2k, mixed per the manufacturer’s instructions. Gloves, respirator, goggles and a strong spray booth are a requirement if you want to use this material, due to its toxicity which is far beyond that of lacquer paints.
For final finishing, the clear was sanded flat after being allowed to harden for a week. After all of the flaws that I could see were taken out of the paint I polished it back up using a Dremel and polishing compounds, a process I’ll cover in a future Paint Booth article.
Then I found more flaws in the paint and did it all again...
Final Touches
The bits of chrome and details such as the lights were applied with Gator Grip PVA glue, which is great water based white glue that won’t etch or mar clear parts like cyano-acrylate tends to. I also polished out a seam line in the rear window that created the open vent, which would have looked out of place.
This was a relaxing build until the final stages where the quirks of the kit made themselves evident. I would recommend that if you tackle it, decide early on if you want to have the engine visible or not. The hinge mechanism for the hood is far too fragile to be relied on in my opinion, so it's best omitted.
I’m glad I took the time to go back over the finish after the first pass, as it really helped bump the end result up a notch. The kit has some small issues and is not up to the standard of Tamiya’s car kits, but is still perfectly buildable and nothing like the nightmares from companies such as Heller and Lindberg that modelers have faced in the past. Heller’s Jaguar E-Type coupe still makes me shudder in fear at the thought of building another…
For more on this review visit Modelpaintsolutions.com.
Text Copyright © 2019 by Evan Smith
Images Copyright © 2019 by John Miller
Page Created 14 February, 2019
Last updated
14 February, 2019
Back to HyperScale Main Page
Back to Reviews Page

|
 Home
| What's New |
Features |
Gallery |
Reviews |
Reference |
Forum |
Search
Home
| What's New |
Features |
Gallery |
Reviews |
Reference |
Forum |
Search