Hasegawa's 1/48 scale
Curtiss F-40E Warhawk
by Jon Bryon
|
Curtiss F-40E Warhawk
|

Hobby Boss's 1/48 F4U-7 Corsair is available online from Squadron.com
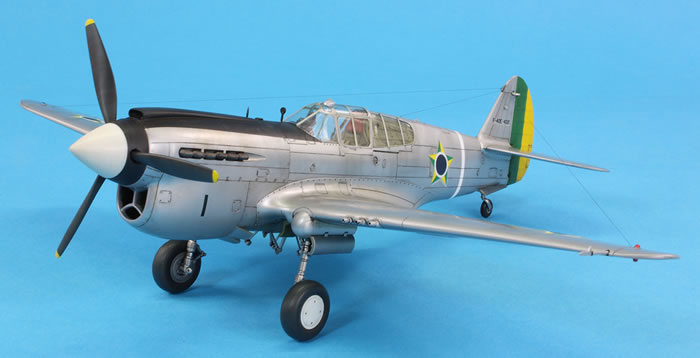
Hasegawa 1/48 Curtiss F-40E Warhawk
with FCM decals
Brazilian Air Force, 1o/14o G.Av., Brazil 1953
I am a fairly measured person, and when it comes to modelling products, I’m pretty sanguine about quality. Of course I would rather build a wonderfully moulded kit with brilliant engineering, but I’ve lots of kits that are neither well moulded nor well engineered that I fully intend to build and enjoy. Consequently, it is rare for me to rant against a modelling product or company, but today I feel compelled to: FCM Decals: you should be ashamed of yourselves.
Just over ten years ago I was excited to find that Italeri released the old AMT/Ertl P-40M with Brazilian post-war markings. Excitement turned to disappointment when the markings turned out to be both inaccurate and significantly out of register.
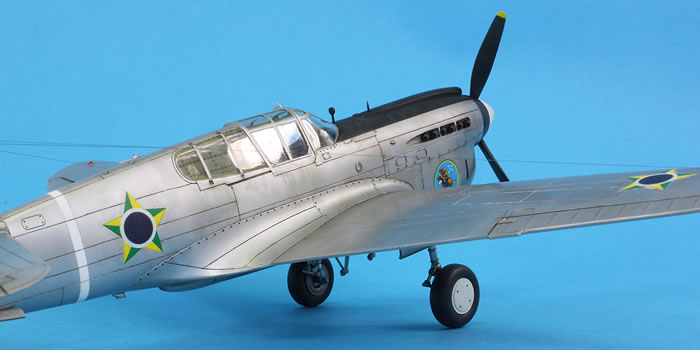
FCM Decals ostensibly came to the rescue, with their aftermarket sheets, and to make the postage to China worth it, two different sets were purchased containing markings for the P-40E/K/M/N in post-war Brazilian markings.
Sadly, the hope was tainted by them being the worst decals I’ve ever used or seen: thick, blobby carrier film that rendered them barely usable, and in some cases completely unusable. I have been in contact with FCM recently about this and they assure me their current sets are printed by Microscale now, not by the local printer they used to make the sets I have, which is wonderful if you’re buying FCM decals today, and sucks if you bought them ten years ago.
The set I used for this model has been reprinted, but missing this option for the silver F-40E (or any other post-war P-40E).
Nevertheless, with no other choice, we push on undaunted: here they are applied to Hasegawa’s wonderful 1/48 P-40E.
I really liked this kit. Reviews have generally been very favourable but criticised Hasegawa for the poor fit of all the inserts required to tool lots of P-40 variants economically. The rear fuselage, spine, wing leading edge and areas ahead of the exhausts are all separate parts that need constructing into fuselage halves. From my perspective, I have to say I thought the fit was wonderful. The only real problem was that the spine inserts are too shallow. As usual in these situations, I constructed two complete fuselage halves before joining them together. This did leave a big gap on the fuselage centreline between the spine inserts which I filled with thin plastic sheet and superglue.
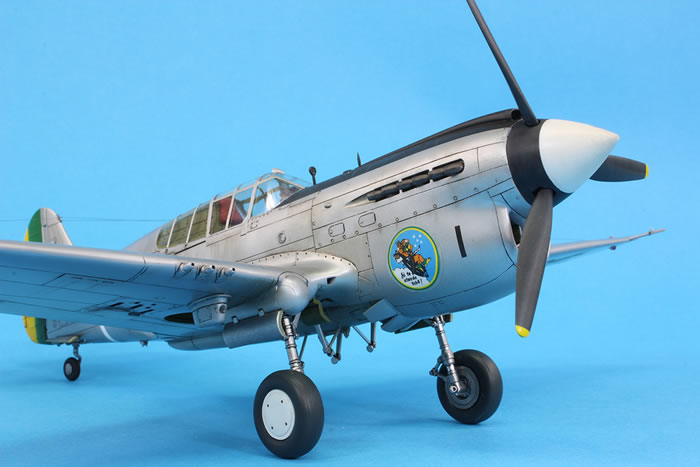
For me, I built this kit very quickly: in less than two weeks from opening the box it was ready for painting. The cockpit is nicely detailed and did not require embellishment beyond some PE seatbelts given I was going to close the canopy. The fit of the transparencies was exceptional, although the rear quarterlight panels are a bit thick and I probably should have sanded them more flush with the fuselage, although I feared sanding through the plastic. I think I’ve made a mistake and painted the area here interior green, when it should probably have been silver. This only occurred to me once the transparencies were on. Oh well.
Photographs of Brazilian F-40Es are not exactly thick on the ground, but I found a few poor quality black and white photos in the book ‘Curtiss P-40 in Brazil’. I was mainly concerned about getting the aerial fit correct. I could not really confirm it, but the vast majority of photos of the Brazilian P-40E seemed to show it without an antenna mast.
The main finish is Mr Color 8 mottled with some Mr Color 104 and Alclad White Aluminium sprayed through Artool masks. I used Gunze GX100 for a gloss coat and then applied various washes and dots of oil paints to try and get some variation in the finish.
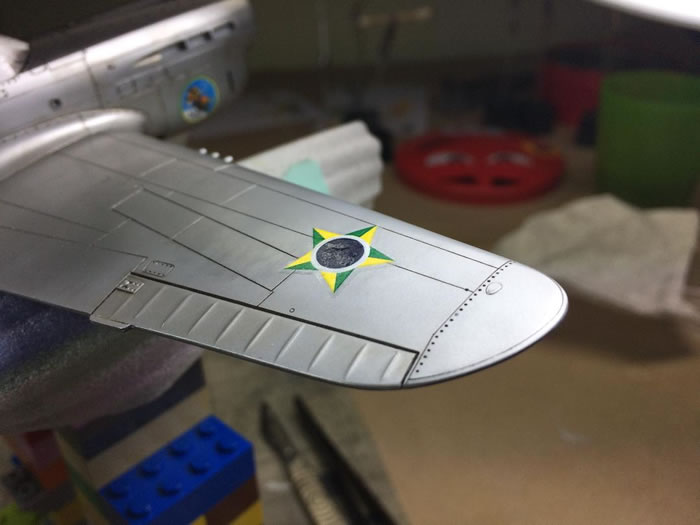
The decals, as you might have picked up by now, were appalling. They are thick, rigid and have no adhesive qualities whatsoever. I have thrown Daco Strong Setting solution at them, Mr Mark Setter and Mr Mark Softer: nada. Fortunately most of the surfaces where the decals went were flat, but that circular emblem would not even stick to the nose cowling.
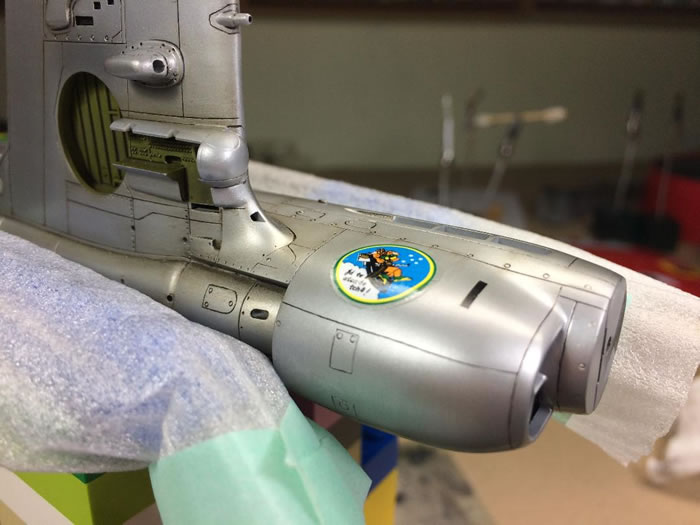
I wasn’t setting my sights high; I was just wanting the decals to stick and not flake off…and forget about getting them to settle into any surface detail! I airbrushed some GX113 matt varnish over the decals at about 15PSI and two of the blue circles flew off. They were reattached with Johnson’s Klear.
The ‘1’ decals on the nose are just strips of black decal from a spare decal sheet. The tail colours were painted on using Mr Color 4 and 6 and the fuselage band is Mr Color 1. The exhausts were drilled out and I did not add any exhaust staining as I couldn’t see any on the vast majority of the photos. The aerial wires are Uschi ‘fine’ rigging thread, which I struggled to attach as my eyes are ageing. The gun sight ring on the nose is from the kit and very clunky. I don’t model this sort of aircraft very often and so don’t have a spare etched example I could have replaced it with. I’ve recently discovered Molotow chrome marker pens and I find them excellent for the oleos, the mirror and the silver reflective surface behind light covers. The latter I attach with Klear, which doesn’t damage the chrome effect.
I feel ambivalent about this model. On the one hand I am pretty pleased with the finish and overall effect and I really enjoyed building Hasegawa’s kit. On the other, the decals are a huge visual distraction and sucked a lot of the pleasure out of finishing the model. I do still have post-war options for an F-40K and an F-40N, which I would love to build as I find the Brazilian silver scheme very attractive, but in reality there’s no way I want to use these decals again.
For more modelling articles like this, please visit my website www.jonbryon.com
Text and Images Copyright ©
2019 by Jon Bryon
Page Created 7 February, 2019
Last Updated
7 February, 2019
Back to
HyperScale Main Page

|
Home
| What's New |
Features |
Gallery |
Reviews |
Reference |
Forum |
Search