Eduard's 1/48 scale
Messerschmitt Bf 109 G-4
by Floyd S. Werner Jr.

Eduard's 1/48 scale Messerschmitt Bf 109 F-2 is available online from Squadron for only $39.99!
Summary
Review Name: Bf 109 G-4
Reviewer: Floyd S. Werner, Jr.
IPMS No.: 26266
Review Product Type: Aircraft
Review Type: Kit
Scale: 1/48
Manufacturer: Eduard
Manufacturer website: www.eduard.com
Mfr Stock No.: 82117
MSRP: $49.95
Provided by: Eduard
Vendor Web Site: www.eduard.com
Direct Link to Item
Background
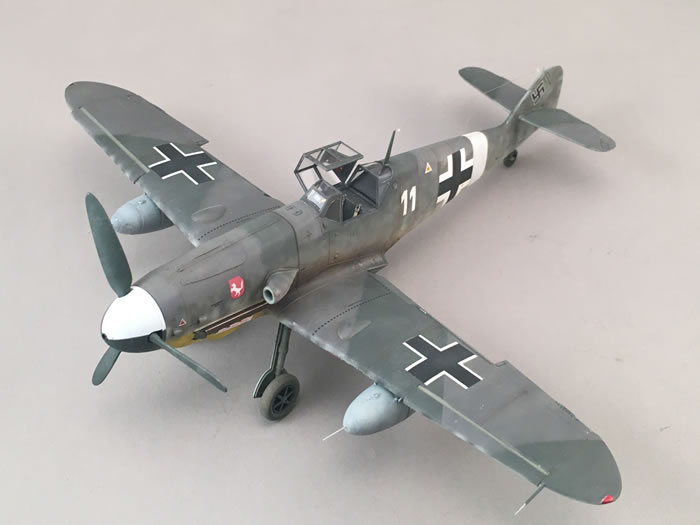
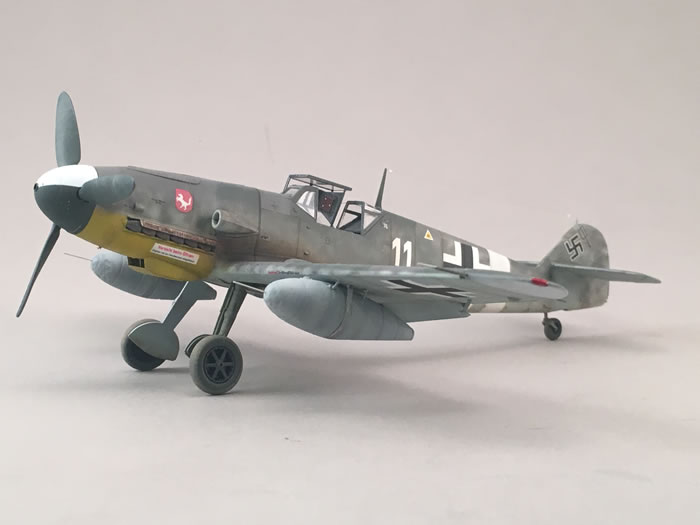
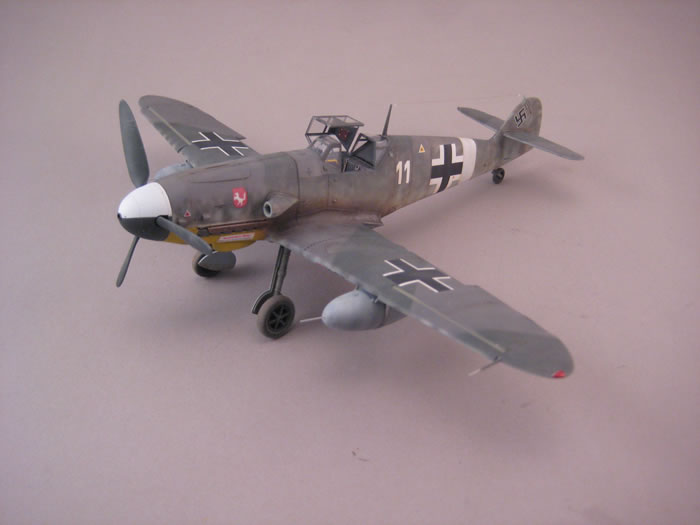
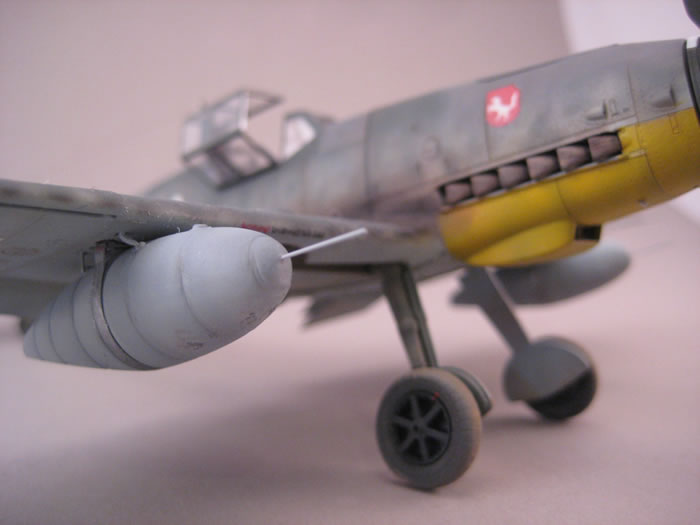
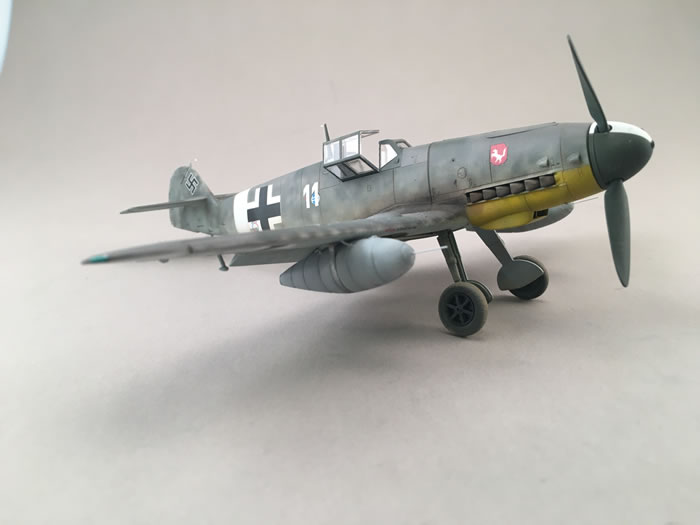
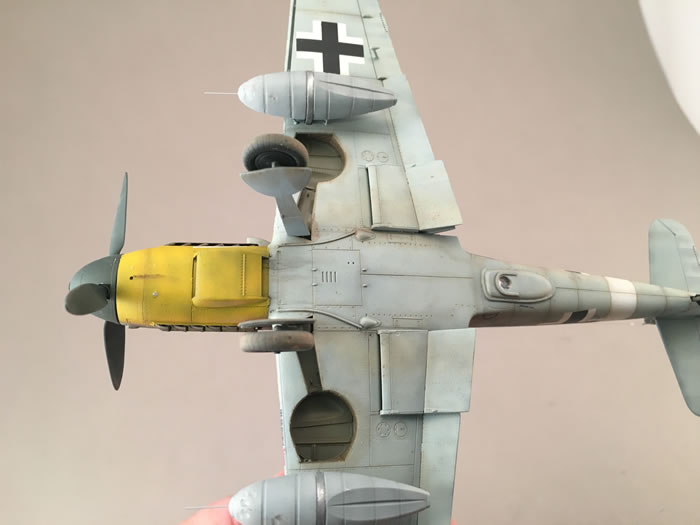
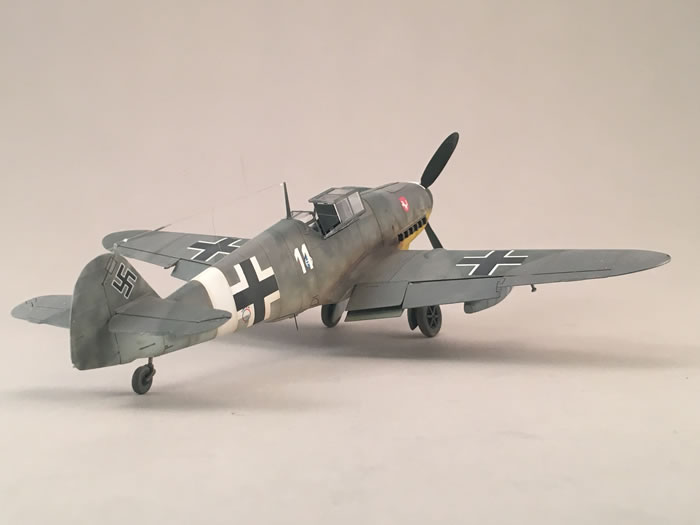
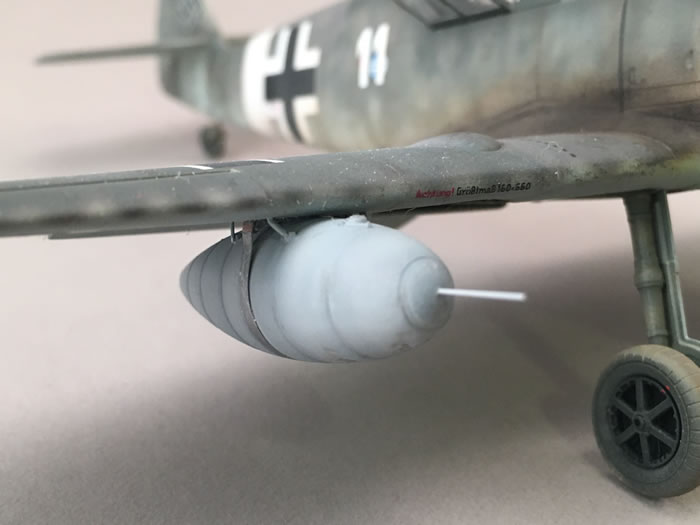
The Bf-109G-4 was very similar to the G-2. Bigger tires along with the corresponding wing bulges and a bigger tail wheel were the only external differences. The service length of the G-4 was short as it was quickly replaced by the G-6 for its increased armament. The G-4 was quickly used by the photo recon units of the Luftwaffe and is often associated with them. There were a couple of variants of the G-4 in the photo recon role. I wanted to have a Bf-109G-4/R3 which could have had the photo recon window under the fuselage, oil deflectors aft of the engine and two 300 liter drop tanks mounted to the wings.
The boxtop has some of the best artwork I’ve seen on a model box. This is just an inkling of the goodness inside the box. Inside the sturdy cardboard box are four sprues of light grey plastic. My example had no flash. Two of the sprues are the common sprues for the Eduard Bf-109F/G series of kits. The other two are unique. The one sprue has the wings which are the same as those on the G-5/6 with the proper bulges on the upper wings. The other sprue is the fuselage sprue from the G-2.
The clear sprue contains all the canopy options for the G-4 and even later versions so there will be plenty of extras for the spare parts box. As a Profipack this kit also has masks and a pre-painted photo etch fret.
The instructions are printed perfectly on high quality paper with marking options for five aircraft. The instructions are easy to understand and the full color profiles are inspiring. The decals are contained on two sheets and printed by Eduard. They are in perfect register and very colorful. The first sheet contains the individual aircraft markings. The second sheet is the stencils for one aircraft.
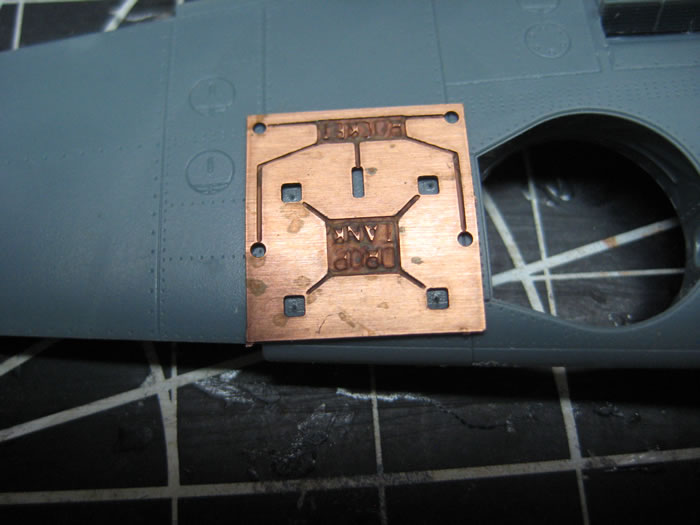
I liked the selection of marking options, but I’ve always wanted to build a photo recon variant for my collection. The Eduard kit is a perfect starting point. I had an old Airwaves Photo Recon set (SC48091) and I just needed the Verlinden Me-109 Underwing Stores set (1321). It had the proper parts for the wing mounted drop tanks so with that in hand it was off to the workbench.
The Profipack has everything that you need to make a great model. I decided to try to put the Verlinden set to the kit first. The Verlinden set has a template which is easy enough to use. I obtained the original handbook from a friend, Heinz Bjornson, on Facebook which contained everything I needed.
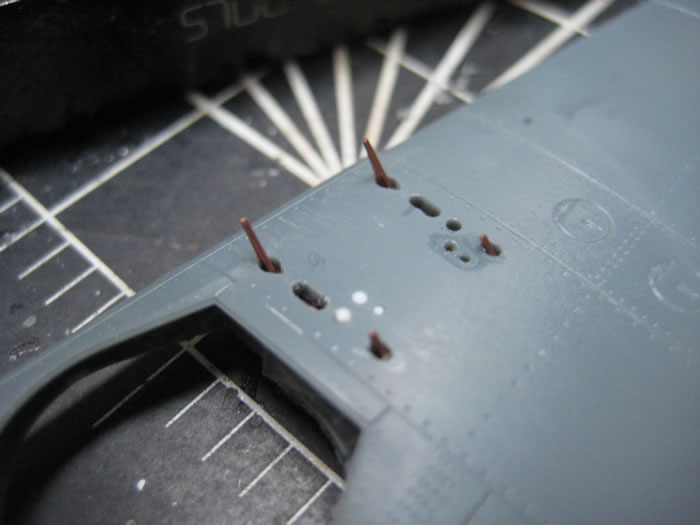
I marked out the proper openings with the template and opened up the additional holes that the handbook showed.

Once that was done it was just a matter of bending the PE from the Verlinden set and making sure it fit. With that done I moved onto the building sequence.
As with most models this starts in the cockpit. The cockpit is impressive with the combination of plastic and pre-painted photo etch. I assembled the plastic parts first. Then I pre-shaded with some Tamiya Flat Black. This was oversprayed with Tamiya Dark Grey. A wash of black artist oils thinned with artist oils added the shadows to the recesses. A dry brush of RLM-02 and silver were added to the highlights. A sponge was used with a silver scrap booking pad. This added random wear. Then a silver and #2 pencil added some specific wear patterns. Details were painted with acrylic paints. The pre-painted PE was added and then a coat of Alclad Flat were added over the entire assembly. Microscale Krystal Klear were added to the instruments to add a ‘glass’ look.
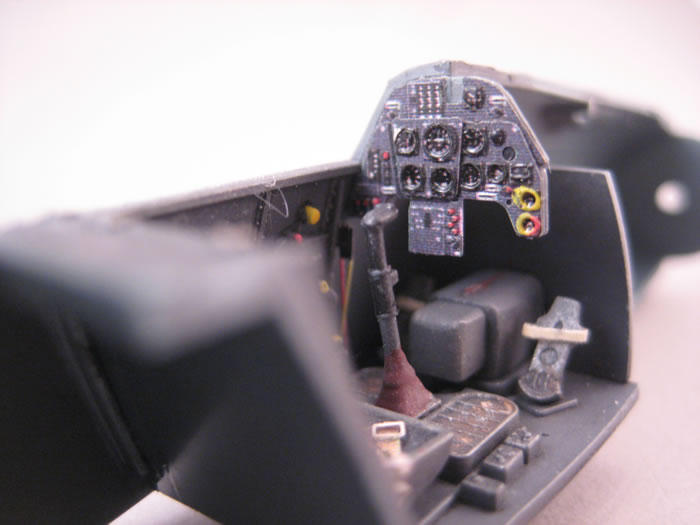
With that the fuselage was ready to close up. The fit of the fuselage halves was perfect. The only issues I had were where I did a terrible job of removing the sprue attachment points. Those were the only areas I needed a bit of filler. I used superglue and accelerator to do that job. Where I sanded too much I added the rivet detail back in with my Rosie the Riveter. I did open up a hole in the belly to fit behind the camera part.
Since I modified my wings already assembling them was easy. The fit was like the fuselage, perfect. Building up the wheel wells was a non-event provided you follow the instructions.
Offering up the wings to the fuselage again proved nothing dramatic. I did need some filler on the aft join where Eduard for some strange reason did not put the joint on a panel line. Again nothing drastic and some light sanding and it was done. I added two styrene deflector strips from the engine drains. This was another modification for the photo recon variant. The horizontal tails were added with no problems whatsoever.
During my research the Bf-109G-4 Photo Recon often had the fuselage guns removed and the gun troughs faired over. So I did just that with a little bit of Apoxy Sculpt and then cut out some .010 styrene to fit over the gun troughs.
The flight controls were added with no trouble as was the landing gear. The Eduard masks were used to mask the canopy and they were attached. After masking off the landing gear strut and the canopy area the model was wiped down with Testor’s Plastic Prep to remove all the oils and stuff from the model.
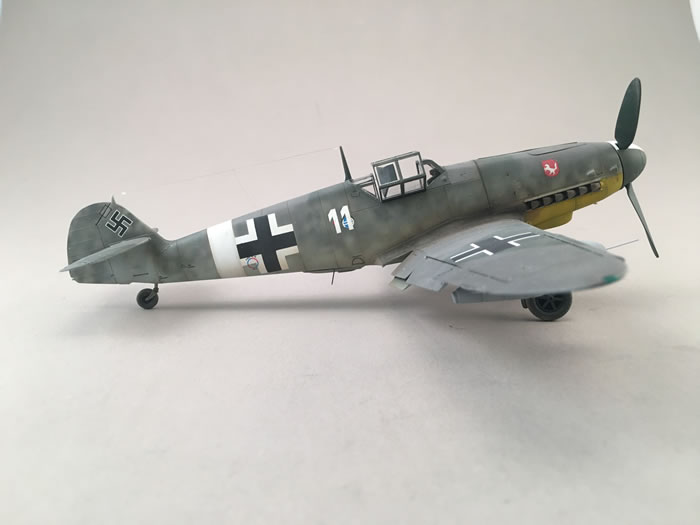
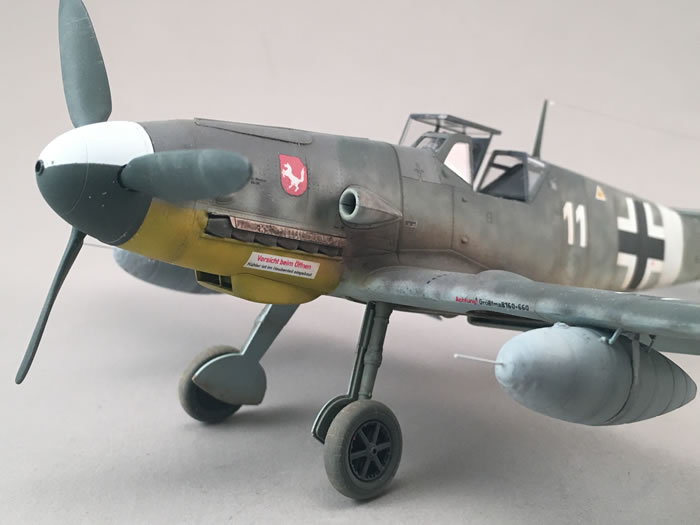
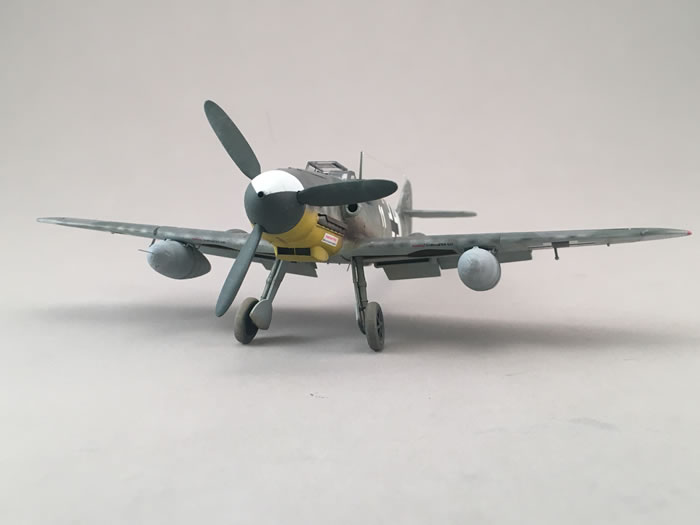
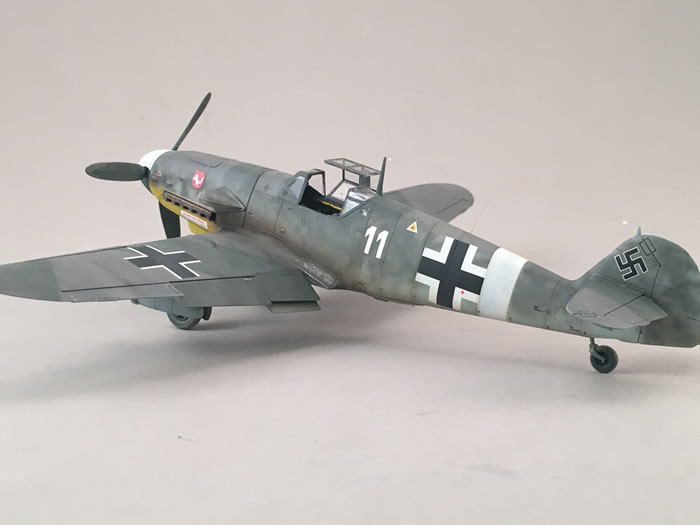
A coat of Alclad Grey Primer was sprayed over the model and a few areas were touched up. I pre-shaded the model with Tamiya NATO Black. The wingtips and the fuselage stripe were painted with Alclad White Primer. If you haven’t tried this stuff it has great coverage and dries quickly. It is my preferred white. These were masked off and the yellow lower cowling were painted with Mr. Paint RLM 04 and when dried were masked off.
Camouflage Colours
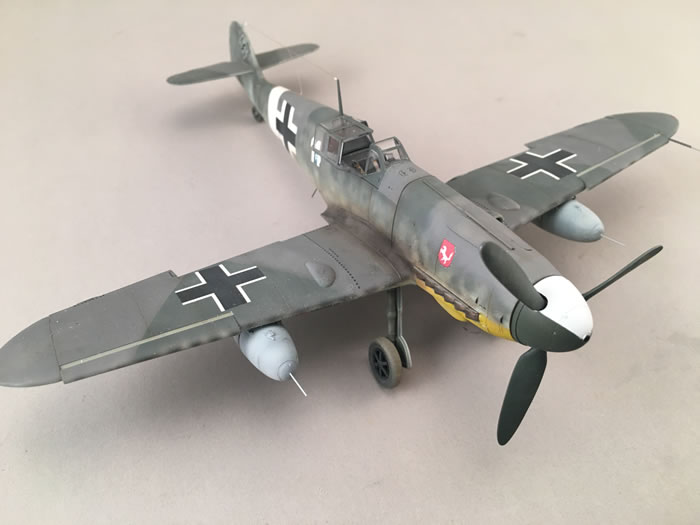
Mr. Paint is my favorite paint at the moment so I elected to use it for this aircraft. Mr. Paint RLM 76 was added to the underside and fuselage sides. RLM 75 was sprayed over the upper surfaces and mottled on the side. I used some Eduard mask for Mtt. Built aircraft. The simplified camouflage on the wings is easy enough to paint but I do like a slightly harder edge. Once the RLM 74 was sprayed on I looked it over and decided I didn’t like the mottling. I resprayed some RLM 76 and RLM 02 over the mottling until I was happy with the results. Then it was all sealed with AV Gloss Resin. My first time using it. I was not impressed and won’t use it again. I would have been better off just leaving the Mr. Paint alone but I wanted to protect the finish for the weathering stages.
After a little bit of drying and working with the finish I was happy enough to add the decals. Since there was very little reference for my subject aircraft I used a complete set of stencils from Eduard as well as most of the markings. The unit markings were drawn by Mason Doupnik and printed by Sean Hampton. The small ‘White 11’ was sourced from EagleCals. Once everything was dried I sealed everything with Future. Then a coat of Alclad Flat was added to the model.
Weathering
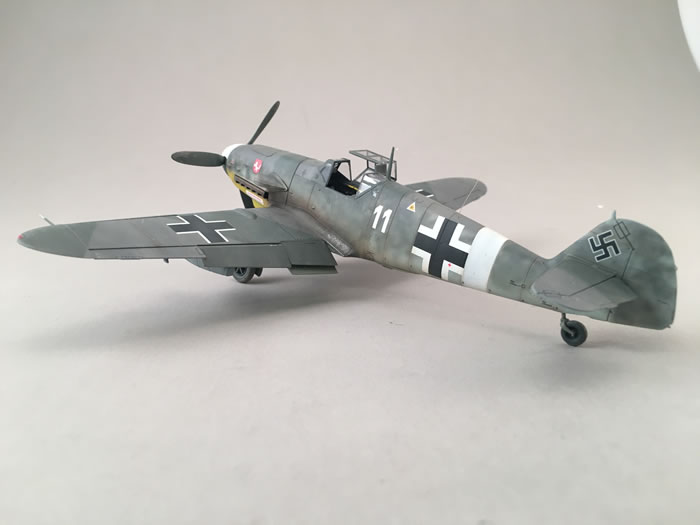
Weathering started with a wash of burnt umber artist oils on the panel lines. I also added some dirty areas where the mechanics would have worked. The paint was then faded with Buff and Titanium White artist oils in a dot pattern. This was worked in with a flat brush that was damp with Turprenoid. The oils were blended in and then stroked from front to back on the wings and top to bottom on the fuselage.
Chipping was added to the wing roots and leading edge of the wings. I use a silver pad with a sponge to get a random pattern of wear. Then I used Model Master Magnesium in the same manner. This was followed up with a #2 and silver pencil to provide specific chipping.
I used Tamiya Buff to add some dirt to the wheels. I also established a pattern for the exhaust staining. Then I thinned the Buff some more and sprayed the wings from front to back and fuselage from top to bottom. A final overall spray was added to the entire upper surface to ‘fade’ the most prominent areas. This acts as a way to ‘attach’ the model to the ground.
The exhausts were built up with a thinned Tamiya Dark Earth. This added volume to the exhaust. Mig Pigments Black Smoke was added to the center of the exhaust. A little bit goes a long way.
Some black, burnt sienna, and burnt umber artist oils were added to the belly and dragged in the direction of airflow with a little turpenoid to represent the oil leaks.
Mig Mud and Splash was added to the bottom of the model. I loaded up a small flat brush and flicked it into the area I wanted it to go. It adds a final dimension to the model.
Finishing Touches
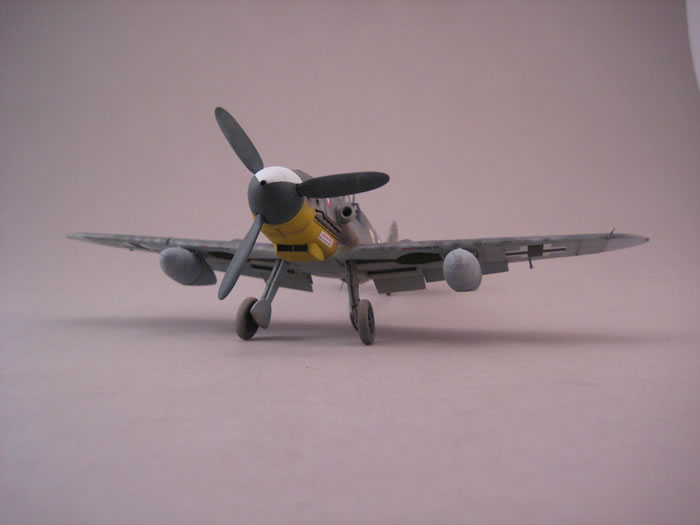
Now that the weathering was done I needed to add my wing drop tanks. After an initial test fitting I determined that the drop tanks sat too far away from the wing. The Verlinden mount was too tall to reach the mounts. I couldn’t figure a way to make it work without removing the mount or depressing the mount. This would work better and look realistic. I cut holes on the wings with my Dremel. This was not for the faint of heart but the results were actually pretty awesome. The tanks were added with superglue. I did have to cut off the rear support struts as they were still too small so I cut them off and replaced them with .004 wire. Now I had a very unique looking Bf-109G-4/R3.
The little parts like the exhaust shrouds, canopy and antennas were added to bring this project to a conclusion.
The Eduard Bf-109F/G series is a great value for the money. Loads of fun to build, exceptional fit, great detail and great subjects. It isn’t perfect. The only thing that is not as good as the rest is the toothy exhausts and the strange breakdown of the rear wing to fuselage join. The photo etch and masks are an added value in the Profipack kits. There really is nothing more you’d need. Sure there are some things you can replace with resin but even out of the box, Eduard’s Messerschmitts are hard to beat. I’ll be building more of them..a lot more.
Thanks to Eduard and IPMS/USA for the review example. You can obtain yours by contacting Eduard directly at www.eduard.com or at your local hobby shop or online retailer.
Model, Images and Text
Copyright © 2018 by Floyd S. Werner Jr.
Page Created 19 January, 2018
Last Updated
20 January, 2018
Back to HyperScale Main Page
|
 Home
| What's New | Features | Gallery | Reviews | Reference | Resource Guides | Forum |
Home
| What's New | Features | Gallery | Reviews | Reference | Resource Guides | Forum |