Kitty Hawk's 1/48 scale
Bell AH-1Z Viper
by Jon Bryon
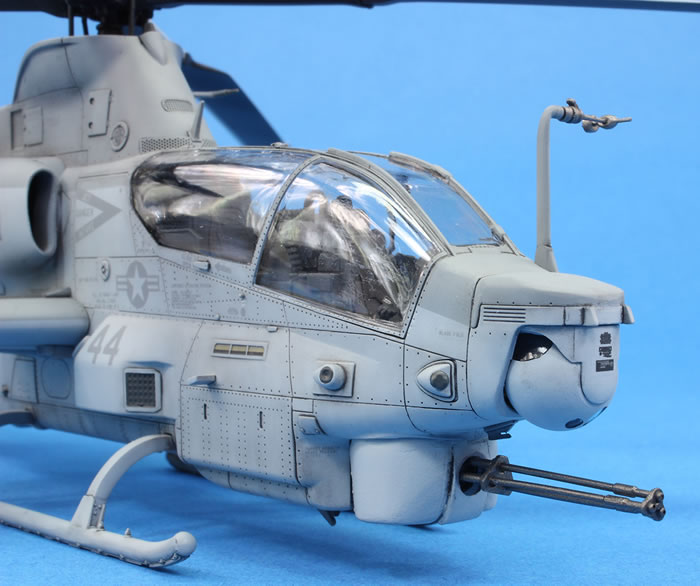
|
Bell AH-1Z Viper
|

Hobby Boss's 1/48 F4U-7 Corsair is available online from Squadron.com
Summary
Kitty Hawk 1/48 Bell AH-1Z Viper
with Werner’s Wings resin gun turret
US Marines, HMLA-367 ‘Scarface’, USA 2011
Background
After the effort of turning Monogram’s 1/48 AH-1S into an acceptable model, I intended to reward myself with a modern tooling of the Cobra: Kitty Hawk’s 1/48 AH-1Z Viper. I wanted a good fitting kit, with nice detail from the box and a straightforward build experience. It did not disappoint.
There are some pitfalls and shortcomings, which I will focus on here, such is the nature of writing about building models, but don’t let that detract from my main message: this kit was a delight to build.
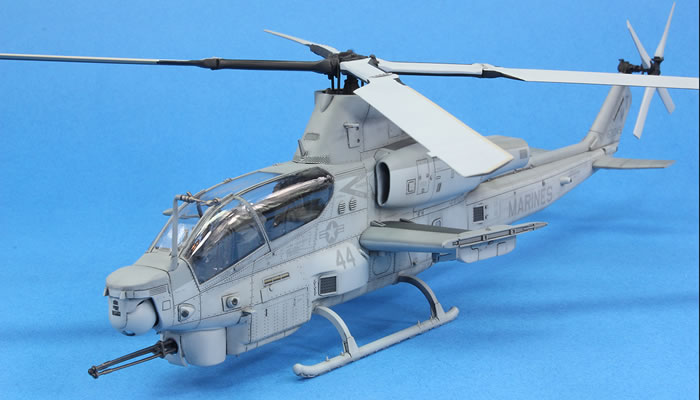
Kitty Hawk has made use of slide moulding on many of the larger components. I generally approve of this as it preserves the surface detail on all surfaces, and you don’t end up with the situation that plagues many otherwise excellent kits, where the surface detail washes out in places like where the fuselage halves join. The downside is that there are some imperfections where the slide moulds meet. These take a bit of effort to remove, but I would far rather deal with these than disappearing panel lines and rivets.
Some of the locating pegs on some parts are too long and need trimming down. But in general, the fit is exceptional. Particularly pleasing is the fit of the engine bay doors and the doors around the nose, and the tail boom fit to the front fuselage is also especially noteworthy. There are plenty of photo-etched grills to fit around the airframe. Those that fit to the AH-1Z specific areas are possibly the best fitting PE parts I’ve ever used. Those that fit into parts common to the AH-1Z and UH-1Y are less so, but still pretty good.
Flash does affect some parts, but is better than, for example, Revell’s 1/48 Tornado. The plastic is exceptionally soft, which makes it nice to work, but also susceptible to shrinking when liquid glue, such as Tamiya Extra Thin, is used. For the main seams I used super glue, and got perfect seams. For smaller joins, like the pods on the end of the wings and the nose turret housing, I used TET, and then ghost seams appeared sometime later. These had to be fixed by a layer of super glue sanded flat once it had dried.

One area of the kit that falls a little short in design terms is the engine intakes. The locating pegs are highly visible down the openings and the interior of the intakes are very poorly moulded. As I was not opening the engine bay doors, I did not install any engine components. The rear engine bay bulkheads can also be omitted as the doors should not fit to these.
The main rotor blades required a little trimming as out of the box they push the blades up into an unrealistic posture. Dry fit the parts and you’ll see what I mean. I don’t think the blades are particularly accurate where they fold and the detail looks significantly under-nourished in this area. Photos show that the blade markings are complex and this took a fair amount of masking and retouching to achieve. My efforts at building the rotor mast were a bit of a disaster. The instructions make no mention of the fact that the little vertical linkages are of different lengths, and I messed this up. This is Kitty Hawk’s fault. I attached them before attaching the main mast (don’t ask me how…). This is my fault. This meant I ended up replacing the linkages with brass rod. It’s all of a bit of a mess!
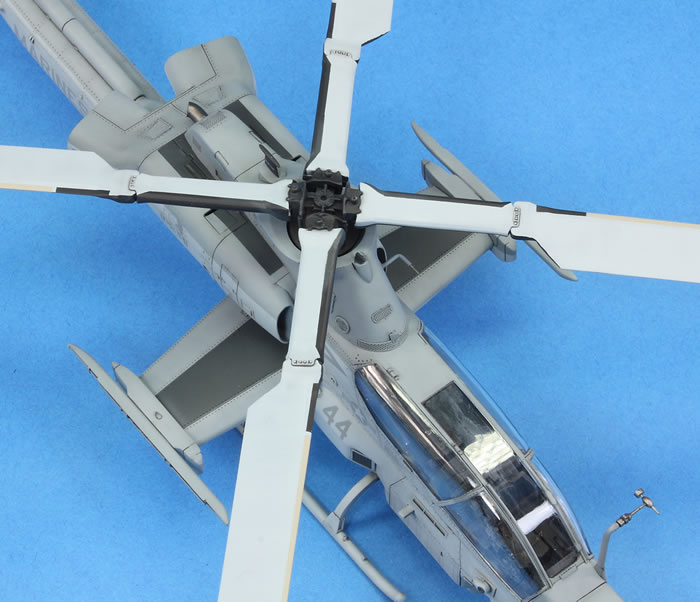
One inaccuracy is the little exhaust above and between the main exhausts. The kit has this turning through 90 degrees, which is incorrect. I cut it down, but probably still not quite enough. As a general comment, I did find it difficult to find good detail photos of the AH-1Z online.
The airframe is decorated with recessed rivets, which does spoil the illusion somewhat as they should be raised. After my riveting adventure with Archer Fine Transfers on the AH-1S there was no way I was going to go through that again, and so I have left the recessed detail as it is.
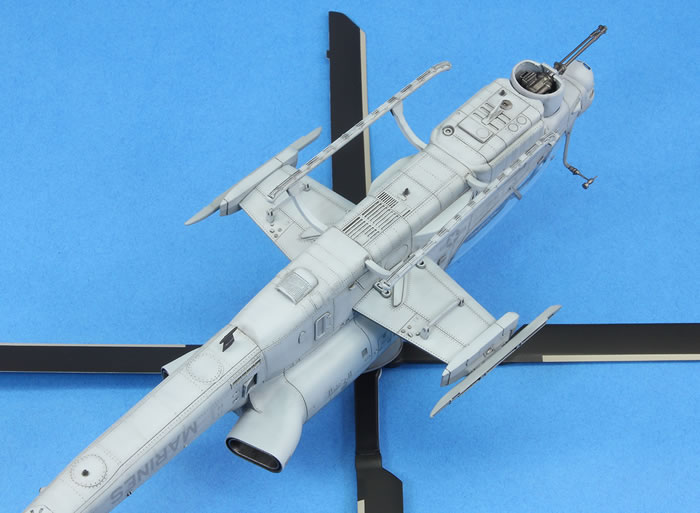
The pitot that is attached above the port engine is, in my opinion, far too short and so I fabricated a new one from Albion Alloys telescoping brass tubing.
The kit instructions are generally quite good. I gather from reading other accounts of making this kit that there may be other editions of the instructions out there. Some parts were not called out at all – such as the canopy handles on sprue D. One part, D13, is not mentioned anywhere and I could not figure out what it is for.
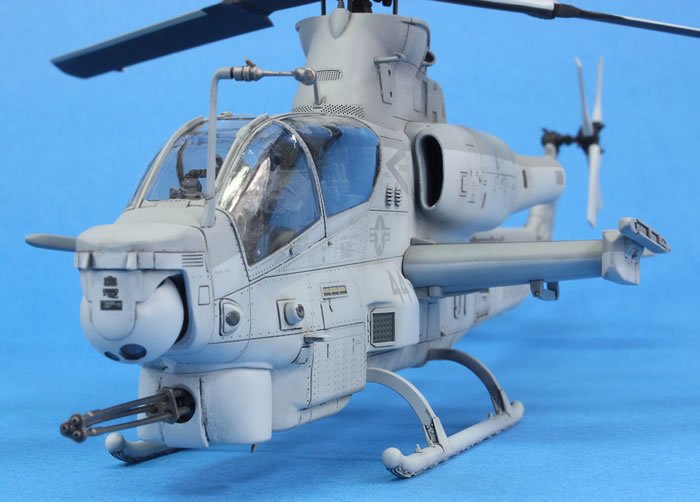
Kitty Hawk made the gun turret an enclosed item, whereas it should be open at the bottom with the gun mechanism exposed. I purchased Werner’s Wings resin correction set for this. This looks nicely designed and cleanly moulded. However, the surface texture of both the turret and the gun mechanism is very rough, like it was trying to replicate cast steel on an old tank. I don’t know if this is because the masters were made by 3D printing. I also struggled to get the turret to mate cleanly with the ring. Eventually it all went together and it does look better than what comes in the kit. In retrospect, I wish I had replaced the gun barrels with those made by Master, or had had a go at scratch building them myself. Those in the kit are as good as can be expected, but they are moulded with a slight bow along their length.
The last main items to be tackled were the clear parts, which were an astonishing fit. A little modification was made to the tip of the tail where I added a clear part from the spares box.
I painted the model using Mr Color 308 and 337, which seemed an excellent match to my eye. These were applied over a black undercoat with my Iwata Custom Micron in an attempt to get some natural colour variation. Photographs showed that the demarcation between the two colours could vary in position quite a lot, and in some cases was pretty hard and in others pretty soft. I went with a high and hard demarcation. How it all works between the exhausts is guesswork.
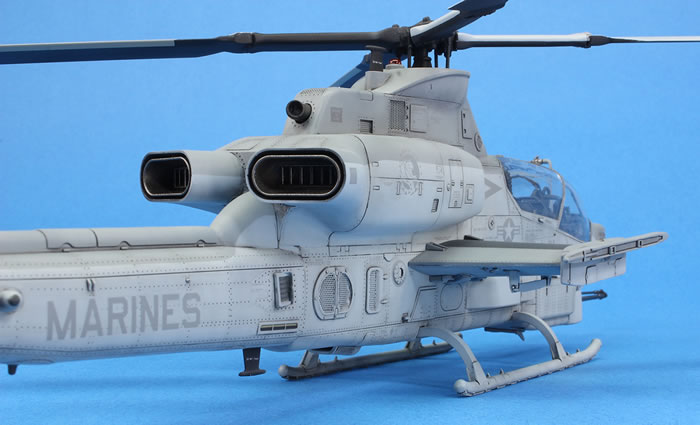
For this model I went with a dark grey oil paint wash applied over a light coat of Tamiya X-22 Gloss Clear. This was not entirely satisfactory as the contrast between the wash and the underlying colours is much greater than I would have liked. With hindsight I would have been better off using an Ammo enamel wash as this seems to stay workable for a longer time and would have resulted in a less stark finish.
There are no aftermarket decals available for the Viper other than those made by Werner’s Wings, but these are (as far as I can tell) unavailable in the UK. This meant I was stuck with those in the kit. There is a very colourful subject, but the decal sheet for this was badly off-register and unusable. This reduced my choices to two: the HMLAT-303 or HMLA-367 low-vis schemes. Everyone seems to have built the HMLAT version, so I went with the other. This seemed an odd choice as HMLA-367 only used the AH-1Z for just over a year before reverting to the AH-1W in 2012. I could not find any photos of Vipers used by ‘Scarface’ but I surmised the weathering would have been light given they only had them for such a short time and very early in the AH-1Z’s operational life.
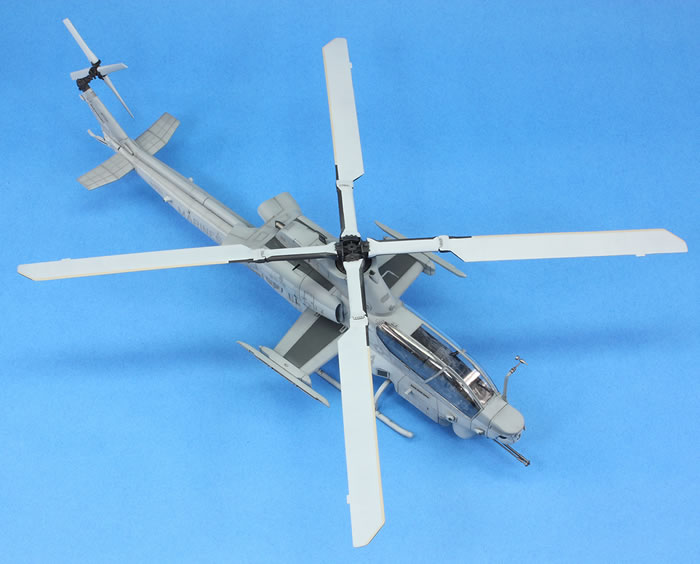
Kitty Hawk indicate the walkways on the wings and upper fuselage should be black. Most Vipers seemed to have these areas in dark grey, but without any photographic reference I went with Mr Color 137. Some AH-1Z landing skids also seem to have a darker colour on their upper surface, and others not. I made life easier for myself by hoping ’44’ was one of those without this feature.
The kit decals are terrible and it’s a shame this kit has not been served better by the aftermarket. They are thick and extremely matt. They are also translucent, to the point of being transparent. Those placed on the Mr Color 337 became almost invisible. On the marking guide for ’44’ lots of stencils are also not called out but are shown in the illustration. The guide for the other two schemes will tell you which other decals you need to add.
There was one last disappointment as I removed the masking from the kit canopy: some form of condensation on the inside of some of the clear parts. I’ve no idea where this comes from but I suspect it may be from over-enthusiastic use of TET to attach the clear parts. Also evident were a few cracks in the pilot’s door that seemed to have developed during painting.
I’m conscious that I have written mainly about this kit’s shortcomings, but as I wrote above, that is kind of unavoidable when I am writing to inform others who may build this model. In general this was a thoroughly enjoyable experience, to the point that I am tempted to get the UH-1Y Venom kit. However, it did feel to me that those parts specifically made for the AH-1Z were slightly better moulded and fitted slightly better than those that are common to this and the UH-1Y kits, and I suspect the latter would not be as quite a wonderful building experience as this kit.
For more articles like this one, please visit my website Jon's Models
Text and Images Copyright ©
2018 by Jon Bryon
Page Created 3 August, 2018
Last Updated
3 August, 2018
Back to
HyperScale Main Page

|
Home
| What's New |
Features |
Gallery |
Reviews |
Reference |
Forum |
Search