|
Hawker Tempest Mk.V
Hi-Tech 2
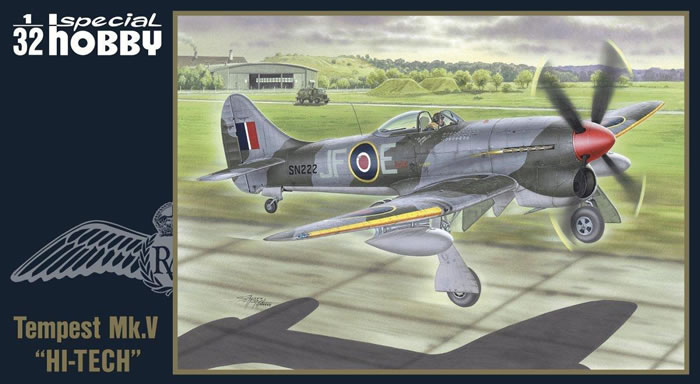
Special Hobby, 1/32 scale
Reviewed by
James Hatch

Kitty Hawk's 1/32 scale OS2U Kingfisher
will be available online from Squadron.com
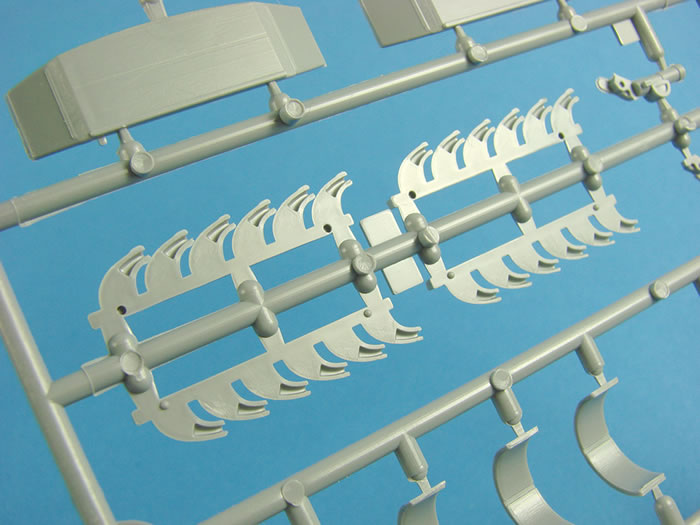
Unlike Spitfire development, where even major airframe revisions saw the type keep its original name, Hawker’s Typhoon project was different.
The Typhoon wasn’t without its problems, such as a seemingly unstoppable leaking of carbon monoxide gas into the cockpit, and of course the tail unit that had broken away completely on some aircraft, ending with a series of reinforcement straps that were designed as a simple fix for this.
Like the Hurricane, the Typhoon also had a thick wing section that provided the machine with enough space for heavy armament, fuel tanks and resulted in a steady gun platform that could be used for low-level operations. Unfortunately, the thick wing was responsible for high levels of drag that slowed the aircraft at certain altitudes, and affected climb rates. To fix these problems needed a number of radical solutions which resulted in Sydney Camm and his team taking the Typhoon literally back to the drawing board. The resulting aircraft was sufficiently different enough to the Typhoon, as to eventually merit a name change, and in keeping with Hawker’s use of severe storm condition names for its range of fighters, ‘Tempest’ was chosen. Originally, the type was to have been called Typhoon II.
Six prototypes were built, using different engines, resulting in not just the large-intake Typhoon style machine being built, but also a radial machine and a sleek-cowl Griffon-engine Tempest. Other variables including bubble canopy and car-door style canopy (á la early Typhoon), were included. The small tail fin surface of the prototype machines was eventually enlarged too, and the recognisable filleted fin introduced into production machines, as well as the wider span horizontal tail-plane that was seen on later versions of the Typhoon. A wider track landing gear helped with higher landing speeds. What made the Tempest radically different to the Typhoon was the design of a sleeker, laminar flow wing that was designed by NACA in the USA, and implemented on the new Mustang design. The Tempest Mk.V, which is the subject of this kit release, was fitted with a Napier Sabre IIa/b liquid-cooled H-24 sleeve-valve engine, and had wingspan of 41ft, length of 33ft 8in, and a maximum speed of between 432 and 435mph at 19,000ft. Armament was typically Mk.II/V Hispano cannon (x4), and rockets and bombs could be carried externally, as could droptanks for increased range/operational time.
The Tempest went through various incarnations, and the later Sea Fury was a development of this, through the Tempest II family, retaining the later Bristol Centaurus engine.
This isn’t the first time that Special Hobby has released the Tempest Mk.V in its flagship HI-TECH format, with the original kit being released only in 2016. Since then, there has been a standard edition, as well as the Centaurus-powered Mk.II kit that we also reviewed here on HyperScale. Along with these releases has been a flurry of their own aftermarket sets, such as the weapons bays and strengthened resin struts etc.
However, the demand for the first HI-TECH release was so high that Special Hobby decided to reintroduce it, but with some changes that would set this aside from the original.
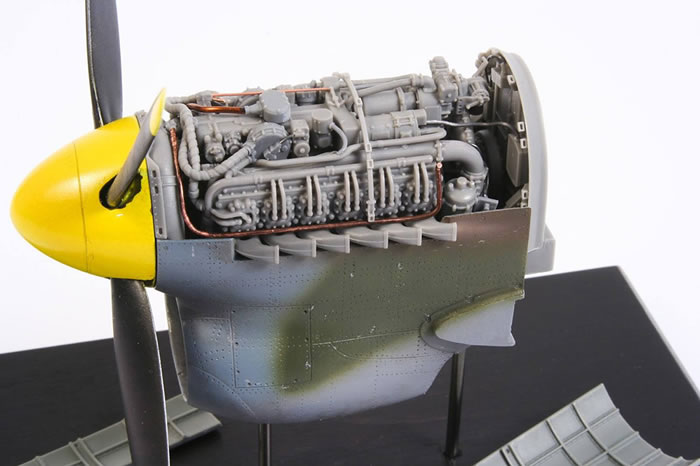
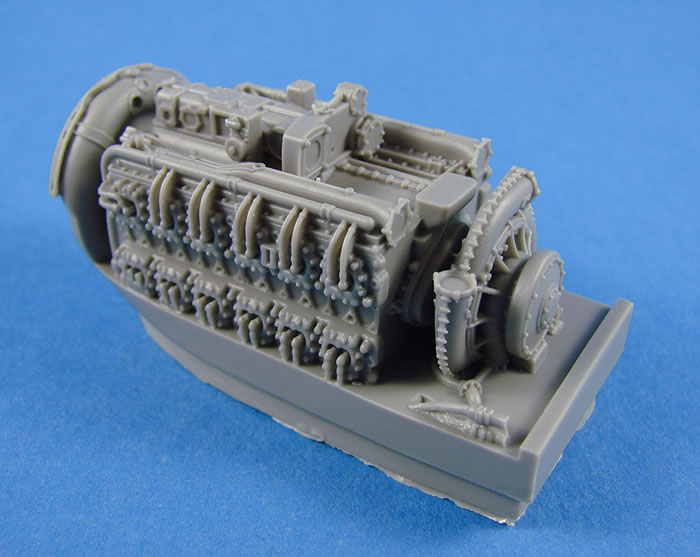
This includes not only FIVE new marking schemes, but also a brand new resin Napier Sabre engine. This is cast as the upper section with the complete cylinder blocks and ancillary equipment.
We’ll look at this in a while though.
SPRUE A
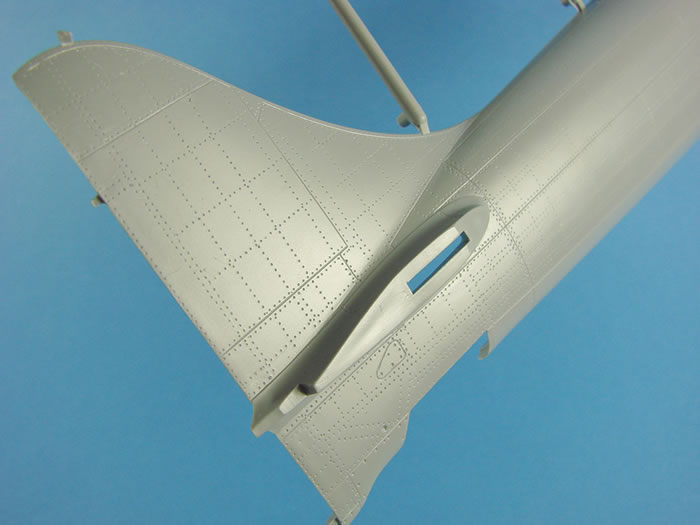
Only two parts here, but pretty key ones; both fuselage halves.
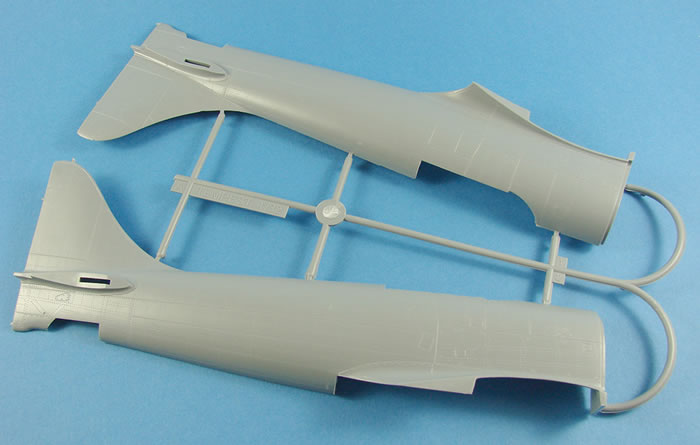
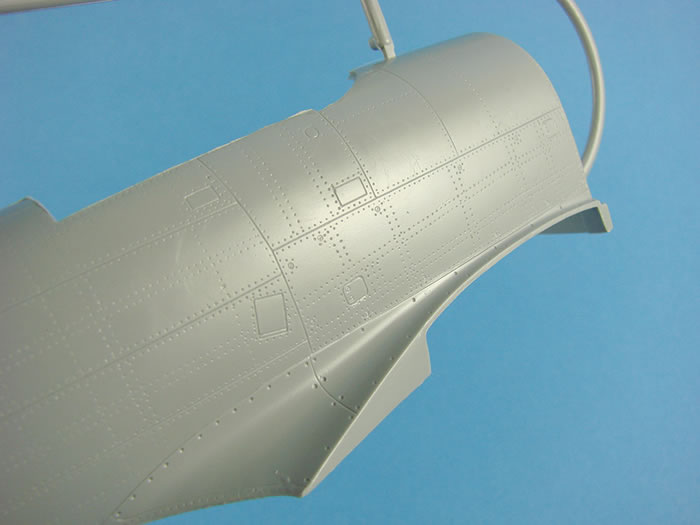
As Special Hobby have future plans for releasing the Mk.6 and Tempest II, the nose is moulded separately, allowing this tooling to be good for all versions. The kit shows just how far this company have come in the last years, with regards to both moulding, tooling and detailing. You would be hard pressed to differentiate the Tempest from a kit made by a whole multitude of more mainstream manufacturers out there, such as Hasegawa, Revell, Airfix etc. Surface detailing is excellent, with restrained, even rows of rivets, and lots of extremely fine panel lining and port/panel access plates. Edges are sharp where the wing will meet the fuselage etc. and the parts have a nicely polished finish to them that wouldn’t look out of place on a Tamiya release. The rudder is separately moulded, and where the nose cowl parts will fit, the forward fuselage has a moulded bulkhead that will provide rigidity to the proceedings.
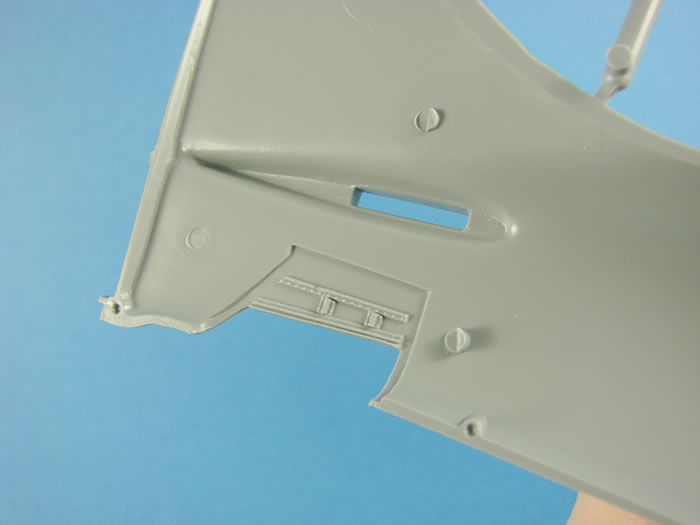
Internally, those high standards of detail are also evident, with stringer and former representation being both refined and sharp, and with associated rivet detail included. Only one ejector pin mark exists in this area, and this is on the area adjacent to the instrument panel. As no other detail is in the vicinity, removing this will be easy.
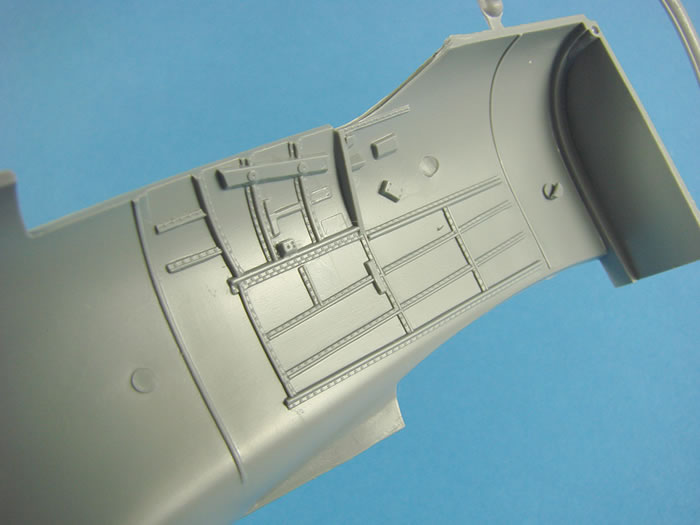
Some detail is also included around the area of the retractable tail wheel, using the same level of refinement seen in the cockpit area. Note also that this model has locating pins too, unlike some of the other less mainstream model kits. I have to say here too that Special Hobby is NOT a Limited-Run company, but fully mainstream.
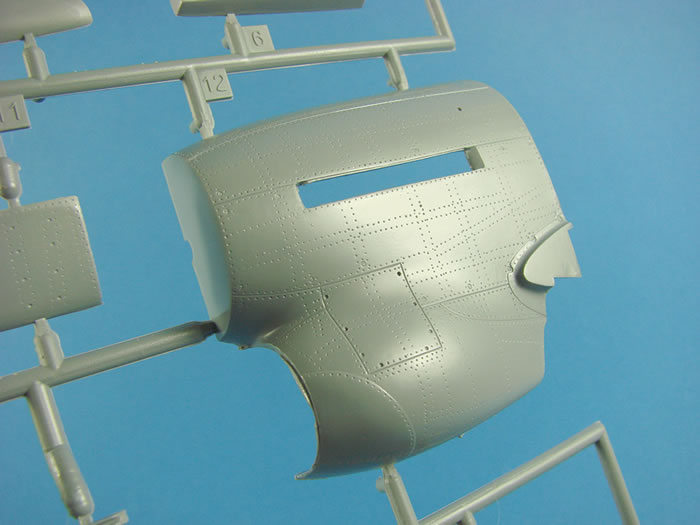
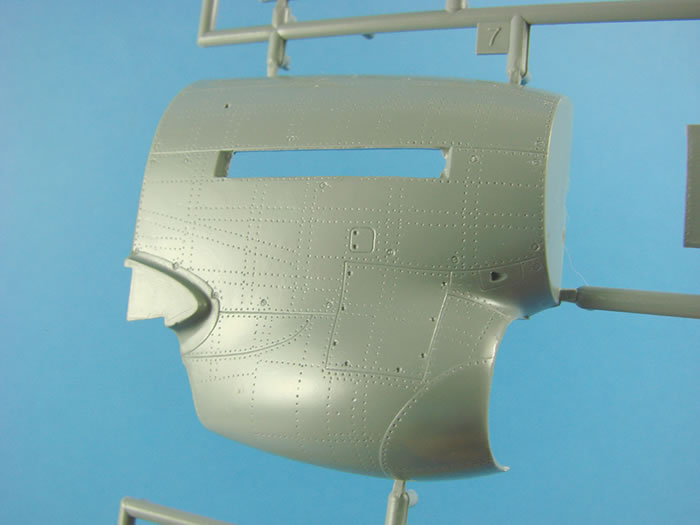
SPRUE B
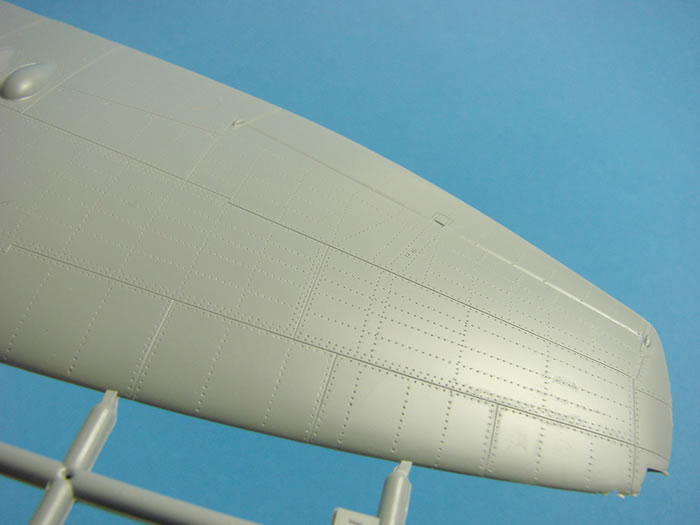
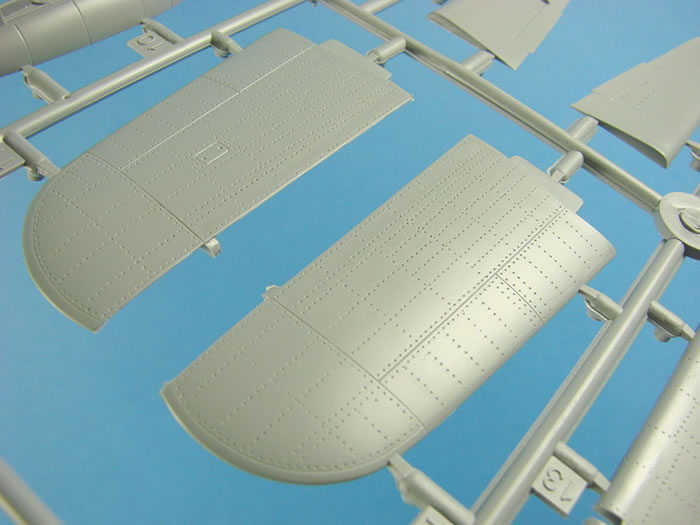
Wings, glorious wings. These are supplied as a single span lower part, and upper port and starboard panels.
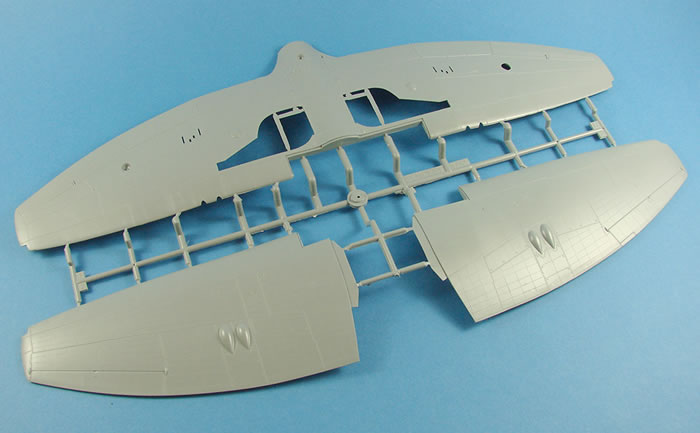
Note that the inboard leading edge is a separate part, accommodating the future kits that will have intakes in these places. I have to say that each time I take a look at this kit, I like it more and more. Surface detail is commensurate with that of the fuselage, incorporating full rivet detail (plus double rows, where applicable), finely engraved panel lines, fastener detail, access panels and nicely shaped cannon blisters. All control surfaces are integrally moulded, so can’t be posed without taking a saw to the model. Ailerons are moulded along with very fine actuator arms that really do look very good. Cannon shell ejection chutes are also finely moulded.
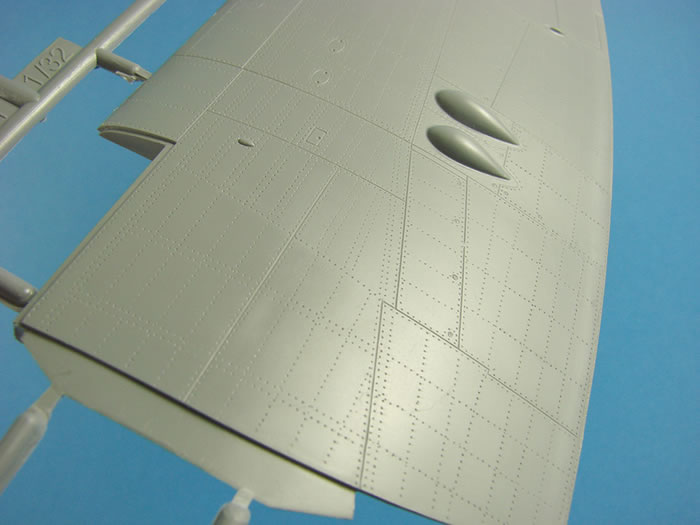
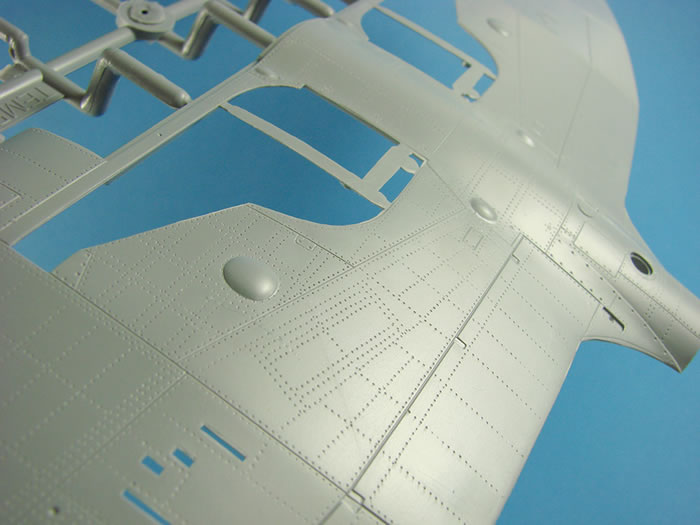
One thing I like here are the tabs that protrude from the upper panels, and provide a support for the wing to fuselage connection. Actually, there is another purpose for those tabs. If you flip the wing parts over, you will see they form the roof of the main gear wells. These areas contain rib and stringer detail, along with rivets, and this will be detailed further with various rods, pistons etc.
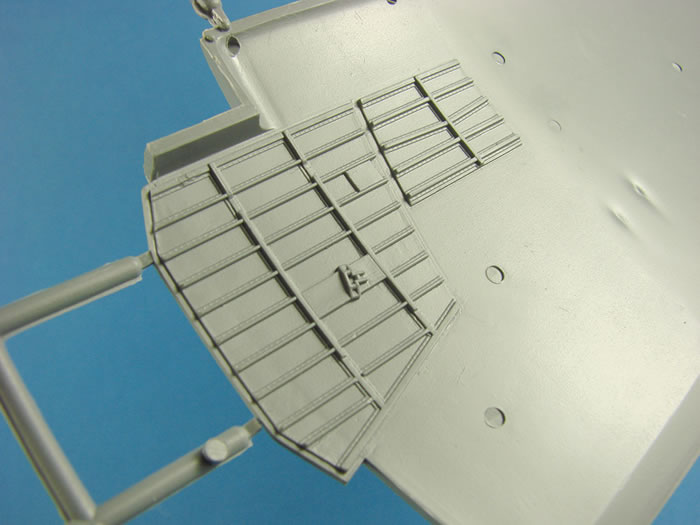
All of this will be framed by the gear bay walls that are supplied as separate parts that will be fitted into the recessed area in the upper wing panel. Cannon fairings are separate parts too, and the wing has a small bulkhead within that stops them from being inserted too far within.
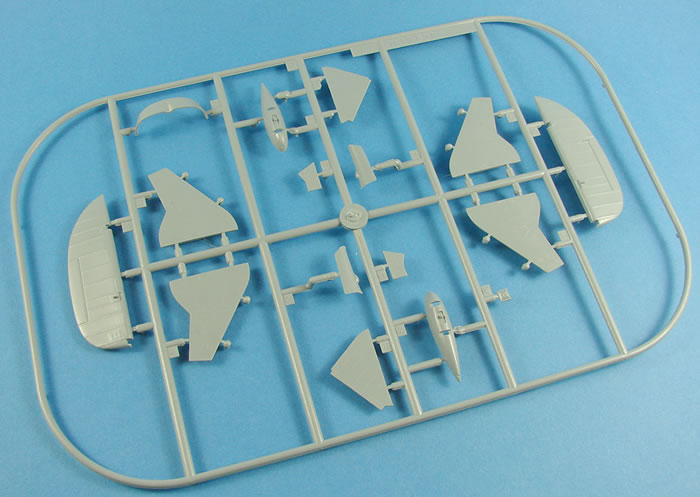
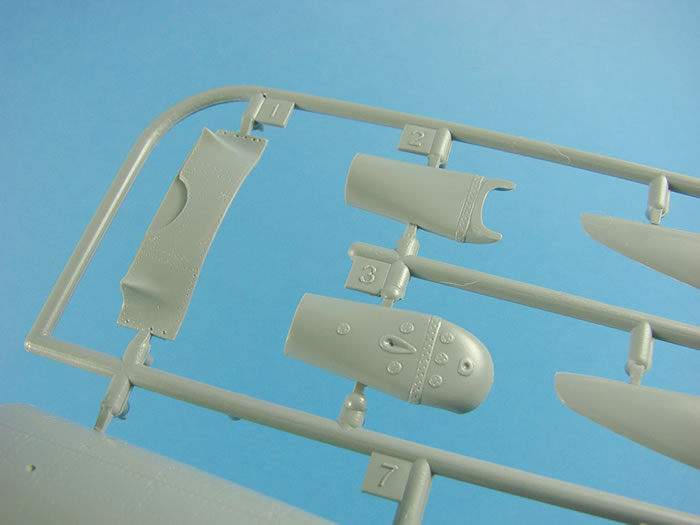
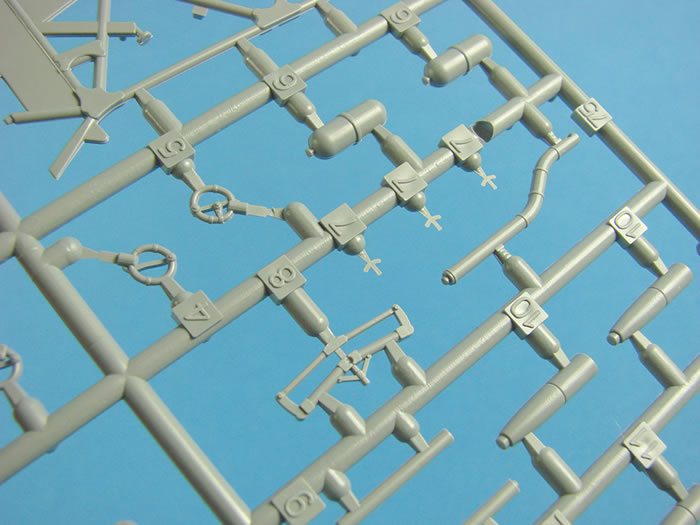
SPRUE C
You will be able to pose the elevators dynamically, as these are moulded separately to the stabilisers.
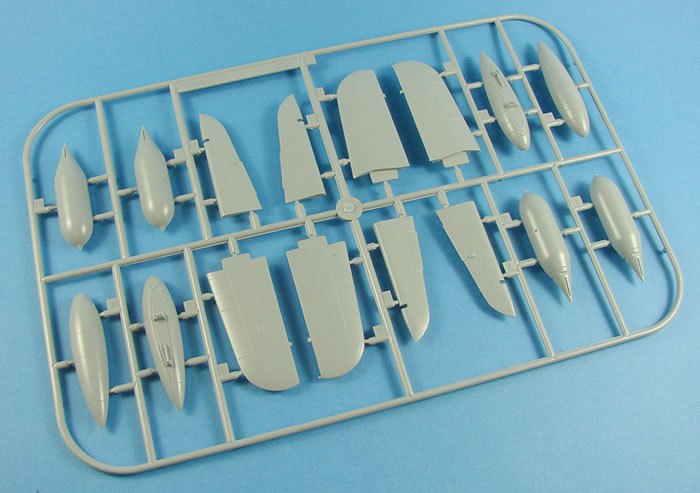
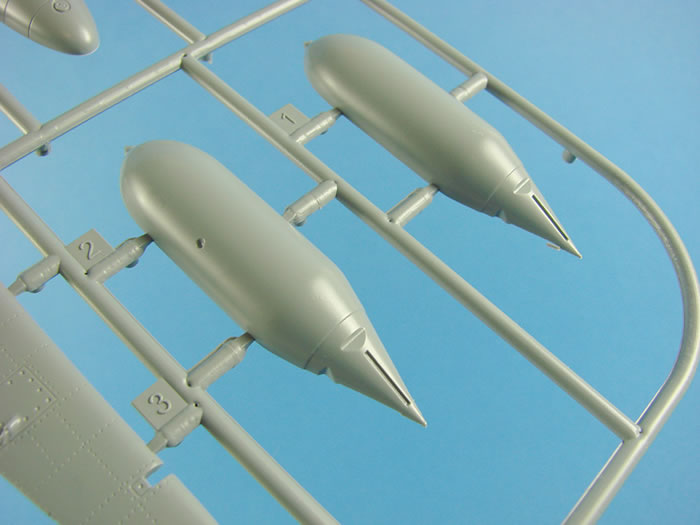
All parts here are the traditional upper and lower halves, and external detail is of the same high standard that we have seen so far, including rivet and fastener detail and trim tab actuators/actuator fairings. Other parts included here are for external drop-tanks and bomb bodies. Bomb fins are separately moulded. Bombs and tanks are moulded as halves also, and with the latter, you will of course need to reinstate any panel line detail that may be lost from seam eradication.

The fuel filler cap is nicely engraved, but I think the detail to the rear of this is supposed to represent a pipe, and is instead moulded as a fillet. If this is the case, cut away and replace with a little length of bent, rigid wire.
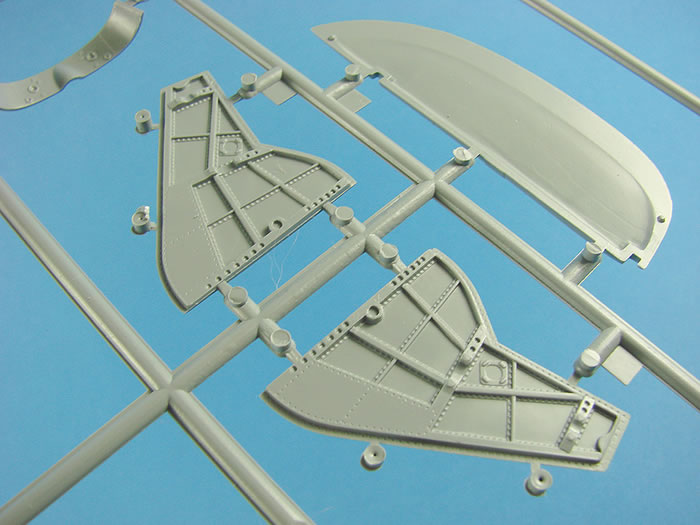
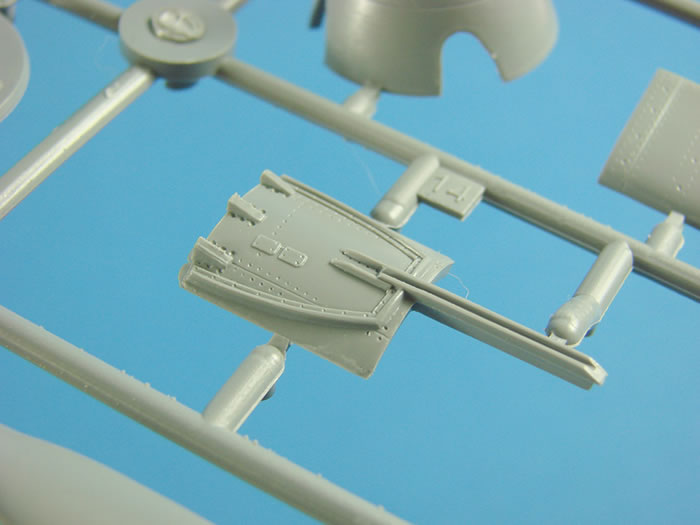
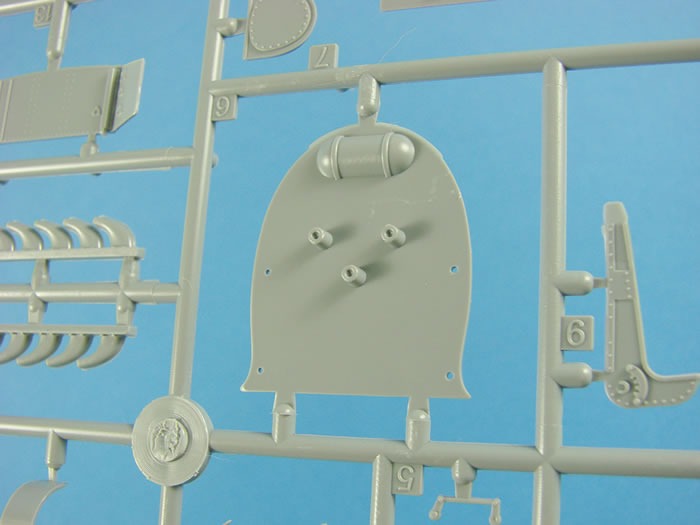
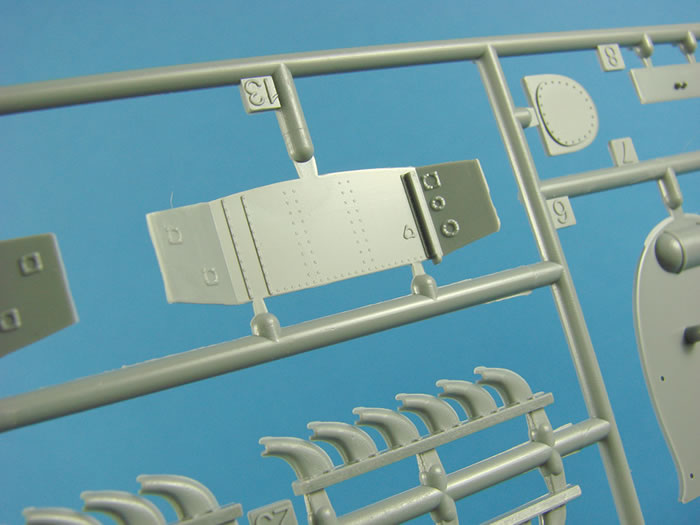
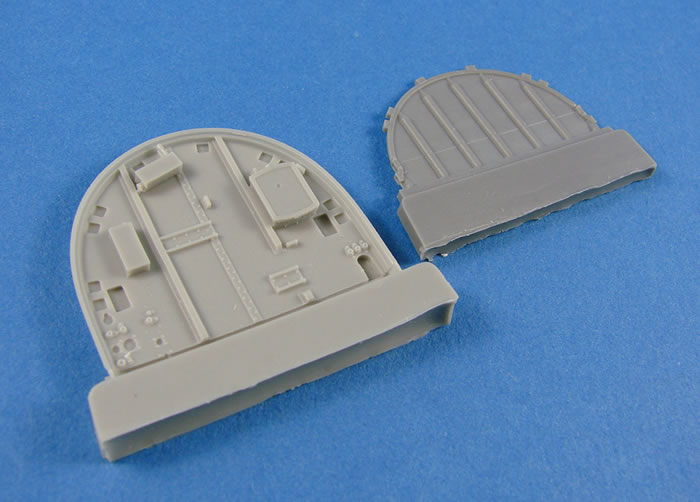
SPRUE D
This sprue looks very Eduard-ish in design, with its large radius corners. Here we have the fabric covered rudder, complete with its rib tape detail and metal trim tab. This is the only fabric covered area on the Tempest, and I do like the representation here. The multiple undercarriage door parts are just beautiful…both inside and out, with some great detail there, and no pesky ejection pin marks to worry about. Small tags have instead been placed externally to the main doors, and these just require snipping off, followed by a quick swipe of a sanding stick. Et voila!
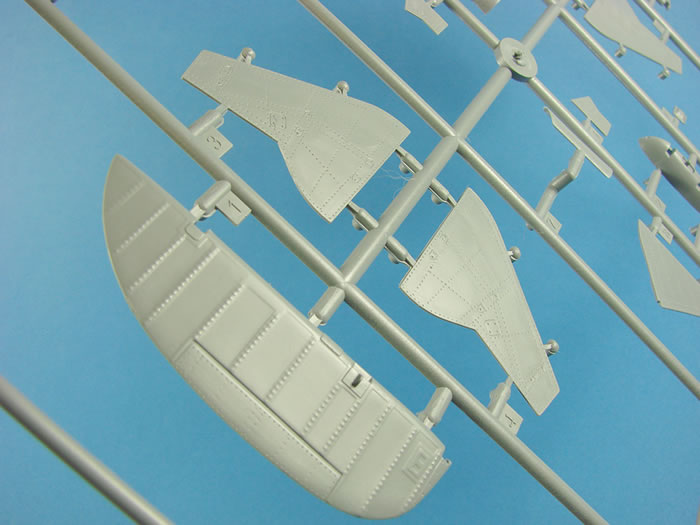
Other parts here include the upper, chin intake wall and the bomb release fairings.
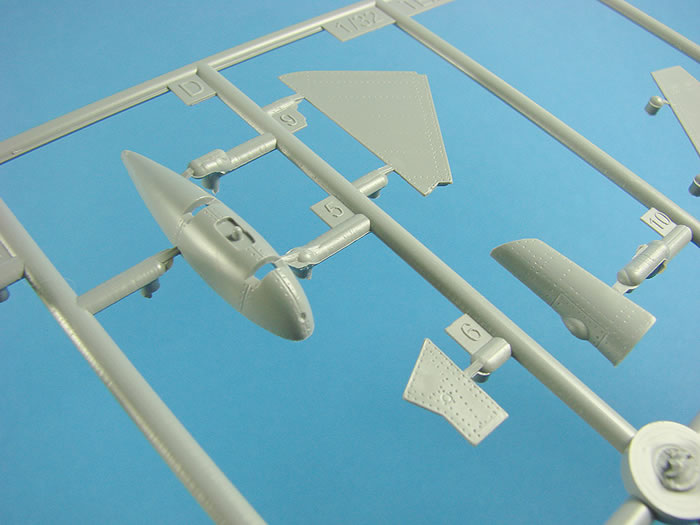
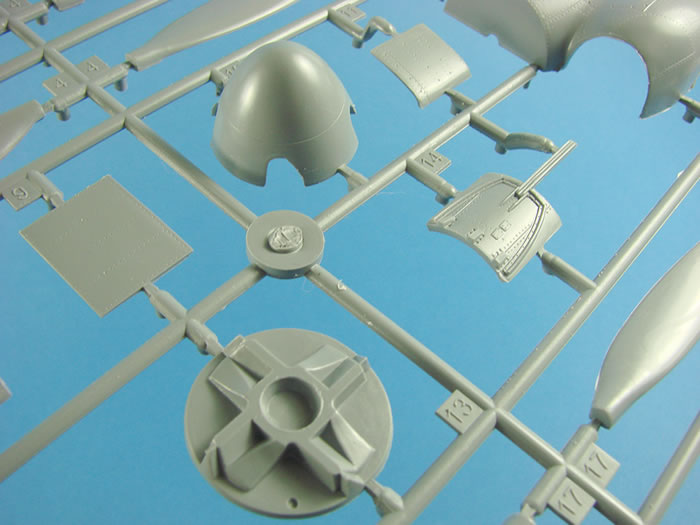
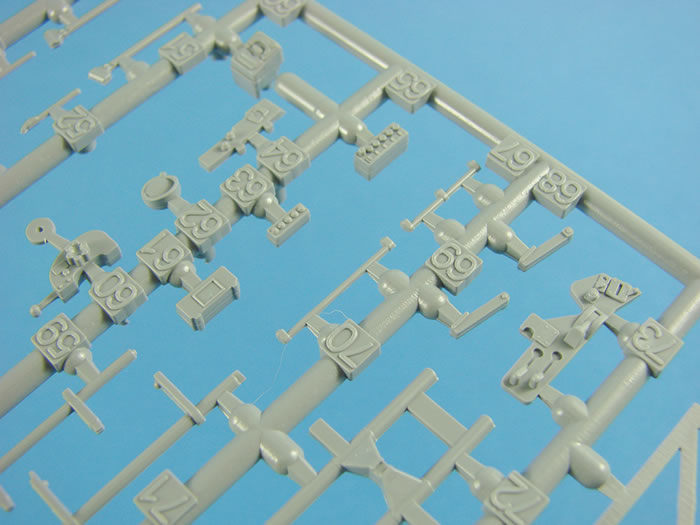
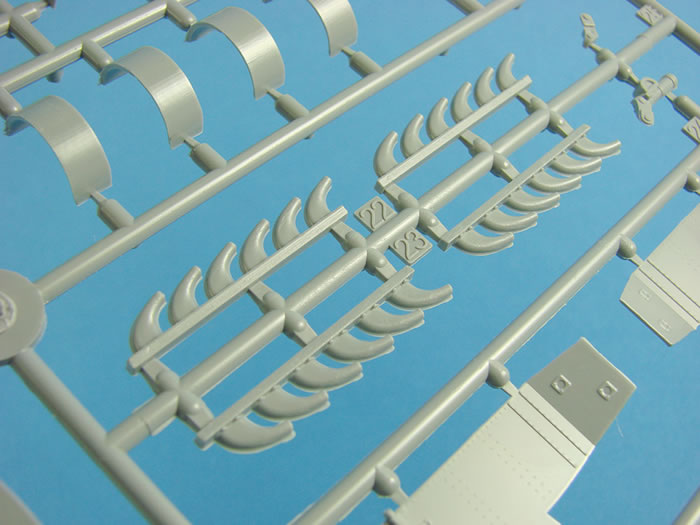
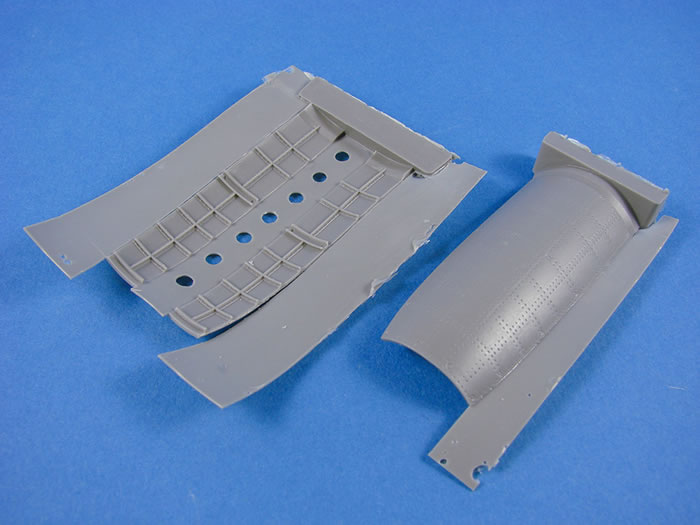
SPRUE E
For the first time, the instructions show parts here that won’t be used on this build. Here, that is for a second set of propeller blades. Engine cowl halves are moulded here, as are a number of parts that form the flap section and intake outlet to the rear of the main intake. The exhaust attachment boxes can be found here, and these will just glue internally. A two-part spinner is included, with the back-plate including channels that will precisely angle the propeller blades. There is a little flash on the spinner, but nothing to be concerned about.
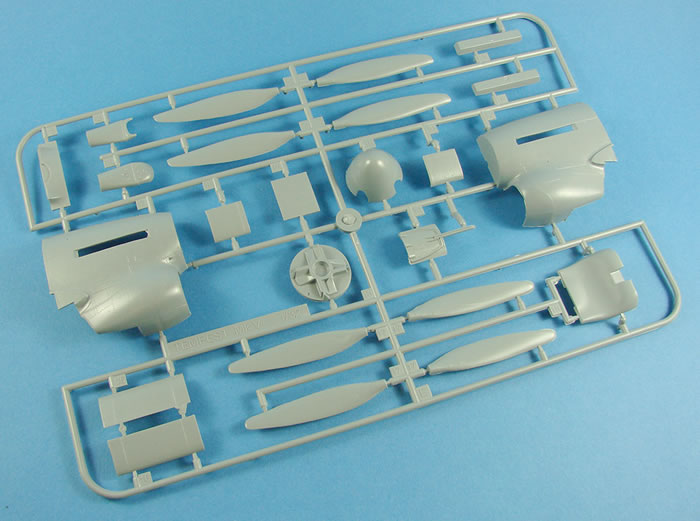
One thing to note is that the fuselage decking to the rear of the pilot, is included here as a separate part. That’s a nice touch as there is a lot of detail in this area, and removing a seam would have been a pain in the arse. Other notable parts here are the upper and lower parts for the wing leading edge inboard areas, where future kits will have the intakes attached.
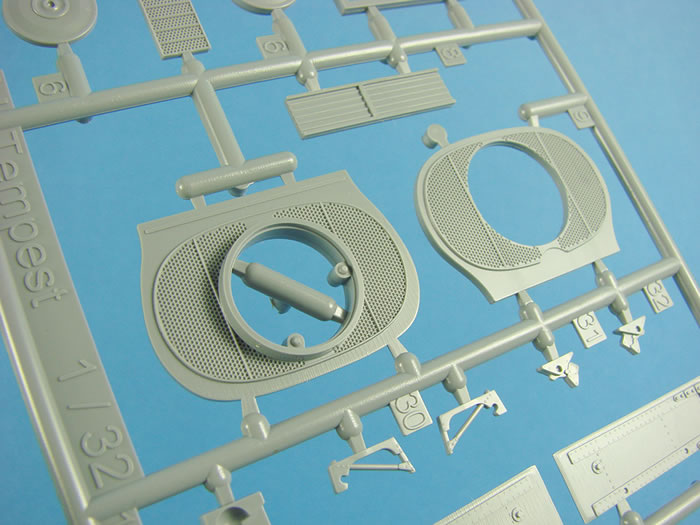
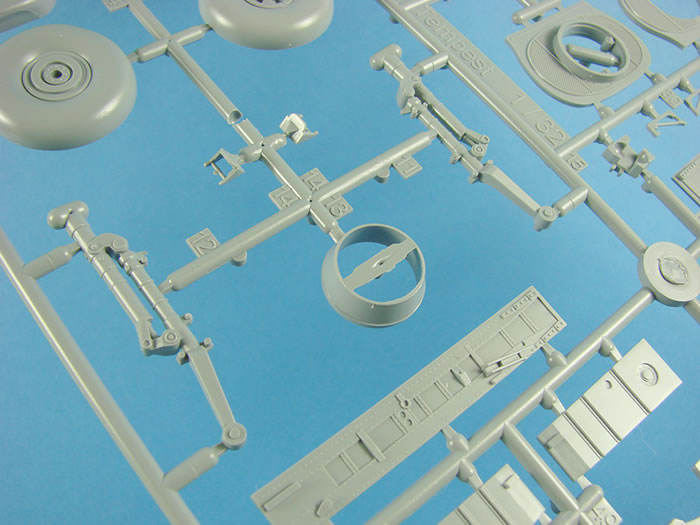
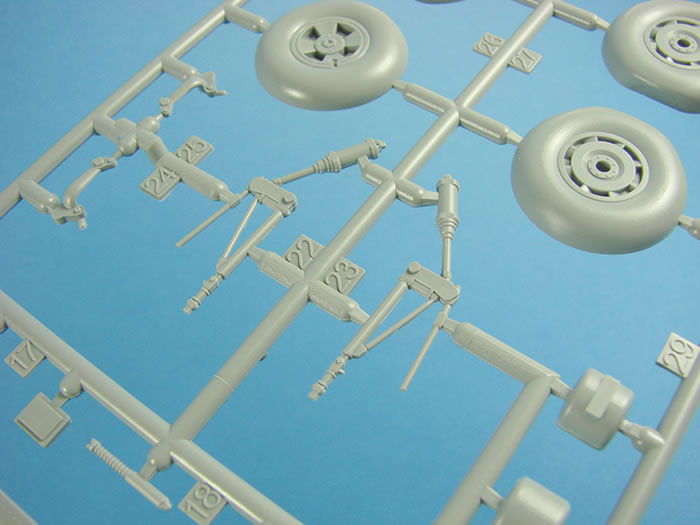
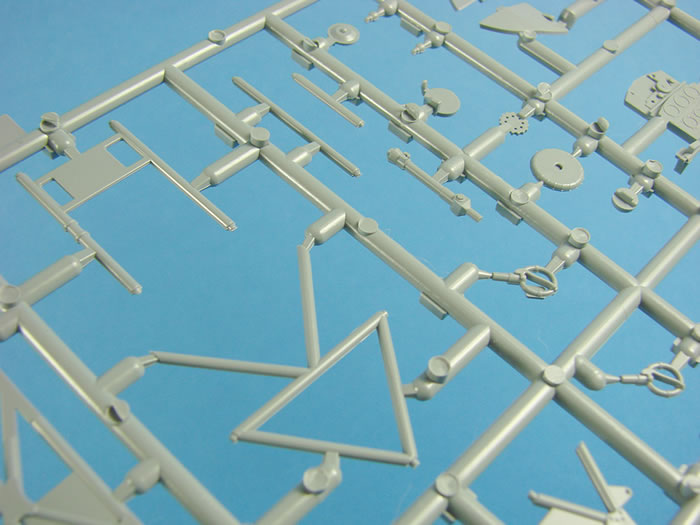
SPRUE H
Quite a few parts here are shown as not for use on this release. These include two sets of balloon tyres, several intake parts, leading edge intake parts, and also a seat back etc.
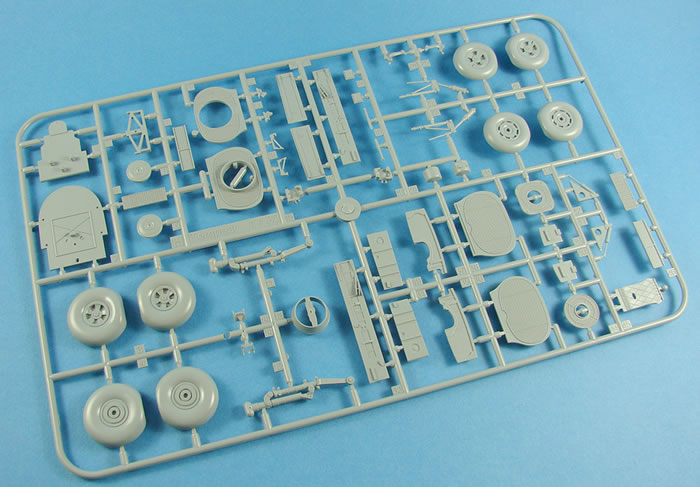
What can be used here are the various undercarriage parts, including well detail, walls and the struts, pistons and rods themselves. Looking at how refined much of the detail is here, I’m going to stick my neck out and say it’s Tamiya-esque. Simply gorgeous details that you’ll bury away in those gear bays. Even the sprung-loaded rods look very authentic and filigree. I am particularly impressed with the gear struts and the detail definition here. Please be careful with the removal of parts from this sprue, as so many of the landing gear parts have some very fine detail protrusions. If in doubt, use a razor saw.
Note also the forward cockpit bulkhead and the armoured frame onto which pilot’s seat will fit.
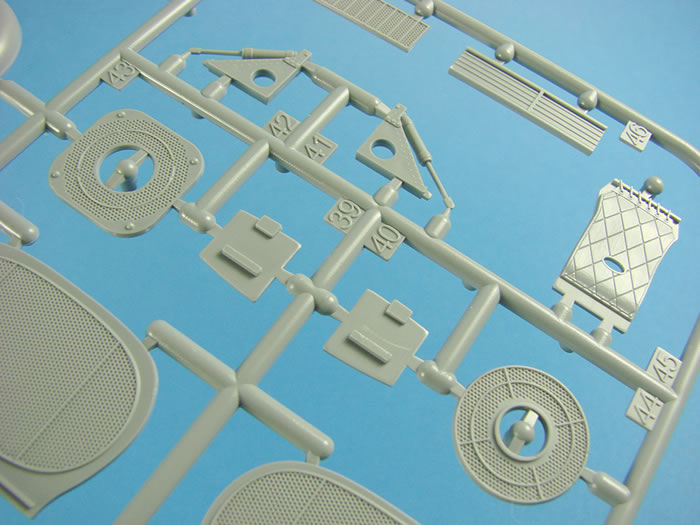
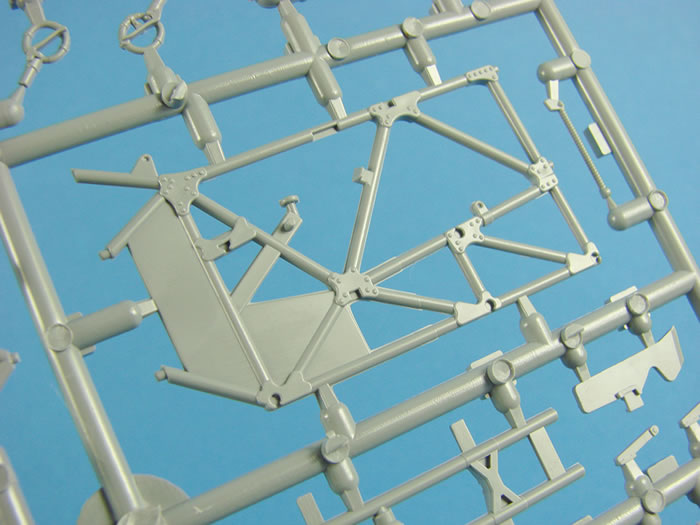
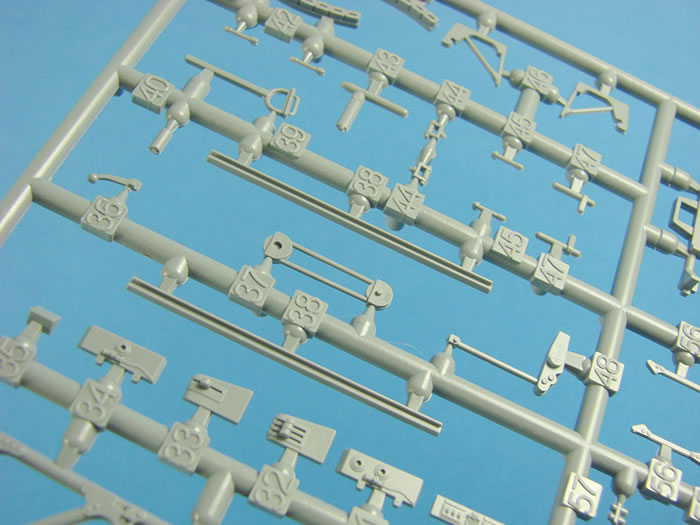
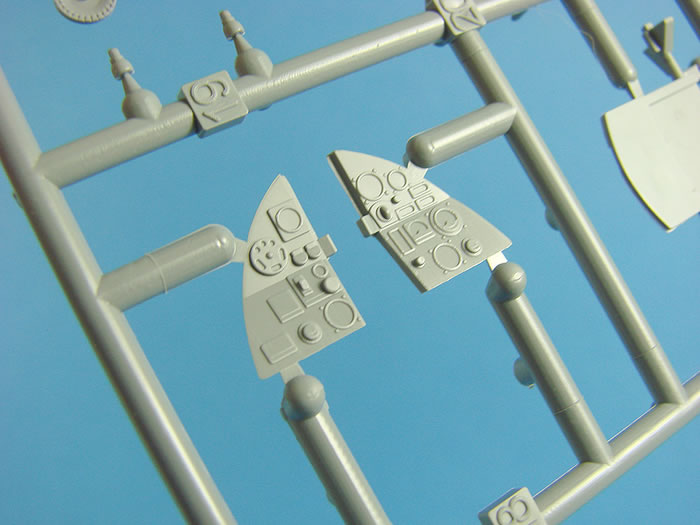
SPRUE I
A small sprue, but one with perhaps more parts on it than any other.

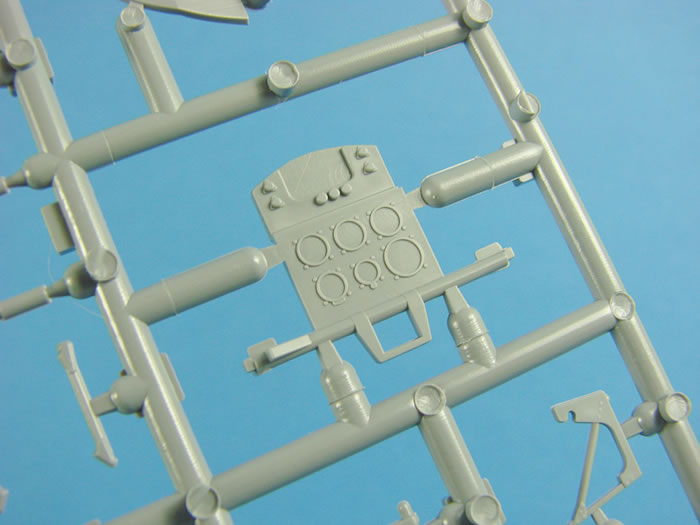
One area that features heavily here is the cockpit. For me, a nicely detailed cockpit is the very heart of a satisfying project, and this cockpit it certainly better than most I’ve seen in quite a long time. Two detailed tubular side frames are adorned with various fixing plates and panels and brackets, and there are numerous console parts, throttle, spacers, torsion rods and linkages etc. The main instrument panel is moulded in three parts; central panel and two angled panels that fit to its sides. Be careful here as there are two different sets of side panels. The instructions clearly show what you should not use.
Here you will also find the canopy rails and three different types of joystick grip, although none of these are shown as for use, with resin parts favouring these all along the way. Presumably these, like the seat and other parts, will be used in any future, standard boxing that isn’t classed as ‘HI-TECH’. The plastic parts are actually still very nice, as are the cannon fairings that will also be ditched in favour of the resin extras here.
Again, watch out for the numerous parts that won’t be used here, and there are a fair few of them.
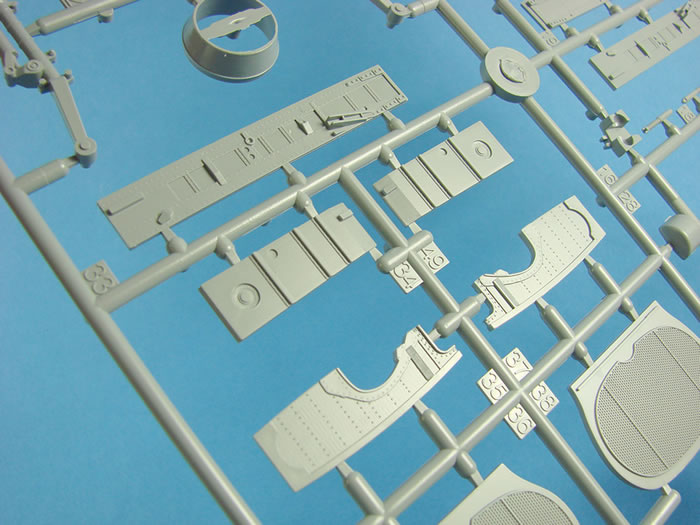
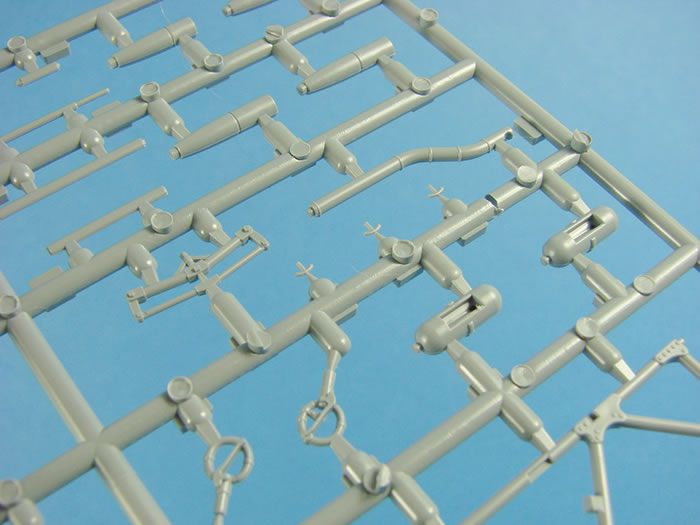
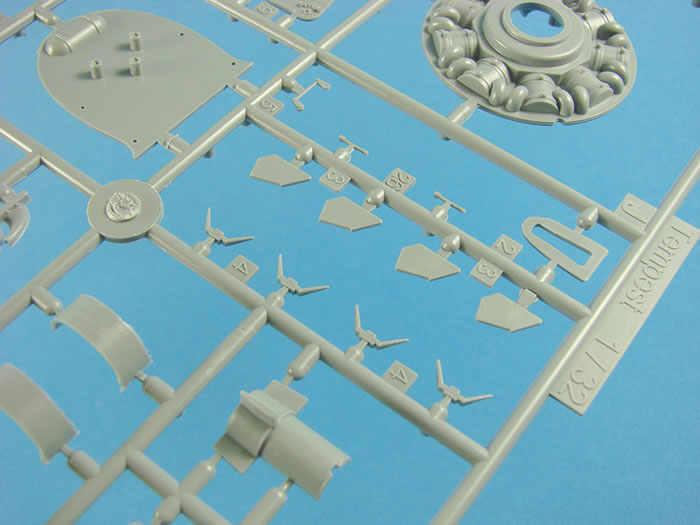
SPRUE J
The last grey styrene sprue. Another bulkhead is supplied here, for the rear of the cockpit, and the exhausts are included as halves. It’s a little disappointing that Special Hobby didn’t include the resin ones they now sell, as part of this HI-TECH offering. I would’ve preferred those to the cockpit seat, for instance. It will take some careful seam removal work on these parts.
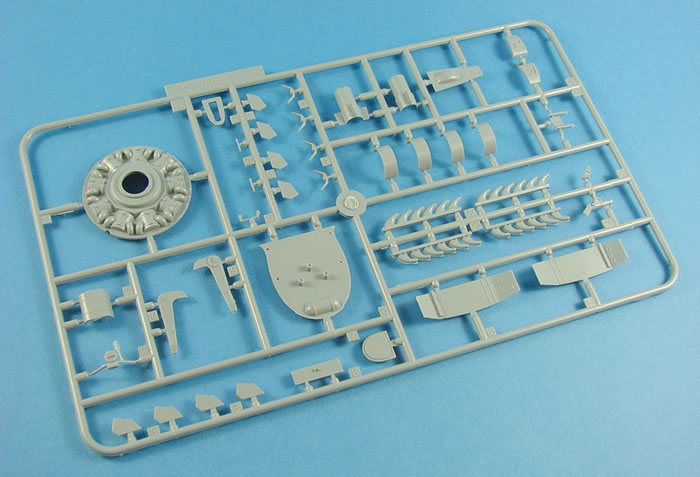
More wheel well parts are found here, as well as the three-part assembly for the tail wheel, again with some very nice structural detail included. More unused seat parts can be found, so some nice parts for the spares box. Several intake parts are moulded here, as are the bomb sway braces and fins and tail wheel strut. The most obvious part though, the radial engine of the Centaurus, is just there to tease us for the future release.
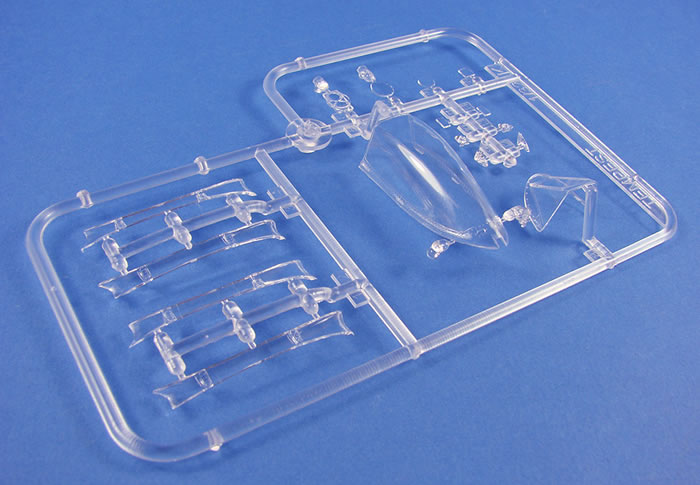
SPRUE K
The clear sprue. Of course, you will find the main canopy parts here, with their nicely-defined framing lines which will make things easier for masking. A number of other parts here are drop tank fairings that I think were made from clear acetate or similar. Nice to see these, and they’ll certainly show off that wire modification I mentioned earlier, for the drop tank itself.
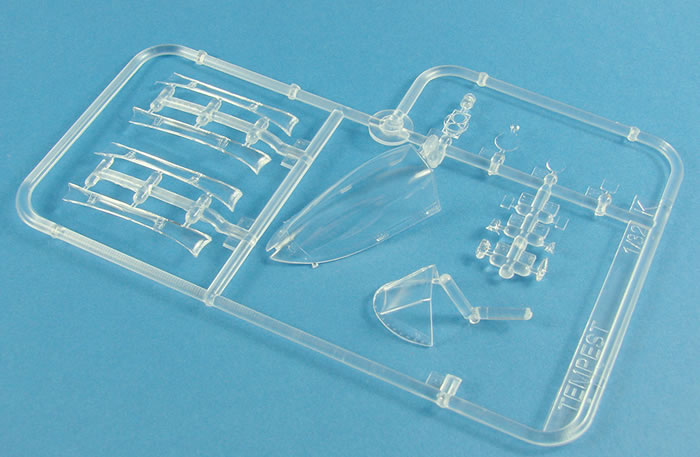
Finally, note the various wingtip, fuselage, tail and wing-underside lenses for the various lights that were fitted to the Tempest. Clarity is very good, but a little scuffing on my main hood means that I will need to polish it away.
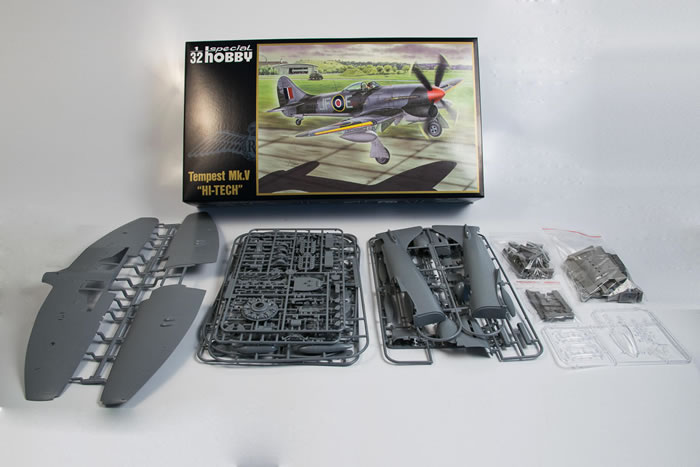
Plastic Summary
This kit is almost flash and seam free, with nice tight sprue gate points that are generally well placed so as not to cause problems. I can’t see any sink marks either, except for a couple on the reverse of a part, so they don’t count. Ejector pin marks; there’s only two I can see that need removal, and that will take just a few minutes. Plastic quality is excellent, and the quality of the mouldings are very high quality.
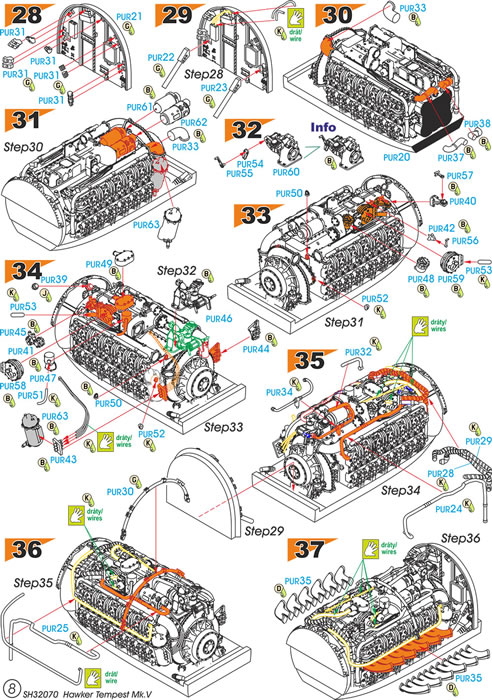
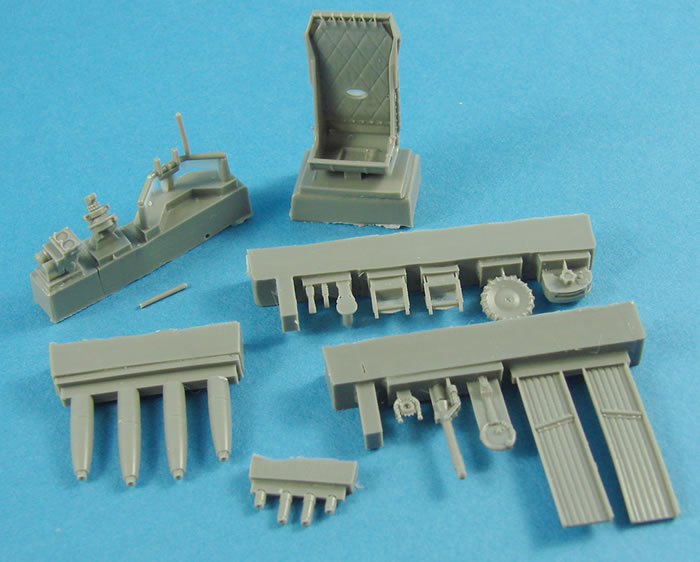
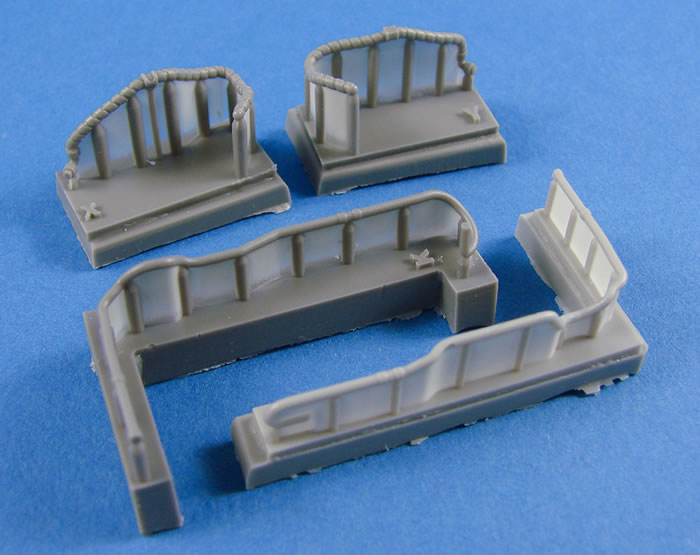
Resin Parts
Unlike the two bags of resin included with the original HI-TECH release, there are now THREE bags, packaged into one of CMK’s yellow resin accessory boxes that they use for the more comprehensive sets.
In these bags, you will find:
-
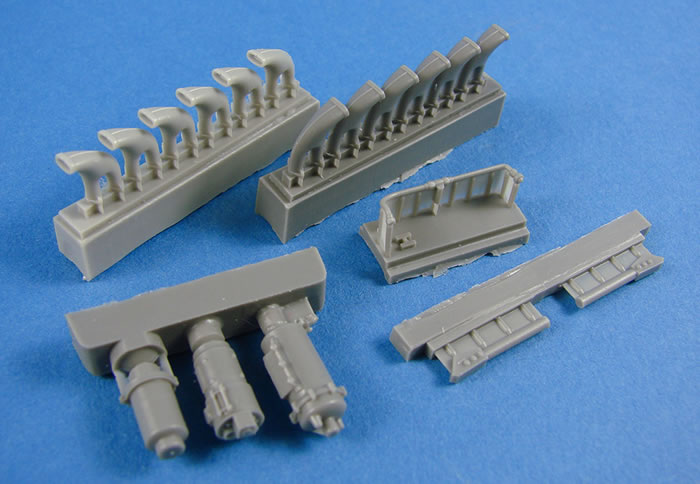
Napier Sabre engine and ancillary equipment and plumbing
-
Detailed engine firewall with fittings
-
Hollow stub exhausts
-
Thin, three part engine cowls with internal details
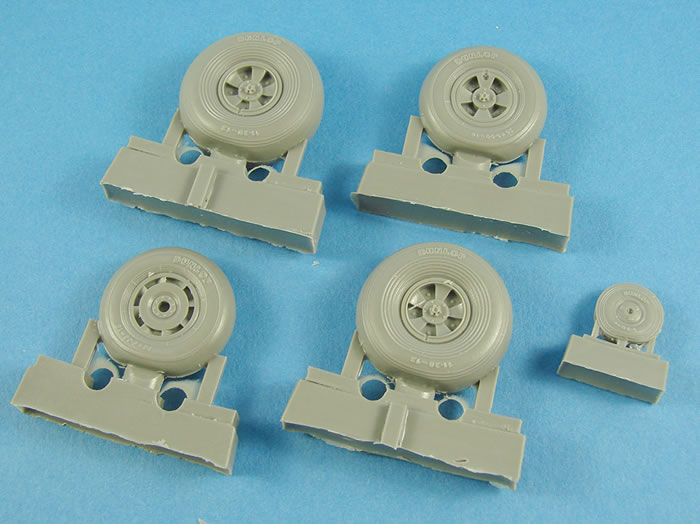
-
Two sizes of main gear wheels (weighted)
-
Anti-shimmy tail wheel
-
Cockpit components (seat, tread boards, pedals, throttle quadrant/levers, control stick/grip, seat, trim wheel, internal windscreen frame)
-
Cannon fairing stubs
These parts are also very high standard, with fine detailing.
There are a total of 63 resin parts in this release (with one shown as not for use), cast in a combination of light and medium grey resin.
Casting blocks will generally be easy to remove too, and there shouldn’t be any nasty surprises here.
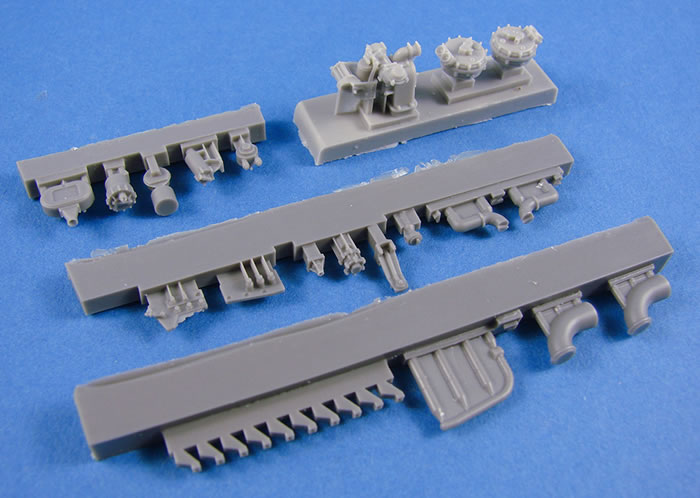
The engine is mounted on a resin plinth that sits within the cowl area.
No chin radiators are included with this release, but I have seen something on Special Hobby’s Facebook page which shows a complete Napier Sabre with the radiator fitted.
Maybe a release we’ll see soon.
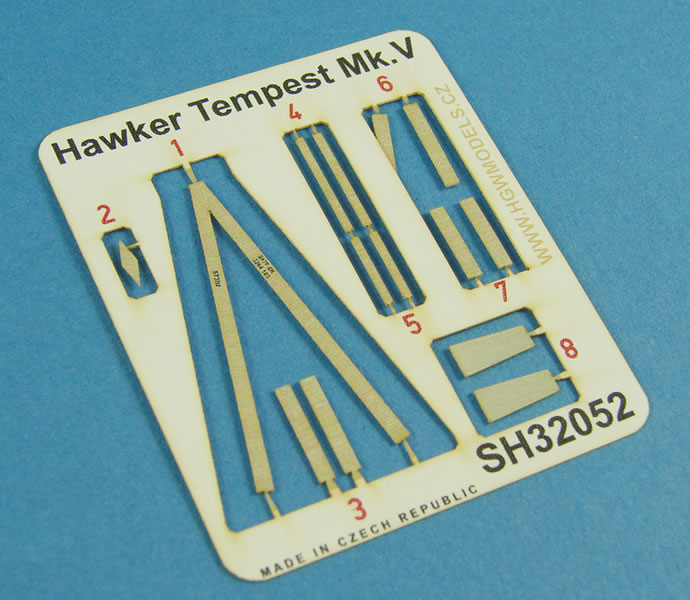
Photo Etch
Only a small fret here that includes parts for the fabric seat belts, control grip trigger, whip aerial and mount plate etc.
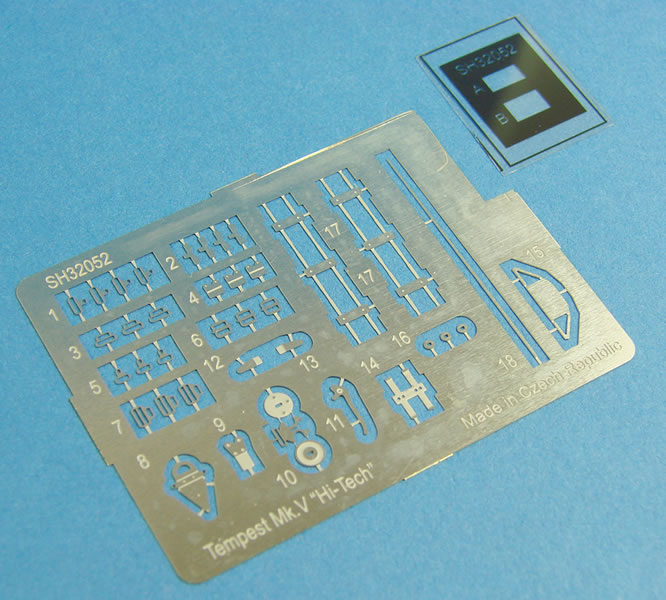
This small stainless fret also contains a small notch that you need to align on the ailerons, and use as a scribing template for the small trim tabs.
Seatbelts
These are produced by HGW, from their microfiber material, and should need no introduction.
Being laser-cut and pre-printed, all you need to do is to snip and assemble. Just remember to peel the backing paper from them first!
Masks
A small sheet of vinyl masks is included, for the canopy, lights and wheel hubs. These are sharply cut and exhibit no shrinkage.
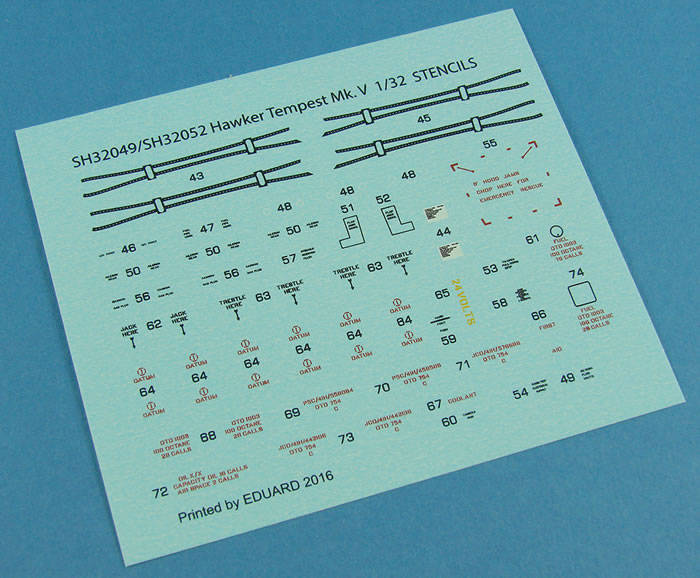
Decals
THREE sheets are supplied here, printed by Eduard.

The largest contains roundels and fin flashes. A slightly smaller sheet holds the various serials, codes, emblems, kill markings, and instrument dials for the cockpit. The latter is printed in banks of instruments, and I would be tempted to punch these out to remove their carrier film. Their definition is excellent and they can certainly be used without having to resort to an aftermarket product.
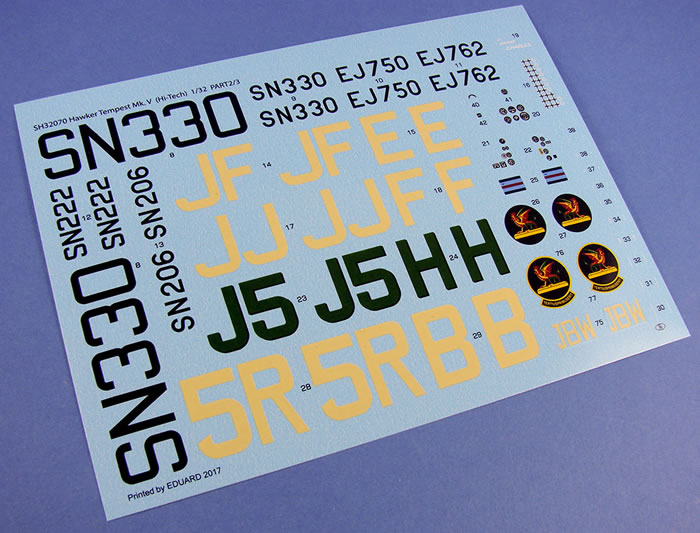
The last sheet is mainly stencils, plus the rivet banding for the drop tank acetate covers. Printing is excellent throughout, with minimal carrier film, solid colour and perfect register.

The schemes offered are:
-
SN222, JF-E, “Le Grand Charles”, No.3 Squadron, Fassberg (B.152), Fl/Lt. Pierre Clostermann, Late April – Early May 1945
-
EJ750, JBW, No.122 Wing, Wg/Cmdr. J.B. Wray, Volkel (B.80), late 1944 (this machine shot down an Me 262!)
-
EJ762, JJ-F, No.274 Sqn, F/L D.C. Fairbanks DFC and Two Bars (12.5 victories), Volkel (B.80), October 1944
-
SN206, 5R-B, No.33 Sqn, F/O G.A. Rens, Quackenbrück (B.109), May 1945
-
SN330, J5-H, No.3 Sqn, Sqn/Ldr Robert Cole DFC and Bar, Wunstorf, British Occupation Zone, Germany, 1946
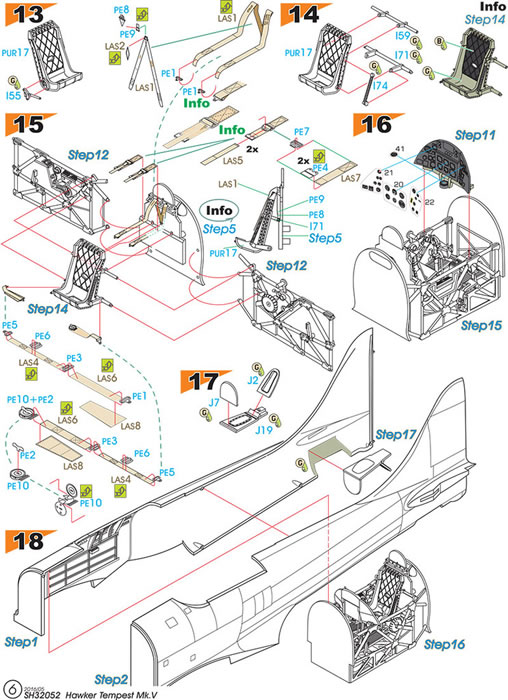
Instructions
This is printed in a glossy A-4 format, similar to that of Eduard, with a profile on the front page, and a history of the type given in both English and Czech. There are then over two pages dedicated to a parts map, which is useful for knowing the parts not to use, and then we are into the construction. A series of excellent line drawings are annotated with splashes of colour to signify paint and other nomenclature, such as drilling and mask use etc.
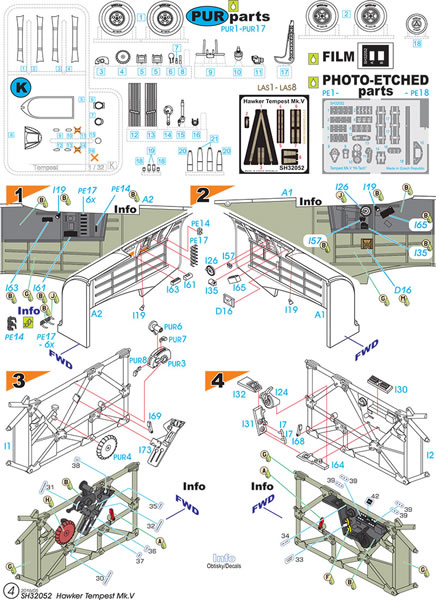
Illustrations are very clear, and should present no problems. Colour call-outs are supplied throughout construction and refer to both Gunze and Alclad II paints, and the last pages of the manual are given over to the 5 schemes, with each being shown in all 4 planforms.
I didn’t think the original HI-TECH release could’ve been matched by Special Hobby, but then again, I wasn’t expecting them to release this kit with this superb resin engine.
As they saw this as a new release now, and not a reintroduction, they went further and replaced the marking schemes too. A superb kit with nicely moulded plastic and fine details, along with a whole box of resin goodies that will keep you at your bench for more hours than you are probably allowed! Add to this the PE and fabric seatbelts too. The only way I can see this being bettered is if you add the CMK and their ‘Quick & Easy’ edition aftermarket stuff too, such as the weapons bays, struts, leading edge cannon fairings etc.
Recommended? Without a doubt. Get one whilst you can!
My sincere thanks to Special Hobby for the review sample
Review Text Copyright © 2017 by James Hatch
Page Created 27 July, 2017
Last updated
27 July, 2017
Back to HyperScale Main Page
Back to Reviews Page

|
 Home
| What's New |
Features |
Gallery |
Reviews |
Reference |
Forum |
Home
| What's New |
Features |
Gallery |
Reviews |
Reference |
Forum |