Hasegawa's 1/72 scale
B-24D Liberator
by Evan “Lacquer Man” Smith
|
|
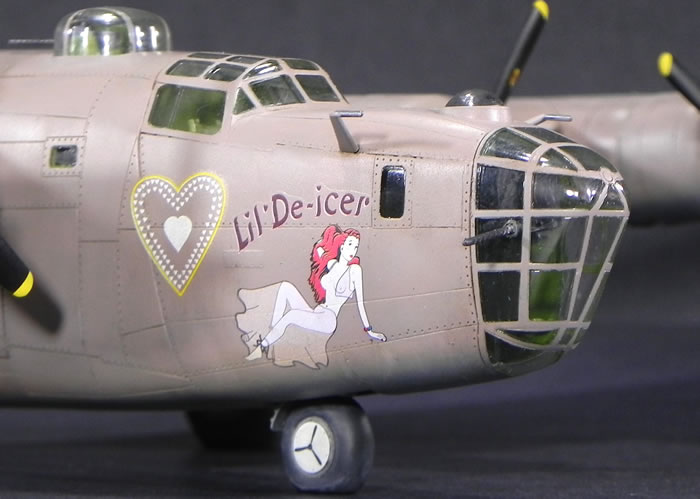
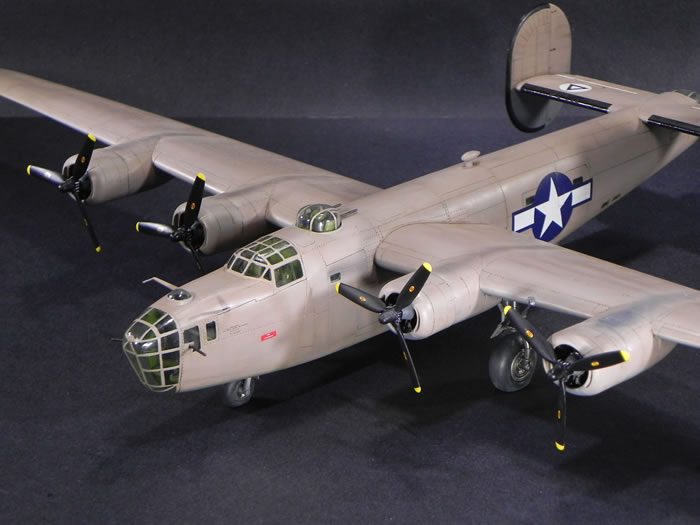
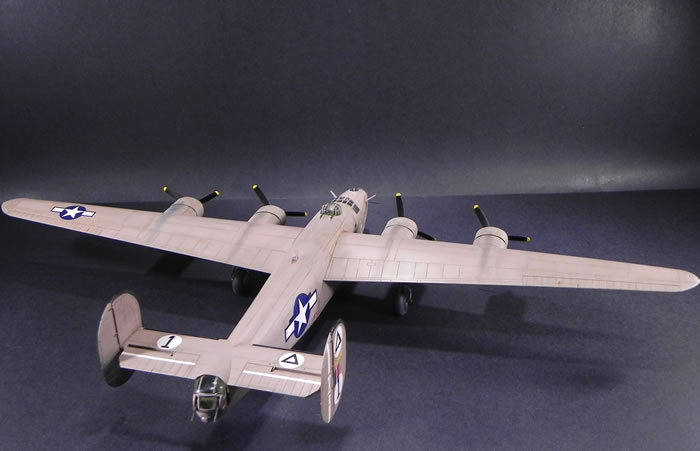
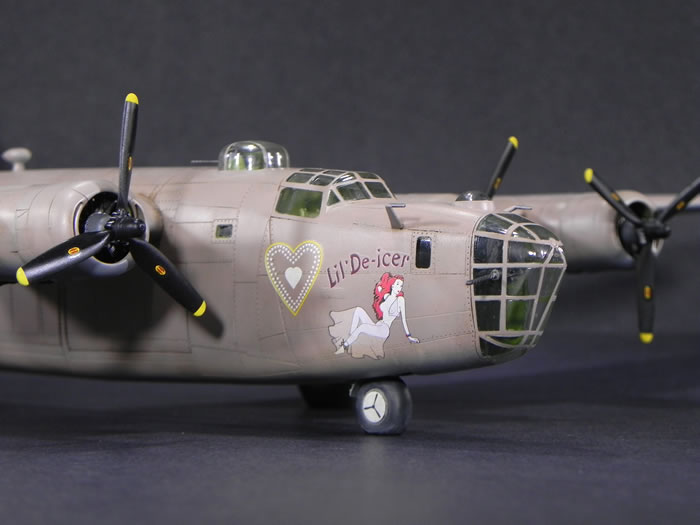
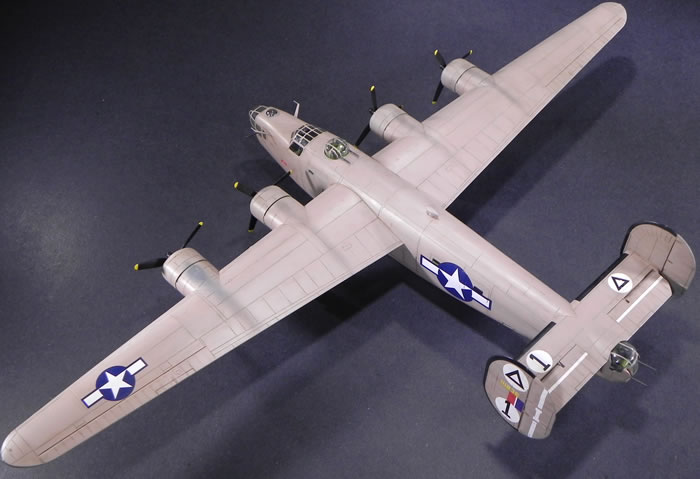
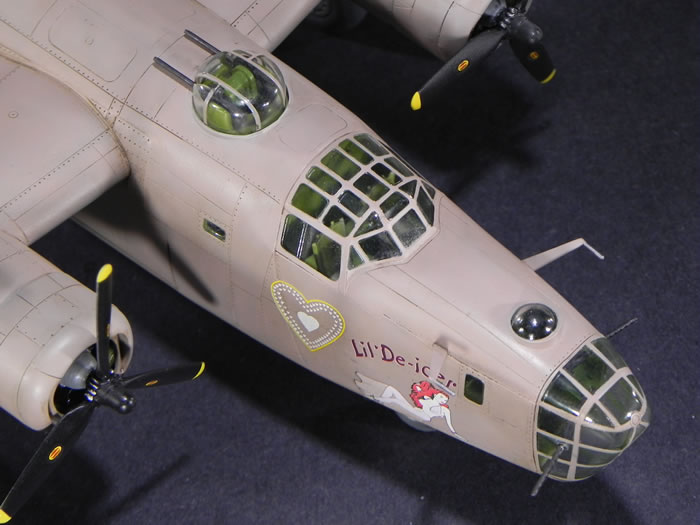
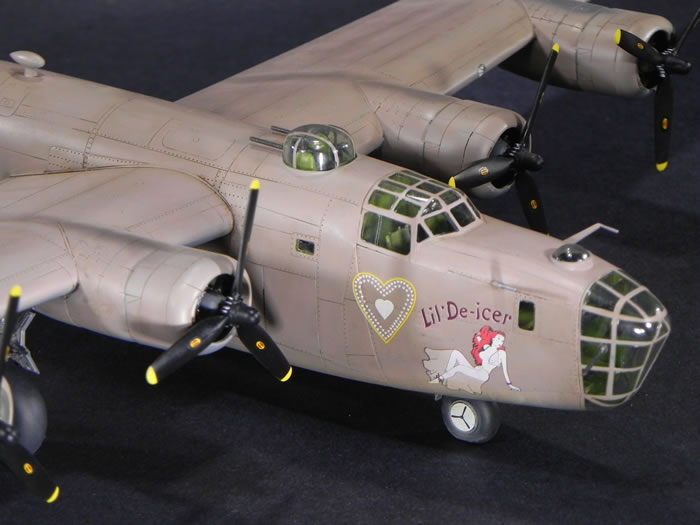
Consolidated B-24D “Lil’ De-Icer”
Veteran of the Ploesti Raid August 1943 |

Trumpeter's 1/48 scale MiG-23M Flogger B
is available online from Squadron.com for only $44.99!
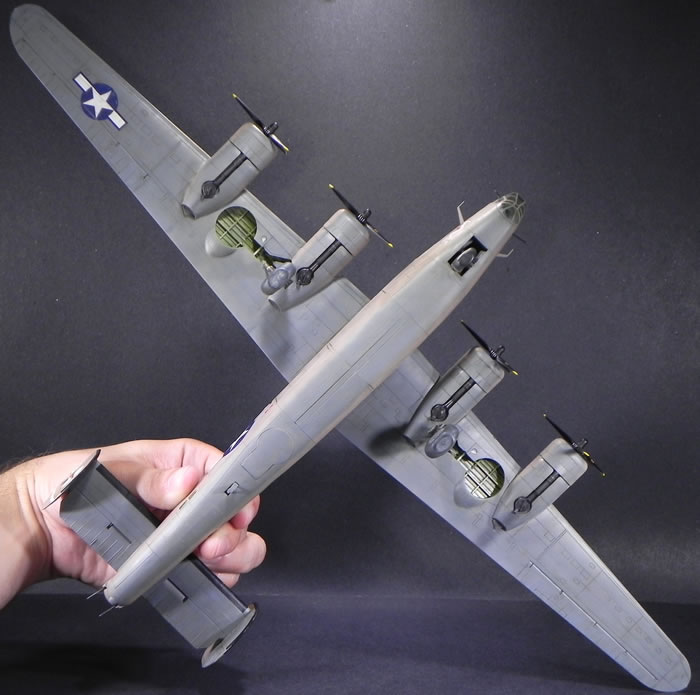
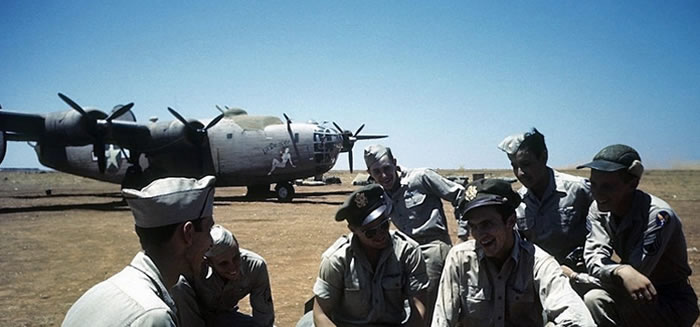
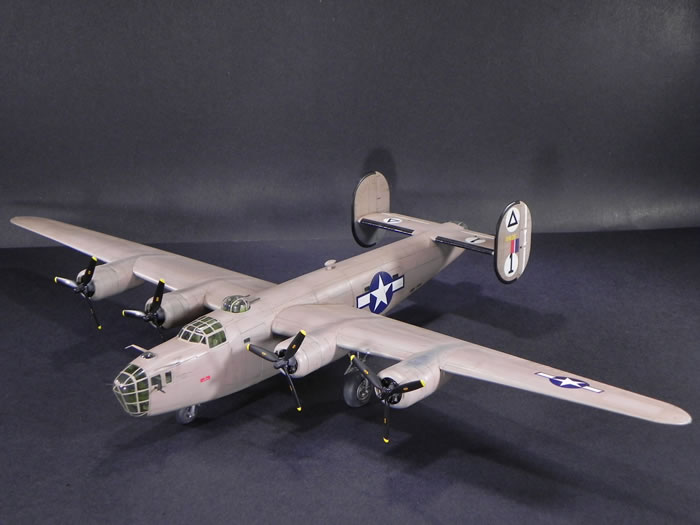
The B-24 never had the looks or publicity of the B-17 but still turned in the work, often paying a high price. I’ve wanted to build a B-24 for a long time: hoarding several of the Hasegawa kits (#00932) in preparation. When I came across the history of one B-24D christened “Lil’ De-Icer” my mind was made up.

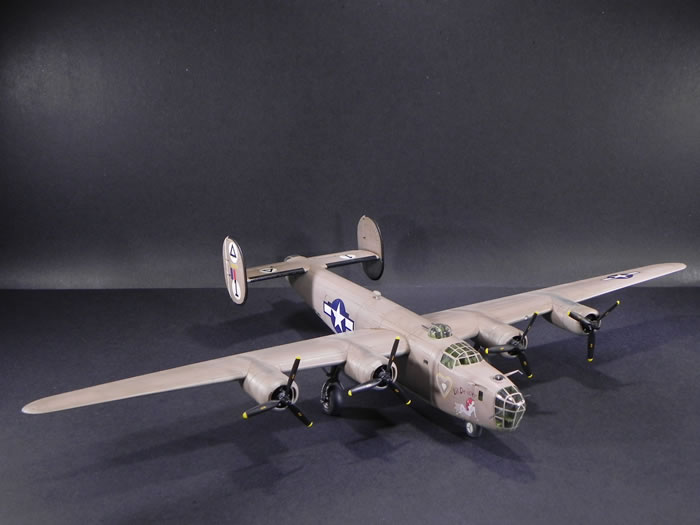
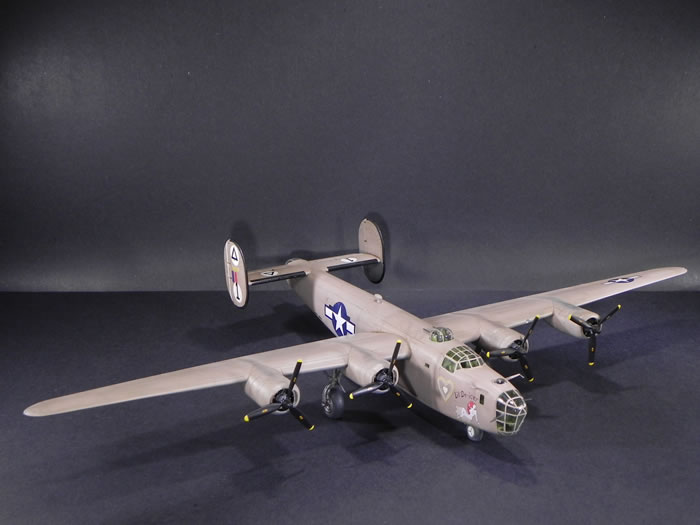
This particular aircraft participated in Operation Tidal Wave: the infamous raid against the Ploesti oil fields on August 1st 1943. Serving with the 98th BG, she and her crew returned from Ploesti and continued to serve well into 1944 when she was sent back to the states in exchange for newer aircraft. “Lil De-Icer” met her end on the scrap heap in 1946.
Fortunately, markings for “Lil’ De-Icer” are available on the excellent and well-researched decal sheet from Lifelike Decals (#72-029). A desert-pink B-24D with a notable history and nose art: I couldn’t say no.
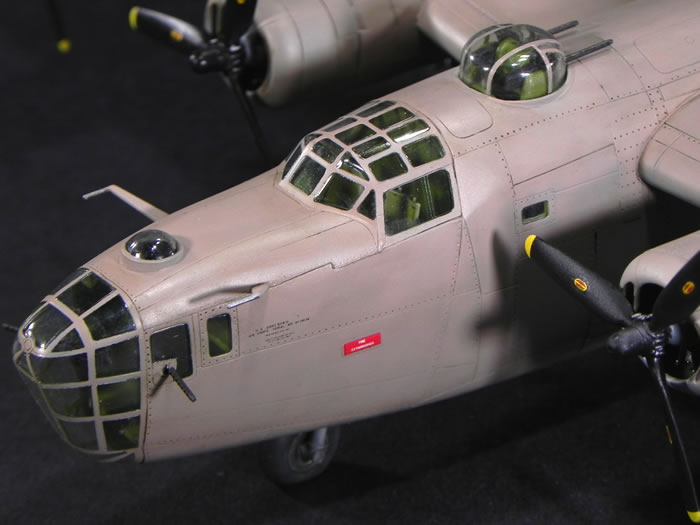
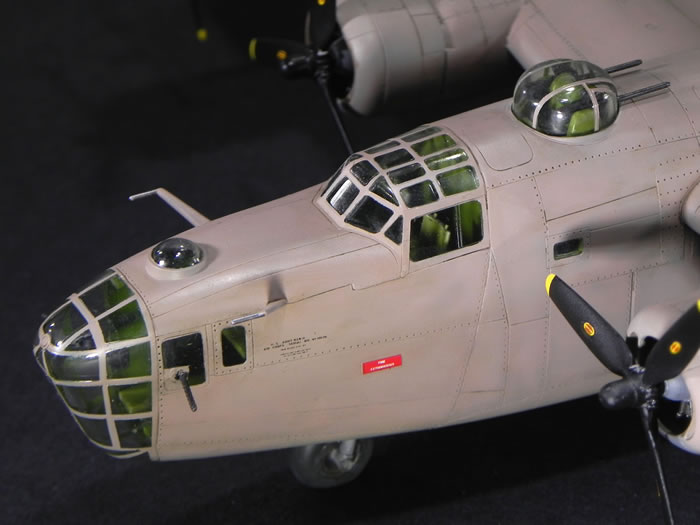
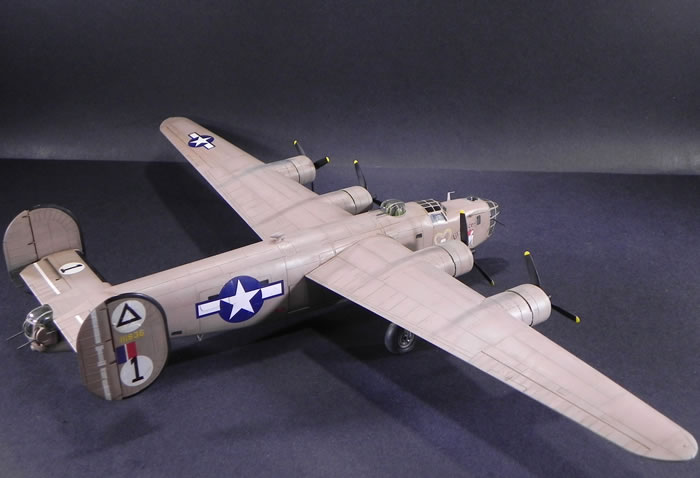
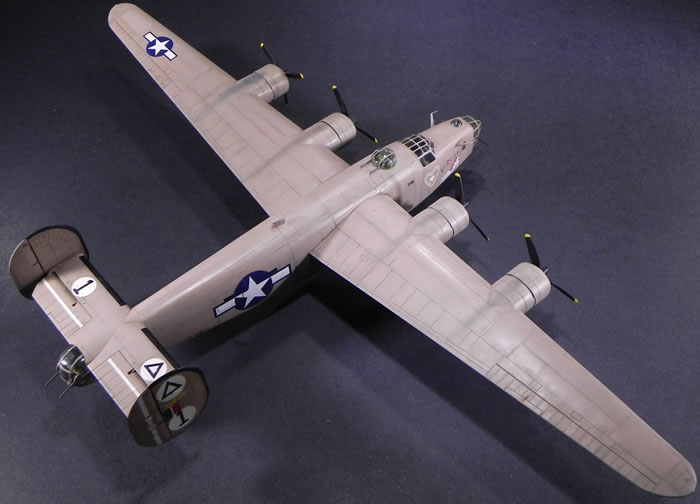
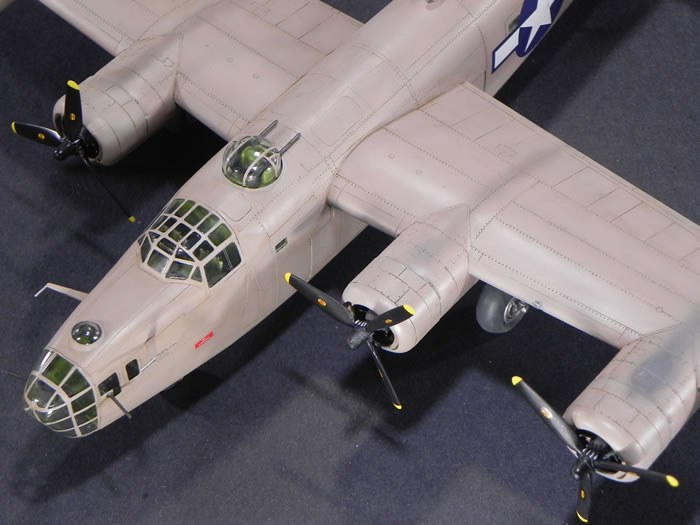
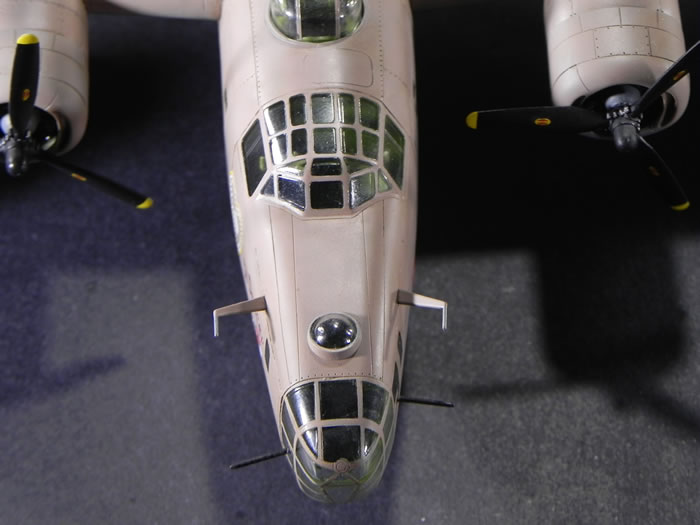
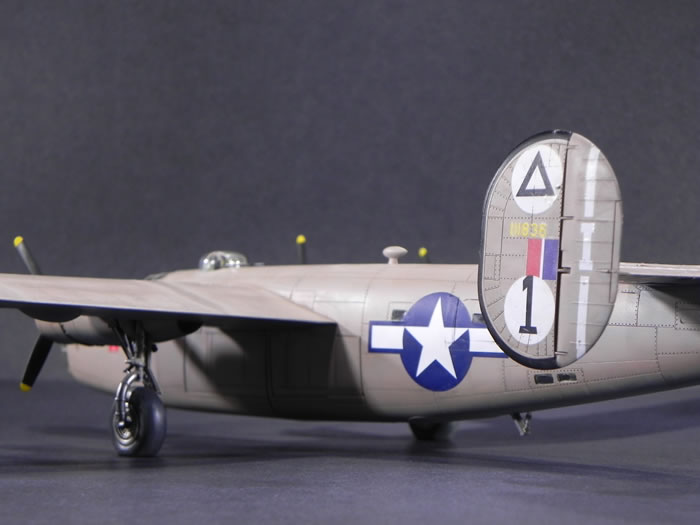
Two major inaccuracies needed correcting right out of the box. The most obvious is the configuration of the starboard side front window. The kit molds this as a separate window, while photo references clearly show a smooth panel on Lil’ De-Icer and other aircraft of the same production run. This was fairly simple to rectify, as it only required a light bit of filling to level out the detail then a quick re-scribing.
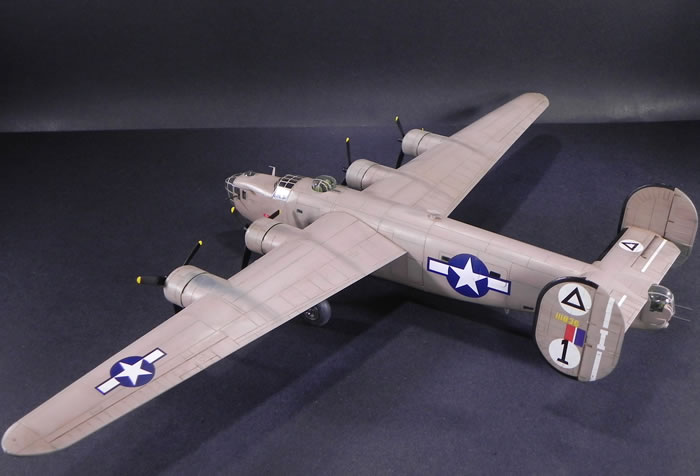
The second issue was much easier to correct, but rather puzzling given the quality of the kit. On the 1:1 B-24D, the front landing gear doors retracted into the wheel well, and are not visible when the plane is on the ground. Hasegawa would have you use the doors from a later version if you follow their instructions. This is an extremely easy fix, as I simply left the doors off.
Finally the positioning of the nose guns took a bit of research and comparisons to other aircraft in the squadron where photos were available. From what I could gather the single machine gun in the very front of the nose was omitted on Lil’ De-Icer, either to save weight or to clear the line of sight for the bombardier.
Weight - and lots of it!
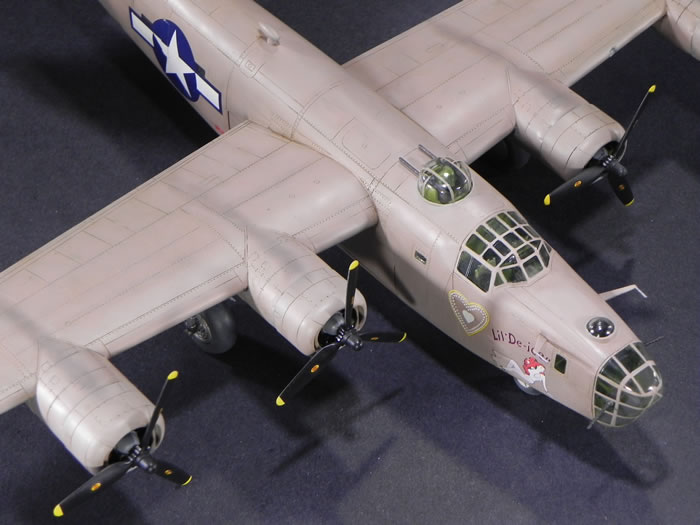
The kit instructions suggest adding 90 grams of weight to the nose. Initially I assumed this was an error. Not so, as I wound up using even more than that from my trusty roll of lead. Due to the open nature of the nose, the front wheel bay and the fuselage underneath the top turret were crammed full of lead in an effort to bring about the correct stance. Fortunately the kit landing gear is extremely robust and was up to the task of supporting this beast!
With the aid of a set of masks from Eduard and my trusty supply of Mr. Paint (MRP) USAAF colors the actual painting of this beast was rather straightforward. All of the demarcations between the Neutral Grey underside and Desert Sand top color were done free hand. This was made easy by the large and quite soft edges on the real aircraft. Only masking of the more complex shapes around the bottoms of the engine nacelles was required for painting.
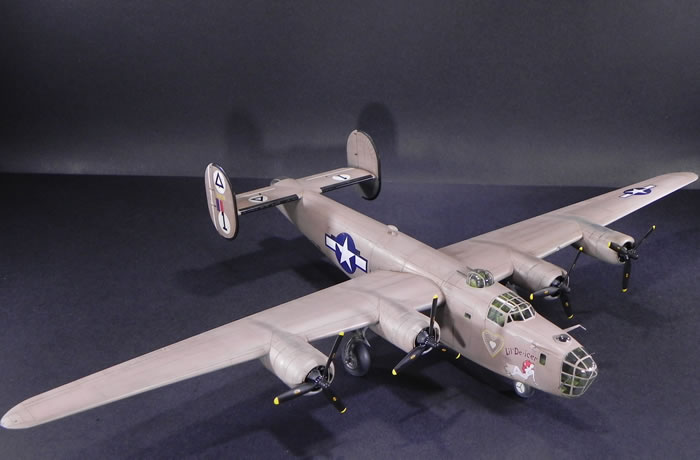
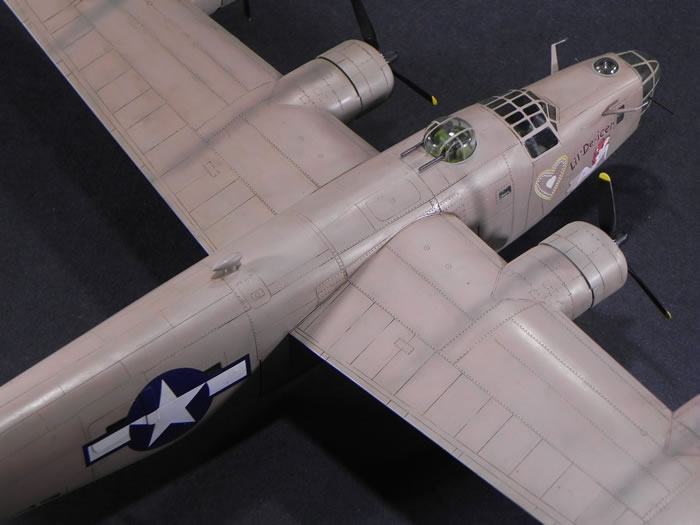
Decals, Weathering and the Logic Behind The Exhaust Stains
Decals were laid down with a substantial amount of cursing and gnashing of teeth due to the fragile nature of the Microscale-printed sheet. My most grievous error came from the use of Tamiya’s Matte Clear XF-86 thinned with their acrylic X-20A thinner. This mixture attacked my decals and caused Thankfully I was able to freehand the corrections and touch ups with Vallejo acrylics. After this, I sprayed a coat of Dullcote to seal everything in and prepare for the various washes.
Weathering was a straightforward affair thanks to a mix of Mig and AK Interactive enamel washes. I used AK’s Africa Dust Effects (AK 022) to replicate the harshness of service in the Libyan Desert. This is more of an armor technique wherein the wash is applied, allowed to dry, and then lightened with a soft brush moistened with odorless thinner. I attempted to keep the effect light so as to not spoil the scale effect by overdoing things.
The exhaust stains sparked a bit of controversy at my local IPMS club. While the actual exhaust on the B-24 routes through the supercharger and out the bottom of the engine nacelle, I noticed in my photo references that a number of the North African based -24’s exhibited significant stains across the top due to cracked exhaust rings.
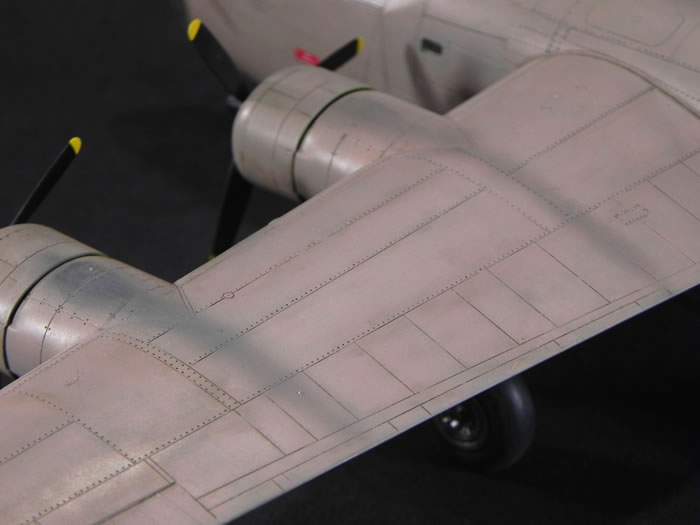
I wasn’t able to find any suitable photos of Lil’ De-Icer, but elected to use weathering in this area to help tell the story of a battle weary bird.
Overall I’m quite pleased with the result, and I feel like it makes a fine addition to my collection. My main takeaway would be that whenever possible, research your topic and try and gather as many photos as possible. It’s the small details and corrections that often bring a model together and make it appealing, and I hope I achieved at least a bit of that here.
Cheers!
For more information on this build, please visit http://modelpaintsol.com/
Text and Images Copyright ©
2017 by John Miller/Model Paint Solutions
Page Created 24 August, 2017
Last Updated
24 August, 2017
Back to
HyperScale Main Page

|
 Home
| What's New |
Features |
Gallery |
Reviews |
Reference |
Forum |
Search
Home
| What's New |
Features |
Gallery |
Reviews |
Reference |
Forum |
Search