Revell 1/32 scale
P-51B to A-36A Apache Conversion
by Suresh Nathan
|
P-51B to A-36A Apache Conversion |

True Details' 1/48 scale Ki-27 Wheels and Spats are available online from Squadron for only $4.99!
The North American A-36 Apache (listed in some sources as "Invader", but also called Mustang) was the ground-attack/dive bomber version of the North American P-51 Mustang, from which it could be distinguished by the presence of rectangular, slatted dive brakes above and below the wings. A total of 500 A-36 dive bombers served in North Africa, the Mediterranean, Italy and the China-Burma-India theater during World War II before being withdrawn from operational use in 1944. By mid 1944, it was replaced by the more modern Republic P-47 Thunderbolts.
The Revell P-51B provided the starting point of the kit. The first order of business was two cans of Singapore’s finest “Tiger Beer” (Figure 1).
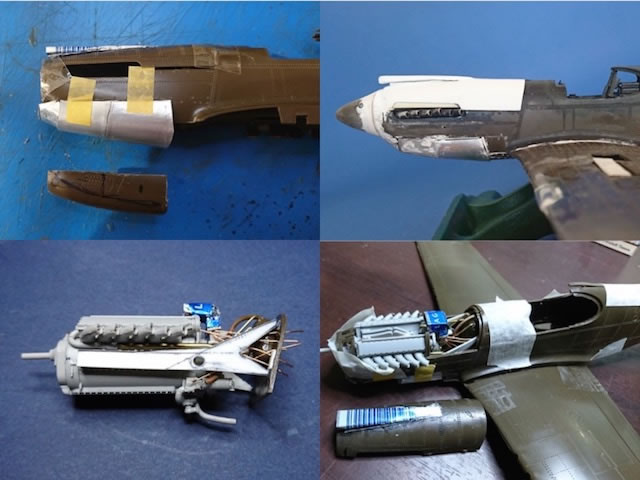
This provided the aluminium for the cowling panels. The four-prop spinner was filled in and converted to a three-prop. The Allison engine was ripped from a Trumpeter P-40B and heavily modified. In mine the fuselage was badly warped and I could have corrected that with major surgery aft of the cockpit (but I got lazy). Mostly raised panel lines and raised rivets were too prominent and required paring down. The panel lines had to be rescribed anyway due to what was essentially an Allison engine P-51 with dive brakes and chin guns. I adapted the Eduard P-51B detail set as well as some scratch-building for the cockpit. The Eduard parts are typically flimsy but with accurate folding and painting with additional scratchbuilding turns out very nice (Figure 2).
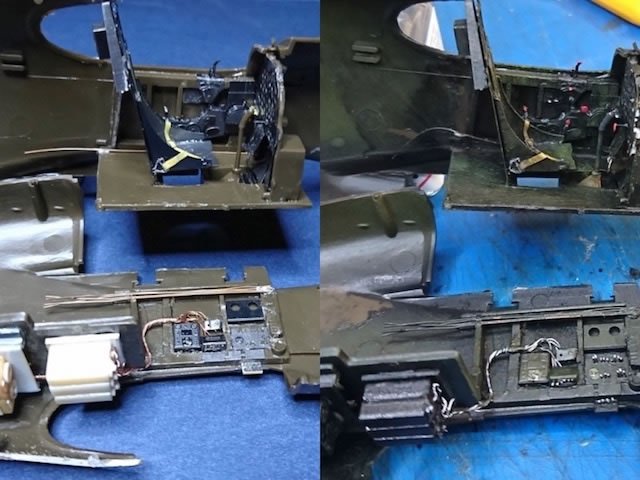
The shape is accurate but it is still worth doing a trial fit. The cockpit will need to be refitted as the fuselage halves come together as they do not fit perfectly. Like many P-51 kits in any scale the wheel wells are boxed in when they should have a recess in the back. Machine guns were redone with brass and copper scratch-building and the door over the machine gun bay opens and closes.
The airbrakes were going to be the most recognizable part of the plane (Figure 3).
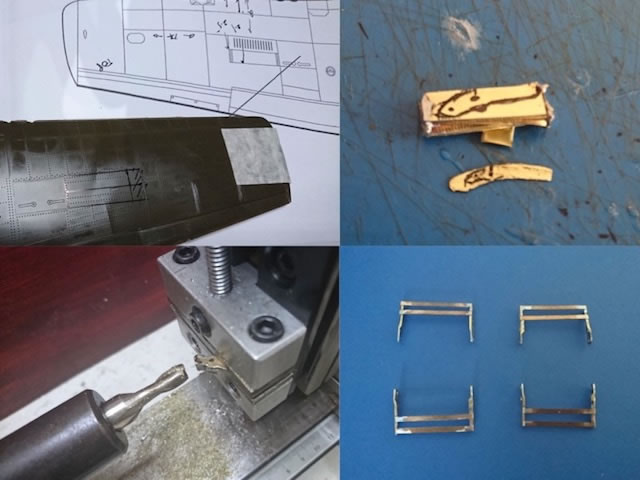
I could have just scribed the profile in but this did not give it justice. The lever system to get the brakes to open in opposite directions was also very intriguing and so I decided to make working airbrakes (!). Eight sheets of brass were stacked and soldered. They were milled and released from solder before being soldered to brass strip. These were wired in place and work like the real thing. Nevertheless (Figure 4) there are two gaps on the side that could not be hidden as they are needed for the arms to move :o(.
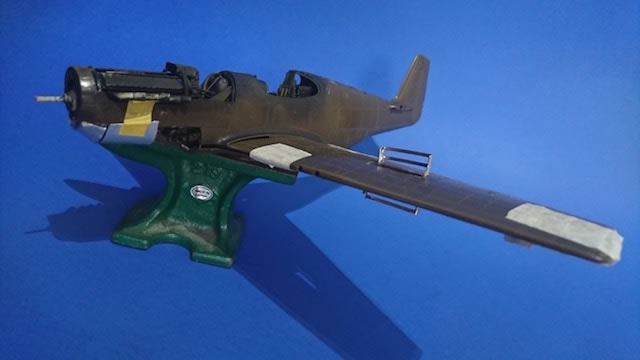
The actual brakes were fabricated out of cast resin from a strip plastic composite master (Figure 5).
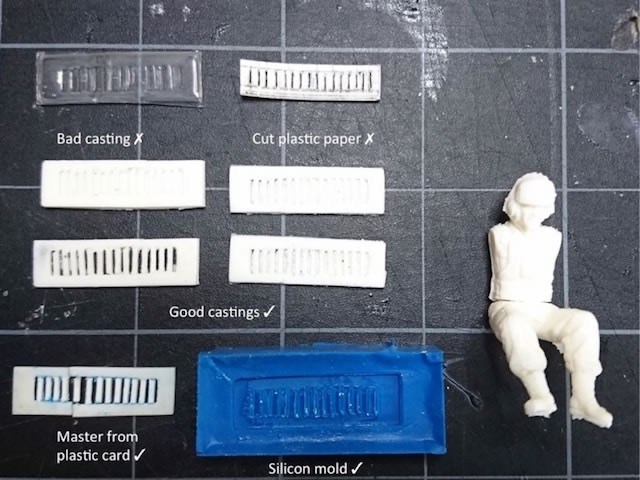
Along the way there were failed attempts at scribed pla-paper, vacuum form and resin itself. The ideal might have been photoetching but disposing of the materials afterwards is very complicated in the present environmen
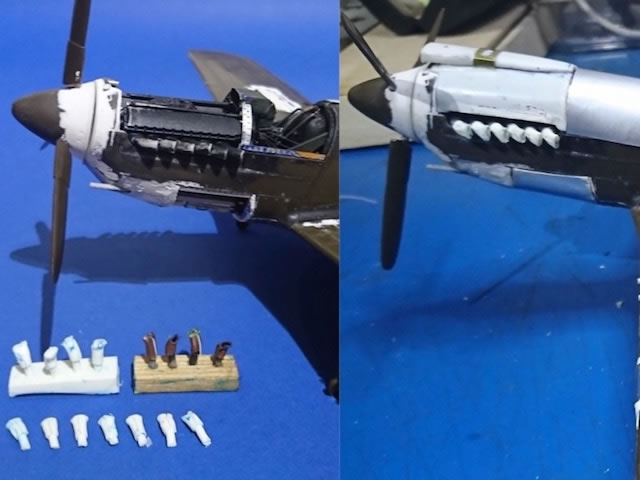
The Trumpeter engine exhaust stacks were inaccurate for flattened stacks. They were redone using resin castings from scratchbuilt exhaust stacks of brass tube. I did not like the final cowling and used that as a master to vacuum form a new cowl (Figure 7).
An important detail to get right is the 3-color indicator lights which should be on the belly aft of the air intake and not on the wing underside as in most mustangs and many Apache kits. Similarly the air intake needed to be modified for the Apache.
The model was base painted in Alclad chrome and in preparation for chipping I used masking fluid liberally (Figure 8).
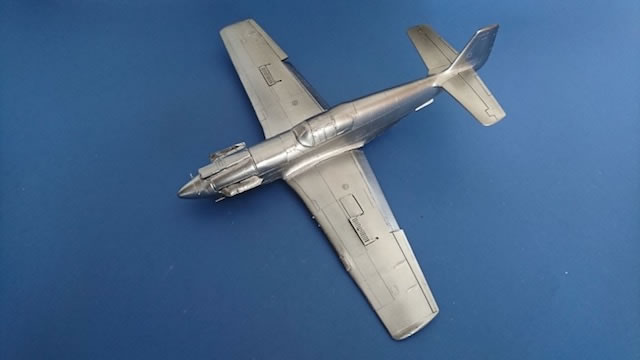
I painted in enamels, varnished with Future-Tamiya Flat acrylic, weathered with turpenoids and drybrushed sparingly. Masking fluid was removed to expose bare metal. I used oil washes for weathering and drop filters for color variation.
The markings for "Priscilla/Mavonne" 1st Lt. Bert Benear, 526th FS, 86th FB, Corsica 1944 are available for the Hobbycraft Apache. I’ve long since preferred to do my own markings though. Red rimmed insignia are difficult to find and had to be painted by first painting a red base (Figure 9).
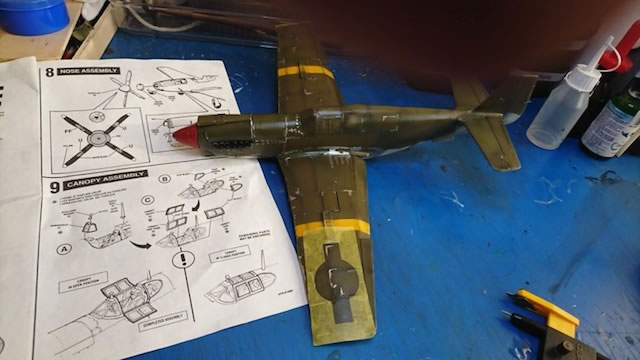
The kit decals were then trimmed to fit into the red base (Figure 10).
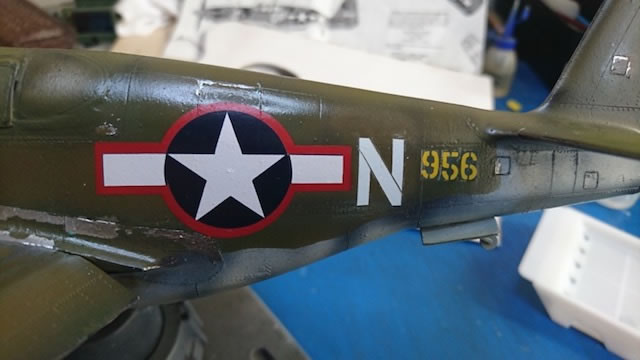
I could scrouge up an M the numbers 9,5,6 and 8 and these were cut and moved around and retouched to form N 956. Benear named this beast "Priscilla" after his college sweetheart and also marked it with her fraternity letters "Pi Beta Phi". On the starboard side, "Mavonne" was the crew CO's (Figure 11).
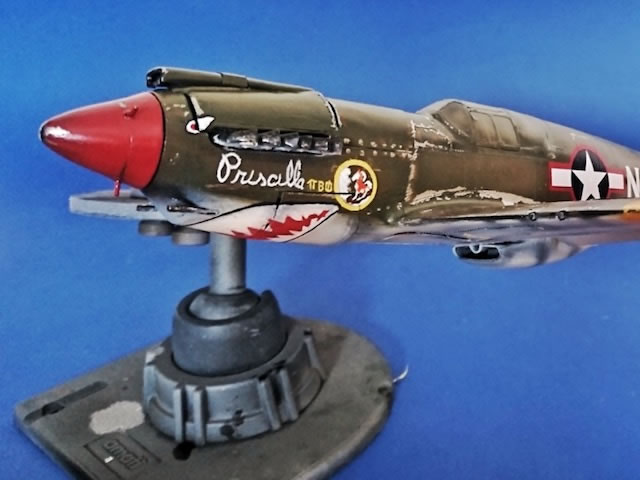
This was all hand-painted in acrylic. The sharkmouth was likewise handpainted. The stencils were from the Revell kit and for their age, Revell constantly amazes me with the quality and comprehensiveness of their decals.
I bought this 1969 kit as a re-issue in 1993 for 12 bucks. I always loved the Apache but its taken some years to develop the skills to pull it off. I could have done the Hobbycraft model but having built a few Hobbycraft offerings, they can be very difficult to do especially with engine and interior detail. The kit itself does not go together well. Attempting a conversion like this on a cheap kit is an excellent undertaking….and sometimes you get it right!
References
-
Walkaround Allison Engined Mustangs from Squadron/Signal Publications
-
American Aero Sevices (www.americanaeroservices.com)
-
National Museum of the US Airforce Dayton,Ohio
-
Colling’s Foundation, A-36 Baby Carmen
Text and Images Copyright ©
2017 by Suresh Nathan
Page Created 21 November, 2017
Last Updated
21 November, 2017
Back to HyperScale Main Page
|
Home
| What's New | Features | Gallery | Reviews | Reference | Resource Guides | Forum |