North American / Ryan L-17 Navion
Valom, 1/72 scale
S u m m a r y : |
Catalogue Number: |
Valom Kit No. 72106 – N.A. L-17 Navion
Valom Kit No. 72107 – Ryan L-17B Navion |
Scale: |
1/72 |
Contents & Media: |
39 parts in tan coloured plastic; 5 parts in clear plastic; 4 parts in resin; photo-etched fret; markings for 2 aircraft in each kit. |
Price: |
Available online from Hannants:
Kit No. 72106 - £14.42 plus shipping
Kit No. 72106 - £14.42 plus shipping
For currency conversion click here |
Review Type: |
First Look. |
Advantages: |
A respectable kit of a long overlooked subject. Choice of open or closed canopy. |
Disadvantages: |
Very minor fictitious details in the cockpit. Photo-etch seatbelts are included but not correct for Navions. Extremely minor errors in the instructions and on 72107’s painting guide. |
Conclusion: |
Quite simply, this is the only Navion model readily available today. It is by far the most detailed and best fitting kit ever offered for this subject. |
Reviewed by Trevor McTavish

Sword's 1/72 scale Ki 44 Shoki is available online from
Squadron.com
The Navion (pronounced nay-vee-on), was designed by the same team of engineers at North American Aviation that were responsible for the legendary P-51 Mustang, who expected that airmen returning home would want to keep flying.
While many manufacturers returned to constructing airplanes from steel tube, wood and fabric, North American used the materials and methods used on its warplanes, namely all aluminum, stressed skin construction.
Forty years ago my father purchased a Twin Navion, so I’ve been immersed in the world of the Navion since the day I was born.
Over the years we’ve developed a website (http://www.twinnavion.com), aimed primarily at the Twin Navion, but it also contains the majority of Navion-related information available on the internet.
Design and Development:
In the summer of 1945, J.H. "Dutch" Kindelberger, President of North American Aviation, and J.L. "Lee" Atwood, Vice President, tasked Chief of Design, Edgar Schmued, with developing a modern light aircraft for the general aviation boom many anticipated to follow with the declaration of peace.
There's speculation on whether North American Aviation was serious about entering the light airplane market because NAA had no pre-war experience with civilian airplanes. Certainly the expected costs of production were far greater than the prices returning airmen would be able to afford so there was little economic sense to entering this market. The most accepted theory is that management at North American felt that keeping their experienced engineering, design and production groups intact as they waited for a new series of military contracts for jet aircraft was well worth any financial losses the company would incur producing a light airplane. Regardless of how they justified it, NAA allotted $7.5-million to develop, test and certify the new plane.
Schmued assembled the same team that developed the famous Mustang fighter plane and began fleshing out the design under the NAA internal designation of NA-143.
The NA-143 was to combine a comfortable four-seat cabin with modern, all-metal construction and gentle handling characteristics. In addition, the plane was to be sturdy enough to permit off-field operations. Many of the NA-143's physical traits were the direct result of the men fleshing out the design. They based much of the profile on their P-51D Mustang, including the sliding canopy and the use of hydraulic landing gear and flaps, and the wing of the NA-35 trainer.
At the start of 1946, the NA-143 was finally given its identity when someone suggested using the company's abbreviated stock market name. Suddenly the NAvion was born.
In February 1946 it was announced that the NA-143 prototype, NX18928, had been successfully tested and flown.
Production lasted from mid-1946 to April 1947, during which time hundreds of orders were placed, including one from the United States Air Force.
Initially selling for $6,100, production would occur in batches of 250. Shortly after production began, North American announced that they'd signed $7-million in sales. NAvions quickly grew in popularity, with businessmen, State Police agencies and members of the Hollywood elite purchasing their own planes, which were now rolling off the Los Angeles production line at a rate of 10 each day. But NAvions did have their drawbacks. The heavy construction, high lift wing and low power of the Continental E-185 engine limited performance. The biggest limitation was the top speed - 12mph slower than the Beech 35 Bonanza. More importantly, North American was losing money on each plane. Production costs were approximately $18,000 but the sale price for 1947 was $6,750 for a standard model and $7,750 for one with an IFR instrument panel. Finally it was announced that NAvion production would cease on April 14, 1947 but with hundreds of NAvions filling the ramp in Los Angeles, no gaps in deliveries occurred.
In July 1947 ownership of NAvion passed from North American Aviation to Ryan Aeronautical Company through an $8-million sale. Production moved from Los Angeles to San Diego and resumed with the only change being the use of a lower case 'a' in the Navion name. The first Ryan-built Navion, now selling for $7,750, was delivered in October 1947.
The following season saw the introduction of the first "Ryan Refinements" - options intended to increase the Navion's usefulness. These included improved instrumentation and auxiliary fuel tanks. 1948 also saw the introduction of four high-gloss enamel paint finishes in maroon, blue, cream and green. Prices increased again in 1948, to $8,750 for a standard model, jumping again to $8,990 before the year was out.
Dropping sales in 1949 reduced production to a rate of four each day, so Ryan slashed prices by $1,000 to $9,485 for the Utility 205 model, and $10,985 for the De Luxe 205. The Utility 205 was a bare-bones workhorse aimed at those needing a flying pickup truck, while the option laden De Luxe 205 was aimed at the business traveler.
Failing sales, demanding military contracts and the uneconomical production cost forced Ryan to cease all Navion production in May 1951.
That’s not the end of the story – Navions continued to be produced into the 1970s and reached an impressive 22 variants. If you would like to learn more, visit http://www.twinnavion.com/specifications.htm.
Source: TwinNavion.com
Previous Navion Models:
For all the model kits offered for the Navion I’ll refer you to (http://www.twinnavion.com/models.htm), as we have collected at least one of every Navion model and toy ever produced.
- In the 1940s there were a couple wooden model kits that ranged from carving an airplane out of a block of balsa wood to free-flight and control-line flying models.
- In the 1950s O-Lin released a 1/48 scale Navion with a whopping 18 pieces (this included a two-piece stand). It was later released under the Lindberg and Pegaso brands, and White Eagle Vacu-Form sold a vacuformed copy in the early 1980s.
- Dujin had a resin kit in 1/72 scale more than a decade ago. To my knowledge it was only available for a short time through Hannants.
- For those wanting something smaller (and more expensive) a 1/144 scale Navion could be found as part of Anigrand’s XB-70 resin kit, released in 2007. It’s cute, but it has only a 3 inch wingspan.
All of these models require the modeller to invest a significant amount of effort to make a respectable representation of any Navion.
Contents
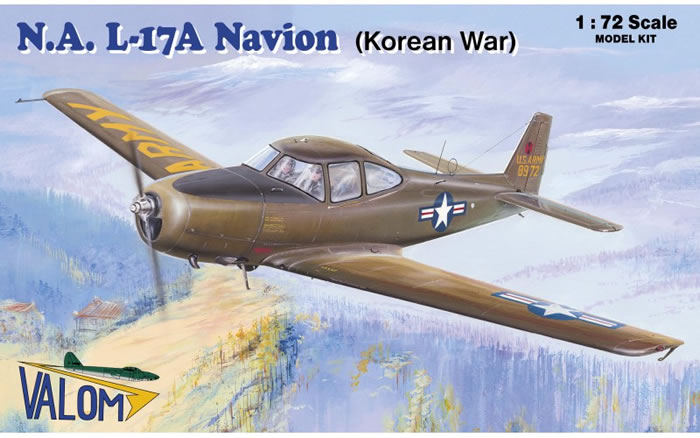
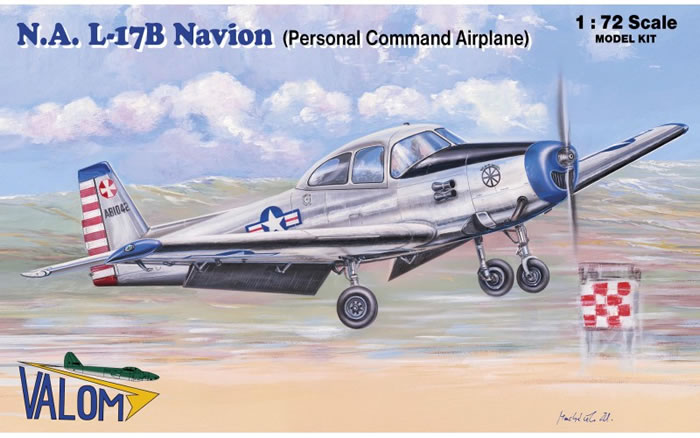
The subject of this review is Valom’s 2015 release, kit number 72106, which is labelled as a N.A. L-17 Navion. Kit 72107 is labelled as a Ryan L-17B Navion but includes all the same parts. The L-17 (later called an L-17A or remanufactured into the L-17C) was almost identical to the L-17B, with the exception of the pitot tube, which moved from beneath the starboard wing to the starboard wingtip.
To further confuse the casual observer some L-17As were remanufactured by the Schweitzer Aircraft Co. into L-17C, which basically reconfigured them to L-17Bs. Some L-17s were also remanufactured into radio-controlled, pilotless drones by TEMCO and called QL-17s.
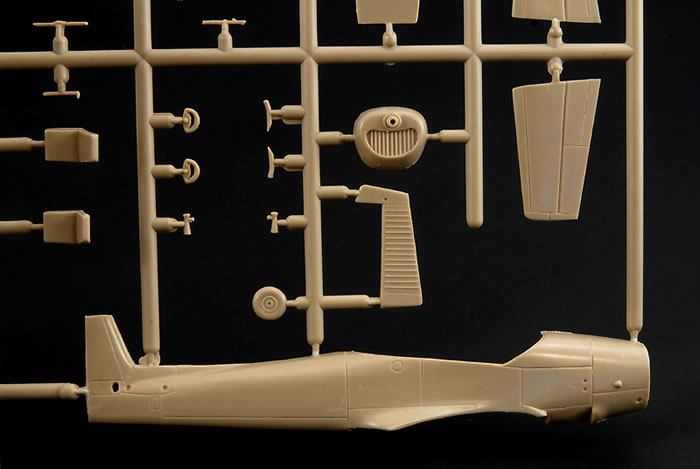
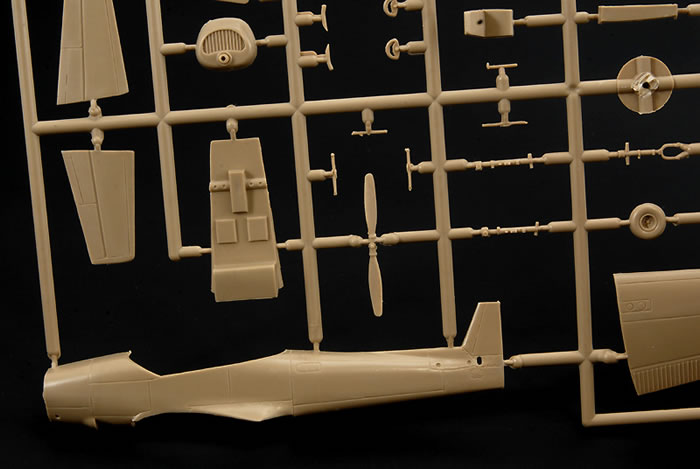
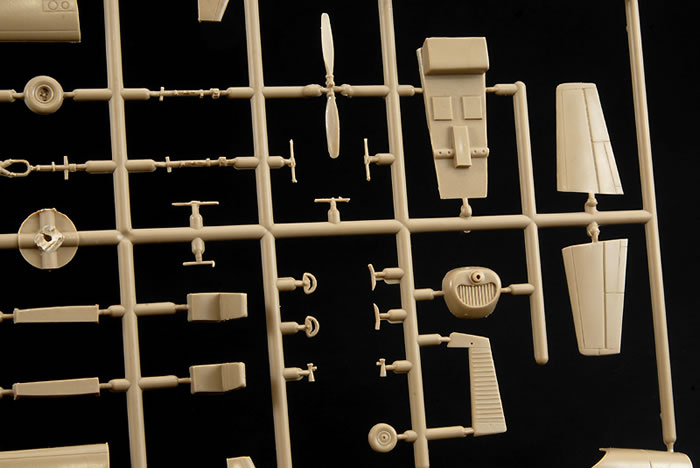
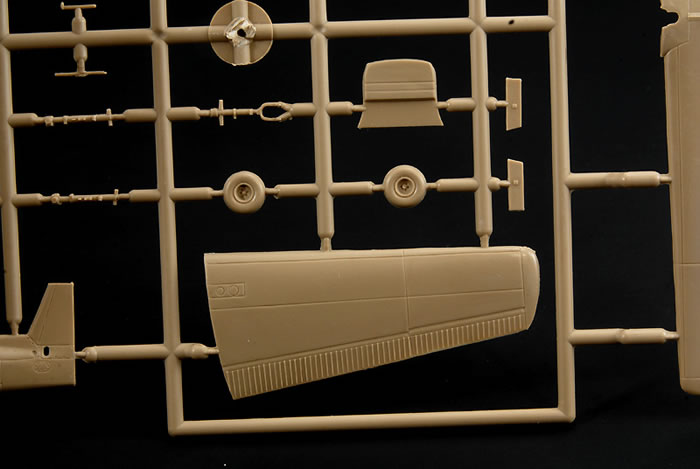
The kit comes in a sturdy top-opening box topped with artwork representing a US Army L-17 over a non-descript countryside. Most parts are contained on a single sprue of tan-coloured styrene. are enclosed in a single plastic bag, with the clear sprue, and the decals and photo-etch further protected in their own smaller bags. All sprues have small attachment points.
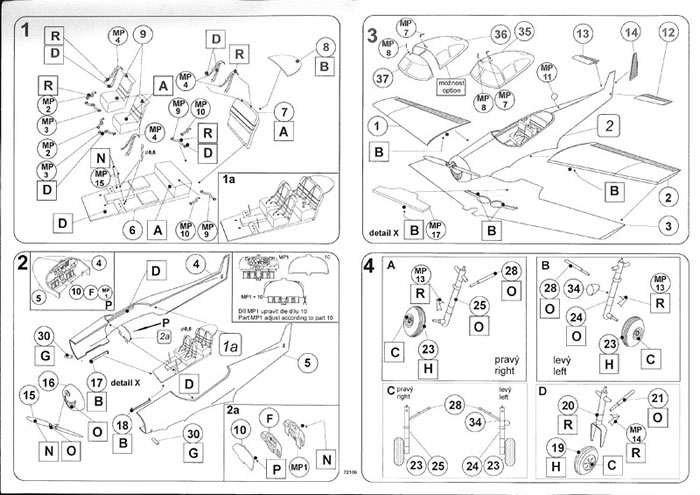
The two page instruction booklet is printed on A4-size paper. Construction steps are shown on seven easy to follow steps. Paint guides for both schemes are in full-colour and include callouts for Humbrol, Agama, Model Master, Gunze Sangyo and Federal Standard 595B.
The Kit
Normally I don’t care about comparing a model to drawings but this is a model review, so I laid the parts against the best Navion plans there are - the ones I created using measurements from real Navions. It's a perfect match. I emailed Valom and discovered they had used my plans, which is good news because this will probably be the only game in town for another half-century.
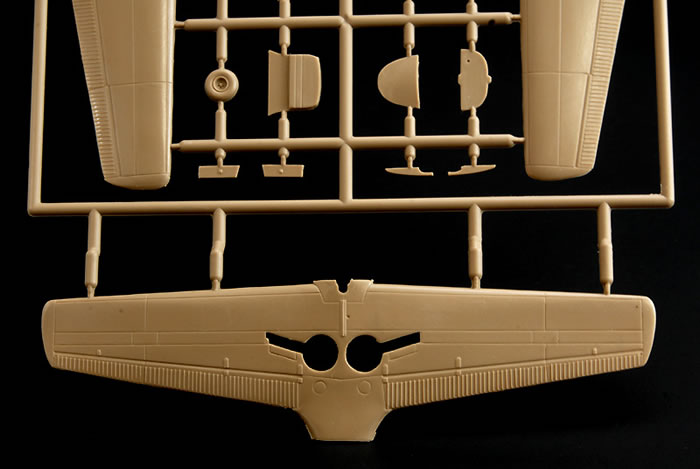
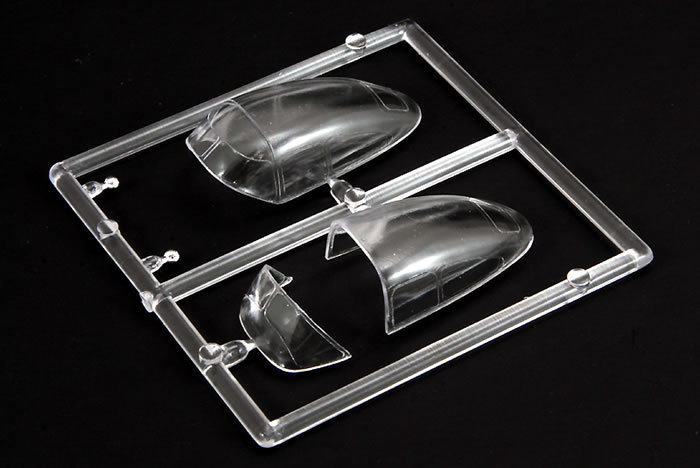
There’s little that can be seen through the tiny windows, but what Valom provides should please most modellers.
I was pleasantly surprised that Valom included two choices of canopy – a one piece closed, and an open two piece unit.
Valom has chosen not to cover this model with rivets but the surface does have a slight texture that should polish away with some fine sand paper. Panel lines are recessed and comparable recent Airfix or Italeri releases in width and depth. Mould ejector pins and seam lines are faint, but I did find a tiny sink mark in the hub of one main wheel.
Buildabilty
Although only a first look review I took the liberty of removing some of the major components for a test fit. With a little test fitting and a touch of liquid putty filler the parts should fit together nicely.
Colours and Markings
Each kits offers two marking options:
72106

- 48-972 - 79th Infantry Division, Korea 1951. Overall olive drab.
- 48-1035 - unknown unit, Korea. Field applied olive drab and neutral grey camouflage.
72107
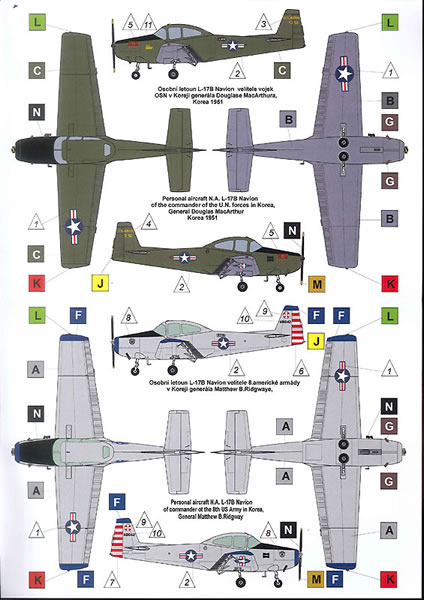
- 48-1316 - Commander of UN Forces, Gen. Douglas MacArthur’s personal L-17, Korea 1951. Olive drab over neutral grey. The decal incorrectly reads 41316 instead of 81316.
- 48-1042 - 8th US Army commander, Gen. Matthew B. Ridgeway, Korea. Overall aluminum lacquer. The decal incorrectly reads AB1042 instead of A81042.
There are several minor errors which I would normally ignore, but since this is a review I’ll include them. Some are simply instruction errors and others are errors brought about by the plethora of variations among surviving Navions. Only a couple actual errors, but correcting them will be simple for any level of modeller.
Step 1:
- There should be no raised details for the rudder pedals, nor is there anything between the front seats.
- Valom called for floor-mounted control sticks (like on a P-51). All Navions used two crescent-shaped yokes protruding from the instrument panel. These yokes are included in plastic (parts 11) but not mentioned in the instructions.
- Do not use the photo-etch shoulder seatbelts (part MP4), as the Navion does not use shoulder straps.
Step 2:
- There should be nothing beneath the lower edge of the instrument panel. The rudder pedals are about 24 inches behind the panel, and there is no column between the front seats. Trim the photo-etch along the lower edge.
Step 5:
- The boarding step (part 29 or MP16) is shown as being installed behind the wing. While this is a common civilian modification, the Navion originally had this step forward of the wing. See the painting guide for the correct location. There's a small indent molded in the proper location.
- Calls for the installation of nose landing gear doors (parts 22). L-17s and North American-built Navions did not have nose gear doors.
Step 6:
- The pitot tube shown is only appropriate for a small number of L-17s based in Western Europe. Civil Navions and most L-17s used an L-shaped pitot mid-span beneath the right hand wing.
- The venturi tubes are shown being mounted to the engine cowl. They should be on the forward right hand side of the fuselage. See the painting guide for the correct location. There's a small indent molded in the proper location.
- Missing the boarding assist hand above the boarding step and forward of the pilot's windshield.
Painting guide:
- If you’re building either example in kit 72107 do not follow the painting guide where it shows red, green and yellow lights immediately behind the canopy. Valom probably thought those were identification or formation lights, but they’re actually flares.
Despite what I’ve written above, Valom’s L-17 is quite simply the most detailed, most accurate and best fitting kit ever offered for this subject. Like all limited-run kits, Valom’s Navions will require some modeling experience.
The real challenge will come if the modeller chooses to tackle the countless modifications that have been incorporated by their civil owners. Later Navion B, D, E and F models can be built from this kit with just some simple scratch built items and scribing a baggage compartment door on the mid-fuselage. I suggest finding photographs of the airplane you are interested in because owners have incorporated dozens of modifications on their planes; from new engines and propellers, to flush windows, downdraft cooling, fairings, tip tanks, baggage compartment doors and landing gear doors. I have also provided copies of all my drawings on the TwinNavion.com website showing the stock configuration for each model.
Review Text & Images Copyright © 2015 by Trevor McTavish
Page Created 26 October, 2015
Last updated
27 October, 2015
Back to HyperScale Main Page

|
 Home
| What's New | Features | Gallery | Reviews | Reference | Resource Guides | Forum |
Home
| What's New | Features | Gallery | Reviews | Reference | Resource Guides | Forum |