Special Hobby's 1/32 scale
X-15A-2
by Leo Stevenson

Airfix's 1/72 scale Hurricane Mk.I is available online from Squadron
First conceived in the 1950s, the X-15 was the most important experimental aircraft used by NASA and the USAF to research a wide range of equipment and up till then little-understood phenomenon in physics. It paved the way to the Apollo space programme and a lot beyond that too, not least, eventually, the space shuttle.
To this day it holds the official record as flying faster and higher than any other aircraft, flying at Mach 6.72 and at a peak altitude of 67.08 miles. I say ‘official’ because over the years constant rumours persist of even faster purely military aircraft flown by the USAF that have been far more secretly developed. I’m inclined to believe such rumours on the grounds that all those billions of dollars that the USA spend every year on secret projects must still have such an obvious goal in order to gain advantage over future potential enemies.
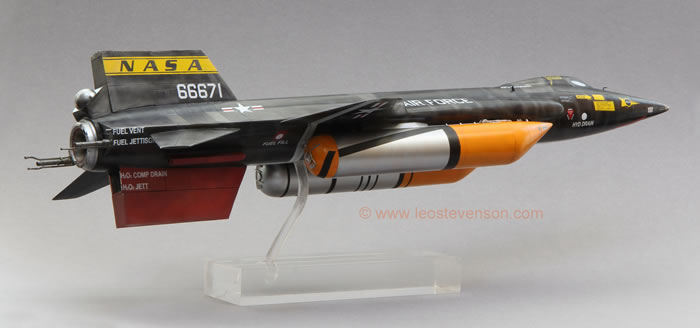
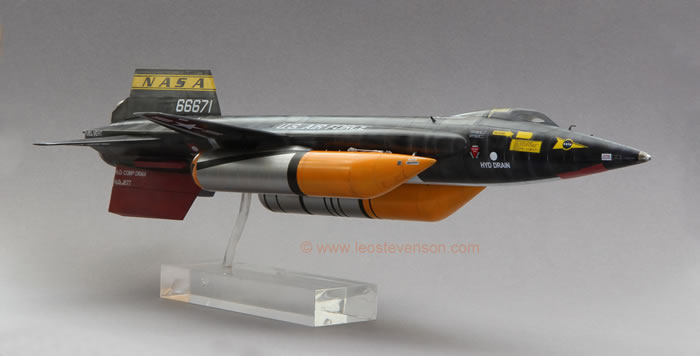
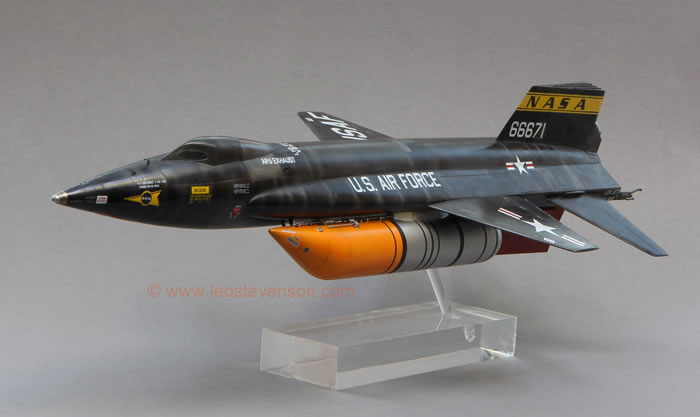
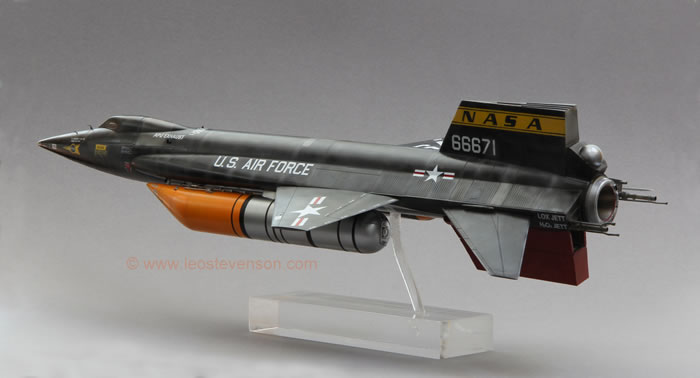
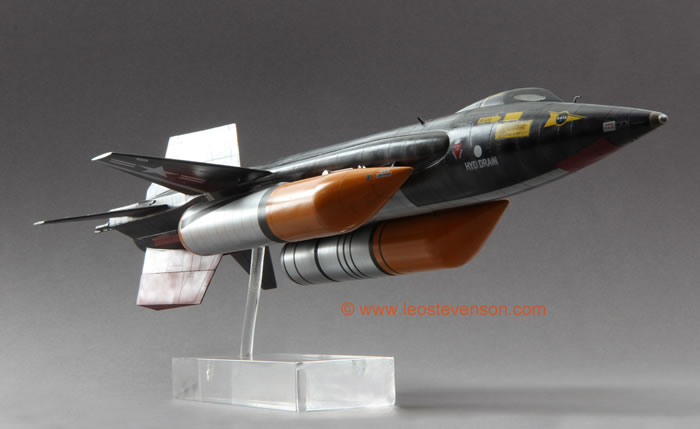
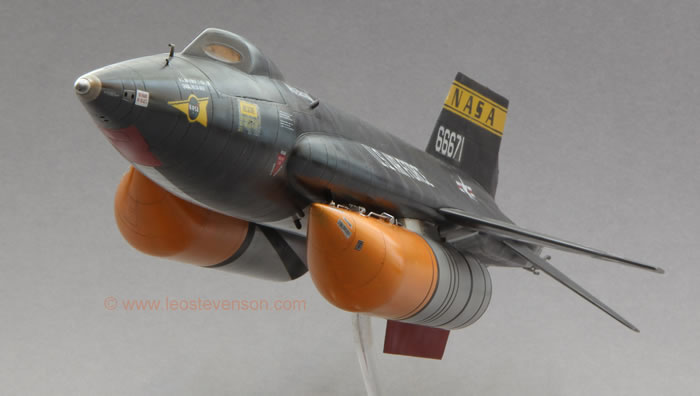
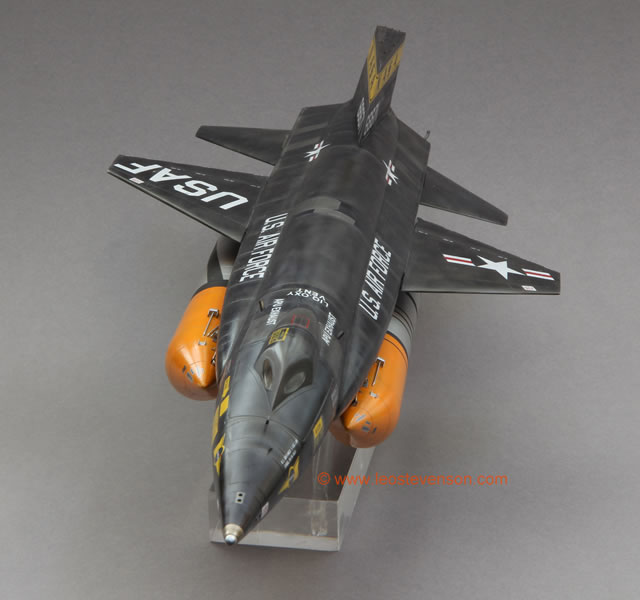
This X-15 A-2 was a special development of the X-15 that carried very large fuel tanks for the massively thirsty Thiokol engine in order to take it further and fly for longer periods. This version only made a few flights. The Czech manufacturer Special Hobby came out with this kit a few years ago to add to their existing X-15 kits.
This kit had the added bonus of coming with a ‘Ground Dolly’, this was a specially designed carriage used to move the aircraft around on the ground and manoeuvre it up to the giant B-52 Stratofortress from which it was launched at high altitudes. This ground dolly is a surprisingly complex little structure, which has been faithfully reproduced by means of a number of cast resin and photo-etched parts. As my most important criterion for taking an interest in an aircraft is the aesthetics – the pleasure of the shape - I thought that making this dolly to show the X-15 when on the ground made it look too lame and tame and so I decided to discard the dolly in favour of presenting my model on a self-made Perspex stand to show it as if in flight to reveal its sleek form better. Wasteful? Yes. Tasteful? You decide!
I became interested in the X-15 as a means to creating a big psychological gear-change from my usual ‘comfort zone’, World War one aircraft. The theory was that making something that had such a simple shape would be easier and more relaxing on my brain which was very tired because a lot of hard intensive work recently. Making and presenting the model in the way I had chosen also had the massive advantage of not having to make any visible undercarriage, or complex wing structures, or an open cockpit, struts, rigging, propellers, guns, or bombs; surely this would be a simple straight-forward build, right? Wrong.
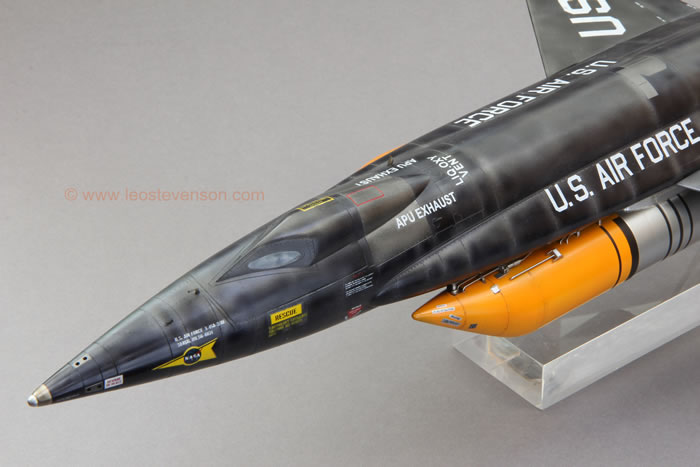
The kit itself is good, there’s not much wrong with it apart from some lacking detail in a few areas, the main problem was in finishing it in a realistic and authentic manner involved a lot more research than I was expecting. The research was not easy because the X-15 was an aircraft that literally changed its appearance after every flight. For example, constant changes were made to the markings and wide a variety of patches of ablative paints were applied in different areas with differing shapes, usually in black, off-white or dull red paint. These areas of ablative paints designed to wear off to reveal certain specific characteristics of hypersonic flight on the airframe. For these reasons it seems that no two flights were the same, both visually and in terms of the data that these flights were supposed to collect.
This model represents the flight made on the Robert A. Rushworth (1924-1993) on July 1st 1966. I think. This is what the instructions say and yet some of what they say seems to be contradicted by other sources, which are themselves often contradictory. I didn’t want to spend the rest of my life getting this right, so what you see here is the best I could do before this project became a chore. By the way Rushworth was an amazing man who flew in WW2, Korea, Vietnam and as well as being an X-15 test pilot he ended up as a Major-General in the USAF.
Another factor that didn’t make this kit the breeze I thought it would be was that it is actually more of a complicated structure than it first appears, for example with the tangle of pipes and gadgets that sit on top of the fuel tanks. The kit comes with copper wire for reproducing these as well as several resin and photo-etched parts, but I chose to replace the wire with various grades of thin brass rod, which was easier to use and looked more to scale too. All this plumbing is fairly visible so it’s worth spending the extra effort to get this right.
One area I did save time on was the cockpit. I predicted, correctly, that this would hardly be visible through those narrow little windows so I assembled and painted this interior as quickly and simply as I could. As always, I only like spending effort on what I can see when the finished model ends up in one of my display cabinets. I get little satisfaction from knowing something like this has been done well if I can’t later still see it!

One area that is very visible is the surface of the model, which is mostly plain and exposed but does actually have a lot of rivets and panel lines all over it, not all of which are reproduced (or reproduced well) on this kit. I added or changed a lot of these in accordance with my references, but I was careful not to over-do this because subtlety equals realism here.
By making a Perspex stand to show this model as if in flight I had to make an extension to the bottom fin of the model because this was a disposable part of the aircraft that was only fitted once it had been attached to the underside of the B-52 from which it was launched. This part of the fin was jettisoned before landing. If I had made the model with its ‘ground dolly’ as it was seen on the ground this wouldn't have been needed and so it isn’t supplied with the kit.
I thought that painting this model would be a quick process, but it wasn’t. These X-15 aircraft were skinned in a specially made alloy called ‘Inconel X’ in order to resist the heat generated by hypersonic flight. This isn’t just plain black in colour, as the instructions suggest, in real life this has a very particular sheen and manner of weathering that is unique. It is vaguely like gunmetal, but it is not as purple-ish. Inconel X is a sort of warm-coloured black, so with some very good quality photographs of X-15’s as a guide, I experimented a lot and came up with the best way of simulating this as follows.
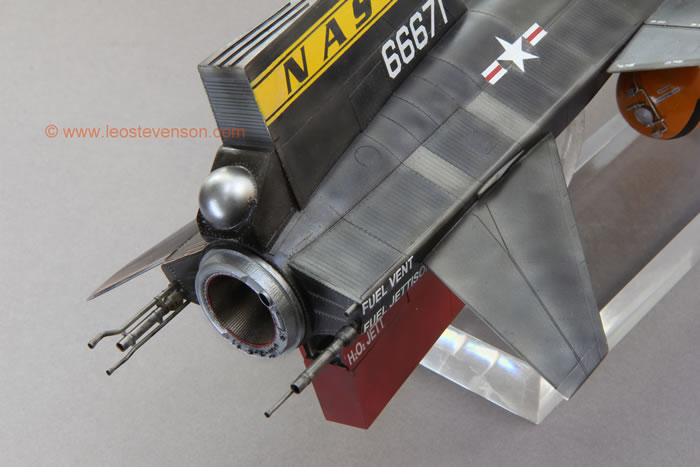
Firstly the whole model was sprayed with Alclad gloss black base coat, then when that was dry I sprayed it all over with Alclad’s steel colour. Then I masked off the areas that were to remain this colour (or that were to be painted in other metallic colours such as aluminium and stainless steel), and I then sprayed the model with several coats of Alclad’s ‘transparent smoke’ (for heat stain effects etc.). This was not done evenly, and I took care to leave some areas with a lot of the steel colour showing through, particularly at the junction of panel lines, which I found is the best way to simulate the heat staining and wearing of the Inconel X finish on the original aircraft.
The decals were a problem. The good thing is that they are fairly dense in colour which is nice and essential with those areas of white and yellow to be able to hide the dark finish underneath, but they are incredibly thin. This is an advantage when it comes to making them settle down on to the rippled surfaces on the flanks of the fuselage, but the bad thing is that this does make them very difficult to handle and so I had to be super-careful not to let them irretrievably fold in on themselves as I slid them off their wet backing. Another problem was that the long ‘NASA’ flash on the top fin is crazily too short for the fin. Photos of the original X-15’s show it going the full length of the fin, but these decals don’t, so I had to mix and match that yellow (not easy) and then mask and spray the yellow flash to the edges of the fins.
Overall, this is a good kit and it was a good experience, despite the unforeseen obstacles on the way, but these obstacles were mainly caused by my fussiness rather than being a reflection on the quality of the kit. Doing this project certainly did make a big change from World War 1 aircraft, which is my own personal comfort zone, and so that’s where I next retreat back to, when I get the time.
www.leostevenson.com www.leojubilee.co.uk
Model, Images and Text
Copyright ©
2015 by Leo Stevenson
Page Created 20 August, 2015
Last Updated
20 August, 2015
Back to HyperScale Main Page
|
 Home
| What's New | Features | Gallery | Reviews | Reference | Resource Guides | Forum |
Home
| What's New | Features | Gallery | Reviews | Reference | Resource Guides | Forum |