Hasegawa 1/48 scale conversion
Spitfire PR.Mk.IV
by Fernando Rolandelli
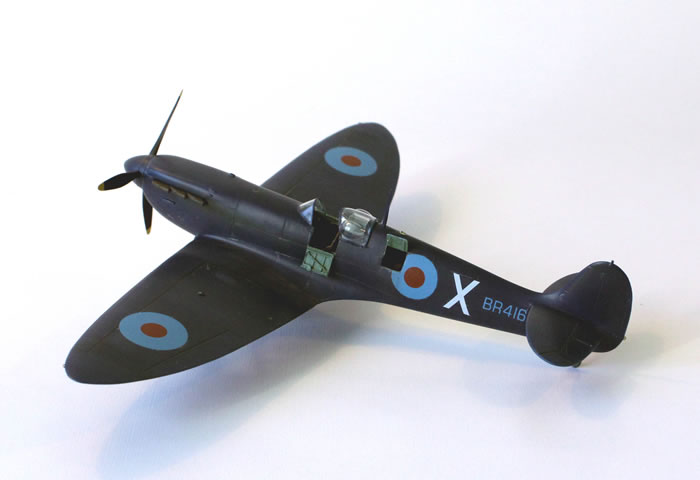 |
Supermarine Spitfire PR.IV
“X”, BR416, 74 Sqn OTU
Palestine, 1943 |

ICM's 1/48 scale LaGG-3 is available online from Squadron
 Background Background
Experts in (or partisans of) the PR Spitfire have claimed that, though calling it “the most influential fighter aircraft of WWII” would be an excess, the title of “the most influential recce aircraft” would have solid fundaments.
Even having long lost the will to enter in such senseless arguments (“which is the best –whatever- of the WWII” is a particularly abstruse one), the importance of the PR Spit is evident, with both long range strategic and short tactical operations of note. The fact that a point defense interceptor could be turned into a long range strategic reconnaissance machine is also something to wonder at. That the conversion was pioneered by a bunch of amateurs in wartime is nothing but extraordinary.
The PR.IV was the first “factory version”, previous ones had been the child of improvisation, so typical of British military at the time. It standardized with extra tanks in the leading edges (in the “D” box originally intended for the evaporation cooling system) and cameras behind the cockpit. Each wing carried 66.5 Imp gal., for a total of 218, giving a range of 1.800 miles and the official name of “Extra Super Long Range” (with that wonderful logic), and the unofficial of “Bowser” (presumably after the refuelling boats used in seaports) Cameras were carried in the fuselage, with three standard combinations, with two vertical F.8 (Type W) for high altitude photography; two F.8 verticals and one F.8 oblique for low level work (Type Z); or one F.52 for high altitude, high resolution (Type X). Radio equipment (T.R. 1133) was also included, a first for a PR variant. Entering service in July 1941, by August it was in widespread use, replacing earlier long range versions.
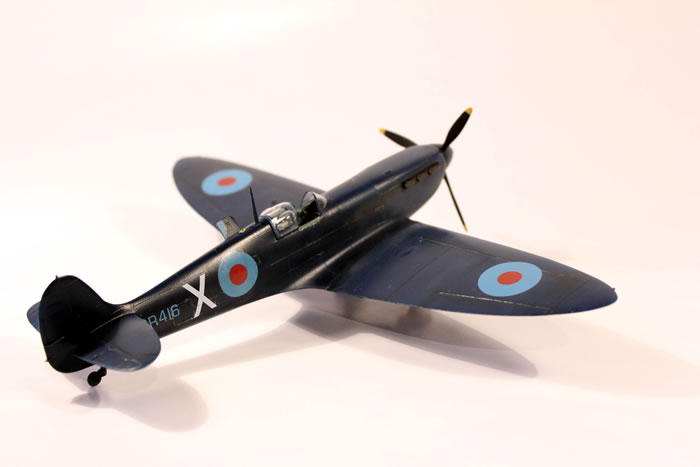
BR416 was a machine of many guises. It sported an “Aboukir” sand filter, so it must have been delivered to the Middle East equipped with something else, acquiring it at the MU n° 103. Presumably it also got its Royal Blue livery at that time. Later in its life it was modified with high altitude wingtips, possibly serving with the 1437th (Strategic Reconnaissance) Flight, though no Spitfire is mentioned in the records of the unit. It sported a coarse light overcoat, probably White but possibly Sky, which apparently kept peeling off and was repainted several times. A picture from the Imperial War Museum collection (in fact the very same picture present in the Ventura book) is captioned indicating the machine is, at that time, serving with 74th Sqn. OTU, a unit especializing in tactical recce flying and that it is mentioned as operating Hurricanes at some point in time.
The Kit
The old Hasegawa 1/48 Spitfire Mk Vb is a classic, overshadowed by its more famous cousin from the Tamiya stable. Though the later is more detailed and renders a better looking model, the former is more accurate in shape (though somewhat skinny). Hard to find today, I managed to get the “HF VI” boxing, which, true to Hasegawa fashion, comes with a complete Vb plus a sprue with the conversion parts. The Aboukir filter came from a Pavla conversion set, as did the windscreen; for the canopy, a Squadron vac was used. The cockpit interior, unacceptably simplified, was detailed with a True Details resin set. All the photographic equipment was scratchbuilt.
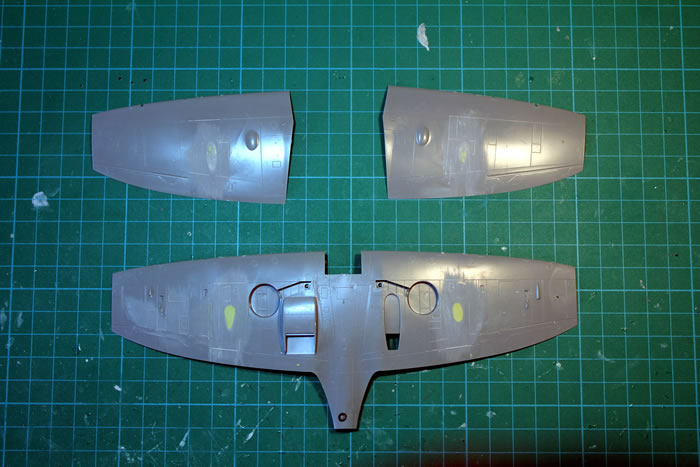
The real work was the conversion of the wings, from the “b” type to the so-called “d”. That involved the suppression of the rather large blisters over the cannon feed drums, in both the upper and under surfaces, a job done with Milliput and putty; and adding the smaller ones over the fuel pump.
This machine being a legitimate Merlin 45 powered Mk V, it lacked the extra intake on the left cowl cheek usually found on early PR Spits when re-engined. The extra hatches on the right fuselage where scribed using a Quickboost template intended for the PR.XI. The cameras for the “W” configuration were scratchbuilt, as was the wooden box that contained them; to show them, I cut open the radio hatch. From pictures in my sources I doubt that it had the oblique camera installed or even the port opened, much less glazed; I scribed the “upwards D” shaped port seen on many PR.IVs as closed, adding the booth for the camera lens from the inside (many airframes had this arrangement, with the small hatch cover simply detached whenever an oblique was added).
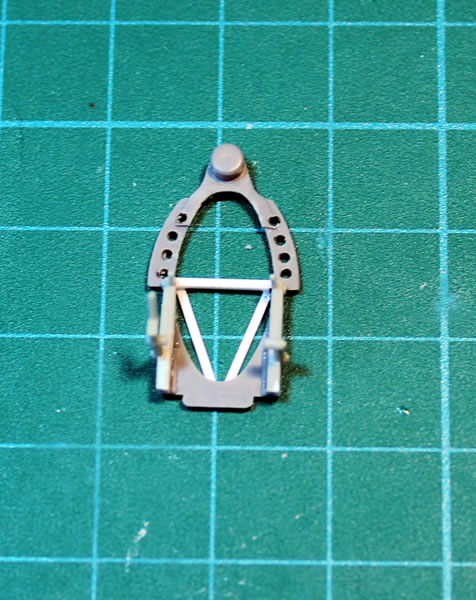
Cockpit was suitably modified to PR configuration by the addition of the Type 35 camera control in place of the gunsight and the master camera controls just below the throttle lever unit.
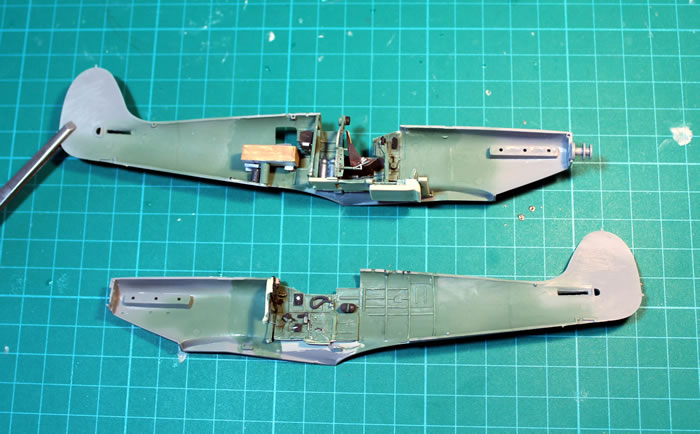
All interior parts were painted in Humbrol 78.
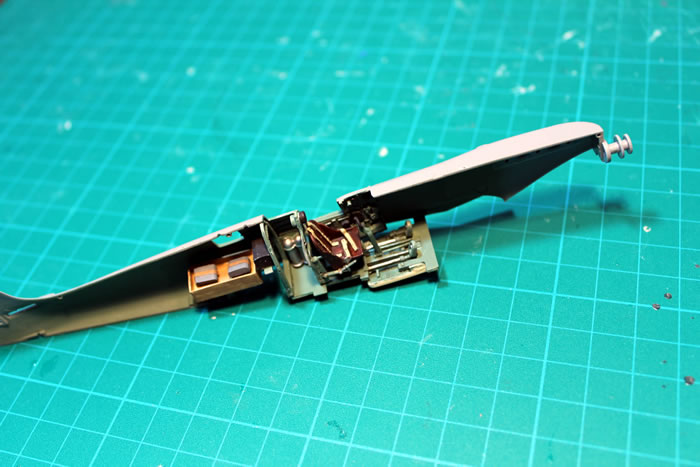
heel wells and u/c door insides in Aluminium.
Painting
Royal Blue is a most elusive hue. I had imagined using a Testors MM Roundel Blue bottle, but the long sea voyage from Kenya to Germany reduced it to jelly. Therefore I took a trusty Humbrol Gloss Blue. It worked, but the glossy paint was not the friendliest. I prepared the surface with a dark preshade over Testors Grey primer, and painted in irregular fashion through several sessions, to achieve an interesting finish. Gloss paint attracts dirt like small children, tends to develop “orange peel effect” and highlights the unevenness of both previous and subsequent coats. Putty shrinkage over the many holes and depressions left by the conversion work didn´t help either. In the end, an honourable result could be obtained, by furiously sanding in between gloss coats. Xtracrylixs varnish was used, in coats both air and hand brushed, to prepare the surface for decals.
Decals
I had the small decal sheet coming in the Pavla conversion, as well as the On Target sheet for early PR Spitfires. The latter is IMHO quite wrong, with an “X” motif too big, “BR146” in White (when according to my references should be darker, most probably in the same Blue as the roundels) and roundels in standard Roundel Blue. The Pavla ones displayed the correct lighter shade in the roundels and code, but they are reputed to be fragile, so a coat of Xtracrylix gloss varnish was added. I had an incident involving breakage to some extent with every single piece, but managed to find a Revell paint which matches the roundel almost exactly OOB (or tin). The serial is still too big, being in standard 8” size, but at least it is in the correct colour. In hindsight, it might be I should have used a generic decal in 6” size, even though the colour would be in MSG (the colour contrast would have been almost the same).
Final Assembly
Undercarriage was fitted without any trouble in itself; I was wary that after all the mishandling of the wings, the tips would be off. While I had a couple of millimetres of difference, I compensated it by not pushing one of the legs deep into its socket, making for a weaker joint that made things a bit more complicated, but cured the seat of the model. The landing light I made with a round slice of sprue.
The small MG muzzles were cumbersome but they were replaced by rod and fixed, as were the pitot tube and antennae mast, for which the original parts were used. The vacuformed hood was just a bit small (or it might be the slightly wider spine didn’t help) but it could be made to ride convincingly.
Weathering was performed with some Burnt Umber oils and pastels as leaks, stressing the fuel relief valves on the wing tips, and some light-coloured pastels to give the dusty appearance obvious in the pictures. Small parts were a breeze; there is no fuel cap, so a disc in Tamiya tape made a suitable ersatz one; the model lacks a ventral landing light, which was made of a circular silver dot, covered in White glue and thinned Clear Yellow Tamiya paint. No radio or IFF wiring were present. Undercarriage had a good positive fit, but the tops of the u/c doors were chopped off. The vac canopy got an easy ride on the spine. The propeller blades have the positioning notch on the back! Or so it seemed to me; I ended up using a Tamiya propeller which comes in one piece and fits perfectly.
Model, Images and Text
Copyright ©
2015 by Fernando Rolandelli
Page Created 27 February, 2015
Last Updated
29 April, 2015
Back to HyperScale Main Page
|
Home
| What's New | Features | Gallery | Reviews | Reference | Resource Guides | Forum |