Trumpeter's 1/48 scale
MiG-19PM Farmer
by Jon Bryon
|
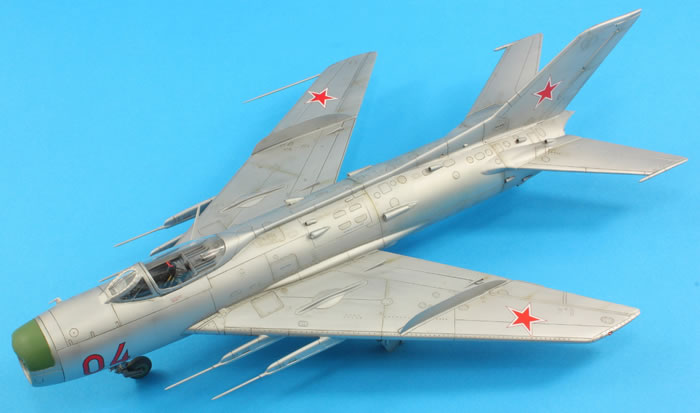
|
Mikoyan-Gureyvich MiG-19PM |

Trumpeter's 1/48 scale MiG-19PM is available online from Squadron.com
For me, making models is a kind of a clock. I build them one by one, one after the other, and they mark time. Looking at completed models reminds me of what was happening in my life at that time. The same is true of purchasing kits; it's a rare enough occurance that I can recall where I bought each one.
I bought Trumpeter's 1/48 MiG-19PM in August 2004 in my favourite city in the world: Hong Kong. I was there with my fiancée a year before we married and she tolerated much traipsing around model shops in the heat and humidity. I picked it up for HK$180, which was less than £15 and a good deal compared to the UK price. Trumpeter released this kit in 2002 and alongside models like their Su-15 and MiG-15UTI it heralded an exciting new phase in the availability of hitherto unkitted (or very poorly-kitted) Soviet jets. With hindsight it was something of a false dawn.
This is an average kit. I regard it as better than the Flagons, but that's not saying much. As the years passed it became clear on the modelling forums that the nose was seriously undernourished. SBS Model made a very nice resin replacement, including pitot and nosewheel well, which I gladly received for Fathers' Day in 2014. With that, and the end of building the Hobby Boss MiG-17F, it was time to dive into this kit.
Aside from the nose, other problems came to light during construction. Some I dealt with; others were neglected. There may be many more for all I know, but this is what I discovered:
-
A lot of the surface detail on the fuselage is fictitious or missing. In particular, the blow-in doors on the upper mid-fuselage are not there; you can see them clearly enough on the box art and markings diagram. I scribed them in using a template from Dream Model. I wished I discovered this earlier as I'd already attached the various fuselage intakes which got in the way.
-
Said fuselage intakes. Oh dear. Several are missing completely, including two on the upper fuselage right where it meets the tailplanes and another one on the upper fuselage on the port side of the fin where it transitions into the spine. I added these from bits I found in the spares box. Other intakes are woefully undersized: D48, D33 and D27 all need replacing with bigger items, again sourced from the spares box. I didn't get the shapes exactly right, but better than nothing.
-
The main undercarriage doors (parts B27 and B16) are missing bulges added to the PM. I butchered some lumps and bumps (I think one set are cast-offs from a Hasegawa A-4) to get something approximately right. They are too big, but again better than nothing.
-
The same parts are also badly shaped. I only realised this at the end and so didn't alter them, but a glance at any photo will reveal the angles are visibly not right.
-
I couldn't see part D54, which looks like a pitot by the nose, on any photos, so I left it off.
So there you go; doubtless there are other issues too I remain ignorant of.
I started with the nose, since that involved major surgery. The pictures below tell the basic story: saw off the nose where the windscreen meets the canopy, pray you got it straight and offer up the resin. Not bad. Work then commenced on the cockpit.
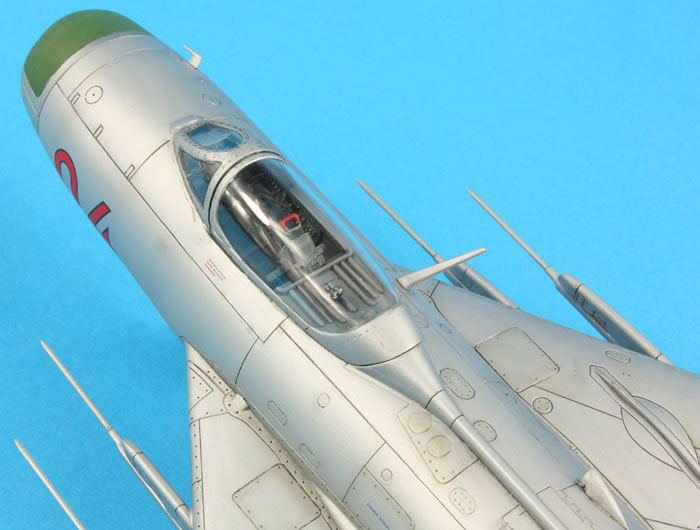
The kit cockpit is surprisingly busy. SBS Model also make a resin version compatible with the nose, but I was going to close the canopy and so passed on that. I ignored the instructions and painted almost everything Tamiya XF-53. The final result is not brilliantly accurate, but then it's not really visible either. The cockpit can be inserted after the nose is attached, so my focus switched back to the fuselage.
The resin nose was one piece, including the radar pod. Whilst saving having to make good a difficult joint, I dreaded the painting and masking necessary. So before attaching the nose, I primed the resin with Mr Surfacer 1000 and airbrushed the green bits a 50/50 mix of Mr Color 319 and 340. The masking was horrible, but thin strips of Tamiya tape eventually meant I could spray the remainder of the nose Mr Color 108 ('Gun Chrome'). Once the masking was removed I breathed a sigh of relief - it was okay! The trunking is not full depth and so I used Tamiya's Black Panel Line Wash to flood the back of the intake. The whole lot was then masked off along the nose ring panel line.
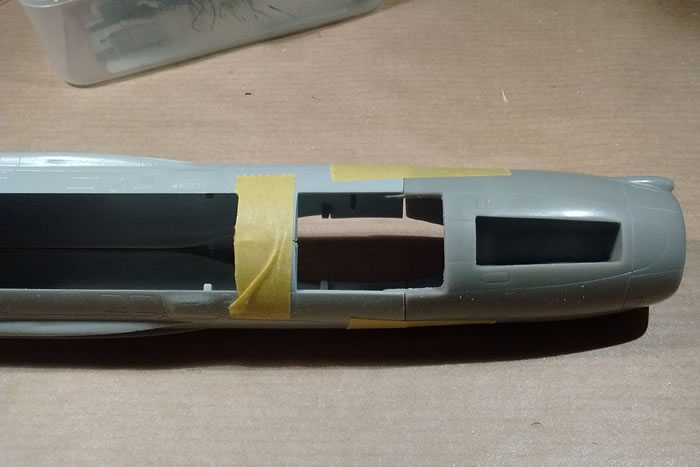
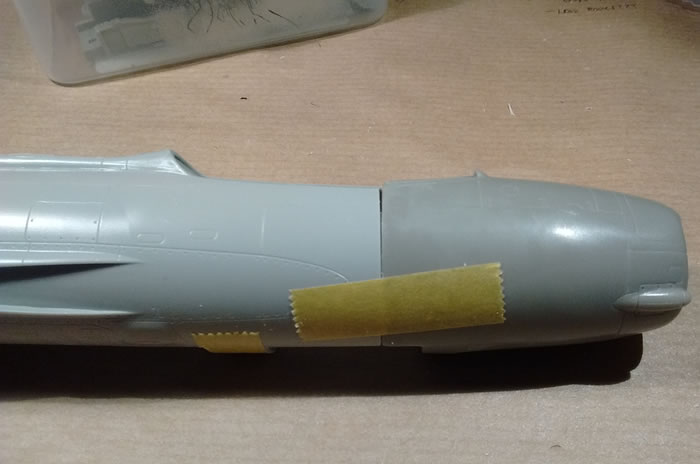
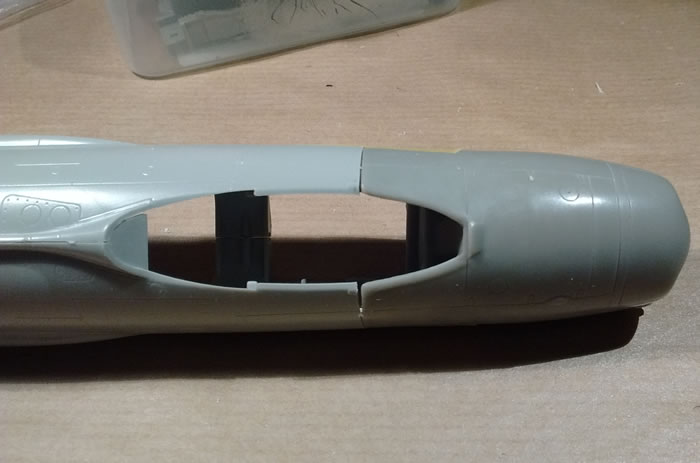
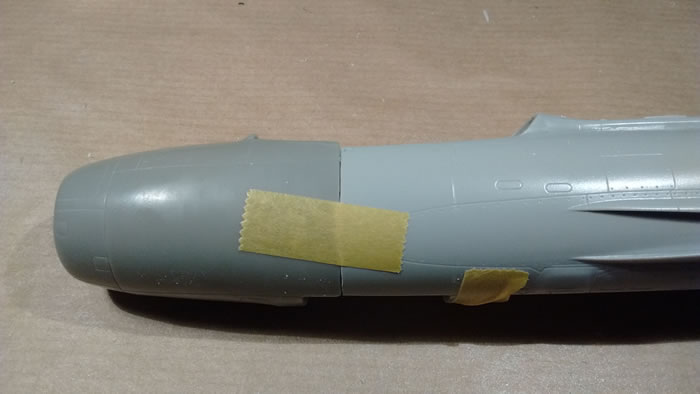
I had been warned that the rear fuselage is a poor fit, so decided to attach it to one fuselage side first, and then joined the other half after it had dried. The fit was surprisingly good. The front of the fuselage was left unglued so that the nose could be attached with super glue. There were gaps, but much sanding and polishing produced a flawless join. I was impressed. The resin is nice and there were no imperfections or bubbles. The join is not on a panel line, which makes life a lot easier.
I inserted the cockpit through the gap in the underneath of the fuselage and super glued it in place. Sadly I got it wonky and only realised later. It means the seat is not quite central with respect to the canopy.
The rest of the fuselage panels were then added. This took a long time as the fit was universally poor, especially panel A16. It took a lot of super glue, sanding, polishing, in some places strips of styrene, and careful rescribing to get an acceptable finish. The bottom airbrake is not a great fit, and those on the side are too small for their openings. Clearly they're all designed to be added open, but I like everything buttoned up.
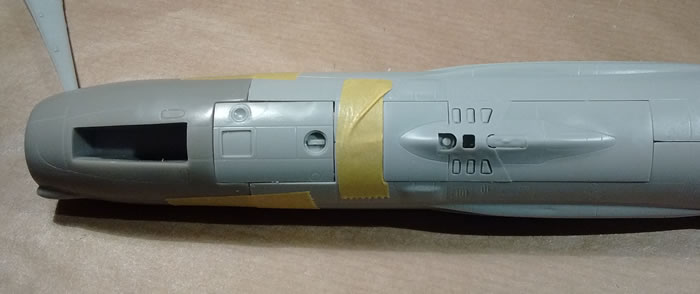
The fin fits okay as do the tailplanes. Not stellar, but not awful either. The panel lines are inconsistent and everything along the upper fuselage needed rescribing, including those blow-in doors. Once that was done I added the myriad intakes scabbed onto the fuselage.
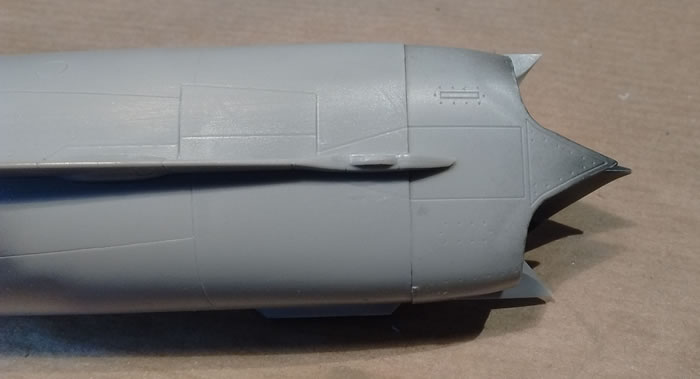
The wings are better. The ailerons and flaps are all split in two and in an endeavour to get them looking better, I attached the upper halves to the upper wing and the lower halves to the lower. This made a lot of extra work as it required some butchery when it came to joining the two complete wing halves together, but it avoided having flaps or ailerons thicker than the wing. I didn't want to add the fuel tanks so had to plug and fill the pylon location holes, whilst opening up those for the missile pylons. The fences and panels B19/22 fitted fine and the wings were cleaned up with super glue as a filler. I replaced the pitot with one I made myself from various diameters of Albion Alloys brass tube and Mr Surfacer 500.
It actually took a long time to get to this point. There were a lot of joints to deal with and bits and pieces to add. Adding the wings, by contrast, was a piece of cake. They fit into a glove moulded on the fuselage. They were slightly too fat towards the rear, but a couple of minutes trimming with a scalpel produced a beautiful fit. All of a sudden I had an almost complete airframe!
The missile pylons fitted okay, but there were some gaps. I took a risk and decided to add them before painting. I was pretty sure I would end up snapping the long thin protrusions off, but they survived! Unfortunately they were not quite parallel to each other. I know Master make a replacement turned brass set which I would have loved to use. The gaps between the pylons and the wings were easily dealt with using Mr Surfacer.
After a wash and dry, I turned to the canopy. This was going to be tricky as I usually use liquid poly to attach clear parts, but the windscreen would require super glue to attach to the resin nose. I coated both parts with Johnson's Klear to help avoid fogging. The windscreen was quite a good fit and left to dry for a long time. Then I added the main canopy using tape to hold it in the correct position. At least I thought it was the correct position. It turns out that because I did it at night under strong illumination I was deceived by shadows, and the whole thing is askew at the rear. It was well and truly welded on with Tamiya Extra Thin, so nothing I could do. (Or, more truthfully, wanted to do.)
The undercarriage had already been constructed and painted at this point. It was uneventful, but I also used Tamiya XF-53 rather than the recommended light blue. Weathering was courtesy of AMMO's panel line washes, which I rather like. No nose weight would be necessary because of that huge hunk of resin at the front; I've no idea if it's needed if the kit nose is used.
Once I'd masked off the canopy and undercarriage bays, I primed the whole lot with Mr Surfacer 1000 using my Iwata RG-3. I love this airbrush. I really love it. The atomisation is astonishing and coverage is very quick. The primer went down absolutely smooth around all the areas you'd usually expect some roughness (wing roots, pylon/wing join, ventral fin, tailplane joins, etc.). No polishing required at all. The seams all looked good, and so I moved on to the silver.
I like Mr Color 8 Silver, which I again airbrushed through the RG-3. Very smooth and, unusually, no bits of rubbish in the finish. I was on a roll and powered ahead. A little too quickly, it turns out, as some of the silver lifted under handling. I had to touch up with the RG-3, but fortunately it blended in fine. I sprayed a generous coat of Tamiya Gloss over everything and left it to dry.
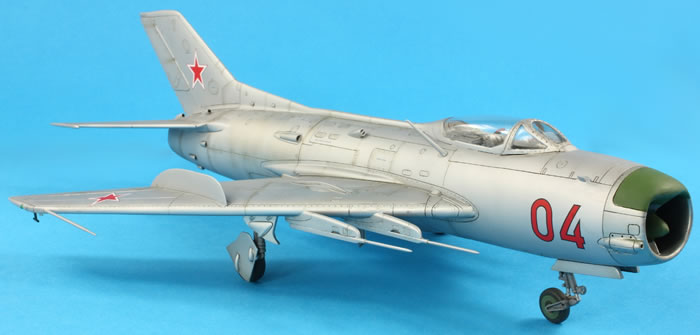
I mixed a dark grey wash from Abteilung oil paints and used a fine brush to highlight the panel lines. Once I was happy, I started adding the decals. Those in the kit weren't quite adequate. I'd found some photos of Blue 30, but it didn't look like the markings provided. A browse on Scalemates.com turned up the High Decal Line markings which I bought from Hannants. These contained a nice Soviet Farmer-E based in East Germany: Red 04. The decals were beautiful, easy to use and extremely thin. They came off the backing paper very fast. Unfortunately they didn't settle into the recessed detail very well with either Mr Mark Softer or MicroSol, but a cocktail stick helped here. I did use Mr Mark Setter as a bedding agent.
I'd read in FSM of a modeller who recommended spraying at 50-70PSI to get very fine lines. I was game for this with some post-shading. I mixed an extremely dilute formulation of Tamiya Red-Brown, Black and Mr Self Leveling Thinner. I removed the crown from my H&S Evolution, pre-set the needle to get the finest line possible, and merrily starting spraying the mix around various panel lines, the lower rear fuselage, the wing joints and to get some streaking on the flaps, rudder, etc. This worked surprisingly well and I'll do it again. The secret is to have the mix *very* thin and the needle set to allow the finest possible line.
Once dry I tried AMMO's Satin Varnish sprayed through the Evolution. This stuff is seriously good. The finish is very matt for a satin varnish, but I liked it a lot. It dries fast on the needle, but it doesn't take long to cover the whole model. I had then hoped to do further enamel and oil-based weathering on top of this matt coat, to get some 'bleed' of the oils and panel line washes into various places and then blend it out with a brush dampened with white spirit. This did not work well. The acrylic varnish was affected by the enamels and oils and the white spirit, and it all went rather blotchy. Further coats of AMMO Satin Varnish didn't unify the finish as it had previously. Despite protestations that it shouldn't happen, there was a reaction between the enamels/oils and the acrylic. Next time I will use a Tamiya Satin/Flat varnish mix to do the weathering on, and then use the AMMO Satin as the final coat. Whilst not quite what I'd been hoping for, the final effect was pleasing.
I removed the canopy masking and was delighted there was no fogging or bits of rubbish. Unfortunately though, the windscreen had developed cracks. I've no idea where these came from; they weren't there during masking! The undercarriage was added next and is rather too wobbly for my liking. The MiG-17F was the same. They both shake and shudder in my display cabinet when someone walks past... Adding the undercarriage doors was delightfully straight forward and the aircraft sits pleasingly square.
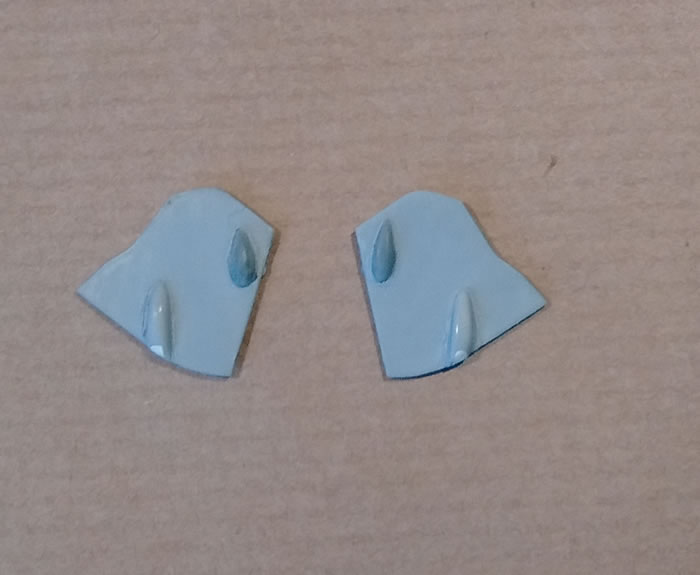
The remaining parts were all added (the antenna mast was pinned) and then some more AMMO Satin airbrushed over the joints to hide any glisten of glue.
On its legs and completed, it was a sight to behold. Far bigger and more complex to build than the superficially similar MiG-17 and MiG-15, I have grown to like the look of this aircraft. It was a fight at times, and rough round the edges, but for all its faults and failings, I love having it on the shelf next to its smaller predecessors. I'd love to have the MiG-19S too, but I believe the nose isn't quite right on that either and I've not seen a correction set produced yet.
A couple of things still stand out. The radar pod in the nose is wonky if viewed from head on. This must be a problem with the master, as it is out of alignment with respect to the cockpit. Fortunately it's not visible unless looking head on. The seat seems very low in the cockpit, too. But a pleasing one to tick off the list; my MiG series will be continuing with a MiG-21F-13, but first there will be an interlude on behalf of a friend.
To see more model build articles like this, please visit my website: www.jonbryon.com/model_index.html
Text and Images Copyright ©
2015 by Jon Bryon
Page Created 21 October, 2015
Last Updated
21 October, 2015
Back to
HyperScale Main Page

|
Home
| What's New |
Features |
Gallery |
Reviews |
Reference |
Forum |
Search