Kinetic's 1/48 scale
Fouga CM.170 Magister
by Mick Evans
 |
Fouga CM.170 Magister |

HyperScale is proudly supported by Squadron
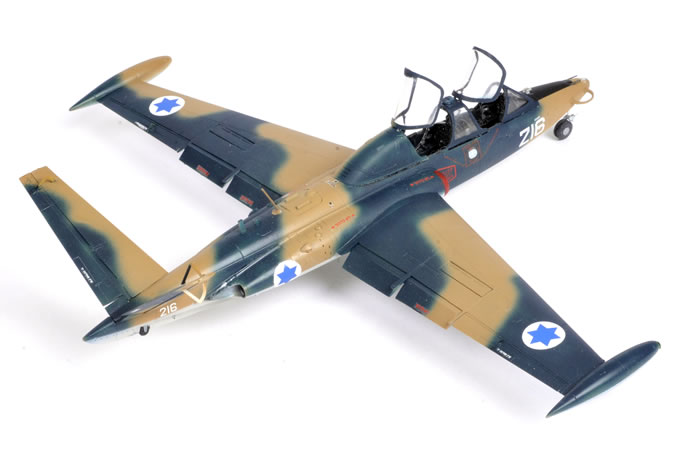
The Magister was the first purpose built two seat trainer aircraft in the world. It was a very good trainer jet with the French trainer having its first flight in 1952. Nearly 1000 Magisters were built and many were exported to many countries. The Magister had a distinctive V tail design. Development of the Magister came to an end when the French Air Force selected the Alpha Jet as their new jet trainer to succeed the Magister. The Israeli Air Force operated a licensed built version, the IAI Tzukit.
While principally a trainer, it was used in the 1967 Six Day War by No 147 Squadron as a close support aircraft, attacking targets on the Egyptian front during the first day of the war, when Israel’s more capable combat aircraft were deployed on Operation Focus against Arab air bases. The Belgium Air Force operated 50 Magisters as primary trainers. The aerobatic team The Red Devils also used them as display aircraft. A small number of Magisters remained in use until September 2007, as flight maintenance aircraft for senior officers.
You can find my detailed in-box review of this kit here on HyperScale by following this link.
In this release you get not one but two complete Magister kits so I decided to build both side by side in Israeli colour schemes.
Construction starts with the internal items such as the cockpit and engine intake and exhaust trunking.
The cockpit was assembled first and has sufficient detail with nicely detailed instrument panels and side panels. Alternate rear cockpit bulkheads are provided but there is no reference to which version uses which bulkhead. A part numbered C4 containing two oxygen bottles although illustrated has no location identified in the instruction sheet. A location line is missing pointing to a square locating hole between the front seat and in front of the rear instrument panel. Once assemble the cockpit looks reasonably busy. 2 bucket seats are fitted as there are no ejection seats fitted to the Magister. The cockpits were painted matt black and then dry brushed to pick out the fine detail.
The intake and exhaust trunking is novel with the two halves capturing the compressor blade disc at the front and turbine blade disc at the rear. This provides good depth to the intakes and the engine exhaust.
Make sure that at this point in the construction you pack a significant amount of weight into the forward fuselage to eliminate the tail sitting tendency that this model has.
The fuselage is constructed from 2 main halves which capture the cockpit and engines prior to assembly. Once complete the nose cone, wings, intakes, exhausts and V tails are added. The nose cone is a tricky assembly which contains the nose undercarriage assembly and framework.
This is a tricky assembly process as the instructions are not overly clear on parts of this assembly and required an amount of test fitting prior to gluing. Alternate nose panels are included. One has two cannons fitted while the other is has the gun troughs blanked. I presume that either panel can be fitted to any version but once again no information is supplied about versions. I took the liberty of fitting guns to both aircraft as I presume they would be fitted at some time during training and certainly would be fitted when the Magisters were used operationally.
The wing detail is great and contains separate flaps and ailerons provided and can be positioned in the up or down positions.
Once again the instructions are not completely clear for this part of the assembly as alternate ailerons are provided but once again no instruction as to which parts should be fitted for which version or configuration.
The V tail has a very positive locking fit which sets the angle of the two tailplanes almost perfectly. Separate rudder/elevators are provided and these may be displaced if the modeller so wishes.
The main wheel wells look good and have a good level of detail present and the main undercarriage was easy to fit.
A major plus point is the separate etched metal speed brakes. On the Magister the speed brakes are 3 serrated surfaces that slide out above and below the wing surfaces.
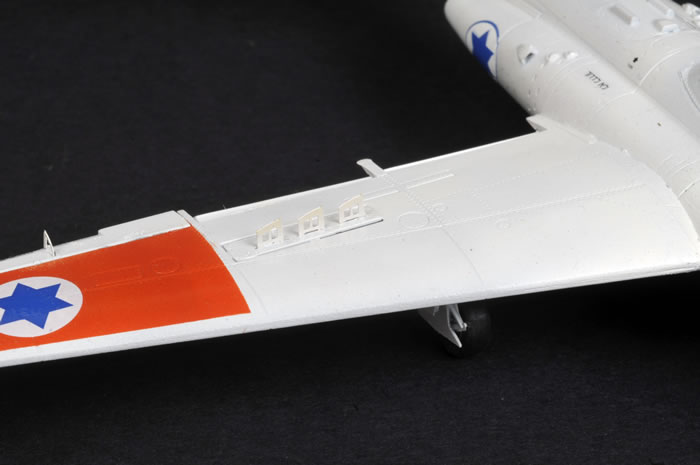
A minor problem exists in that at least 5 of the slots on each of my kits required a clean out of some moulding flash before the etched parts would fit into the slots.
The fitting of the various cooling scoops and antennas are not clear on the instructions nor are there positive locking locations. This required me to research these locations through reference pictures provided by Google.
The wheels are provided in typical Kinetic style of separate wheel hubs sandwiched between two tyre halves. This allowed me to accurately paint the hubs and tyres prior to assembly. Once assembled the seam on the tyres is cleaned up and the tyre paint touched up. No masking required.
The instructions are also confusing around the wing pylon fitment. Step 6 has you fitting the underwing pylon and then the next step mentions fitting a twin rocket launcher in the same locating hole that the underwing pylons has been fitted to.
The stores supplied for this kit are 2 x underwing pylons and 2 x dual rocket launchers. There is no guidance around when these would be fitted, although I did find a photograph of an Israeli camouflaged aircraft in RAL 8025 Brown and RAL 5008 Blue with the dual rockets fitted under the wings and I presume this was during the Six Day War as it also has guns fitted to the nose.
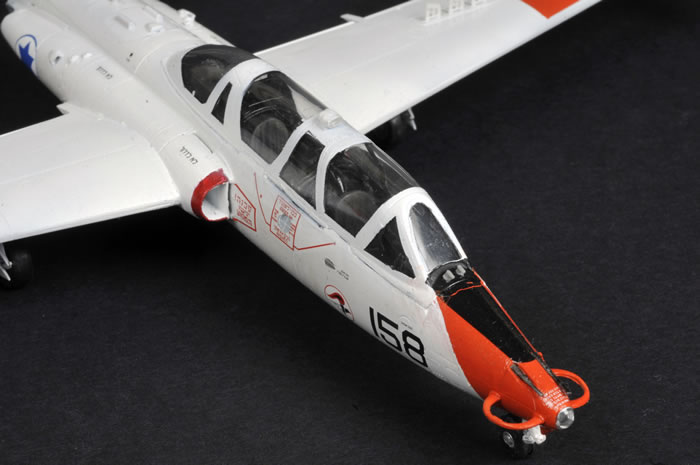
The transparencies are crystal clear and well moulded and two options for canopies are provided. A single piece canopy if you wish to model the kit with the canopy closed and a canopy that is broken into three parts to allow the canopies to be positioned in the open position. A no transparent rear section is provided for open canopy option for those Magisters that have the hard shell fitted to the rear of the cockpit. I presume for the closed version you just paint the rear section of the one piece transparency. All the transparencies fitted well, but for the open canopies the fitment of the actuator braces is tricky as there are no location lugs.
The decals went on well as they are very thin. This is where I struck my first hurdle. While decals are provided for two Israeli options, only one set of common data decals are provided. I resorted to some wheeling and dealing with a mate who was not going to build Israeli options from his kit.
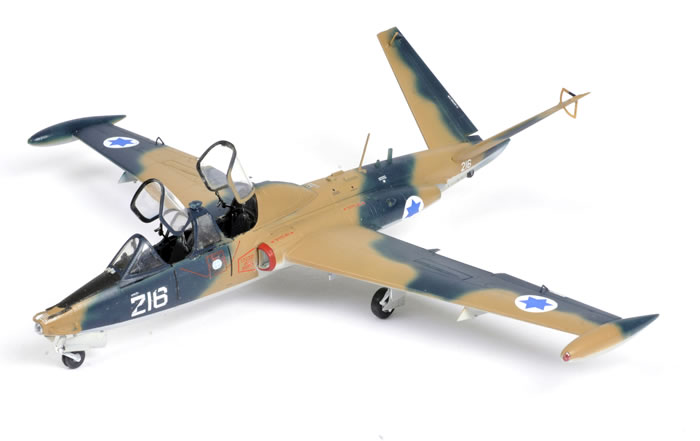
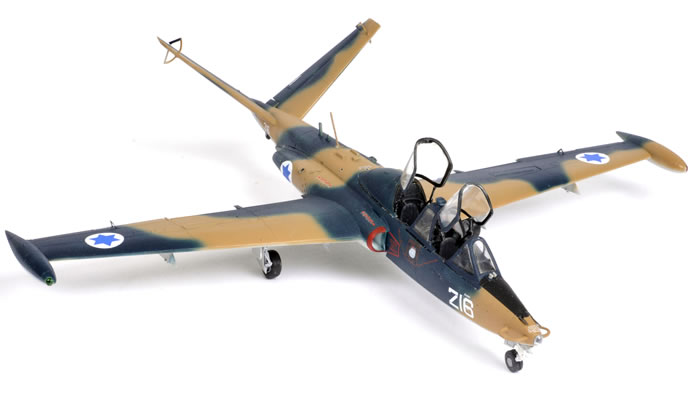
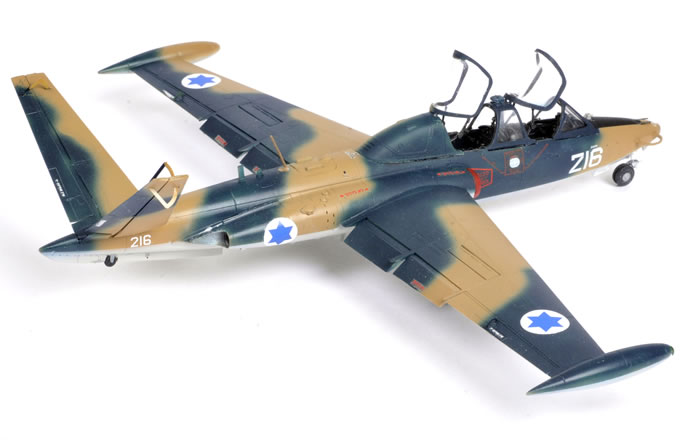
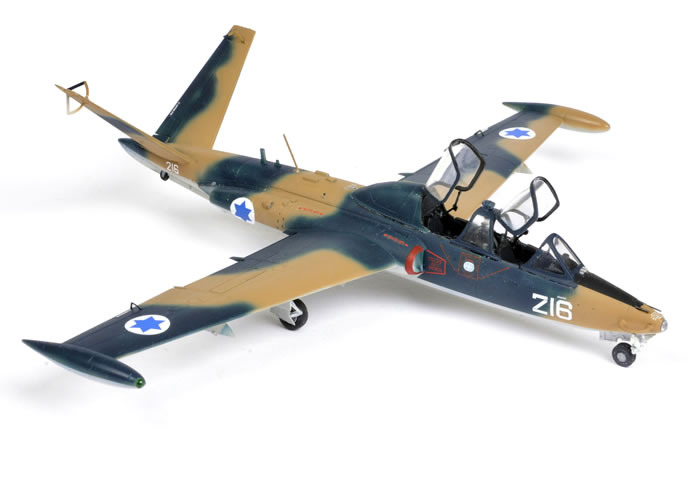
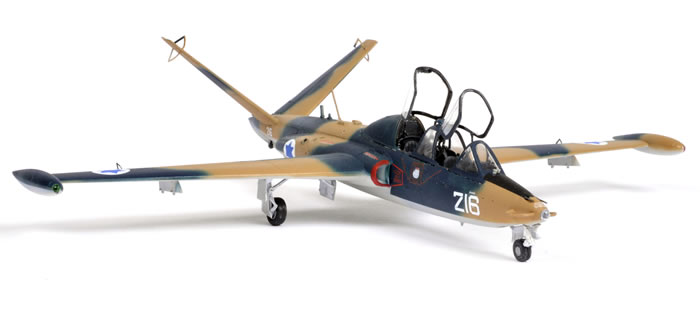
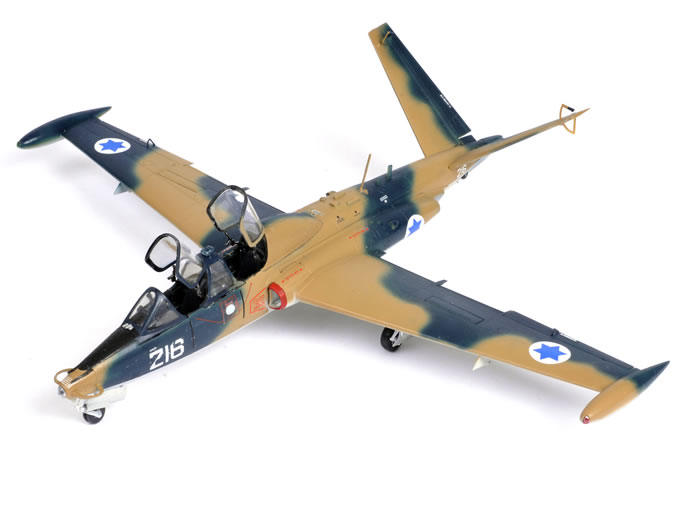
I finished the first kit as a Fouga CM.170 Magister Serial Number 216 from 147 Squadron of the Israeli Air Force during the 1967 Six Day War. This aircraft is finished in a camouflage of RAL 8025 Brown and RAL 5008 Blue upper surfaces and RAL 7044 Grey under surfaces.
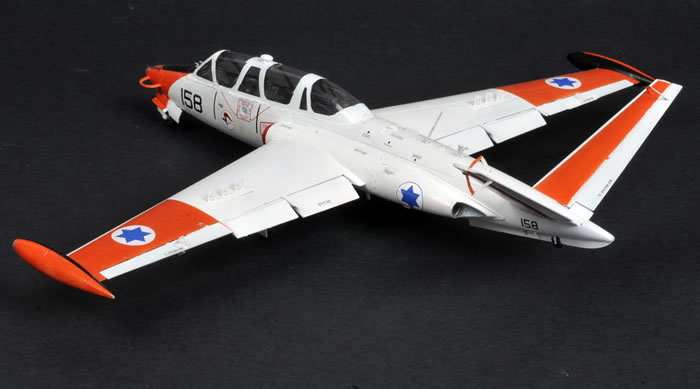
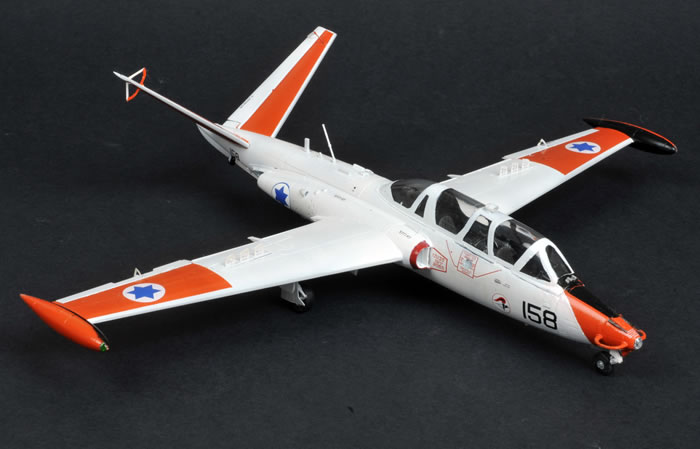
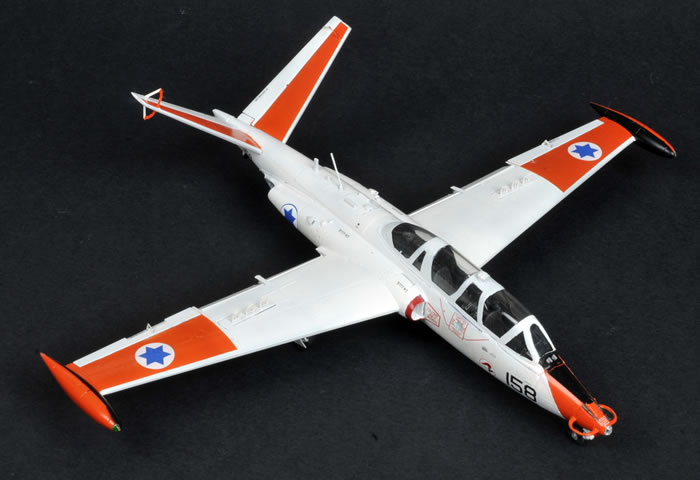
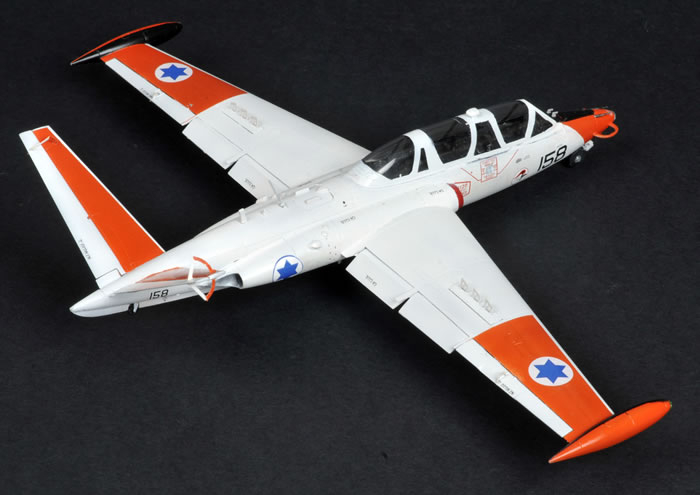
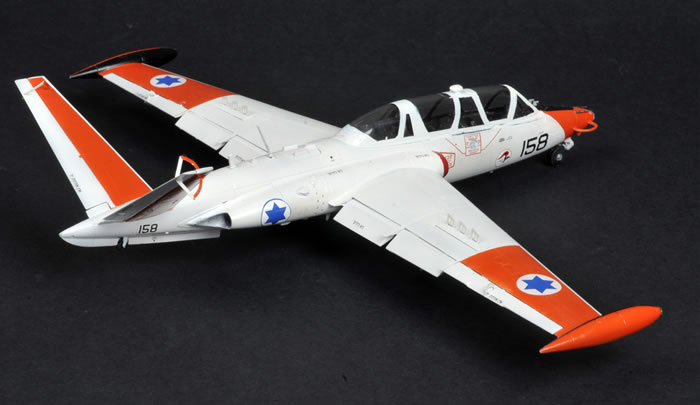
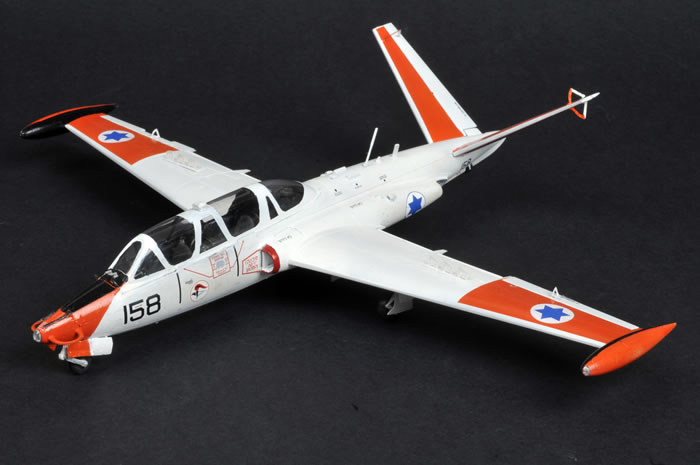
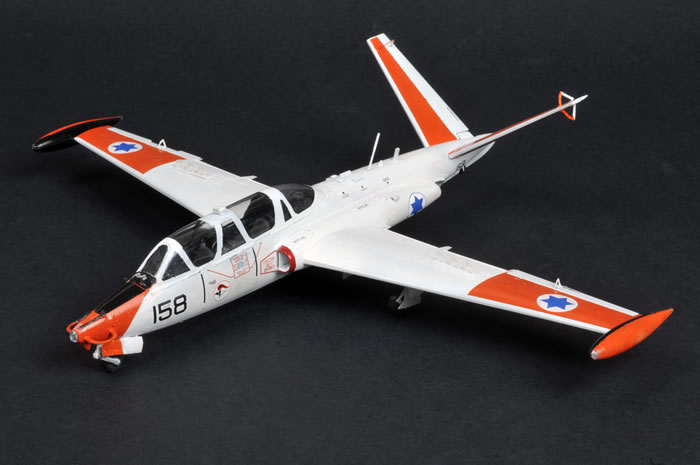
I finished the second kit as a Fouga CM.170 Magister Serial No 158 from the Israeli Air Force Flight School in 1976. This aircraft is finished in overall FS17925 White with FS 12197 dayglo Orange trimming on the nose, wing outer surfaces and V tail. In the Colours and Markings book that I have there is reference to using these aircraft in this scheme in the Six Day War but I am not sure.
I am debating whether to build a third Israeli scheme in the three tone later desert scheme from the second kit that I have, but I also like the French and Belgium Aerobatic team schemes as well.
Overall another excellent kit and a big kudos to Kinetic for this release. The kit goes together well but is complicated by some issues with the instructions being vague as to the fitment of alternate parts and the location of some parts.
I enjoyed building both kits once I sorted the instruction issues and I am pleased with the results.
Thanks to Lucky Model for the sample.
Model and Text Copyright ©
2015 by Mick Evans
Images Copyright ©
2015 by Brett Green
Page Created 12 March, 2015
Last Updated
12 March, 2015
Back to HyperScale Main Page

|
 Home
| What's New | Features | Gallery | Reviews | Reference | Resource Guides | Forum |
Home
| What's New | Features | Gallery | Reviews | Reference | Resource Guides | Forum |